background image

Toshiba 1110651160 (TOC)

CONTENTS

PRECAUTIONS FOR SAFETY

 .............................................. 1

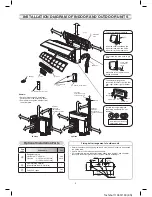
INSTALLATION DIAGRAM OF INDOOR AND
OUTDOOR UNITS

 ................................................................. 2

n

 Optional Installation Parts ................................................... 2

INDOOR UNIT

 ........................................................................ 3

n

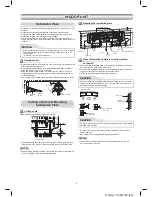
 Installation Place ................................................................. 3

n

 Cutting a Hole and Mounting Installation Plate ................... 3

n

 Wiring Connection ............................................................... 4

n

 Piping and Drain Hose Installation ...................................... 4

n

 Indoor Unit Fixing ................................................................ 5

n

 Drainage .............................................................................. 5

EN

OUTDOOR UNIT

 .................................................................... 5

n

 Installation Place ................................................................. 5

n

 Precautions about Installation in Regions with Snowfall  

and Cold Temperatures....................................................... 5

n

 Refrigerant Piping Connection ............................................ 6

n

 Evacuating  .......................................................................... 6

n

 Wiring Connection ............................................................... 6

n

 Electrical Work .................................................................... 6

OTHERS

 ................................................................................. 7

n

 Gas Leak Test ..................................................................... 7

n

 Remote Control A-B Selection ............................................ 7

n

 Test Operation  .................................................................... 8

n

 Auto Restart Setting  ........................................................... 8

Summary of Contents for 24S Series

Page 1: ...1 Toshiba 1110651160 COVER_F ENGLISH Indoor unit RAS 18 24SK Series Outdoor unit RAS 18 24S Series AIR CONDITIONER SPLIT TYPE INSTALLATION MANUAL 1110651160 ...

Page 2: ...tion Plate 3 nWiring Connection 4 nPiping and Drain Hose Installation 4 nIndoor Unit Fixing 5 nDrainage 5 EN OUTDOOR UNIT 5 nInstallation Place 5 nPrecautions about Installation in Regions with Snowfall and Cold Temperatures 5 nRefrigerant Piping Connection 6 nEvacuating 6 nWiring Connection 6 nElectrical Work 6 OTHERS 7 nGas Leak Test 7 nRemote Control A B Selection 7 nTest Operation 8 nAuto Rest...

Page 3: ...WAY MORE THAN M FROM HEAT SOURCES SUCH AS RADIATORS HEATERS FURNACE STOVES ETC WHEN MOVING THE AIR CONDITIONER FOR INSTALLING IT IN ANOTHER PLACE AGAIN BE VERY CAREFUL NOT TO GET THE SPECIFIED REFRIGERANT R WITH ANY OTHER GASEOUS BODY INTO THE REFRIGERATION CYCLE IF AIR OR ANY OTHER GAS IS MIXED IN THE REFRIGERANT THE GAS PRESSURE IN THE REFRIGERATION CYCLE BECOMES ABNORMALLY HIGH AND IT RESULTING...

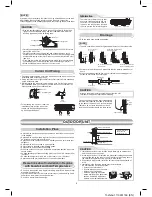
Page 4: ...er operation Do not allow the drain hose to get slack Make sure to run the drain hose sloped downward Cut the piping hole sloped slightly The auxiliary piping can be connected to the left rear left rear right right bottom right or bottom left Right Rear right Left Bottom right Rear left Bottom left Insulate the refrigerant pipes separately with insulation not together 8 mm thick heat resisting pol...

Page 5: ...nything on the top of the indoor unit The center of the pipe hole is above the arrow Pipe hole In case of block brick concrete or similar type walls make 5 mm dia holes in the wall Insert clip anchors for appropriate mounting screws 7 Indoor unit Side view Top view Indoor unit Remote control Remote control Reception range R e c e p t i o n r a n g e Installation plate Keep horizontal direction 5 m...

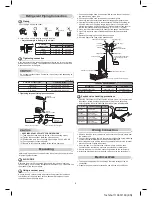
Page 6: ... the connecting pipe so that it is laid within 43 mm above the wall surface If the connecting pipe is laid exceeding 43 mm above the wall surface the indoor unit may unstably be set on the wall When bending the connecting pipe make sure to use a spring bender so as not to crush the pipe Bend the connecting pipe within a radius of 30 mm To connect the pipe after installation of the unit figure Inse...

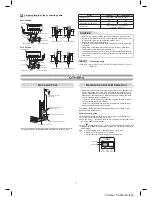
Page 7: ...ion drain hose insulate the connecting part of extension drain hose with shield pipe NOTE The hole should be made at a slight downward slant on the outdoor side CAUTION Arrange the drain pipe for proper drainage from the unit Improper drainage can result in dew dropping 1 Installation plate Information The lower part of indoor unit may float due to the condition of piping and you cannot fix it to t...

Page 8: ...handle of the gauge manifold valve 6 Open fully the valve stem of the packed valves both gas and liquid sides 7 Remove the charging hose from the service port 8 Securely tighten the caps on the packed valves Packed valve at liquid side Vacuum pump Handle Lo 101 kPa 76 cmHg Packed valve handling precautions Open the valve stem until it touches the stopper Once it is in contact with the stopper refr...

Page 9: ... 3 2 Terminal block Cord clamp Earth line Terminal screw Cord clamp Screw Power supply cord Connecting cable For 18 Class For 24 Class Earth line Stripping length of the connecting cable CAUTION Wrong wiring connection may cause some electrical parts burn out Be sure to comply with local rule on running the wire from indoor unit to outdoor unit size of wire and wiring method etc Every wire must be...

Page 10: ...3 beep sound but OPERATION lamp does not blink In case of ON timer or OFF timer are set AUTO RESTART OPERATION does not activate This product is designed so that after a power failure it can restart automatically in the same operating mode as before the power failure To switch the TEST RUN COOL mode press RESET button for 10 seconds The beeper will make a short beep RESET Hi POWER FILTER PAP TIMER...

Reviews: