background image


Introduction 

TOSHIBA A60 Series 

 1-13 

TOSHIBA A60 Series

 Version   

1

   Last Saved on 13/05/2004 10:37 

ENGLISH using  Euro_M.dot –– Printed on 13/05/2004 as IM_A60EN 

TOSHIBA Controls 

This utility lets you customize application button: 
you can assign applications or several actions to 
the application button(default setting is the 
Internet button). 

Options 

You can add a number of options to make your computer even more 
powerful and convenient to use. The following options are available: 

Memory expansion 

A memory expansion slot is available for 
installing 256 MB or 512MB or 1024MB memory 
modules. The modules are PC2100, 200-pin, SO 
Dual In-line (SO-DIMM). 

Main battery pack 

An additional 12 cells battery pack (PA3382U-
BSR or PA3382U-BAS) can be purchased from 
your TOSHIBA dealer. The battery pack is 
identical to the one that came with your 
computer. Use it as a spare or replacement. 

AC adaptor 

If you use your computer at more than one site, 
it may be convenient to purchase an additional 
AC adaptor for each site so you will not have to 
carry the adaptor with you. 

USB diskette drive 

A 3 ½" diskette drive accommodates 
1.44-megabyte or 720-kilobyte diskettes. It 
connects to a USB port. (Windows

®

XP does not 

support 720-kilobyte diskettes.) 

Security lock 

A slot is available to attach a security cable to 
the computer to deter theft. 


Summary of Contents for A60 Series

Page 1: ...A TOSHIBA A60 TOSHIBA A60 TOSHIBA A60 TOSHIBA A60 TOSHIBA A60 TOSHIBA A60 TOSHIBA A60 A60 A60 PMR300027EN0 User s Manual User s Manual Choose freedom Choose freedom computers toshiba europe com Choose freedom ...

Page 2: ...ation of copyright or author s rights and is subject to civil damages or criminal action Please comply with copyright laws in making any reproduction from this manual Disclaimer This manual has been validated and reviewed for accuracy The instructions and descriptions it contains are accurate for the TOSHIBA A60 Series Portable Personal Computer at the time of this manual s production However succ...

Page 3: ...ssful operation on every PSTN network termination point In the event of problems you should contact your equipment supplier in the first instance Network Compatibility Statement This product is designed to work with and is compatible with the following networks It has been tested to and found to conform with the additional requirements contained in EG 201 121 Germany ATAAB AN005 AN006 AN007 AN009 ...

Page 4: ...efore it is shipped the Class 1 Laser is certified to meet the United States Chapter 21 Standards of the Department of Health and Human Services DHHS 21 CFR For any other country the drive is certified to meet the Class 1 Laser standards of IEC825 and EN60825 This computer is equipped with one of the optical disc drives in the following list according to the model purchased Manufacturer Type TOSHI...

Page 5: ...en darf das Gerät nicht geöffnet werden ADVARSEL Denne mærking er anbragt udvendigt på apparatet og indikerer at apparatet arbejder med laserstråler af klasse 1 hviket betyder at der anvendes laserstrlier af svageste klasse og at man ikke på apparatets yderside kan bilve udsat for utilladellg kraftig stråling APPARATET BOR KUN ÅBNES AF FAGFOLK MED SÆRLIGT KENDSKAB TIL APPARATER MED LASERSTRÅLER In...

Page 6: ... to the touch if you maintain physical contact with the computer for a long time if you rest the computer on your lap or if you keep your hands on the palm rest for example your skin might suffer low heat injury If the computer has been used for a long time avoid direct contact with the metal plate supporting the I O ports It can become hot The surface of the AC adaptor can become hot when in use ...

Page 7: ...uct may automatically shut down This is a normal protective feature designed to reduce the risk of lost data or damage to the product when used outside recommended conditions To avoid risk of lost data always make back up copies of data by periodically storing it on an external storage medium For optimum performance use your computer product only under recommended conditions Read additional restri...

Page 8: ...oduct in non approved working environments may be Interference with other devices or machines in the near surrounding area Malfunction of or data loss from this product caused by disturbances generated by other devices or machines in the near surrounding area Therefore TOSHIBA strongly recommend that the electromagnetic compatibility of this product should be suitably tested in all non approved wo...

Page 9: ... use of the CD RW Please adhere to the following information on the use of the CD RW to minimise the risk of unsuccessful storing process As the storing may be unsuccessful despite your adhering to these information for example because of a defective storing medium you should even if the software indicates a successful storage always check if the data has been stored successfully ...

Page 10: ...x Icons xix Keys xix Key operation xix Display xix Messages xix Chapter 1 Introduction 1 1 Equipment checklist 1 1 Hardware 1 1 Software 1 2 Features 1 3 Special features 1 9 Utilities 1 11 Options 1 13 Chapter 2 The Grand Tour 2 1 Front with the display closed 2 1 Left side 2 2 Right side 2 3 Back side 2 4 Underside 2 6 Front with the display open 2 7 System indicators 2 9 USB diskette drive opti...

Page 11: ...ture 3 3 Lighting 3 4 Work habits 3 4 Connecting the AC adaptor 3 5 Opening the display 3 6 Turning on the power 3 7 Starting up for the first time 3 7 Turning off the power 3 8 Shut Down mode Boot mode 3 8 Hibernation mode 3 8 Standby mode 3 10 Restarting the computer 3 12 Restoring the preinstalled software 3 12 Restoring the complete system 3 12 Restoring TOSHIBA utilities and drivers 3 12 Chap...

Page 12: ...or rewriting 4 15 When writing or rewriting 4 17 Disclaimer DVD R RW drive 4 17 Writing CD DVDs on DVD Super Multi drive 4 18 Important message DVD Super Multi drive 4 18 Before writing or rewriting 4 18 When writing or rewriting 4 20 Disclaimer DVD Super Multi drive 4 21 RecordNow Basic for TOSHIBA 4 21 Data Verification 4 22 DLA for TOSHIBA 4 22 Video 4 23 When WinDVD Creator 2 Platinum is used ...

Page 13: ...y off 5 9 Temporarily changing modes 5 9 Generating ASCII characters 5 9 Chapter 6 Power and Power Up Modes 6 1 Power conditions 6 1 Power indicators 6 2 Battery indicator 6 2 DC IN indicator 6 3 Power indicator 6 3 Battery types 6 3 Battery 6 3 Real time clock battery 6 4 Care and use of the battery pack 6 5 Safety precautions 6 5 Charging the batteries 6 8 Monitoring battery capacity 6 9 Maximis...

Page 14: ...ority 7 6 Keyboard 7 7 USB 7 8 LAN 7 8 Chapter 8 Optional Devices 8 1 Cards memory 8 1 Power devices 8 1 Peripheral devices 8 1 PC cards 8 2 Installing a PC card 8 2 Removing a PC card 8 3 Memory expansion 8 3 Installing memory module 8 4 Removing memory module 8 5 Additional battery pack 8 6 Additional AC adaptor 8 6 USB FDD Kit 8 6 Parallel printer 8 7 External monitor 8 7 Television 8 8 i LINK ...

Page 15: ...3 System start up 9 4 Self test 9 4 Power 9 5 Password 9 7 Keyboard 9 7 LCD panel 9 7 Hard disk drive 9 8 DVD ROM drive 9 8 CD RW DVD ROM drive 9 10 DVD R RW drive 9 11 DVD R RW drive 9 13 DVD Super Multi drive 9 14 Diskette drive 9 16 Infrared port 9 16 Printer 9 17 USB mouse 9 17 PC card 9 18 Monitor 9 18 Sound system 9 19 TV output signal 9 19 USB 9 20 Modem 9 20 Standby Hibernation 9 21 LAN 9 ...

Page 16: ...ENGLISH using Euro_M dot Printed on 13 05 2004 as IM_A60EN Appendix A Specifications A 1 Appendix B Power Cord and Connectors B 1 Appendix C Display Controller and Modes C 1 Appendix D If your computer is stolen D 1 Appendix E Wireless LAN E 1 Appendix F Internal Modem Guide F 1 Glossary F 1 Index F 1 ...

Page 17: ...t read over the Introduction and The Grand Tour chapters to familiarise yourself with the computer s features components and accessory devices Then read Getting Started for step by step instructions on setting up your computer If you are an experienced computer user please continue reading the preface to learn how this manual is organised then become acquainted with this manual by browsing through...

Page 18: ...ptional external diskette drive Audio Video controls LAN Wireless LAN and internal modem Chapter 5 The Keyboard describes special keyboard functions including the keypad overlay and hot keys Chapter 6 Power and Power Up Modes gives details on the computer s power resources and battery save modes Chapter 7 HW Setup and Passwords explains how to configure the computer using the HW Setup program and ...

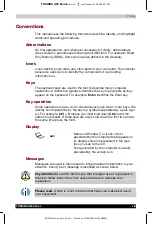
Page 19: ...ppear on the keyboard For example Enter identifies the Enter key Key operation Some operations require you to simultaneously use two or more keys We identify such operations by the key top symbols separated by a plus sign For example Ctrl C means you must hold down Ctrl and at the same time press C If three keys are used hold down the first two and at the same time press the third Display S ABC Na...

Page 20: ...res options and accessories Some of the features described in this manual may not function properly if you use an operating system that was not preinstalled by TOSHIBA Equipment checklist Carefully unpack your computer Save the box and packing materials for future use Hardware Check to make sure you have all the following items TOSHIBA A60 Series Portable Personal Computer Universal AC adaptor and...

Page 21: ... be used only for Wireless LAN models Sound Driver for Windows DVD Video Player LAN Driver Pointing device Driver TOSHIB Power Saver TOSHIBA user s manual TOSHIBA Console TOSHIBA ConfigFree TOSHIBA Touch and Launch TOSHIBA Touch pad and On Off Utility TOSHIBA PC Diagnostic Tool TOSHIBA Zooming Utility Documentation TOSHIBA A60 Series User s manual TOSHIBA A60 Series Quickstart Microsoft Windows XP...

Page 22: ...corporates the following features and benefits Processor Processor Intel Celeron Processor up to 2 8 GHz Mobile Intel Pentium 4 Processor up to 3 06GHz Mobile Intel Pentium 4 Processor up to 3 2 GHz supporting HTT Other processors may be introduced Memory Slots 256MB or 512MB on motherboard PC2100 256 MB or 512MB or 1024MB memory modules can be installed in the expansion memory slot for a maximum ...

Page 23: ...sing an adaptor It runs DVD ROMs at maximum 8 speed and CD ROMs at maximum 24 speed This drive supports the following formats DVD Video CD Text Photo CD single multi session CD ROM XA Mode 2 Form1 Form2 CD G Audio CD only DVD ROM CD DA CD ROM Mode 1 Mode 2 Enhanced CD CD EXTRA Addressing Method 2 CD RW DVD ROM drive Some models are equipped with a full size CD RW DVD ROM drive module that lets you...

Page 24: ...rive supports the following formats DVD Video DVD RW CD ROM Photo CD CD ROM X A CD I CD R DVD ROM DVD R CD EXTRA Audio CD CD DA CD Text CD RW DVD R RW drive Some models are equipped with a full size DVD R RW drive module that lets you record data to rewritable CD DVDs as well as run either 12cm 4 72 or 8cm 3 15 CD DVDs without using an adaptor It reads DVD ROMs at maximum 8 speed and CD ROMs at ma...

Page 25: ... the DVD ROM drive DVD Video DVD RW DVD RW CD Text CD ROM Mode1 Mode2 Enhanced CD CD EXTRA Addressing Method 2 DVD RAM DVD ROM DVD R DVD R CD DA Photo CD single multi session CD ROMXA Mode2 Form1 Form2 CD G Audio CD only Display The computer s LCD panel supports high resolution video graphics The screen can be set at a wide range of viewing angles for maximum comfort and readability Built in Thin ...

Page 26: ...cause it is universal it can receive a range of AC voltage between 100 and 240 volts Ports Headphone Enables connection of a stereo headphone Microphone Enables connection of a monaural microphone Parallel Port Parallel printer or other parallel device ECP compatible Infrared This infrared port is compatible with Infrared Data Association IrDA 1 1 Fast InfraRed FIR standards It enables cableless 4...

Page 27: ...ditions It has a modem jack for connecting to a telephone line Both of V 90 and V 92 are supported only in USA Canada UK France Germany and Australia Only V 90 is available in other regions LAN The computer is equipped with a LAN card that supports Ethernet LAN 10 Mbit s 10BASE T and Fast Ethernet LAN 100 Mbit s 100BASE Tx Wireless LAN Some computers in this series are equipped with a wireless LAN...

Page 28: ...combinations let you quickly modify the system configuration directly from the keyboard without running a system configuration program Display automatic power off This feature automatically cuts off power to the internal display when there is no keyboard input for a time specified Power is restored when any key is pressed You can specify the time in the Monitor power off item of the Basic Setup ta...

Page 29: ...n TOSHIBA Power Saver Battery save mode This feature lets you save battery power You can specify the Power Save Mode in the Profile item in TOSHIBA Power Saver Panel power on off This feature turns power to the computer off when the display panel is closed and turns it back on when the panel is opened You can specify the setting in the When I close the lid item of the Setup Action tab in TOSHIBA P...

Page 30: ...This section describes preinstalled utilities and tells how to start them For details on operations refer to each utility s online manual help files or readme txt files TOSHIBA Console TOSHIBA Console is a graphical user interface that provides easy access to help and services TOSHIBA Power Saver To access this power savings management program click the Control Panel and select the TOSHIBA Power S...

Page 31: ...Diagnostic Tool TOSHIBA ConfigFree ConfigFree is a suite of utilities to allow easy control of communication device and network connections ConfigFree also allows you to find communication problems and create profiles for easy switching between location and communication networks You can boot ConfigFree from the menu bar as follows TOSHIBA Touch pad On Off Utility Pressing Fn F9 in a Windows envir...

Page 32: ...r 512MB or 1024MB memory modules The modules are PC2100 200 pin SO Dual In line SO DIMM Main battery pack An additional 12 cells battery pack PA3382U BSR or PA3382U BAS can be purchased from your TOSHIBA dealer The battery pack is identical to the one that came with your computer Use it as a spare or replacement AC adaptor If you use your computer at more than one site it may be convenient to purc...

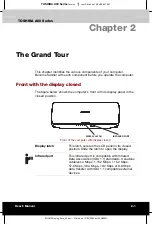
Page 33: ...he figure below shows the computer s front with its display panel in the closed position DISPLAY LATCH INFRARED PORT Front of the computer with display closed Display latch This latch secures the LCD panel in its closed position Slide the latch to open the display Infrared port This infrared port is compatible with Infrared Data Association IrDA 1 1 standards It enables cableless 4 Mbps 1 152 Mbps...

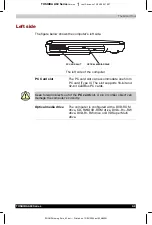
Page 34: ...SLOT OPTICAL MEDIA DRIVE The left side of the computer PC Card slot The PC card slot can accommodate one 5mm PC card Type II The slot supports 16 bit and 32 bit CardBus PC cards Keep foreign objects out of the PC card slot A pin or similar object can damage the computer s circuitry Optical media drive The computer is configured with a DVD ROM drive CD RW DVD ROM drive DVD R RW drive DVD R RW drive...

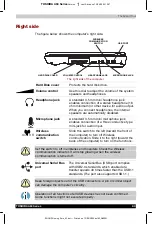
Page 35: ...hone jack A standard 3 5 mm mini microphone jack enables connection of a three conductive type mini jack for audio input On Off Wireless communication switch Slide this switch to the left toward the front of the computer to turn off Wireless communication Slide it to the right toward the back of the computer to turn on the functions Set the switch to off in airplanes and hospitals Check the Wirele...

Page 36: ...an vent Also be careful to keep foreign objects out of the vents A pin or similar object can damage the computer s circuitry Video out TV OUT Plug a 4 pin S Video connector into this jack Modem jack The modem jack lets you use a modular cable to connect the modem directly to a telephone line In case of a lightning storm unplug the modem cable from the telephone jack Do not connect the modem to a d...

Page 37: ...ject can damage the computer s circuitry Operation of all functions of all USB devices has not been confirmed Some functions might not execute properly DC IN 19V The AC Adaptor connects to this socket Use only the model of AC Adaptor that comes with the computer Using the wrong adaptor can damage your computer External monitor port This 15 pin port lets you connect an external monitor Parallel por...

Page 38: ... The underside of the computer Battery pack The battery pack powers the computer when the AC Adaptor is not connected The Battery section in Chapter 6 Power and Power Up Modes describes how to access the battery pack Additional battery packs can be purchased from your TOSHIBA dealer to extend the computer s battery operating time Battery Release Latch Slide this latch to release or the battery pac...

Page 39: ...TROL BUTTONS TOUCH PAD STEREO SPEAKER LEFT TOUCH PAD CONTROL BUTTONS POWER SOURCE SYSTEM INDICATORS STEREO SPEAKER RIGHT The front with the display open Display screen The full colour LCD displays high contrast text and graphics The computer s LCD consist of one of below 14 1 XGA LCD consists of up to 1024 768 pixels or dots 15 0 XGA LCD consists of up to 1024 768 pixels or dots The computer has a...

Page 40: ...you open the panel the computer starts in Hibernation mode Use the TOSHIBA Power Saver Utility to enable or disable this feature The default is enabled Refer to the TOSHIBA Power Saver Utility and Panel Power Off On items in Chapter 1 Introduction for details on settings Stereo Speakers The speakers emit sound generated by your software as well as audio alarms such as low battery condition generat...

Page 41: ...If the adaptor s output voltage is abnormal or if the power supply malfunctions this indicator flashes orange Power The Power indicator glows blue when the computer is on If you turn off the computer in Resume mode this indicator blinks orange one second on two seconds off while the computer shuts down Battery The Battery indicator shows the condition of the charge Green means fully charged and or...

Page 42: ...W MODE NUMERIC MODE Keypad overlay indicators Arrow mode When the Arrow mode indicator lights green you can use the keypad overlay white labelled keys as cursor keys Refer to the Keypad overlay section in Chapter 5 The Keyboard Numeric mode You can use the keypad overlay white labelled keys for numeric input when the Numeric mode indicator lights green Refer to the Keypad overlay section in Chapte...

Page 43: ...kette slot Insert diskette in this slot Eject button When a diskette is fully seated in the drive the eject button pops out To remove a diskette push in the eject button and the diskette pops out partially for removal Check the Disk In Use indicator when you use the diskette drive Do not press the eject button or turn off the computer while the light is glowing Doing so could destroy data and dama...

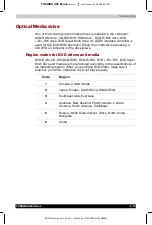
Page 44: ... When the computer is accessing a CD DVD an indicator on the drive glows Region codes for DVD drives and media DVD ROM CD RW DVD ROM DVD R RW DVD R RW DVD Super Multi drive and media are manufactured according to the specifications of six marketing regions When you purchase DVD Video make sure it matches your drive otherwise it will not play properly Code Region 1 Canada United States 2 Japan Euro...

Page 45: ...orded data cannot be erased or changed CD RW discs can be recorded more than once Use either 1 2 or 4 multi speed CD RW discs or high speed 4 to 10 speed discs The write speed of the ultra speed CD RW discs Ultra speed is CD RW DVD ROM drive only is maximum 24 speed DVDs DVD R DVD R discs can be written only once The recorded data cannot be erased or changed DVD RW DVD RW and DVD RAM discs can be ...

Page 46: ...ata to rewritable CDs as well as run either 12 cm 4 72 or 8 cm 3 15 CD DVDs without using an adaptor The read speed is slower at the centre of a disc and faster at the outer edge DVD read 8 speed maximum CD read 24 speed maximum CD R write 24 speed maximum CD RW write 10 speed maximum high speed media 24 speed maximum ultra speed media DVD R RW drive The full size DVD R RW drive module lets you re...

Page 47: ...d DVD RW write 2 speed DVD R write 4 speed DVD RW write 2 4 speed CD read 24 speed maximum CD R write 16 speed maximum CD RW write 10 speed maximum high speed media DVD Super Multi drive The full size DVD Multi drive module lets you record data to rewritable CD DVDs as well as run either 12 cm 4 72 or 8 cm 3 15 CD DVDs without using an adaptor The read speed is slower at the centre of a disc and f...

Page 48: ... 240 volts and to a frequency of either 50 or 60 hertz enabling you to use the computer in almost any region To recharge the battery simply connect the AC Adaptor to a power source and the computer See Chapter 6 Power and Power Up Modes for details The AC Adaptor Use of the wrong adaptor could damage your computer TOSHIBA assumes no liability for any damage in such case The output rating for the c...

Page 49: ...nstruction Manual This guide which is included with the computer explains product liability Connecting the AC adaptor Opening the display Turning on the power Starting up for the first time Turning off the power Restarting the computer Restoring the preinstalled software If you are a new user follow the steps in each section of this chapter as you prepare to operate your computer All users should ...

Page 50: ...your computer but read the following to make sure your work site provides a proper environment Make sure there is adequate space around the computer for proper ventilation Make sure the AC power cord connects to an outlet that is close to the computer and easily accessible The temperature should be 5 to 30 degrees Centigrade 41 to 86 degrees Fahrenheit and the relative humidity should be 20 to 80 ...

Page 51: ...per holder set it at about the same height and distance as the computer Seating and posture The height of your chair in relation to the computer and keyboard as well as the support it gives your body are primary factors in reducing work strain Refer to the following tips and to the figure below BELOW EYE LEVEL FOOT REST 90 DEGREE ANGLES Posture and positioning of the computer Place your chair so t...

Page 52: ...he computer finding ways to break up the routine can reduce stress and improve your efficiency Sit in a relaxed posture Good positioning of your chair and equipment as described earlier can reduce tension in your shoulders or neck and ease back strain Vary your posture frequently Occasionally stand up and stretch or exercise briefly Exercise and stretch your wrists and hands a number of times duri...

Page 53: ...ource supplying from 100 to 240 volts and 50 or 60 hertz For details on using the AC adaptor to charge the battery pack refer to Chapter 6 Power and Power Up Modes Use of the wrong adaptor could damage your computer TOSHIBA assumes no liability for any damage in such case The output rating for the computer is 19 volts DC 1 Connect the power cord to the AC adaptor Connecting the power cord to the A...

Page 54: ...g the display The display panel can be rotated in a wide range of angles for optimal viewing 1 Slide the display latch on the front of the computer to the right to unlatch the display panel 2 Lift the panel up and adjust it to the best viewing angle for you When you open the display hold it with both hands and lift up slowly DISPLAY LATCH Opening the display panel ...

Page 55: ...operating system OS and the OS has started up 1 If the external diskette drive is connected make sure it is empty If a diskette is in the drive press the eject button and remove the diskette 2 Open the display panel 3 Press and hold the computer s power button for two or three seconds Turning on the power Starting up for the first time When you first turn on the power the computer s initial screen...

Page 56: ...isc 3 Click start then click Turn off computer From the Turn off computer menu select Turn off 4 Turn off the power to any peripheral devices Do not turn the computer or devices back on immediately Wait a moment to let all capacitors fully discharge Hibernation mode The hibernation feature saves the contents of memory to the hard disk when the computer is turned off The next time the computer is t...

Page 57: ...puter receives no input or hardware access for the duration set by the System hibernate feature You can use the panel power off feature Starting Hibernation To enter Hibernation mode follow the steps below 1 Click Start 2 Select Turn Off Computer 3 Open the Turn Off Computer dialog box Hibernate is not displayed 4 Press the Shift key The Standby item will change to Hibernate 5 Select Hibernate Aut...

Page 58: ...go into Standby mode according to the settings in the TOSHIBA Power Saver utility To restore operation from Standby mode press the power button or press any key The latter action works only if Wake up on Keyboard is enabled in HW Setup If the computer automatically enters Standby mode while a network application is active the application might not be restored when the computer wakes up from Standb...

Page 59: ...ndby 2 Close the display panel This feature must be enabled Refer to the Setup Action tab in Toshiba Power Saver Utility described in the Control Panel Open Performance and Maintenance and open TOSHIBA Power Saver 3 Press the power button This feature must be enabled Refer to the Setup Action tab in Toshiba Power Saver Utility described in the Control Panel When you turn the power back on you can ...

Page 60: ...preinstalled software follow the steps below When you reinstall the Windows operating system the hard disk will be reformatted and all data will be lost Make sure you have a backup copy of your data before you perform a complete system recovery 1 Load the Product Recovery Media in the optional optical media drive and turn off the computer s power 2 Hold down the F12 key and turn on the power When ...

Page 61: ...screen pointer to go Two buttons below the Touch pad are used like the buttons on a mouse pointer Press the left button to select a menu item or to manipulate text or graphics designated by the pointer Press the right button to display a menu or other function depending on the software you are using You can also tap the Touch pad to perform functions similar to those of the left button Click Tap t...

Page 62: ...onnection doing so can damage the connecting pins Connecting the USB diskette drive If you connect the diskette drive after turning on the computer it will take about 10 seconds for the computer to recognize the drive Do not disconnect and reconnect before 10 seconds has elapsed Disconnecting 3 diskette drive When you have finished using the diskette drive follow the procedures below to disconnect...

Page 63: ...OM operation When the computer is accessing a CD DVD ROM an indicator on the drive glows Use the WinDVD 5 application to view DVD Video discs If you have a DVD ROM CD R RW drive refer also to the Writing CDs on DVD ROM CD R RW drive section for precautions on writing to CDs If you have a DVD R RW drive refer also to the Writing CD DVDs on DVD R RW drive section for precautions on writing to CDs DV...

Page 64: ...ect button will not open the drawer when the DVD ROM drive s power is off If the power is off you can open the drawer by inserting a slender object about 1 5 mm such as a straightened paper clip into the eject hole just to the right of the eject button 1 0mm Manual release with the eject hole 2 Grasp the drawer gently and pull until it is fully opened Pulling the drawer open ...

Page 65: ... opened the edge of the computer will extend slightly over the CD DVD tray Therefore you will need to turn the CD DVD at an angle when you place it in the tray After seating the CD DVD however make sure it lies flat as shown in the figure above Do not touch the laser lens Doing so could cause misalignment Do not keep foreign matter from entering the drive Check the back edge of the tray to make su...

Page 66: ...he CD DVD until you feel it click into place The CD DVD should lie below the top of the spindle flush with the spindle base 5 Push the centre of the drawer to close it Press gently until it locks into place If the CD DVD is not seated properly when the drawer is closed the CD DVD might be damaged Also the drawer might not open fully when you press the eject button Closing the DVD ROM drawer ...

Page 67: ...rawer wait for it to stop before you remove it 1 To pop the drawer partially open press the eject button Gently pull the drawer out until it is fully opened When the drawer pops open slightly wait a moment to make sure the CD DVD has stopped spinning before pulling the drawer fully open Turn off the power before you use the eject hole If the CD DVD is spinning when you open the drawer the CD DVD c...

Page 68: ... functions Press on the icon to select the desired function Next Press the icon to advance to the next track chapter or data Previous Press the icon to advance to the previous track chapter or data If Random is selected in Windows Media Player selecting Next or Previous advances to a random selection Play Pause and Stop buttons A single button on a rocker controls the Play Pause and Stop functions...

Page 69: ...ction If you fail to do so the CD RW DVD ROM drive may not function properly and you may fail to write or rewrite loose data or incur other damage Before writing or rewriting Please observe the following points when you write or rewrite the data We recommend the following manufacturers of CD R and CD RW media Media quality can affect write or rewrite success rates CD R TAIYOYUDENCO LTD Mitsui Chem...

Page 70: ...aver which can put a heavy load on the CPU Operate the computer at full power Do not use power saving features Do not write while virus check software is running Wait for it to finish then disable virus detection programs including any software that checks files automatically in the background Do not use hard disk utilities including those intended to enhance HDD access speed They may cause unstab...

Page 71: ...d writing or rewriting errors may occur Set the computer on a level surface and avoid places subject to vibration such as airplanes trains or cars Do not use an unstable surface such as a stand Keep mobile phones and other wireless communication devices away from the computer Disclaimer CD RW DVD ROM drive TOSHIBA does not bear responsibility for the following Damage to any CD R RW disc that may b...

Page 72: ... in no event does TOSHIBA guarantee the operation quality or performance of any disc Disc quality can affect write or rewrite success rates CD R TAIYOYUDENCO LTD MITSUBISHI CHEMICAL CORPORATION RICOH Co Ltd Hitachi Maxell Ltd CD RW High Speed Multi Speed MITSUBISHI CHEMICAL CORPORATION RICOH Co Ltd DVD R DVD Specifications for Recordable Disc for General Version 2 0 TAIYOYUDENCO LTD PIONEER VIDEO ...

Page 73: ...nt of data it might take time to fill in the dummy data When multiple drives that can write data to discs are connected be careful not to write to the wrong drive Be sure to connect the universal AC adaptor before you write or rewrite Be sure to close all other software programs except the writing software Do not run software such as a screen saver which can put a heavy load on the CPU Operate the...

Page 74: ...before going into standby hibernation Writing is completed if you can open the DVD R RW drive tray Set the computer on a level surface and avoid places subject to vibration such as airplanes trains or cars Do not use an unstable surface such as a stand Keep mobile phones and other wireless communication devices away from the computer Disclaimer DVD R RW drive TOSHIBA does not bear responsibility f...

Page 75: ...e Before writing or rewriting Base on TOSHIBA s limited compatibility testing we suggest the following manufacturers of CD R RW and DVD R R RW RW RAM disc However in no event does TOSHIBA guarantee the operation quality or performance of any disc Disc quality can affect write or rewrite success rates CD R TAIYOYUDENCO LTD MITSUBISHI CHEMICAL CORPORATION RICOH Co Ltd Hitachi Maxell Ltd CD RW High S...

Page 76: ...D R RW disc some disc space is required for file management so you may not be able to write the full capacity of the disc Since the disc is based on the DVD standard it might be filled with dummy data if the written data is less than about 1 GB Even if you write only a small amount of data it might take time to fill in the dummy data When multiple drives that can write data to discs are connected ...

Page 77: ...efore going into standby hibernation Writing is completed if you can open the DVD R RW drive tray Set the computer on a level surface and avoid places subject to vibration such as airplanes trains or cars Do not use an unstable surface such as a stand Keep mobile phones and other wireless communication devices away from the computer Disclaimer DVD R RW drive TOSHIBA does not bear responsibility fo...

Page 78: ...r damage Before writing or rewriting Base on TOSHIBA s limited compatibility testing we suggest the following manufacturers of CD R RW and DVD R R RW RW RAM disc However in no event does TOSHIBA guarantee the operation quality or performance of any disc Disc quality can affect write or rewrite success rates CD R TAIYOYUDENCO LTD MITSUBISHI CHEMICAL CORPORATION RICOH Co Ltd Hitachi Maxell Ltd CD RW...

Page 79: ...hole or in part Data deleted erased from a CD RW and DVD RW DVD RW and DVD RAM disc cannot be recovered Check the content of the disc carefully before you delete it If multiple drives that can write data to discs are connected be careful not to delete data from the wrong drive In writing to a DVD R RW DVD R RW or DVD RAM disc some disc space is required for file management so you may not be able t...

Page 80: ...XP operating system Operate the computer for any other function including using a mouse or Touch pad closing opening the LCD panel Start a communication application such as a modem Apply impact or vibration to the computer Install remove or connect external devices including the following PC card USB devices external display i LINK devices optical digital devices Use the Audio Video control button...

Page 81: ...nnot be created using RecordNow You cannot use RecordNow s Audio CD for Car or Home CD Player function to record music to the DVD R RW or DVD R RW disc Do not use the Exact Copy function of RecordNow to copy DVD Video and DVD ROM with copyright protection DVD RAM disc cannot be backed up with the Exact Copy function of RecordNow You cannot back up a CD ROM or CD R RW to DVD R RW or DVD R RW using ...

Page 82: ...Data in the left side menu 3 Mark the Verify data written to the disc after burning check box in the Data Options 4 Click the OK button DLA for TOSHIBA Note the following limitations when you use DLA This software supports only rewritable discs DVD RW DVD RW and CD RW It does not support DVD R DVD R and CD R discs that are not rewritable DLA does not support formatting the DVD RAM disc and writing...

Page 83: ...D R R RW discs cannot be written in VR format It may take several hours for InterVideo WinDVD Creator 2 Platinum to convert video to MPEG format and several hours more to save the MPEG file to a DVD Super Multi drive You will need 2 GB of empty hard disk space for every hour to write to a DVD R RW R RW disc You cannot edit or play copy protected content using InterVideo WinDVD Creator 2 Platinum W...

Page 84: ...ake effect How to make a DVD Video Simplified steps for making a DVD Video from video data captured from a DV Camcorder 1 Click Start All Programs InterVideo WinDVD Creator to launch WinDVD Creator 2 Click Capture button then capture the video data from the DV Camcorder via IEEE1394 3 Click Edit button then drag the video clips from Video Library tab to the edit track 4 Click Make Movie button in ...

Page 85: ...t show video on the external monitor when in simultaneous mode WinDVD Creator cannot edit or play copy protected content Do not change display settings while using WinDVD Creator Do not enter standby hibernation mode while using WinDVD Creator Do not operate WinDVD Creator immediately after turning on the computer Please wait until all Disc Drive activity has stopped When recording to a DV Camcord...

Page 86: ... data DVD R R RW disc cannot be written in VR format A maximum of about 2 hours of video data can be written in DVD Video format to DVD R R RW RW disc WinDVD Creator cannot export to DVD Audio VideoCD miniDVD format WinDVD Creator can write DVD RAM RW in VR format but the disc may only play on your computer When writing to DVD disc WinDVD Creator requires 2GB or more over disk space every one hour...

Page 87: ...If your CD DVDs become dusty or dirty wipe them with a clean dry cloth Wipe from the centre out do not wipe in a circular direction around the CD DVD If necessary use a cloth dampened in water or a neutral cleaner Do not use benzene thinner or similar cleaner Diskettes 1 Store your diskettes in the container they came in to protect them and keep them clean If a diskette is dirty do not use cleanin...

Page 88: ...oint to All Programs point to TOSHIBA point to Networking and click Modem Region Select Do not use the Country Region Select function in the Modem setup utility in the Control Panel if the function is available If you change the Country Region in the Control Panel the change may not take effect 2 The Region Selection icon will appear in the Windows Task Bar The Region Selection icon Windows XP 3 C...

Page 89: ...e into the modem jack 2 Plug the other end of the modular cable into a telephone jack Connecting the internal modem Do not pull on the cable or move the computer while the cable is connected If modem speed is low or communication is interrupted when you are using modem please check and set CPU speed to Maximum by TOSHIBA Power Management Utility If you use a storage device such as a DVD ROM drive ...

Page 90: ...on A Automatic Transmit Rate Select mechanism in the transmit range of 54 48 36 24 18 12 9 6 2 and 1 Mbit s Revision G Automatic Transmit Rate Select mechanism in the transmit range of 108 96 72 48 36 24 18 and 12 Mbit s Turbo Mode Frequency Channel Selection Revision A Turbo Mode 5 GHz Revision G 2 4 GHz Roaming over multiple channels Card Power Management Wired Equivalent Privacy WEP data encryp...

Page 91: ...Indicator status Indication Indicator off Wireless communication switch is set to off Automatic power down because of overheating Power malfunction Indicator glows Wireless communication switch is on Wireless LAN is turned on by an application If you used the Task Bar to disable W LAN restart the computer or follow the procedures below to enable the system to recognize W LAN Open or click the foll...

Page 92: ...off the power to the computer and to all external devices connected to the computer 2 Plug one end of the cable into the LAN jack Press gently until you hear the latch click into place Connecting the LAN cable 3 Plug the other end of the cable into a LAN hub connector Check with your LAN administrator before connecting to a hub When the computer is exchanging data with the LAN the LAN active indic...

Page 93: ...t clean cloth and wipe the screen gently with the cloth Never spray cleaner directly onto the computer or let liquid run into any part of it Never use harsh or caustic chemical products to clean the computer Moving the computer The computer is designed for rugged durability However a few simple precautions taken when moving the computer will help ensure trouble free operation Make sure all disk ac...

Page 94: ...U speed Or by lowering the CPU speed first then if necessary turning on the fan Use the Cooling Method item of the Basic Setup tab in TOSHIBA Power Saver Maximum Performance Turn on the fan first then if necessary lower the CPU processing speed Performance Use a combination of the fan and lowering the CPU processing speed Battery optimised Lower the CPU processing speed first then if necessary tur...

Page 95: ...produce the upper and lower case letters numbers punctuation marks and special symbols that appear on the screen There are some differences however between using a typewriter and using a computer keyboard Letters and numbers produced in computer text vary in width Spaces which are created by a space character may also vary depending on line justification and other factors The lowercase l el and th...

Page 96: ... on the computer See the section Soft keys Fn key combinations in this chapter The function executed by individual keys depends on the software you are using Soft Keys Alt Gr Key Combinations Alt Gr The Alt Gr key at the right of the space bar is used in combination with other keys to create accented or special characters etc Note that some of the keys at the top of the keyboard bear three symbols...

Page 97: ... 101 key enhanced keyboard layout The keyboard is designed to provide all the features of the 101 key enhanced keyboard shown above The 101 102 key enhanced keyboard has a numeric keypad and scroll lock key It also has additional Enter Ctrl and Alt keys to the right of the main keyboard Since the keyboard is smaller and has fewer keys some of the enhanced keyboard functions must be simulated using...

Page 98: ...When you press these hot keys the current setting will be displayed as an icon Instant security Press Fn F1 to lock the keyboard and blank the screen to prevent others from accessing your data To restore the screen and original settings press any key or move the AccuPoint When a dialog box appears enter the screen saver password and click OK If no password is set the screen will be restored when y...

Page 99: ... to change the device When you release Fn and F5 the selected device will change If you hold down the keys for three seconds the selection will return to LCD LCD Display Brightness Pressing Fn F6 decreases the display brightness in decrements When you press these hot keys the current setting will be displayed for two seconds by an icon You can also change this setting through the Screen brightness...

Page 100: ...an icon Display resolution selection Press Fn space keys to change the display resolution Each time when you press these hot keys the display resolution changes as follows From the current resolution the original resolution to 1024X768 from 1024X768 to 800X600 from 800X600 to the original resolution TOSHIBA Zooming Utility reduce To reduce the icon size on the desktop or the application window pre...

Page 101: ...and they press an F number key To start the Toshiba Accessibility Utility click start point to All Programs Windows 2000 only point to Programs point to TOSHIBA Utilities and click Accessibility Windows special keys The keyboard provides two keys that have special functions in Windows one activates the Start menu and the other has the same function as the secondary mouse button This key activates ...

Page 102: ...provides the same functions as the numeric keypad on the 101 102 key enhanced keyboard Turning on the overlays The numeric keypad overlay can be used for numeric data input or cursor and page control Arrow mode To turn on the Arrow mode press Fn F10 The Arrow mode indicator lights Now try cursor and page control using the keys shown below Press Fn F10 again to turn off the overlay Numeric mode To ...

Page 103: ...most recently used overlay If the Numeric mode icon lights you can use the overlay for numeric entry If the Arrow mode icon lights you can use the overlay for cursor and page control 3 Release Fn to return to normal keyboard operation Temporarily changing modes If the computer is in Numeric mode you can switch temporarily to Arrow mode by pressing a shift key If the computer is in Arrow mode you c...

Page 104: ... conditions The computer s operating capability and battery charge status are affected by the power conditions whether an AC adaptor is connected whether a battery is installed and what the charge level is for the battery Power on Power off no operation AC adaptor connected Battery fully charged Operates No charge LED Battery green DC IN green No charge LED Battery green DC IN green Battery partia...

Page 105: ...alert you to the computer s operating capability and battery charge status Battery indicator Check the Battery indicator to determine the status of the battery The following indicator lights indicate the battery status Flashing amber The battery charge is low The AC adaptor must be connected to recharge the battery Amber Indicates the AC adaptor is connected and charging the battery Green Indicate...

Page 106: ...e computer is turned on Blinking amber Indicates the power was turned off while the computer was in Resume mode The indicator turns on for one second and turns off for two seconds No light Under any other conditions the indicator does not light Battery types The computer has two types of batteries Battery 8 cell or 12 cell depending on the model purchased Real Time Clock RTC battery Battery When t...

Page 107: ...ery pack is fully discharged Refer to Extending battery life in this Chapter for procedures If the computer is continuously operated on AC power more than a month the battery may fail to retain a charge It may not function efficiently over the expected life of the battery and the Battery LED may not indicate a low battery condition Real time clock battery The Real Time Clock RTC battery provides p...

Page 108: ...nor injury or property damage Note Provides important information Danger 1 Never try to dispose of the battery pack by burning or expose it to a heating device such as a microwave oven The battery pack could explode and cause bodily injury 2 Never try to disassemble repair or otherwise tamper with a battery pack The battery pack will overheat and ignite Leakage of caustic alkaline solution or othe...

Page 109: ...at ignite or rupture possibly resulting in death or serious injury Warning 1 Never allow caustic electrolyte fluid leaked from a battery pack to contact your eyes skin or clothing If caustic electrolyte fluid should contact your eyes immediately wash your eyes with large amounts of running water and seek medical attention to help prevent eye damage If electrolyte fluid should contact your skin imm...

Page 110: ...or the remaining battery power If the battery pack and real time clock battery discharge completely Standby and Suspend will not function and data in memory will be lost Also the computer might register an incorrect time and date In this case connect the AC adaptor to recharge the batteries 7 Never install or remove the battery pack without first turning off the power and disconnecting the AC adap...

Page 111: ...attery pack while it is installed in the computer connect the AC adaptor to the DC IN socket and plug the other end into a working outlet The Battery indicator glows amber when the battery is being charged Use only the computer connected to an AC power source to charge the battery pack Do not attempt to charge the battery pack with any other charger Time The following table shows the approximate t...

Page 112: ... until the power automatically shuts off 2 Plug in the AC adaptor 3 Charge the battery until the Battery indicator glows green Repeat these steps two or three times until the battery recovers normal capacity Leaving the AC adaptor connected will shorten battery life At least once a month run the computer on battery power until the battery is fully discharged then recharge the battery Monitoring ba...

Page 113: ... you use the hard disk optical disk drive and the optional diskette drive How much charge the battery contained to begin with How you use optional devices such as a PC card to which the battery supplies power Enabling Resume mode conserves battery power if you are frequently turning the computer off and on Where you store your programs and data Closing the display when you are not using the keyboa...

Page 114: ...rged If the Battery LED flashes or there is some other warning to indicate a low battery go to step 4 4 Connect the AC adaptor to the computer and the power cord to a power outlet The DC IN LED should glow green and the Battery LED should glow amber to indicate that the battery pack is being charged If the DC IN indicator does not glow power is not being supplied Check the connections for the AC a...

Page 115: ...apter 2 The Grand Tour for component locations When handling battery packs be careful not to short circuit the terminals Also do not drop hit or otherwise apply impact do not scratch or break the casing and do not twist or bend the battery pack Do not remove the battery pack while the computer is in Standby mode Data is stored in RAM so if the computer loses power it will be lost In Hibernation mo...

Page 116: ... 05 2004 as IM_A60EN 6 Slide the battery release latch to free the battery pack for removal then lift up the battery pack BATTERY RELEASE LATCH BATTERY PACK Removing the battery pack 7 Pull the battery pack forward to remove it For environmental reasons do not throw away a spent battery pack Please return spent battery packs to your TOSHIBA dealer ...

Page 117: ...s 1 Be sure the computer s power is off and all cables are disconnected 2 Insert the battery pack BATTERY PACK Installing the battery pack 3 Push down the battery pack until it is firmly seated Starting the computer by password To start up the computer with the user password follow these steps 1 Turn on the power as described in Chapter 3 Getting Started The following message appears S Password At...

Page 118: ...r 3 Getting Started Windows utilities You can specify the setting in TOSHIBA Power Saver Hot keys You can use hot keys Fn F3 to enter Standby mode and Fn F4 to enter Hibernation See Chapter 5 The Keyboard for details Panel power on off You can set up your computer so that power turns off automatically when you close the display panel When you open the panel power turns on in Standby or Hibernation...

Page 119: ...d is set access to the TOSHIBA HW Setup program can be prevented when the user password is used to log on to the computer Accessing HW Setup In Windows XP click start click Control Panel click Printers and Other Hardware and select TOSHIBA HW Setup to run HW Setup HW Setup window The HW Setup window contains the following tabs Display CPU Boot Priority Keyboard USB LAN General Password Parallel Pr...

Page 120: ...is option allows you to set or reset the user password for power on Not Registered Change or remove the password Default Registered Set the password A dialog box will appear to let you set the password To enter a user password 1 Select Registered to display the following prompt S Enter Password 2 Enter a password of up to 10 characters The character string you enter is displayed as a string of ast...

Page 121: ...g of asterisks S Enter Password If you click the OK button before entering the password Registered will appear on the display 3 Click the OK button If the character string you enter matches the registered password the password option is reset and the display changes to S Not registered If they do not match the following message appears You must repeat step 1 S Incorrect Password If you enter the p...

Page 122: ...rt type to Extended Capabilities Port ECP For most printers the port should be set to ECP Default Standard Bidirectional This setting should be used with some other parallel devices Display This tab lets you customize your computer s display settings for either the internal LCD screen or for an external monitor Power On Display Lets you set the display to be used when the computer is booted Auto S...

Page 123: ...tion is automatically switched when necessary Default Always High CPU power consumption and clock speed automatic switching function is disabled The CPU always runs at its fastest speed Always Low CPU power consumption and clock speed automatic switching function is disabled The CPU always runs at low power consumption and low speed HT Technology Configures the Hyper Treading Technology Enabled wi...

Page 124: ...e CD ROM and LAN Default FDD HDD CD ROM LAN The computer looks for bootable files in the following order diskette drive HDD CD ROM and LAN HDD CD ROM LAN FDD The computer looks for bootable files in the following order HDD CD ROM LAN and diskette drive FDD CD ROM LAN HDD The computer looks for bootable files in the following order diskette drive CD ROM LAN and HDD CD ROM LAN HDD FDD The computer l...

Page 125: ...omputer 2 The following menu will be displayed 3 Use the up down cursor keys to select boot device you want and press Enter If a supervisor password is set the menu above does not appear when you use the user password to start the computer The selection method above does not change the boot priority settings in HW Setup If you press a key other than one of those above or if the selected device is ...

Page 126: ...d Disables the USB KB Mouse Legacy Emulation Use this option to enable or disable USB FDD Legacy Emulation Enabled Enables the USB FDD Legacy Emulation Default Disabled Disables the USB FDD Legacy Emulation LAN Wake up on LAN This features lets the computer s power be turned on when it receives a wake up signal from the LAN Enabled Enables Wake up on LAN Disabled Disables Wake up on LAN Default Do...

Page 127: ...ional devices can expand the computer s capabilities and its versatility The following optional devices are available from your TOSHIBA dealer Cards memory PC cards Memory expansion Power devices Additional battery pack Additional AC adaptor Peripheral devices USB FDD Kit Parallel printer External monitor Television i LINK IEEE1394 Other Security lock TOSHIBA A60 Series User s Manual 8 1 ...

Page 128: ...nsmission Installing a PC card One PC card connector is located one above the other on the right side of the computer Connector is accessed from the same slot You can install one Type II card Windows hot install feature lets you install PC cards while the computer s power is on Do not install a PC card while the computer is in standby or hibernation mode Some cards might not work properly An HDD o...

Page 129: ...dware icon on the system tray and disable the PC card 2 Press the eject button of the PC card you want to remove to extend the button 3 Press the extended eject button to pop the card out slightly 4 Grasp the PC card and remove it Removing the PC card Memory expansion You can install additional memory in the computer s memory module to increase the amount of RAM Only memory module with the followi...

Page 130: ...er and the memory module If you install a memory module that is not compatible with the computer a beep will sound when you turn on the power If the module is installed in slot A there will be a long beep followed by a short beep If the module is in slot B there will be a long beep followed by two short beeps In this case shut down the power and remove the incompatible module 2 Remove all cables c...

Page 131: ...zed If it is not recognized check the module s connection Removing memory module To remove the memory module make sure the computer is in boot mode then 1 Turn the computer off and remove all cables connected to the computer If you use the computer for a long time the memory module will become hot In this case let the memory module cool to room temperature before you replace them Do not try to rem...

Page 132: ... memory module 7 Seat the cover and secure it with one screw Additional battery pack You can increase the portability of the computer with additional battery packs If you re away from an AC power source you can replace a low battery with a fully charged one See Chapter 6 Power and Power Up Modes Additional AC adaptor If you frequently transport the computer between different sites such as your hom...

Page 133: ...tup window 10 Set the Parallel Port Mode and press OK 11 Choose Reboot for the change to take effect 12 Select the printer in Windows Add Print Wizard To access the Add Print Wizard utility click Start point to Settings click Printers and double click the Add Printer icon External monitor An external analog monitor can be connected to the external monitor port on the back side of the computer The ...

Page 134: ...mputer s display you must set the computer s display resolution to the same as that of the external monitor or other device such as a projector Television A television can be connected to the TV Out port on the computer To connect a television follow the steps below 1 Turn the computer off 2 Use a video cable not supplied to connect the television to the TV Out port Connecting a television 3 Use a...

Page 135: ...iability for such loss of data Do not transfer data in areas where static electricity is easily generated or in areas subjected to electronic noise Data can be destroyed If you are transferring data through an IEEE1394 hub do not connect or disconnect other devices from the hub during data transfer There is a likelihood that data will be damaged Connect all devices to the hub before you turn on th...

Page 136: ... meters Some devices might not support standby or automatic off functions Do not connect or disconnect an i LINK device while it is using an application or when the computer is automatically shutting it down to save power Data might be destroyed Disconnecting 1 Open the Safety Remove Hardware icon on the System tray 2 Point to i LINK IEEE1394 device and click 3 Disconnect the cable from the comput...

Page 137: ...nes Stop immediately when you recognise a problem exists Further action may result in data loss or damage You may destroy valuable problem related information that can help solve the problem Observe what is happening Write down what the system is doing and what actions you performed immediately before the problem occurred If you have a printer attached print a copy of the screen using PrtSc The qu...

Page 138: ...a permanent error log This will help you describe your problems to your dealer If a problem recurs the log will help you identify the problem faster Analysing the problem Sometimes the system gives clues that can help you identify why it is malfunctioning Keep the following questions in mind Which part of the system is not operating properly keyboard diskette drives hard disk drive printer display...

Page 139: ...or messages in the OS documentation Hardware If you cannot find a software problem check your hardware First run through the items in the preliminary checklist above If you still cannot correct the problem try to identify the source The next section provides checklists for individual components and peripherals Hardware and system checklist This section discusses problems caused by your computer s ...

Page 140: ...w seconds If the self test is successful the computer tries to load the operating system Depending on how the Boot Priority is set in the Hardware Setup the computer tries to load first from drive A then from drive C or first from drive C then from drive A If any of the following conditions are present the self test failed The computer stops and does not proceed to display information or messages ...

Page 141: ...cator blinks orange Leave the computer off until the DC IN indicator stops blinking It is recommended to leave the computer off until the its interior reaches room temperature even though the DC IN indicator stops blinking If the computer has reached room temperature and still does not start or if it starts but shuts down quickly contact your dealer Computer shuts down and its DC IN indicator is f...

Page 142: ...h If the battery is too hot or too cold it will not charge properly Let it reach room temperature Unplug the AC adaptor and remove the battery to make sure the terminals are clean If necessary wipe them with a soft dry cloth dipped in alcohol Connect the AC adaptor and replace the battery Make sure the battery is securely seated Check the Battery indicator If it does not glow let the computer char...

Page 143: ...ure the software you are using is not remapping the keyboard Remapping involves reassigning the meaning of each key See your software s documentation If you are still unable to use the keyboard consult your dealer LCD panel Apparent LCD problems may be related to the computer s setup Refer to Chapter 7 HW Setup and Passwords for more information Problem Procedure No display Press hot keys Fn F5 to...

Page 144: ...ocumentation or online HELP for information on running SCANDISK and the defragmenter As a last resort reformat the hard disk Then reload the operating system and other files If problems persist contact your dealer DVD ROM drive For more information refer to Chapter 4 Operating Basics Problem Procedure You cannot access a CD DVD in the drive Make sure the drive s drawer is securely closed Press gen...

Page 145: ... Form1 Form2 Enhanced CD CD EXTRA CD G AudioCD ROMXA Mode 2 Form1 Form2 Enhanced CD CD EXTRA CD G Audio CD only Addressing Method 2 Check the region code on the DVD It must match that on the DVD ROM drive Region codes are listed in the Optical media section in Chapter 2 The Grand Tour Cannot write correctly If you have trouble writing make sure you are observing the following precautions Use only ...

Page 146: ... dirty If it is wipe it with a clean cloth dipped in water or a neutral cleaner See the Media care section in Chapter 4 for details on cleaning Some CD DVDs run correctly but others do not The software or hardware configuration may be causing a problem Make sure the hardware configuration matches your software s needs Check the CD DVD s documentation Check the type of CD DVD you are using The driv...

Page 147: ...nnect external devices or install remove internal cards during writing If problems persist contact your dealer DVD R RW drive For more information refer to Chapter 4 Operating Basics Problem Procedure You cannot access a CD DVD in the drive Make sure the drive s drawer is securely closed Press gently until it clicks into place Open the drawer and make sure the CD DVD is properly seated It should l...

Page 148: ... Form1 Form2 Enhanced CD CD EXTRA CD G AudioCD ROMXA Mode 2 Form1 Form2 Enhanced CD CD EXTRA CD G Audio CD only Addressing Method 2 Check the region code on the DVD It must match that on the DVD R RW drive Region codes are listed in the Optical media section in Chapter 2 The Grand Tour Cannot write correctly If you have trouble writing make sure you are observing the following precautions Use only...

Page 149: ...DVD is dirty If it is wipe it with a clean cloth dipped in water or a neutral cleaner See the Media care section in Chapter 4 for details on cleaning Some CD DVDs run correctly but others do not The software or hardware configuration may be causing a problem Make sure the hardware configuration matches your software s needs Check the CD DVD s documentation Check the type of CD DVD you are using Th...

Page 150: ...t external devices or install remove internal cards during writing If problems persist contact your dealer DVD Super Multi drive For more information refer to Chapter 4 Operating Basics Problem Procedure You cannot access a CD DVD in the drive Make sure the drive s drawer is securely closed Press gently until it clicks into place Open the drawer and make sure the CD DVD is properly seated It shoul...

Page 151: ...ssion CD ROM Mode 1 Mode 2 CD ROMXA Mode 2 Form1 Form2 Enhanced CD CD EXTRA CD G Audio CD only Addressing Method 2 Check the region code on the DVD It must match that on the DVD Super Multi drive Region codes are listed in the Optical media section in Chapter 2 The Grand Tour Cannot write correctly If you have trouble writing make sure you are observing the following precautions Use only media rec...

Page 152: ... the hardware configuration matches your software needs You cannot access the external 3 diskette drive Try another diskette If you can access the diskette the original diskette not the drive is probably causing the problem If problems persist contact your dealer Infrared port Refer also to the documentation for your IrDA compatible device and related software Problem Procedure Infrared devices do...

Page 153: ...he parallel port and a serial printer to the serial port Make sure the ports are configured correctly Make sure your software is configured to recognize the printer Check your printer and software documentation Printer error Check your printer documentation If problems persist contact your dealer USB mouse This section applies only to Windows XP operating systems Problem Procedure On screen pointe...

Page 154: ...m Procedure PC card error occurs Reset the PC card to make sure it is firmly connected Make sure the connection between the external device and the card is firm Check the card s documentation If problems persist contact your dealer Monitor Refer also to Chapter 8 Optional Devices and to your monitor s documentation Problem Procedure Monitor does not turn on Make sure that the external monitor s po...

Page 155: ...ware and do not conflict with other hardware devices that you may have connected to the computer If problems persist contact your dealer TV output signal Refer also to your TV set s documentation Problem Procedure Display on TV is poor Make sure the TV type is correct for your area NTSC US JAPAN PAL Europe No display Try adjusting the contrast and brightness controls on the external monitor Press ...

Page 156: ...aler Modem Problem Procedure Communication software can t initialise modem Make sure the computer s internal modem settings are correct Refer to Phone and Modem Options in the Control Panel You can hear a dial tone but can t make a call If the call is going through a PBX machine make sure the communication application s tone dial detection feature is disabled You place a call but a connection can ...

Page 157: ...ck the flow control and communication protocol You cannot receive an incoming call Check the rings before auto answer setting in your communications application If problems persist contact your dealer Standby Hibernation Problem Procedure The system will not enter Standby Hibernation Is Windows Media Player open The system might not enter Standby Hibernation if Windows Media Player is either playi...

Page 158: ...m is off If problems persist consult your LAN administrator Wireless LAN Problem Procedure Cannot access Wireless LAN Make sure the computer s wireless communication switch is set to on If problems persist consult your LAN administrator i LINK IEEE1394 Problem Procedure i LINK device does not function Make sure the cable is securely connected to the computer and to the device Make sure the device ...

Page 159: ...assistance first Before contacting TOSHIBA try the following Review troubleshooting sections in the documentation for software and peripheral devices If a problem occurs when you are running software applications consult the software documentation for troubleshooting suggestions Call the software company s technical support for assistance Consult the dealer you purchased your computer and or softw...

Page 160: ...nical specifications Physical Dimensions Size 343 w x 282 d x 37 5 front 49 rear millimetres does not include the thicker part of the bottom of the computer Weight typical 3 4kilograms Approximate configured with 15 XGA display fixed DVD ROM drive 256MB memory 40GB 4200rpm HDD and 8 cells or 12 cells battery Weight will vary depending on whether or not and what kind of options are adopted TOSHIBA ...

Page 161: ...mbient temperature Relative humidity Operating 5 C 41 F to 30 C 86 F 20 to 80 Non operating 20 C 4 F to 65 C 149 F 10 to 90 Thermal Gradient 20 C per hour maximum Wet bulb temperature 26 C maximum Conditions Altitude from sea level Operating 60 to 3 000 metres Non operating 60 to 10 000 metres maximum Power Requirements AC adaptor 100 240 volts AC 50 or 60 hertz cycles per second Computer 19 VDC ...

Page 162: ...lex Fax Half duplex Communication protocol Data ITU T Rec Former CCITT V 21 V 22 V 22bis V 32 V 32bis V 34 V 90 Bell 103 212A Fax ITU T Rec Former CCITT V 17 V 29 V 27ter V 21 ch2 Communication speed Data transmission and reception speed 300 1200 2400 4800 7200 9600 12000 14400 16800 19200 21600 24000 26400 28800 31200 33600 bps Data reception only with V 90 28000 29333 30666 32000 33333 34666 360...

Page 163: ...ations TÜV DIN GOST TÜV UL CSA FCC TOSHIBA declares that this product complies with the following directives to be observed for CE marking CE Marking is the responsibility of TOSHIBA Europe GmbH Hammfelddamm 8 41460 Neuss Germany 93 68 EEC CE marking directive 89 336 EEC EMC directive 73 23 EEC Low voltage directive 99 05 EEC R TTE Directive EN 60950 Electrical safety EN 55022 EMC Radio disturbanc...

Page 164: ...ust meet the standards for the country region in which it is used All cords must meet the following specifications Length Minimum 2 metres Wire size Minimum 0 75 mm2 Current rating Minimum 2 Amperes Voltage rating 125 or 250 VAC depending on country region s power standards Certification agencies U S and Canada UL listed and CSA certified No 18 AWG Type SVT or SPT 2 two conductor Australia AS Japa...

Page 165: ...er cords must be VDE type H05VVH2 F and two conductor For the United States and Canada plug configuration must be a 2 15P 250 V or 1 15P 125 V as designated in the U S National Electrical code handbook and the Canadian Electrical Code Part II The following illustrations show the plug shapes for the U S A and Canada the United Kingdom Australia and Europe USA and Canada United Kingdom UL approved C...

Page 166: ...xternal monitors Two models are available 14 1 XGA 1024 horizontal x 768 vertical pixels 15 0 XGA 1024 horizontal x 768 vertical pixels A high resolution external monitor connected to the computer can display up to 2048 horizontal and 1536 vertical pixels at up to 16M colours The display controller also controls the video mode which uses industry standard rules to govern the screen resolution and ...

Page 167: ...selection of mode numbers that do not match the numbers on the table select a mode based on mode type resolution number of colours and refresh rates Table Video Modes CRT Display Resolution Colour Depth Refresh Rate Hz 800x600 16bpp 32bpp 60 75 85 100 60 75 85 100 1024x768 16bpp 32bpp 60 75 85 100 60 75 85 100 1280x1024 16bpp 32bpp 60 75 85 100 60 75 85 100 1600x1200 16bpp 32bpp 60 75 85 100 60 75...

Page 168: ...lease also keep the receipt of the computer you purchased Should your computer be stolen however we ll help you try to find it Before contacting TOSHIBA please prepare the following information which is necessary to uniquely identify your computer In which country was your computer stolen What type of machine do you have What was the model number PA number What was the serial number 8 digits When ...

Page 169: ...SHIBA Theft Registration Send to TOSHIBA Europe GmbH Technical Service and Support Leibnizstr 2 93055 Regensburg Germany Fax number 49 0 941 7807 925 Country stolen Machine type e g TOSHIBA A60 Series Model number e g PSA60 YXT Serial number e g 70123456E Date stolen Warranty seal e g 9813 123456 049 Owner s details Name Company Street Postal Code City Country Phone Fax ...

Page 170: ...Standard for Wireless LANS DSSS Wi Fi Wireless Fidelity certified by the Wi Fi Alliance The Wi Fi CERTIFIED logo is a certification mark of the Wi Fi Alliance Network Operating Microsoft Windows Networking Media Access CSMA CA Collision Avoidance with Protocol Acknowledgment ACK Data Rate 54 48 36 24 18 12 9 6 Mb s 11a 11 5 5 2 1 Mb s 11b 108 96 72 48 36 24 18 12 Mb s Turbo Mode 54 48 36 24 18 12 ...

Page 171: ...y impose a number of limitations to the use of wireless communication equipment R F Frequency Band 5GHz 5150 5850 MHz Revision A Turbo Mode Band2 4GHz 2400 2483 5 MHz Revision B Modulation Technique DSSS CCK DSSS DQPSK DSSS DBPSK Revision B OFDM BPSK OFDM QPSK OFDM 16QAM OFDM 64QAM Revision A and Turbo Mode The range of the wireless signal is related to the Transmit Rate of the wireless communicat...

Page 172: ...s regions your Wireless LAN Card may support a different set of 5GHz 2 4GHz channels Consult your Authorized Wireless LAN or TOSHIBA Sales office for information about the radio regulations that apply in the countries regions Wireless IEEE 802 11 Channels Sets Revision B Frequency Range Channel ID 2400 2483 5 MHz 1 2412 2 2417 3 2422 4 2427 5 2432 6 2437 7 2442 8 2447 9 2452 10 2457 1 11 2462 12 2...

Page 173: ... points the station can dynamically switch to another channel if required For Wireless LAN Cards installed in Wireless clients that operating in a peer to peer mode the card will use the default channel 10 In a Wireless LAN Access Point the Wireless LAN card will use the factory set default channel printed in bold unless the LAN Administrator selected a different channel when configuring the Wirel...

Page 174: ...3 05 2004 10 37 ENGLISH using Euro_M dot Printed on 13 05 2004 as IM_A60EN Wireless Channels Sets Turbo Mode Frequency Range Channel ID 5150 5850 MHz Note 42 5210 US only 1 50 5250 US only 1 58 5290 US only 1 152 5760 US only 1 160 5800 US only 1 1 Available Area US USA CANADA only ...

Page 175: ...is preinstalled The following is for information only To install the modem board follow the steps below 1 Save your data quit Windows and turn off the power 2 Disconnect the AC adaptor and any other peripheral devices 3 Turn the computer upside down and remove the battery pack 4 Remove one screw securing the modem cover and remove the cover 5 Remove two screws which you use later to secure the mod...

Page 176: ...nd any other peripheral devices 3 Turn the computer upside down and remove the battery pack 4 Remove one screw securing the modem cover and remove the cover 5 Remove two screws securing the modem board 6 Lift out the modem board 7 Disconnect the modem board cable 8 Secure the modem board with two screws removed in step 5 9 Seat the modem board cover and secure it with one screw 10 Install the batt...

Page 177: ... for Information Interchange BIOS basic input output system CMOS complementary metal oxide semiconductor CPU central processing unit CRT cathode ray tube DC direct current DDC display data channel DOS disk operating system DMA direct memory access DRAM dynamic random access memory DSVD Digital Simultaneous Voice and Data DVD Digital Versatile Disc DVI Digital Visual Interface ECP extended capabili...

Page 178: ...it board PCI peripheral component interconnect PCMCIA Personal Computer Memory Card International Association RAM random access memory RGB red green and blue ROM read only memory RTC real time clock SCSI small computer system interface SIO serial input output SO DIMM small outline dual in line memory module SVGA super video graphics array SDRAM synchronized dynamic random access memory TFT thin fi...

Page 179: ...in proportion to are an analog of the value to be transmitted Voice communications are analog signals ANSI American National Standards Institute An organization established to adopt and define standards for a variety of technical disciplines For example ANSI defined the ASCII standard and other information processing requirements antistatic A material used to prevent the buildup of static electric...

Page 180: ...nformation used by the computer It is either zero or one Eight bits is one byte See also byte Bluetooth A short range radio technology designed to simplify wireless communication among computers communication devices and the Internet board A circuit board An internal card containing electronic components called chips which perform a specific function or increase the capabilities of the system boot...

Page 181: ...anufacturer whose method of data transmission between a parallel printer and a computer has become an industry standard CGA Colour graphics adaptor A video display protocol defined by the IBM Graphics Graphics Monitor Adaptor and its associated circuitry This protocol supports two colour 640x200 and four colour 320x200 graphics and 16 color 640x200 and 320x200 text modes character Any letter numbe...

Page 182: ...our system such as the terminal printer and disk drives and the settings that define how your system works You use the Hardware Setup MaxTime or HW Setup program to control your system configuration control keys A key or sequence of keys you enter from the keyboard to initiate a particular function within a program controller Built in hardware and software that controls the functions of a specific...

Page 183: ... the computer on dialog box A window that accepts user input to make system settings or record other information disk drive The device that randomly accesses information on a disk and copies it to the computer s memory It also writes data from memory to the disk To accomplish these tasks the unit physically rotates the disk at high speed past a read write head disk storage Storing data on magnetic...

Page 184: ... escape guard time A time before and after an escape code is sent to the modem which distinguishes between escapes that are part of the transmitted data and escapes that are intended as a command to the modem execute To interpret and execute an instruction Extended Capability Port An industry standard that provides a data buffer switchable forward and reverse data transmission and run length encod...

Page 185: ...ardware The physical electronic and mechanical components of a computer system typically the computer itself external disk drives etc See also software and firmware hertz A unit of wave frequency that equals one cycle per second hexadecimal The base 16 numbering system composed of the digits 0 through 9 and the letters A B C D E and F host computer The computer that controls regulates and transmit...

Page 186: ...o connect one system or device to another 2 To physically connect one system or device to another to exchange information 3 The point of contact between user the computer and the program for example the keyboard or a menu interrupt request A signal that gives a component access to the processor I O Input output Refers to acceptance and transfer of data to and from a computer I O devices Equipment ...

Page 187: ...associated circuitry for direct drive TTL displays that supports a monochrome 720x350 text mode megabyte MB A unit of data storage equal to 1024 kilobytes See also kilobyte megahertz A unit of wave frequency that equals 1 million cycles per second See also hertz menu A software interface that displays a list of options on the screen Also called a screen microprocessor A hardware component containe...

Page 188: ... alter data stored in nonvolatile memory numeric keypad overlay A feature that allows you to use certain keys on the keyboard to perform numeric entry or to control cursor and page movement O OCR Optical Character Recognition reader A technique or device that uses laser or visible light to identify characters and input them into a storage device OCR wand A device that reads using an optical device...

Page 189: ...ixels See pixel peripheral component interconnect An industry standard 32 bit bus peripheral device An I O device that is external to the central processor and or main memory such as a printer or a mouse plug and play A capability with Windows that enables the system to automatically recognize connections of external devices and make the necessary configurations in the computer pixel A picture ele...

Page 190: ... Resetting a computer without turning it off also called warm boot or soft reset To restart the computer press Ctrl Alt Del while the computer is on See also boot RCA jack A single pin connector that carries composite video signals which include both contrast and colour information See also S video RGB Red green and blue A device that uses three input signals each activating an electron gun for a ...

Page 191: ...ogram execution and access the numeric keypad overlay software The set of programs procedures and related documentation associated with a computer system Specifically refers to computer programs that direct and control the computer system s activities See also hardware stop bit One or more bits of a byte that follow the transmitted character or group codes in asynchronous serial communications sub...

Page 192: ...to the USB HUB and a mouse to the keyboard V VGA Video graphics array is an industry standard video adaptor that lets you run any popular software volatile memory Random access memory RAM that stores information as long as the computer is connected to a power source W Warm dock undock Connecting or disconnecting a device to or from the computer while the computer is suspended warm start Restarting...

Page 193: ...1 7 removing 6 12 replacing 6 12 safety precautions 6 5 saving power 6 10 types 6 3 Battery pack 1 7 2 6 Battery Release Latch 2 6 Battery Safety Locks 2 6 C Caps Lock 2 10 CD DVD drives CD RW DVD ROM drive 1 4 DVD R RW drive 1 5 DVD Multi drive 1 5 DVD Super Multi drive 1 6 DVD ROM drive 1 4 CD RW DVD ROM problems 9 10 Certification A 4 Certification agencies B 1 Cleaning the computer 4 33 Commun...

Page 194: ... 5 5 Fn F6 Display Brightness 5 5 Fn F7 Display Brightness 5 5 Fn F9 Touch pad 5 6 Fn space display resolution selection 5 6 Fn F10 Arrow mode 5 8 Fn F11 Numeric mode 5 8 H Hard Disk cover 2 3 Hard disk drive 1 4 problems 9 8 Headphone jack 2 3 Heat dispersal 4 34 Hibernation 1 10 Hot keys 5 4 Hotkey 1 9 Hotkeys Arrow mode 5 3 Display Brightness 5 5 display selection 5 5 Hibernation 5 5 Instant se...

Page 195: ...skette drive 4 2 Operating System 1 9 Optical Media drive 2 12 Optional Devices Additional AC adaptor 8 6 Additional battery pack 8 6 External monitor 8 7 Parallel printer 8 7 Television 8 8 USB FDD Kit 8 6 Options 1 13 overheating problems 9 5 P Panel power on 6 15 Parallel port 2 5 Parallel printer 1 7 Password power on 1 10 problems 9 7 starting the computer by 6 14 PC card 8 2 problems 9 18 re...

Page 196: ... 21 support from TOSHIBA 9 23 system start up 9 4 TV output signal 9 19 USB 9 20 USB mouse 9 17 Wireless LAN 9 22 Processor 1 3 R Real time clock battery 6 4 restarting the computer 3 12 Restoring the preinstalled software 3 12 Retaining data with power off 6 10 RTC battery 1 7 S Security 1 8 Security lock 1 13 8 10 slot 2 4 Self Test 9 4 Setting up your work space 3 2 Slots 1 8 Soft keys 5 3 Alt ...

Page 197: ...37 ENGLISH using Euro_M dot Printed on 13 05 2004 as IM_A60EN W Wireless communication switch 2 3 wireless LAN E 1 Wireless LAN 4 30 problems 9 22 Writing CD DVDs on DVD Super Multi drive 4 18 CD DVDs on DVD R RW drive 4 15 CD DVDs on DVD R RW drive 4 12 CDs on CD RW DVD ROM drive 4 9 ...

Reviews: