

18
1
2
3
4
5
INSTALLATION
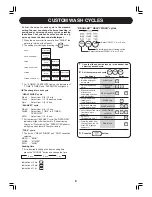
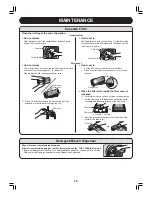
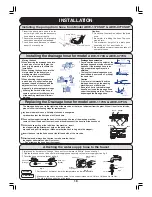
Installing the pump drain hose from Model AEW-1170SUP & AEW-9770SUP
•
Insert the pump drain hose in as far
as it will go, then use the accessory
hose band to secure it tightly.
•
Secure the hose tightly. An improperly
secured hose may cause leakage.
•
•
•
•
•
•
•
•
•
Lock hose band distance to cabinet
about 10 mm as figur
e.
Caution:
•
Do not use the machine without the drain
hose.
•
Be careful in rubbing the hose. The hose
may be torn.
•
The maximum height of the drain hose
should be at 1.2 m from the floo
r.
•
Be careful about water leak when take off
pump drain hose.
10 mm
Hose-
band
Pump drain
Pump drain hose
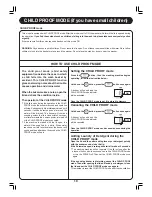
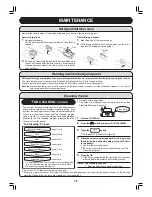
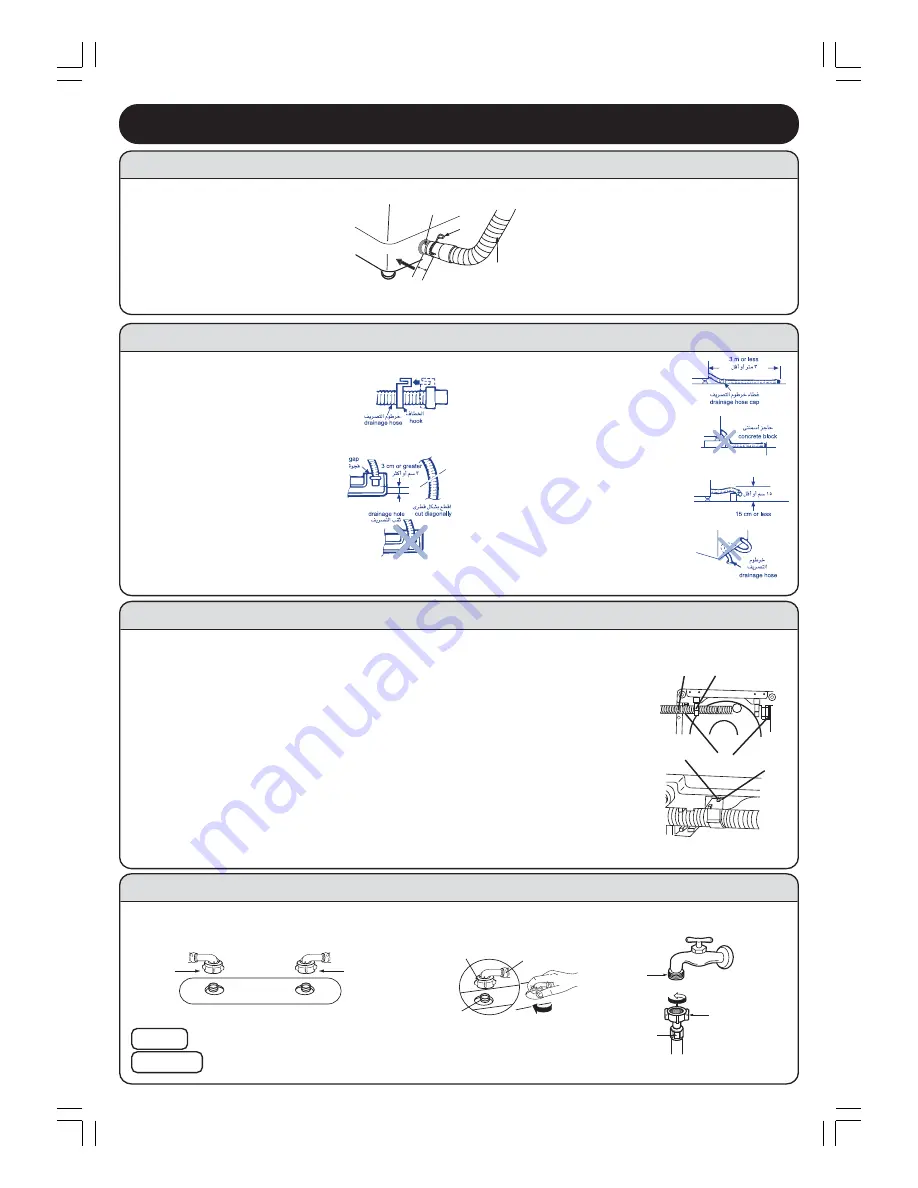
Attaching the water supply hose to the faucet
•
Inlet hose for hot water is “Orange” hose nut, for cold water is “White” hose n
ut as fig
. 1.
•
Tighten the hose nut on the end of water supply hose securely to the water supply port as
fig
. 2.
•
Twist the hose nut to the f
aucet as fig
. 3.
Hints
Caution
•
For faucet of hot water, lower its temperature as low as possible.
•
Make sure the hoses are connected to the correct intake valve, Cold to Cold and Hot to Hot.
•
The old inlet hose should not be reuse.
Hose nut
Inlet hose
Twist
Faucet
fig.
3
Hose nut
Water supply
hose
Water
supply port
fig.
2
fig.
1
COLD
HOT
Hose nut
(White)
Hose nut
(Orange)
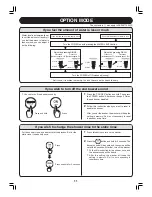
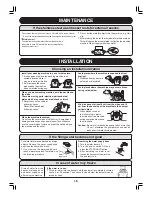
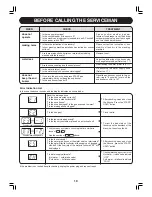
Moving the hook
When inserting the drainage hose into
a wash pan or onto a drain pipe, the
hook may be moved to facilitate the
installation.
When hooking the hose hook into the
slot provided on the body of your
washing machine, move the hook
back to its initial position.
When attaching the drainage hose to
a wash pan, etc., either leave a gap
between the end of the hose and the
adjacent surface, or cut the hose
diagonally to ensure proper drainage.
All
owing the fl
at end of the hose to
come in contact with the fl
at surface
of the washing machine will impair
drainage.
Drainage hose extension
Pay close attention to the height of the
drainage hose and articles over which
it passes. If the drainage hose is too
high, proper drainage may not be
obtained.
The length of the drainage hose may
be extended to as much as 3 m if kept
the same level.
Caution
If the level of the threshold and the
drainage hose is high, the washing
machine may not be drained.
Be carefull not to rub the drainage
hose.Do not insert the drainage hose
under the washing machine. They may
be damaged the drainage hose.
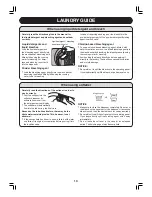
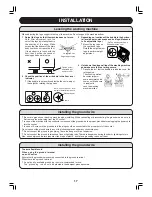
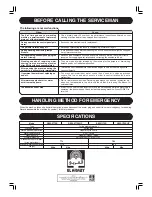
The drainage hose is set to the right side of the machine at the time of shipment from the plant. When it is set to the left side,
please follow the following steps for replacement.
lay down the machine on a flat object such as a corrugated
cardboard so that the front panel will face down.
Push up the stopper toward the back of the machine (the top of the washing machine)
,remove it from the base of the machine and then disconnect the hose from the hose hook.
With the hose putting at the left side of the machine , insert
the stopper into the attachment hole on the base of the
machine and pull it toward you (Make sure that the hook is hinged to the stopper).
Insert the hose into the hose hook at the left hand side of the machine.
After replaced, always do a test run to make sure that water
leakage or abnormal sound will not occur.
* Do not remove the hose from the stopper.
Installing the drainage hose for model
AEW-1170S & AEW-9770S
Replacing the Drainage hose for model
AEW-1170S & AEW-9770S
Hose Stopper
Hose Hook
Stopper
Hook


