7-1
7. LOADING THE RIBBON
EM1-33035
Fig. 7-2
4. Reset the ribbon shaft holder plate by aligning it with the ribbon shaft.
5. Turn the head lever clockwise to lower the print head.
6. Close the top cover.
7. LOADING THE RIBBON
7. LOADING THE RIBBON
WARNING!
1. Do not touch moving parts. To reduce the risk that fingers, jewelry, clothing, etc., be drawn
into the moving parts, push the switch in the “OFF” position to stop movement.
2. To avoid injury, be careful not to catch or jam your fingers while opening or closing the cover.
There are two types of media available for printing on, these are standard media and direct thermal media
(a chemically treated surface). DO NOT LOAD a ribbon when using a direct thermal media.
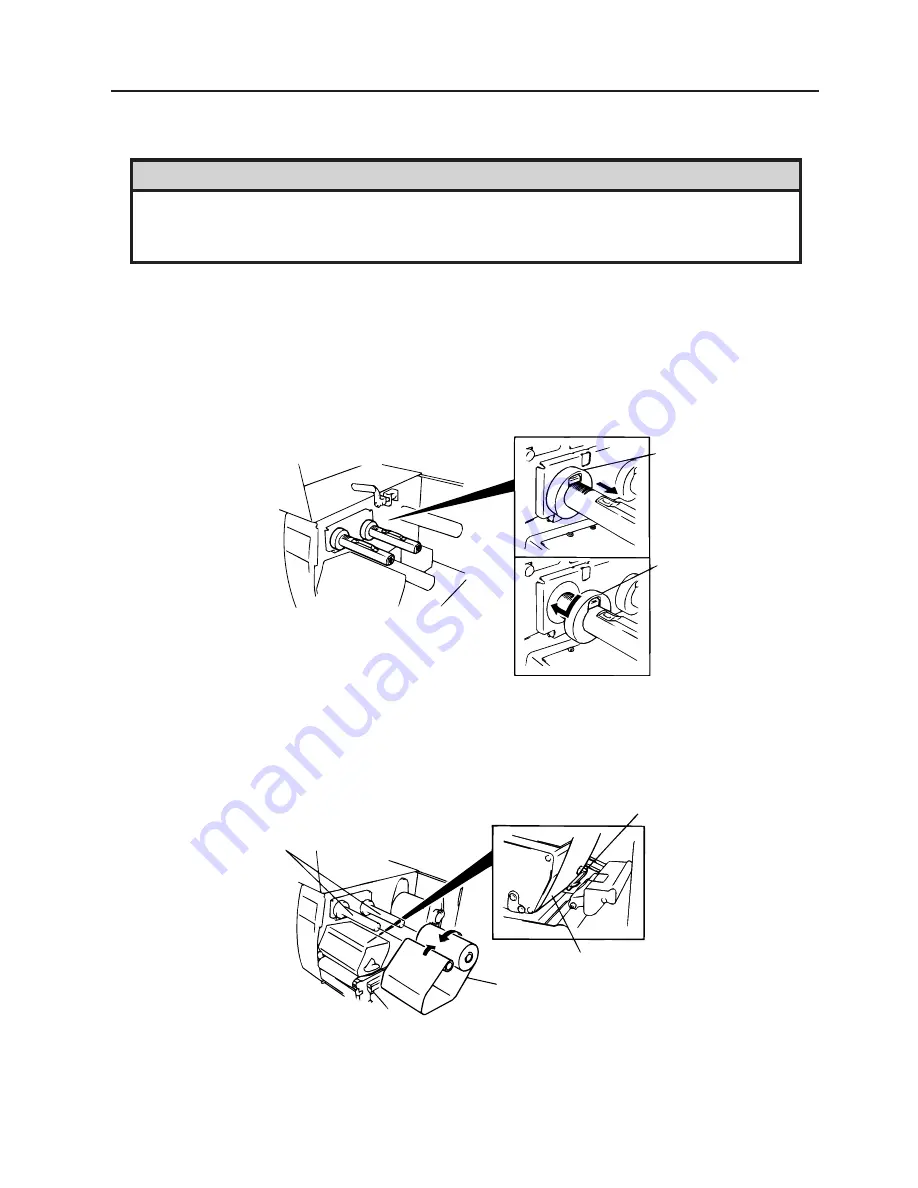
1. When using a narrow width ribbon, slide the ribbon stoppers along the shafts to a position where the
ribbon will be centered when it is fitted. When changing from a narrow width to a wider one rotate the
ribbon stoppers by 90
°
, push them back to the correct position and then rotate back to lock.
NOTE: When attaching the ribbon stoppers, fit them to the shafts with the pinchers facing into the printer.
Ribbon Stopper
(FMHC0008801)
Ribbon Stopper
(FMHC0008801)
Fig. 7-1
2. Leaving plenty of slack between the spools, fit the ribbon as shown below. When the ribbon is fitted it
must be positioned over the ribbon sensor.
3. Wind both shafts towards each other to tighten the ribbon.
Ribbon Sensor
Ribbon Shafts
Ribbon
Ribbon
Summary of Contents for B-570
Page 3: ......
Page 4: ...PRINTED IN JAPAN EO0 33004 ...
Page 5: ...TEC Thermal Printer B 570 QQ SERIES Owner s Manual ...
Page 33: ......
Page 34: ...PRINTED IN JAPAN EM1 33035 E ...
Page 56: ......
Page 57: ......
Page 58: ...PRINTED IN JAPAN EM10 33006A ...
Page 157: ......
Page 158: ...PRINTED IN JAPAN EM18 33010A ...


