background image


-65- 


7.4.3 

Zero  Font 


This setting determines how zero should be displayed/printed, “Ø” (with slash) or “0” (without slash).   


0 without slash 

0


0 with slash   

Ø:


Default value: 0 (Without slash) 


*Support  mode  (o

valid

x

invalid


TPCL,  TPCL1, 
LABEL 

C  Mode 

ESC/POS 
RECEIPT,RECEIP
T1 

Z  Mode 

S  Mode 

x


x


x


Summary of Contents for B-FP2D Series

Page 1: ...TOSHIBA Portable Printer B FP2D Series Key Operation Specification 1st Edition December 16 2019 ...

Page 2: ...Modification History KEY OPERATION SPECIFICATION Date Modified Pages Description 16DEC2019 Newly published ...

Page 3: ...E 29 6 1 LIST BOX WITH SCROLLBAR 29 6 2 Movement of the cursor when scrolled 30 6 3 VALUE SETTING DISPLAY 31 6 4 INFORMATION DISPLAY 33 7 SYSTEM MODE FOR SERVICE PERSONS AND SYSTEM ADMINISTRATORS ALL MENU ITEMS ARE AVAILABLE 34 7 1 OUTLINE OF SYSTEM MODE 34 7 2 Diagnostic 35 7 2 1 MAINTE CNT 35 7 2 1 1 COUNTER PARAMETER PRINT CONTENTS 36 7 2 2 Diagnostic 45 7 2 2 1 AUTO SELF DIAGNOSIS PRINTOUT 46 ...

Page 4: ...laten Roller 76 7 4 20 2 Thermal Head 76 7 4 21 System Mode Password Setting Password 77 7 4 21 1 System mode start screen when password is enabled 78 7 5 Adjust Set 79 7 5 1 Feed Amount Fine Adjustment FEED ADJ 80 7 5 2 X coordinate Fine Adjustment X Adjust 81 7 5 3 Print Tone Fine Adjustment Tone Adjust 82 7 5 4 Reflective Sensor Manual Threshold Fine Adjustment REFL Sensor 82 7 5 5 Transmissive...

Page 5: ...Saving Setting Powersave 108 7 9 3 Bluetooth 109 7 9 3 1 Mode 109 7 9 3 2 Test Mode 109 7 9 3 3 Search Setting 109 7 9 3 4 Security Level 109 7 9 3 4 1 SSP AUTH type 110 7 9 3 5 Auto Connect 110 7 9 3 6 Inquiry Page Scan Interval Setting Scan Interval 110 7 9 3 7 Inquiry Page Scan Window Setting Scan Window 110 7 10 BASIC Setup 111 7 10 1 BASIC Interpreter Setting BASIC 111 7 10 2 BASIC File Brows...

Page 6: ...11 POWER SAVE MODE 120 11 1 Shifting To Power Save Mode 120 11 2 When A Wireless LAN Module Is Connected 120 11 3 Precausions 120 12 POWER OFF OPERATION 121 12 1 TIME REQUIRED FOR POWER OFF 121 12 2 PRECAUTIONS 121 COPYRIGHT 2019 TOSHIBA TEC CORPORATION ALL RIGHTS RESERVED ...

Page 7: ...ations are performed mainly to pause or restart the printer and to display printer status messages and error messages on the LCD In system mode the key operations are performed mainly to conduct a self test and to make various parameter settings This specification describes the key operations in these two modes For explanation purposes this specification uses English key names and LCD messages of ...

Page 8: ...of program and data For details refer to the Program Downloa d Operation Specification Press and hold down the POWER key until the message Initiallizing appears then 3 sec or more elapses While holding down the PAUSE key press the POWER key for 1 sec or more While holding down the FEED key press the POWER key for 1 sec or more Press the POWER key While holding down the FEED and PAUSE keys press th...

Page 9: ...SE PAUSE PAUSE Hold down PAUSE 3 sec or more Hold down FEED 3 sec or more PAUSE The printer power cannot be turned off under this condition Press FEED Moves the menu in the opposite direction from when PAUSE is pressed Press POWER Moves to each setting process Hold down POWER Moves to the top menu in User System Mode 2 The printer power cannot be turned off under this condition PAUSE 1 1 In TPCL1 ...

Page 10: ... command should not be sent from the host device otherwise the resulting printout will not be satisfactory showing an incorrect layout The same may happen if the FEED key is pressed to start printing while data is being drawn in the image buffer 3 Performs a forced strip issue in strip wait state 4 Programs a threshold value PAUSE key 1 Stops printing temporarily and resumes printing 2 Resumes pri...

Page 11: ...el 1 low battery state In idle state Red ON Strip wait state Blue Blink Error Red Blink CHARGE LED Indicates the following statuses orange Connection status of the AC adapter Battery charge LED lighting patterns Power OFF 1 AC adapter not connected OFF 2 AC adapter connected Charging Orange ON Full charge OFF Temperature error Orange Blink Ambient temperature below 0 or higher than 45 C Battery te...

Page 12: ...digit change because of using proposional font 5 5 ONLINE MODE LCD DISPLAY 5 5 1 Online Mode LCD Display Example Printer condition LCD Display Display contents Online Icon Message 3 Model name Firmware version 1 Pause Icon Message The number of remaining labels to print 2 Cover open Error Error icon Error message Message The number of remaining labels to print 2 ...

Page 13: ...ce Firmware version V 2 The remaining label description TO DO 0005 The number of remaining labels to print The number of remaining labels to print Specified number of labels to print The number of normally printed labels before occurrence of an error or placing the printer in pause When the number of remaining labels to print is zero it is not displayed 3 For B FP2D GH50 only the following additio...

Page 14: ...e is very strong Bluetooth icon Displayed and used when the wireless Bluetooth module is mounted OFF Bluetooth connection invalid ON Bluetooth connection valid Data transmission icon Appears when a print job is present No connection Data receiving Data sending Data receiving and sending Battery level mark 1 Indicates a remaining battery power level 10 increments Level1 Inoperative low battery 0 Le...

Page 15: ...ate battery Over 5 degree C 6 8V 7 0V 7 6V 7 9V 8 2V Under 11 degree C 6 8V 7 0V 7 6V 7 9V 8 2V Battery icon 0 10 20 30 40 50 60 70 80 90 100 2 The battery percentage icon the Parts Alert icon and the Battery Check icon are displayed in the same position If they occur simultaneously the display priority is as follows 1st Priority Battery Check Icon No battery life problem Battery replacement requi...

Page 16: ... while printing When PAUSE key is pressed while printing When PAUSE key is pressed the printer resumes printing if there is remaining data After error recovery close the printer cover press PAUSE key If there is remaining label start to print If printer cover is opened while idling Close the printer cover ...

Page 17: ...nt when the POWER key is pressed for 3 seconds or more after the printer power is turned on and a Initiallizing message is displayed on the LCD An example of parameter print for each module is given in the subsequent section 5 6 2 Parameter Print Examples 1 With Bluetooth module B FP2D GH30 GH50 Print contents Code128 Barcode print BD address ...

Page 18: ... DHCP WLAN connection mode CON Host name ESSID 1 MAC address Version information Code128 bardcode print IP address 1 ESSID prints in case of established connection But it can be checked at Setting value display RF LAN PARAMS TYPE JPN IP 000 000 000 000 LPD OFF GW 000 000 000 000 DHCP ON SUB 255 255 000 000 CON INF TCP SOCK ON 09100 HOST ESSID MAC 00 23 a7 fd d5 54 WLAN Ver3 1 1 ...

Page 19: ...H50 From Online state Press PAUSE key at online state PAUSE state Press POWER key Case Bluetooth setting is enable and module is a vailable Display information QR code Data is BD address Press POWER key Case Bluetooth setting is enable and module is a vailable Display information BD address Device nickname ...

Page 20: ...ailable Display information IP address Allocate IP address DYNAMIC STATIC MAC address dBm Channel BSSID Connection mode AP MODE INFRA Press POWER key Case Wireless LAN setting is enable and module is available Display information Socket port TCP PORT LPR server LPR Country code Country Code ESSID Press POWER key Goto Bluetooth Information state Case Bluetooth setting is enable and module is a vail...

Page 21: ...is positioned by detecting the black mark on the back of the label the reflective rate variation of an area of the label other than the black mark may prevent the proper positioning correction In this case determine the reflective sensor threshold manually by key operation and store the value in the non volatile memory A constant print position can also be obtained when printing on a tag since the...

Page 22: ...r cutter error is not performed 3 When the proper print position is not obtained after threshold programming the sensor may be improperly adjusted In this case readjust the sensor in system mode and program the threshold When the backing paper of the label is too thick the transmissive sensor should be readjusted In addition make sure that 3 Transmissive sensor when using a manual threshold value ...

Page 23: ...ash ROM on the CPU board No Yes 12 FLASH WRITE ERROR An error occurred in writing data into the flash ROM on the CPU board No Yes 13 FLASH MEMORY FULL Saving failed due to insufficient memory capacity of the flash ROM on the CPU board No Yes 14 LOW BATTERY The battery voltage under 7 2V No Yes 15 AMBIENT TEMP ERROR An ambient temperature is below 20 C or over 60 C Yes Yes 16 BATTERY TEMP ERROR The...

Page 24: ...planation Range ON Blinking red Blinking OFF xxxx Remaining issue 0 to 9999 in units of 1 label tag Remaining memory capacity of PC save area in the flash memory on the CPU 4 0 to 3200 in units of 1 Kbyte Remaining memory capacity of writable character BASIC file form graphic storage area in the flash memory on the CPU 4 0 to 3200 in units of 1 Kbyte System error No 00 to 21 Charge error No 1 to 5...

Page 25: ...the LCD At this time the maximum number of bytes varies depending on the character However LF and NUL are not displayed When a command error is displayed it is displayed as 3FH in codes other than 20H to 7FH and A0H to DFH 4 Each remaining memory capacity shows in TPCL TPCL1 LABEL mode Other mode don t show remaining one ...

Page 26: ...M 14 ERREUR TEMP BATTERIE 15 HIGH VOLT ERROR 15 HIGH VOLTAGE FEHLER 15 ERREUR HAUTE TENSION 16 SYSTEM ERROR 16 SYSTEM FEHLER 16 ERREUR SYSTÈME 17 WAITING BATTERY 17 WARTEN BATTERIE 17 ATTENDRE BATTERIE 18 WAITING HEAD 18 WARTEN DRUCKKOPF 18 ATTENDRE TETE 19 WAITING MOTOR 19 WARTEN MOTOR 19 ATTENDRE MOTEUR 20 BT INIT ERROR 20 BLUETOOTH INI FEHLER 20 ERREUR INIT BLUETOOTH 21 BT SETTING ERROR 21 BLUE...

Page 27: ...CTIVE 31 REFLECTIVE 31 REFLECTIVE 32 TRANSMISSIVE 32 TRANSMISSIVE 32 TRANSMISSIVE 33 PAIRING 33 PAIRING 33 COUPLAGE 34 REJECTING 34 ABGELEHNT 34 REJETÉ 35 PIN 35 PIN 35 PIN 36 YES 36 JA 36 OUI 37 NO 37 NEIN 37 NON ...

Page 28: ...E VOLT 15 ERR VOLT BATERIA 15 ERRORE ALTO VOLTAGGIO 16 SYSTEEM FOUT 16 ERROR DE SISTEMA 16 ERRORE DI SISTEMA 17 WACHTEN BATTERIJ 17 ESPERA BATERIA 17 ATTENDERE BATTERIA 18 WACHTEN PRINTKOP 18 ESPERA CABEZAL 18 ATTENDERE TESTINA 19 WACHTEN MOTOR 19 ESPERA MOTOR 19 ATTENZIONE MOTORE 20 BLUETOOTH INIT FOUT 20 ERR INICIAL BLUETOOTH 20 ERRORE INIZIAL BT 21 BLUETOOTH SETTING FOUT 21 ERR CONFIG BLUETOOTH...

Page 29: ... 23 32 TRANSMISSIVE 32 TRANSMISSIVE 32 TRANSMISSIVE 33 PAIRING 33 EMPAREJANDO 33 PAIRING 34 VERWORP 34 RECHAZANDO 34 RIFIUTATO 35 PIN 35 PIN 35 PIN 36 JA 36 SI 36 SI 37 NEE 37 NO 37 NO ...

Page 30: ...I 14 电池温度错误 15 ERR VOLT BATERIA 15 BŁĄD WYSOK NAPIĘCIA 15 高电压错误 16 ERRO DE SISTEMA 16 BŁĄD SYSTEM 16 系统错误 17 ESPERA BATERIA 17 OCZEKIWANIE BATERIA 17 待机中 电池 18 ESPERA CABECA 18 OCZEKIWANIE GŁOWICA 18 待机中 打印头 19 ESPERA MOTOR 19 OCZEKIWANIE SILNIK 19 待机中 电机 20 ERR INICIAL BLUETOOTH 20 BŁĄD INICJAL BLUETOOTH 20 蓝牙初始化 错误 21 ERR CONFIG BLUETOOTH 21 BŁĄD USTAW BLUETOOTH 21 蓝牙设置错误 22 ERROR DE CARGA 22 BŁ...

Page 31: ... 25 31 REFLECTIVO 31 ODBLASKOWY 31 反射式 32 TRANSMISIVO 32 PRZEPUSZCZ 32 传送式 33 A EMPARELHAR 33 PAROWANIE 33 配对中 34 RECUZAR 34 ODRZUCANIE 34 断开中 35 PIN 35 PIN 35 PIN 36 SIM 36 TAK 36 是 37 NAO 37 NIE 37 否 ...

Page 32: ... 13 주변 온도 에러 13 外気温エラー 14 배터리 온도 에러 14 バッテリー 温度エラー 15 고전압 에러 15 バッテリー 異常 16 시스템 에러 16 システム エラー 17 대기 배터리 17 待機中 バッテリー 18 대기 헤드 18 待機中 ヘッド 19 대기 모터 19 待機中 モータ 20 블루투스 초기화 에러 20 Bluetooth 初期化エラー 21 블루투스 셋팅 에러 21 Bluetooth 設定エラー 22 충전 에러 22 充電エラー 23 명령어 에러 23 コマンド エラー 24 제거 대기 24 剥離待ち 25 SSP 인증 실패 25 SSP 認証 エラー 26 무선랜 펌웨어 업데이트 26 無線 LAN の FW 更新中 27 SETTING MODE 27 SETTING MODE 28 NOW LOADING 28 NOW L...

Page 33: ... 27 31 반사 31 反射センサー 32 전송 32 透過センサー 33 연결 33 ペアリング 34 거부 34 リジェクト 35 핀 35 PIN 36 YES 36 はい 37 NO 37 いいえ ...

Page 34: ...d or an unspecified battery is detected 2 Abnormal battery voltage 8 7V or more Less than 4 6V 3 Abnormal charge current in tricle charge 0 5A or more 4 Trickle charge timeout After a 90 min trickle charge a normal charge did not start 5 Abnormal charge current in normal charge AC charge 1 5A or more ...

Page 35: ... changes POWER Displays a next screen FEED Moves the cursor upward The cursor move bottom when the selected option is listed at the top PAUSE Moves the cursor downward The cursor move top when the selected option is listed at the top Key function value setting display Key Function FEED PAUSE Returns to the upper hierarchy without saving changes POWER Saves the changes and returns to the upper hier...

Page 36: ...e cursor moves to the next item Press PAUSE key The position of the displayed menus change and the cursor moves to top The cursor position when shifting from upper menu to its sub menu When shifting from upper menu to its sub menu the cursor is positioned at the topmost item The cursor position when shifting from upper menu to its subordinate value setting display When shifting from upper menu to ...

Page 37: ...without saving changes POWER Saves the changes and returns to the upper hierarchy FEED Increases the setting value by specified step When the setting value reaches the maximum it goes to minimum PAUSE Decreases the setting value by specified step When the setting value reaches the minimum it goes to maximum Key operation Setting display with multiple fields horizontal Key Function FEED PAUSE Retur...

Page 38: ... 32 PAUSE Decreases the setting value by specified step When the setting value reaches the minimum it goes to maximum ...

Page 39: ...n FEED PAUSE Displays the top menu PAUSE Displays the upper hierarchy FEED No function PAUSE No function Key function Scroll Key Function FEED PAUSE Displays the top menu PAUSE Displays the upper hierarchy FEED Moves the cursor upward The cursor moves to bottom when it is positioned at the top PAUSE Moves the cursor downward The cursor moves to top when it is positioned at the bottom タイトル Title In...

Page 40: ...stic 3 Mode Setting 4 Set PARAM 5 Adjust Set 6 Test Print 7 Sensor ADJ 8 RAM Clear 9 I F Setting 10 BASIC Setup 1 Shutdown Used to shutdown the printer 2 Diagnostic Used to perform self diagnosis print out the result check for the print head broken elements 3 Mode Setting Used to set the parameters for each printer movement 4 Set PARAM Used to set the parameters for each printer function 5 Adjust ...

Page 41: ... to print out the maintenance counter data The following table shows the menu structure from the top menu of the system mode to MAINTE CNT MENU ITEM SYSTEM MODE 2 Diagnostic MAINTE CNT CHECKING PRINT When an error occurs while printing the error message is displayed the STATUS LED blink red Though the error can be cleared by presing PAUSE key the printer does not print the erroneous label ...

Page 42: ...DE AUTO EURO CODE B0 AUTO HEAD CHK OFF MAXI CODE SPEC TYPE1 HEAD DIVISION AUTO1 HEAD DIV CMD ON HEAD ERROR CHK OFF HEAD ERROR PRT OFF FEED CHECK OFF BEEP ON B EP MODE ON LINERLESS OFF STOP POSITION CUT BACKFEED LIMIT ON PEEL BACKFEED OFF XML OFF AUTO OFF 120min ERR POWER OFF ON SLEEP 3sec LCD LIGHT OFF 3sec CHARGE MODE LOW2 BATTERY CHECK OFF EXT CHR AREA 640KB BASIC AREA 192KB PC SAVE AREA 1984KB ...

Page 43: ... AUTO HEAD CHK OFF MAXI CODE SPEC TYPE1 HEAD DIVISION AUTO1 HEAD DIV CMD ON HEAD ERROR CHK OFF HEAD ERROR PRT OFF FEED CHECK OFF BEEP ON B EP MODE ON LINERLESS OFF STOP POSITION CUT BACKFEED LIMIT ON PEEL BACKFEED OFF XML OFF AUTO OFF 120min ERR POWER OFF ON SLEEP 3sec LCD LIGHT OFF 3sec CHARGE MODE LOW2 BATTERY CHECK OFF EXT CHR AREA 640KB BASIC AREA 192KB PC SAVE AREA 1984KB FORM AREA 256KB GRAP...

Page 44: ... Previous label distance covered 1 to 4 0 0 to 320000 0 m in units of 10 cm PRINT Current label print distance 0 0 to 320000 0 m in units of 10 cm PRINT 1 to 4 Previous label print distance 1 to 4 0 0 to 320000 0 m in units of 10 cm SYSTEM ERR System error count 0 to 15 About detail refer to 7 8 3Maintenance Counter Clear WIRELESS LAN WLAN ON BAND SELECTION DUAL BAND COUNTRY CODE JPN CHANNEL 001 I...

Page 45: ...hen the label distance covered reaches the maximum value the maintenance counter must be cleared Otherwise the total label distance covered cannot be updated Label print distance Counts while printing Counting is not performed during a paper exit or reverse feed operation System error count Counts when a No 18 system error described in the section 5 9 LCD MESSAGES AND LED INDICATIONS occurs Only s...

Page 46: ...unt fine adjustment 50 0mm to 50 0mm TONE Print tone fine adjustment 30step 30step PEEL Strip position fine adjustment 2 0mm to 3 0mm X ADJ X coordinate fine adjustment 99 9mm to 99 9mm THRESHOLD R Reflective sensor manual threshold fine adjustment 0 0V to 4 0V THRESHOLD T Transmissive sensor manual threshold fine adjustment 0 0V to 4 0V CMD SETTING Print command language B EP MODE OFF TPCL TPCL1 ...

Page 47: ...automatic print head check for broken dots is performed MAXI CODE SPEC MaxiCode specification TYPE1 Compatible with existing versions TYPE2 Special specification HEAD DIVISION Head division AUTO AUTO1 AUTO2 HEAD DIV CMD Head output division parameter of AY command OFF The parameter is not processed ON The parameter is processed HEAD ERROR CHK Print head check for broken dots after cover close OFF ...

Page 48: ...e NORMAL Normal mode LOW Battery protection mode LOW2 Battery protection mode BATTERY CHECK Battery deterioration check OFF Battery deterioration check OFF ON Battery deterioration check ON EXT CHR AREA Writable character storage area size 0 to 3200 KB in units of 64 KB BASIC AREA BASIC file storage area size 0 to 896 KB in units of 64 KB PC SAVE AREA PC save area size 0 to 896 KB in units of 64 K...

Page 49: ...ooth mode for process inspection OFF ON SEARCH SETTING Inquiry scan time OFF EVERY 60sec SECURITY LEVEL Security level OFF LINK SSP SSP AUTH TYPE SSP authentication type JUST WORKS NUMERIC CMP NO IN OUT NUMERIC CMP DISPLAY ONLY NUMERIC CMP DISPLAY Y N AUTO CONNECTION Auto Connection Setting OFF ON SCAN INTERVAL Inquiry page scan interval 18 to 4096 SCAN WINDOW Inquiry page scan window 18 to 4096 ...

Page 50: ...n Port number OFF Socket communication function is disabled ON Socket communication function is enabled Port No 0 to 65535 1 and 2 HOST NAME DHCP ID16 byte ASCII in hexadecimal xxxxxxxxxxxxxxxx USER CLASS User Class ID 32 byte ASCII in hexadecimal xxxxxxxxxxxxxxxx xxxxxxxxxxxxxxxx ESS ID ESS ID 32 byte ASCII in hexadecimal xxxxxxxxxxxxxxxx xxxxxxxxxxxxxxxx LPR SERVER LPR OFF LPR setting is disable...

Page 51: ...owing table shows the menu structure from top menu of the system mode to Diagnostic MENU ITEM SYSTEM MODE 2 Diagnostic Diagnostic CHECKING PRINT When an error occurs while printing the error message is displayed the STATUS LED blink red Though the error can be cleared by presing PAUSE key the printer does not print the erroneous label ...

Page 52: ...CS2 09JUN2016 V1 0 5300 SBCS3 09JUN2016 V1 0 0E00 SBCS4 09JUN2016 V1 0 5800 SBCS5 09JUN2016 V1 0 5800 DBCS1 09JUN2016 V1 0 4A00 DBCS2 09JUN2016 V1 0 D000 DBCS3 NONE DBCS4 09JUN2016 V1 0 D000 CONST 09JUN2016 V1 0 FC00 WLAN 12FEB2019 V0 4 9600 SDRAM 32MB SENSOR1 00000000 00000010 SENSOR2 H 30 C A 30 C R 4 0V T 1 6V PE LV R 1 2V T 4 7V M THRE R 5 0V T 0 6V BATTERY 7 4V 3 I F USB BT LOOPBACK BLUETOOTH...

Page 53: ...V1 0 0E00 SBCS4 09JUN2016 V1 0 5800 SBCS5 09JUN2016 V1 0 5800 DBCS1 09JUN2016 V1 0 4A00 DBCS2 09JUN2016 V1 0 D000 DBCS3 NONE DBCS4 09JUN2016 V1 0 D000 CONST 09JUN2016 V1 0 FC00 WLAN 12FEB2019 V0 4 9600 SDRAM 32MB SENSOR1 00000000 00000010 SENSOR2 H 30 C A 30 C R 4 0V T 1 6V PE LV R 1 2V T 4 7V M THRE R 5 0V T 0 6V BATTERY 7 4V 3 I F USB BT WLAN LOOPBACK BLUETOOTH OK sppi_v2 12 MFi OK iAP Serial 11...

Page 54: ...sive sensor is attached upside down the A D value sometimes becomes 3V or more when the D A value is set to 0 2 When the reflective sensor is attached upside down the A D value sometimes becomes 3V or more when the D A value is set to 0 B FP2D GH MAIN XXXXX2018 V1 3 XXXX BOOT 25JAN2018 V1 2 2000 SBCS1 09JUN2016 V1 0 8100 SBCS2 09JUN2016 V1 0 5300 SBCS3 09JUN2016 V1 0 0E00 SBCS4 09JUN2016 V1 0 5800...

Page 55: ...ear Name BOOT BOOT area SBCS 01JAN2016 V1 0 5600 Checksum Version C G Name SBCS1 1 byte font SBCS2 1 byte font ESC POS SBCS3 1 byte font Z Mode SBCS4 1 byte font C Mode SBCS5 1 byte font S Mode DBCS 01JAN2016 V1 0 7800 Checksum of 2 byte fonts Version C G Name DBCS1 2 byte fonts Japanese Kanji 1 DBCS2 2 byte fonts Chinese DBCS3 2 byte fonts Korea DBCS4 2 byte fonts Japanese Kanji 2 1 16 16 and 32 ...

Page 56: ...r Name WLAN WLAN program area SDRAM 32MB Capacity of SDRAM Peel off model 32MB Memory for the system and drawing Supplemental Explanation Normally the last two digits of the checksum of the program area are 0 If the first byte of the Kanji ROM is not legitimate checksum is not calculated and 0000 is printed Version and checksum vary depending on the software version ...

Page 57: ...99 C C if the temperature cannot be detected Thermal head thermistor status 15 C to 70 C R 4 2V T 2 5V Transmissive sensor status 0 0V to 5 0V Reflective sensor status 0 0V to 5 0V PE LV R 1 8V T 2 5V Transmissive sensor for no paper level 0 0V to 5 0 V Reflective sensor for no paper level 0 0V to 5 0 V No paper level M THRE R 1 8V T 2 5V Transmissive sensor for no paper level 0 0V to 5 0 V Reflec...

Page 58: ...AN USB BT USB BT WLAN Installed interface 8 Loopback test result LOOPBACK BLUETOOTH OK sppi_v2 12 Bluetooth module firmware version Bluetooth check OK Normal NG Abnormal Not installed MFi OK MFi chip CP chip OK Normal NG Abnormal iAP Serial 2318T120023 iAP Serial Number iAP Serial WIRELESS LAN OK WLAN check OK Normal NG Abnormal Not installed ...

Page 59: ... shows the menu structure from the top menu of the system mode to Head Check MENU ITEM SYSTEM MODE 2 Diagnostic Head Check Head check image While checking Displays CHECKING In the case of normal end Displays NORMAL END When broken dots are detected 1 The STATUS LED blink red and the CHARGE LED turns off 1 It can be recovered by PAUSE button ...

Page 60: ...Check LED lighting pattern STATUS LED Turns on for 3 sec blue STATUS LED Turns off STATUS LED Turns on for 3 sec red STATUS LED Turns off STATUS LED Turns on for 3 sec purple STATUS LED Turns off CHARGE LED Turns on for 3 sec orange CHARGE LED Turns off LED check image While checking Displays CHECKING In the case of test complete Displays Test Completed ...

Page 61: ...ck MENU ITEM SYSTEM MODE 2 Diagnostic LCD Check LCD pattern Red Green Blue When the PAUSE key is pressed with all LCD dots turned on the printer stops under such condition Pressing the PAUSE key again continues test LCD check image While checking Red Green Blue In the case of test complete Displays Test Completed ...

Page 62: ...eck The following table shows the menu structure from the top menu of the system mode to Beep Check MENU ITEM SYSTEM MODE 2 Diagnostic Beep Check Push Beep Check Beep Check start Sounds BEEP for 3seconds Beep Check end ...

Page 63: ...ey is pressed the menu moves in the opposite direction from when the PAUSE key is pressed When the FEED and PAUSE keys are simultaneously pressed the display returns to the system mode menu When the FEED key or PAUSE key is pressed for 0 5 seconds or more during this parameter setting repeat mode is enabled and the key pressed is repeatedly entered The change in the parameter setting becomes effec...

Page 64: ...ged to prevent print tone from becoming lighter AUTO1 Automatic selection from none 2 division AUTO Automatic selection from 2 division Print quality oriented AUTO2 Automatic selection from none 2 division Print speed oriented Default value AUTO1 none 2 division Commentary If it uses normal battery available conditions of AUTO2 is Ambient temperature is over 10 degree Battery level is over 4 Label...

Page 65: ...de OFF B EP Mode is disabled ON B EP Mode is Enabled Default value OFF Commentary Support mode o valid x invalid TPCL TPCL1 LABEL C Mode ESC POS RECEIPT RECEIP T1 Z Mode S Mode o o o o o 7 3 5 Linerless Setting LINERLESS This setting is for using a linerless label OFF Linerless setting is disabled ON Linerless setting is enabled Default value OFF Linerless setting is disabled Commentary When liner...

Page 66: ...sition Setting Stop Position When back feed restriction is enabled ON printing is disabled on a label located between the head and the cutter during next printing after an issue of one or more labels since no back feed is performed To prevent such waste stop position setting is performed For details refer to the External Equipment Interface Specification CUT Stop at the cut position HEAD Stop at t...

Page 67: ...he label pitch is 20 0 mm or more and less than 24 0 mm and the effective print length is less than 15 0 mm The label pitch is less than 20 0 mm During label issue without sensor type specified whether or not to perform a back feed is determined according this setting When a feed is performed by using the FEED key or the Feed command no back feed is performed However when the label pitch is less t...

Page 68: ...nt position for the purpose of printing on the normal position OFF Performs no back feed ON Performs a back feed Default value OFF No back feed performed Commentary When the gap length is 5 mm or more printing is not misaligned on the label although the strip position fine adjustment is set to negative Therefore no back feed is performed when ON back feed performed is selected in this setting Supp...

Page 69: ...emental Explanations When the FEED key is pressed the menu moves in the opposite direction from when the PAUSE key is pressed When the FEED and PAUSE keys are simultaneously pressed the display returns to the system mode menu When the FEED key or PAUSE key is pressed for 0 5 seconds or more during this parameter setting repeat mode is enabled and the key pressed is repeatedly entered The change in...

Page 70: ...valid TPCL TPCL1 LABEL C Mode ESC POS RECEIPT RECEIP T1 Z Mode S Mode o o o o o 7 4 2 Code Page Setting Code Page PC 850 PC 852 PC 857 PC 8 PC 851 PC 855 PC 1250 PC 1251 PC 1252 PC 1253 PC 1254 PC 1257 LATIN9 Arabic PC 866 UTF 8 Default value PC 850 Support mode o valid x invalid TPCL TPCL1 LABEL C Mode ESC POS RECEIPT RECEIP T1 Z Mode S Mode o x x x x ...

Page 71: ...ines how zero should be displayed printed Ø with slash or 0 without slash 0 without slash 0 0 with slash Ø Default value 0 Without slash Support mode o valid x invalid TPCL TPCL1 LABEL C Mode ESC POS RECEIPT RECEIP T1 Z Mode S Mode o x x x x ...

Page 72: ...TALIAN PORTUGUESE SIMP CHINESE KOREAN POLISH JAPANESE Default value ENGLISH QM Type QQ Typel JAPANESE JA Type SIMP CHINESE CN Type Supplemental Explanations In system mode Japanese is displayed when Japanese is set For other languages English is displayed Support mode o valid x invalid TPCL TPCL1 LABEL C Mode ESC POS RECEIPT RECEIP T1 Z Mode S Mode o o o o o ...

Page 73: ...is a control code and if is sent first is a control code The control code is selected for each command If the first command ends with ESC LF NUL and is followed by ESC the control code is ESC LF NUL If is sent first the control code for the next command is When the control code is the data of 00H to 1FH in is ignored However the data of 00H to 1FH becomes valid while processing the graphic command...

Page 74: ... EURO Font Code Setting EURO Code This setting determines to which code the EURO font code is to be assigned Max value Min value Step Display Sign Integer digit Decimal place 0 padding Unit of measure 0xFF 0x20 1 Hex decimal None 2 0 None h Default value B0 Support mode o valid x invalid TPCL TPCL1 LABEL C Mode ESC POS RECEIPT RECEIP T1 Z Mode S Mode o x x x x 7 4 7 MaxiCode Specification Setting ...

Page 75: ... 69 Support mode o valid x invalid TPCL TPCL1 LABEL C Mode ESC POS RECEIPT RECEIP T1 Z Mode S Mode o o o o o ...

Page 76: ... C Mode ESC POS RECEIPT RECEIP T1 Z Mode S Mode o o o o o 7 4 9 Auto Power off after Error Error Power Off This setting enables selecting whether or not to turn off the power in 5 minutes after an occurrence of an error OFF The power does not turn off even if an error occurs ON The power is turned off in 5 min after an occurrence of an error Default value ON Supplemental Explanations Even if this ...

Page 77: ...Setting LCD Off This setting selects a time to turn off the LCD backlight OFF The LCD backlight does not turn off ON The LCD backlight turns off after following setting time Max value Min value Step Display Sign Integer digit Decimal place 0 padding Unit of measure 30 1 1 Decimal None 2 0 None sec Default value 3sec Supplemental Explanations If the setting value is bigger than power save setting L...

Page 78: ... not to check battery deterioration detection Set to check for battery deterioration detection and display the result with an icon after charging is comple te Displayed at the next start up for offline charging If the outside temperature battery temperature is 46 C or higher or the charging time is less than 30 minutes during charging battery deterioration is not detected For the icons to be displ...

Page 79: ...rned on Default value OFF Support mode o valid x invalid TPCL TPCL1 LABEL C Mode ESC POS RECEIPT RECEIP T1 Z Mode S Mode o o o o o 7 4 15 Print Head Check For Broken Dots After Cover Close Setting Head Error CHK This setting selects whether or not a print head check for broken dots is to be performed after the cover is closed OFF A print head check for broken dots is not performed after the cover ...

Page 80: ...o o o 7 4 17 Feed To Top Of Feed After Cover Close Setting Feed Check This setting selects whether or not the printer feeds the paper to the top of feed after the cover is closed OFF The printer does not feed the paper to the top of feed ON The printer feeds the paper to the top of feed Default value OFF The printer does not feed the paper to the top of feed Supplemental Explanations The printer f...

Page 81: ... and memory is bac ked up It can not adjust the volume Support mode o valid x invalid TPCL TPCL1 LABEL C Mode ESC POS RECEIPT RECEIP T1 Z Mode S Mode o o o o o 7 4 19 XML Setting XML OFF XML setting is disabled STD Standard XML setting is enabled ORACLE Oracle XML setting is enabled Default value OFF Supplemental Explanations If the XML setting is STD or ORACLE issue mode is automatically changed ...

Page 82: ...efault value Near Alert 20 0km Alert 25 0km Supplemental Explanations Support mode o valid x invalid TPCL TPCL1 LABEL C Mode ESC POS RECEIPT RECEIP T1 Z Mode S Mode O O o o o 7 4 20 2 Thermal Head Set the value of the thermal head component life When the specified distance is reached an icon is displayed If the value is set to 0 the component life is not checked Near Alert 0 0 320 0 km Alert 0 0 3...

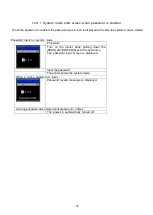
Page 83: ... Password This setting selects whether or not a new password which is required to enter system mode for service persons and system administrators is to be programmed OFF Password is not set ON Password is set Default value OFF Password 0000 ...

Page 84: ...ssword input for system mode Procedure Turn on the printer while holding down the FEED and POWER keys at the same time The password input screen is displayed Input the password The printer enters the system mode When a wrong password is input Password invalid message is displayed A wrong password was entered consecutively for 3 times The power is automatically turned off ...

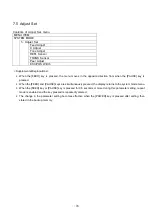
Page 85: ...opposite direction from when the PAUSE key is pressed When the FEED and PAUSE keys are simultaneously pressed the display returns to the system mode menu When the FEED key or PAUSE key is pressed for 0 5 seconds or more during this parameter setting repeat mode is enabled and the key pressed is repeatedly entered The change in the parameter setting becomes effective when the POWER key is pressed a...

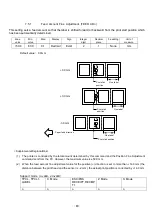
Page 86: ...trolled by the total amount determined by this command and the Position Fine Adjustment command sent from the PC However the maximum value is 50 0 mm 2 When the feed amount fine adjustment value for the positive direction is set to more than 14 0 mm the distance between the print head and the sensor is 2 mm the actual print position is corrected by 14 0 mm Support mode o valid x invalid TPCL TPCL1...

Page 87: ...erformed to finely shift the x coordinate of graphic data to the right or left This fine adjustment is performed within the effective print width range When the X coordinate is shifted in the minus direction and reaches its origin 0 it cannot be further shifted and stays at the origin 2 This fine adjustment is disabled for self test print maintenance counter values various parameter values and aut...

Page 88: ... printer is controlled by the total amount determined by this command and the Position Fine Adjustment command sent from the PC However the maximum value is 30 step Support mode o valid x invalid TPCL TPCL1 LABEL C Mode ESC POS RECEIPT RECEIP T1 Z Mode S Mode o o o x x 7 5 4 Reflective Sensor Manual Threshold Fine Adjustment REFL Sensor Max value Min value Step Display Sign Integer digit Decimal p...

Page 89: ...djustment TRANS Sensor Max value Min value Step Display Sign Integer digit Decimal place 0 padding Unit of measure 4 0 0 0 0 1 Decimal None 1 1 None V Default value 1 4V Supplemental Explanations This setting is effective only in the TPCL and TPCL1 modes ...

Page 90: ... mentioned stop position is not proper the stop position should be adjusted using the stop position fine adjust function for the strip issue Supplemental Explanations The printer is controlled by the total amount determined by this command and the Position Fine Adjustment command sent from the PC strip position fine adjustment value However the maximum value is 2 0 mm to 3 0 mm Support mode o vali...

Page 91: ...nations This setting is effective only in the ESC POS mode There is no command to set paper width in the ESC POS mode If a paper of which width is short for the print width the print start position may be outside of the paper To prevent this problem the width of paper to be loaded in the printer must be specified Support mode o valid x invalid TPCL TPCL1 LABEL C Mode ESC POS RECEIPT RECEIP T1 Z Mo...

Page 92: ...menu moves in the opposite direction from when the PAUSE key is pressed When the FEED and PAUSE keys are simultaneously pressed the display returns to the system mode menu When the FEED key or PAUSE key is pressed for 0 5 seconds or more during this parameter setting repeat mode is enabled and the key pressed is repeatedly entered The change in the parameter setting becomes effective when the POWE...

Page 93: ...tment parameter is effective for test print However the X coordinate fine adjustment is excluded When an error occurs during a test print the error message is displayed and printing is stopped The STATUS LED blinks and the CHARGE LED turns off The error is cleared by a depression of the PAUSE key and the display returns to the test print menu The STATUS LED turns on and the CHARGE LED turns off Pr...

Page 94: ...hen using receipt paper REFLECTIVE Transmissive sensor when using tag paper with black mark TRANSMISSIVE Reflective paper when using label paper Default value NONE 7 6 1 3 Print Type Setting Print Type This setting selects a print type auto mode using the strip sensor or fixed mode BATCH or STRIP regardless of a sensor status AUTO Print depending on the sensor used BATCH Fixed to batch issue STRIP...

Page 95: ...f specified the printer prints the data of image buffer length then stops 7 6 2 Paper Feed Mode Setting Paper Feed This setting is used to feed a paper without performing printing in system mode where the FEED key is invalid to feed a paper NO FEED Paper is not fed FEED Paper is fed Default value NO FEED Supplemental Explanations By selecting an option using the FEED key and determining it using t...

Page 96: ... 90 7 6 3 Slant Line 1dot 1 dot slant line Enlarged view of slant lines 1 dot slant line print Print ratio 16 7 ...

Page 97: ... 91 7 6 4 Slant Line 3dot 3 dot slant line Enlarged view of slant lines 3 dot slant line print Print ratio 16 7 ...

Page 98: ... 92 7 6 5 Characters 7 6 6 Barcode 7 6 7 Non Printing The printer feeds blank label ...

Page 99: ...d the factory test print is performed when the POWER key is pressed When the PAUSE and FEED key is pressed at the same time the display returns to the menu Other keys are invalid Print test pattern Feeding 1 label Printing 3 dot slant lines Printing barcode Printing characters Issue count 5 labels each Sensor type Transmissive sensor Issue mode Continuous issue Label pitch 63 mm Print density fine...

Page 100: ... print is performed when the POWER key is pressed When the PAUSE and FEED key is pressed at the same time the display returns to the menu Other keys are invalid Print test pattern Feeding 1 label Printing 3 dot slant lines Printing barcode Printing characters Issue count 5 labels each Sensor type Reflective sensor Issue mode Continuous issue Label pitch 63 mm Print density fine adjustment value 0 ...

Page 101: ...em mode menu When the FEED key or PAUSE key is pressed for 0 5 seconds or more during this parameter setting repeat mode is enabled and the key pressed is repeatedly entered The change in the parameter setting becomes effective when the POWER key is pressed after setting then stored in the backup memory 7 7 1 Temperature The ambient temperature and print head temperature are displayed Only when th...

Page 102: ...ng range is as below Reflective sensor 0 0V to 5 0 V 7 7 3 Transmissive The sensor level of the transmissive sensor is registered Remove some labels and place the backing paper so that the Transmissive sensor can detect it The display of the currently detected value is updated every 200 msec Hold down the FEED key for 3 seconds or more When the registration of the label gap level is completed Adju...

Page 103: ...enu is displayed The setting range is as below Reflective sensor 0 0V to 5 0 V Transmissive sensor 0 0V to 5 0 V 7 7 5 Battery Voltage Battery VOLT The battery voltage is displayed 7 7 6 Backlash Step Count Adjustment 1 Backlash1 This setting selects a backlash step count for a feed in forward direction Max value Min value Step Display Sign Integer digit Decimal place 0 padding Unit of measure 99 ...

Page 104: ...is pressed the menu moves in the opposite direction from when the PAUSE key is pressed When the FEED and PAUSE keys are simultaneously pressed the display returns to the system mode menu 7 8 1 No RAM Clear This option is provided for users who access this menu by mistake and intended to exit from the RAM clear menu without performing any RAM clear ...

Page 105: ... Global model JA TYPE RAM clear for Japan model CN TYPE RAM clear for Chinese model QQ TYPE RAM clear for North America model Supplemental Explanations 1 To comfirm which destination after parameter clear it can be checked sight top of maintenance counter Maintenance counter image COUNTER TOTAL FEED 4 8km QM FEED 0 0km FEED1 4 8km 2 LCD image at parameter clear Clearing After clear 3 When the para...

Page 106: ...or broken dots OFF MaxiCode specification TYPE1 Head division AUTO1 Head output division command parameter setting ON Print head check for broken dots after cover close OFF Resume printing after broken dots error OFF Feed to top of feed after cover close OFF Beep ON B EP Mode OFF Linerless OFF Post print stop position setting CUT Back feed restriction setting ON Strip issue back feed setting OFF X...

Page 107: ...ction OFF Inquiry page scan interval 2048 Inquiry page scan window 36 WLAN Wireless LAN enable disable CONFIG MODE BAND SELECT DUAL BAND COUNTRY CODE It is not subject to parameter clear CHANNEL 1 IP MODE DYNAMIC Printer IP address 192 168 254 254 Printer gateway IP address 000 000 000 000 Printer subnet mask 255 255 000 000 Printer MAC address Fixed module address Socket communication port number...

Page 108: ...1 FEED FEED1 4 8km FEED2 0 0km FEED3 0 0km FEED4 0 0km PRINT 0 0km 2 PRINT PRINT1 4 5km PRINT2 0 0km PRINT3 0 0km PRINT4 0 0km SYSTEM ERR 0 3 SYSTEM ERROR Print Result of Maintenance Counter Values and Various Parameter Values After Each Type of Clear Clear when replacing the platen FEED The total feed up to the last feed moves to FEED1 and the FEED1 value moves to FEED2 The FEED 4 value is cleare...

Page 109: ...1 4 Operation as described above System error count 0 times TOTAL FEED 0 0m QM TOTAL PRINT 0 0 m FEED 0 0 m FEED1 0 0 m FEED2 0 0 m FEED3 0 0 m FEED4 0 0 m PRINT 0 0 m PRINT1 0 0 m PRINT2 0 0 m PRINT3 0 0 m PRINT4 0 0 m SYSTEM ERR 0 PC FEED 0 0mm TONE 0step Whenever FEED is performed FEED value FEED1 FEED1 value FEED2 Whenever PRINT is performed PRINT value PRINT1 PRINT 1 value PRINT 2 ...

Page 110: ... 104 Supplemental Explanations 1 LCD image at counter clear Clearing After clear 2 Turn off the printer when COMPLETED Turn off the printer is displayed after the RAM clear is completed ...

Page 111: ...r PAUSE key is pressed for 0 5 seconds or more during this parameter setting repeat mode is enabled and the key pressed is repeatedly entered The change in the parameter setting becomes effective when the POWER key is pressed after setting then stored in the backup memory 7 9 1 USB Serial Number Setting USB Set USB serial ID Range 000000000000 Z00000000000 Characters that can be used for setting S...

Page 112: ...2 1 WLAN Mode MODE OFF ON CONFIG MODE Default value CONFIG MODE About mode setting and authentication refer to Network specification 7 9 2 2 Band Select BAND SELECT DUAL BAND 2 4GHz 5GHz Default value DUAL BAND ...

Page 113: ...NAMIC DHCP enable Default value DYNAMIC Supplemental Explanations If it sets DYNAMIC printer can get IPaddress from DHCP server automatically 7 9 2 3 2 Printer IP Address Setting Printer IP ADD IP address is displayed and set 7 9 2 3 3 GATEWAY ADDRESS Gateway ADD Gateway address is displayed and set 7 9 2 3 4 Subnet Mask Subnet mask is displayed and set ...

Page 114: ...PR Server SNMP Agent 7 9 2 4 1 Socket Communication Setting Socket Port OFF ON Default value ON 7 9 2 4 2 Port Number Socket port number is displayed and set range 00000 65535 Default value 9100 7 9 2 4 3 LPR Server OFF ON Default value OFF 7 9 2 4 4 SNMP Agent OFF ON Default value ON 7 9 2 5 Wireless LAN Power Saving Setting Powersave OFF ON Default value ON ...

Page 115: ...t is not used ON Device nickname for assembly process test is used Default value OFF Supplemental Explanations When set to ON the device nickname is FACTORY TEST When set to OFF the device nickname is TOSHIBA TEC BT 7 9 3 3 Search Setting OFF Inquiry is disabled EVERY Inquiry is enabled 60 sec Inquiry is enabled only for 60 sec after the start of the printer Default value EVERY 7 9 3 4 Security Le...

Page 116: ...val Max value Min value Step Display Sign Integer digit Decimal place 0 padding Unit of measure 4096 18 1 Decimal None 4 0 None msec Default value 2048 Cannot be set to a smaller value than Inquiry Page Scan Window Setting If an invalid value is specified it will be corrected to the default value at the next startup If the value is odd it will be corrected to an even number at the next startup 7 9...

Page 117: ... is no data stored For the LCD display when there is data stored LCD display when there is stored data It displays Registration No and Name of data stored Max 9 characters IF there is no data it displays If BASIC area is not allocated LCD shows blank 7 10 3 BASIC Trace Setting Trace This setting selects whether the BASIC trace setting is enabled or disabled OFF Disabled ON Enabled Default value OF...

Page 118: ...POWER key is pressed without the BASIC expansion mode program loaded the display does not change from 10 BASIC Setup which indicates the BASIC expansion mode menu For details of the BASIC expansion mode refer to the section Startup of System Mode Program in the BASIC Interpreter Specification ...

Page 119: ...ys at the same time The system mode is intended for performing self test parameter setting and other settings When a language other than Japanese is selected in the language setting 7 4 4 LCD language setting the language displayed on the panel is English The key operations for the system mode are described below Key operations follow Section 6 1 LIST BOX WITH SCROLLBAR System Mode for users top i...

Page 120: ...eset 8 3 Diagnostic Same as 7 2 Diagnostic of the system mode 8 4 Mode Setting Same as 7 3 Mode Setting of the system mode 8 5 Adjust Set Same as 7 5 Adjust Set of the system mode 8 6 Test Print Same as 7 6 Test Print of the system mode ...

Page 121: ...escribed below Key operations follow Section 6 1 LIST BOX WITH SCROLLBAR System Mode for users top image Top menu 1 Reset 2 Mode Setting 3 Set PARAM 4 Adjust Set 5 Dump Mode 6 Expand Mode 7 I F Setting 8 BASIC Setup 1 Reset Used to reset the printer 2 Mode Setting Same as 7 3 Mode Setting of the system mode 3 Set PARAM Same as 7 4 Set PARAM of the system mode 4 Adjust Set Same as 7 5 Adjust Set of...

Page 122: ...ge 8 byte data is printed on one line Data is printed starting from the newest data to the older data Print direction 00 00 00 00 00 00 00 00 00 00 00 00 00 00 00 00 00 00 00 00 00 00 00 00 00 00 00 00 00 00 00 00 7B 41 58 3B 2B 30 30 30 AX 000 2C 2B 30 30 30 7C 7D 7B 000 44 30 37 37 30 2C 31 31 D0760 11 37 34 30 7C 7D 7B 43 7C 740 C 7D 7B 4C 43 30 2C 30 30 LC0 00 32 30 2C 30 30 33 30 2C 20 0030 2...

Page 123: ...an error message and stops The error is cleared by pressing the PAUSE key and the display is returned to the PRINT menu After the error is cleared data is not automatically reprinted 9 6 Expand Mode Same as 7 10 4 Expand Mode of the system mode 9 7 I F Setting Same as 7 9 I F Setting of the system mode 9 8 BASIC Setup Same as 7 10 BASIC Setup of the system mode ...

Page 124: ...nection of the AC adapter in the printer power off state and a power on under the above condition This problem can be solved by turning off the printer after disconnection of the AC adapter or removing and inserting the battery again 2 When the USB cable is connected without the battery installed LCD No display Same as power off LED STATUS LED Red ON Blink CHARGE LED OFF If the printer power is tu...

Page 125: ... state ON CHARGE LED orange Charging ON Full charge OFF If the printer power is turned on under the above condition a charge error will result For details about the charge error refer to 5 11 Charge Error Number List of this specification and Chapter 8 Error Processing of the External Equipment Interface Specification In charging it doesn t display battery percentage Sometimes it doesn t display 1...

Page 126: ...eless LAN Module Is Connected When a wireless LAN module is connected Power Save Mode Setting inside the module is switched from No Power Save to Auto Power Save after the printer enters power save mode Only when the wireless LAN power save setting is enabled 11 3 Precausions The printer does not enter power save mode under any of the following conditions When any error is displayed When the BASIC...

Page 127: ...he printer is in the system mode the parameter information is saved after the shutdown menu is selected In both modes the printer power is turned off after saving is completed It may take approx 4 seconds at the maximum to save the information 12 2 PRECAUTIONS Before removing the battery for replacement or other purposes it is required to confirm that the LCD and LED turned off If the battery is r...

Reviews: