3. REPLACING THE IMPORTANT PARTS
EO18-33030
3.1 Replacing the Parts for B-FV4T-GS/TS
3-14
3.1.7 Replacing the Print Head Assembly
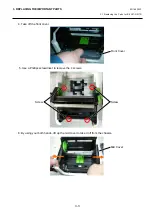
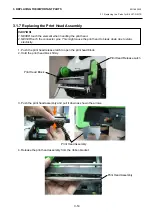
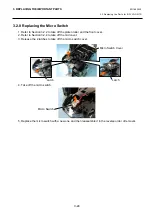
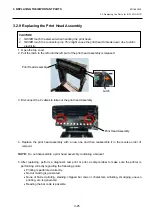
1. Push the print head release latch to open the print head block.
2. Hold the print head block firmly.
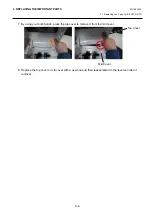
3. Push the print head assembly and pull it down as shown the arrows.
4. Release the print head assembly from the ribbon bracket.
Print Head Block
CAUTION!
1. NEVER touch the element when handling the print head.
2. NEVER touch the connector pins. This might cause the print head to break down due to static
electricity.
Print Head Release Latch
Print Head Assembly
Print Head Assembly
Summary of Contents for B-FV4 Series
Page 41: ...2 ELECTRONICS SPECIFICATIONS EO18 33030 2 2 Main PC Board Layout 2 4 B FV4D GH B FV4D GL ...
Page 301: ...APPENDIX EO18 33030 APPENDIX Establishing a Bluetooth connection with B FV4D and B FV4T A 8 ...
Page 302: ...1 11 1 OSAKI SHINAGAWA KU TOKYO 141 8562 JAPAN E PRINTED IN JAPAN EO18 33030H ...


