2. PRINTER SETUP
ENGLISH VERSION EO1-33057
2.6 Connecting the Printer to Your Host Computer
E2-17
2.6 Connecting the
Printer to Your Host
Computer
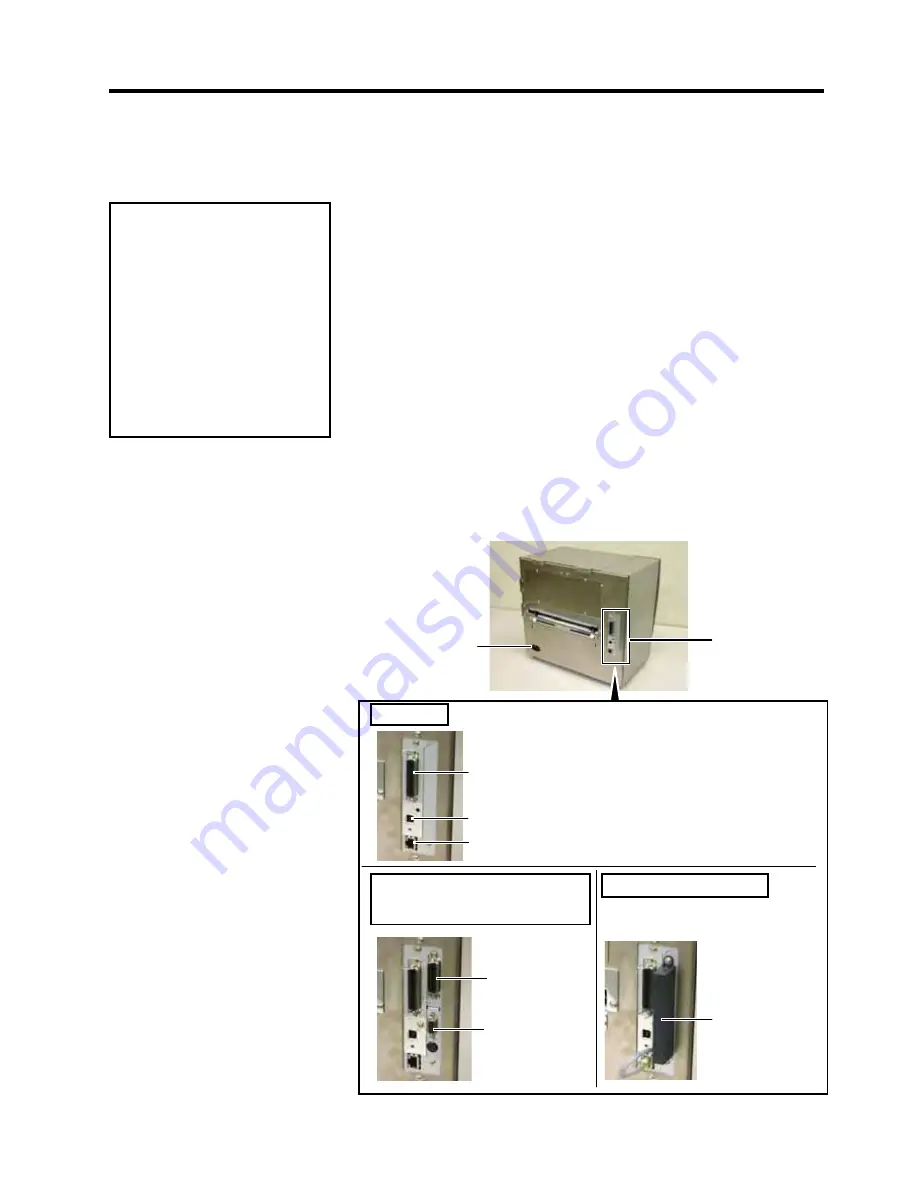
The following paragraphs outline how to connect your host computer to
the printer, and will also show how to make cable connections to other
devices. Depending on the system configuration you use to print labels,
there are 5 possibilities for connecting the printer to your host computer.
These are:
•
A parallel cable connection between the printer’s standard parallel
connector and your host computer’s parallel port (LPT).
•
An Ethernet connection using the standard LAN board.
•
A USB cable connection between the printer’s standard USB
connector and your host computer’s USB port. (Conforming to
USB 2.0 Full Speed)
•
A serial cable connection between the printer’s optional RS-232C
serial connector and one of your host computer’s COM ports.
<Option>
•
Wireless LAN using an optional Wireless LAN board. <Option>
For details of each interface, refer to
APPENDIX 2
.
After connecting the necessary interface cables, set an operating
environment of the printer. Refer to
Section 2.8.1 Parameter Setting
.
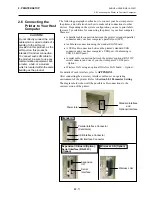
The diagram below shows all the possible cable connections to the
current version of the printer.
Standard
Expansion I/O Board (Option),
Serial Interface (RS-232C)
(Option)
Wireless LAN (Option)
Wireless LAN
Expansion
I/O
Serial
Interface
USB Interface Connector
LAN Interface Connector
Parallel Interface Connector
(Centronics)
CAUTION!
Do not directly connect the LAN
cable which is wired outside of a
building to the LAN port
provided on this product, as the
LAN port on this product is
intended for indoor connection.
To connect such LAN cable to
the product, be sure to use any
communication equipment, like
a router, a hub, or a modem
which is located within the same
building as the product.
Power Inlet
Standard Interface
and
Optional Interface

