Stratagy ES Model C1 Installation Guide
Step 9: Connect Voice Board(s) to Telephone Lines
Stratagy ES Model C1 Installation Guide 12/01
7
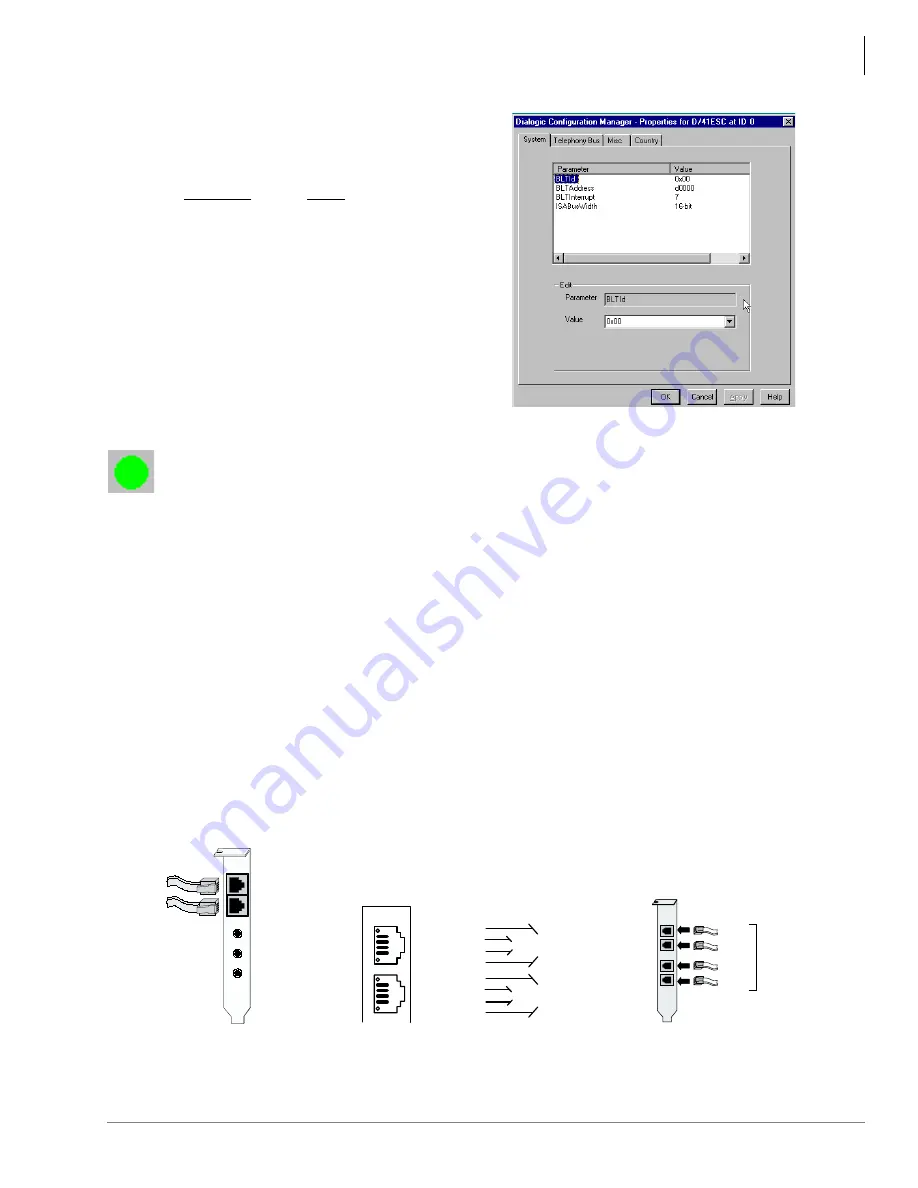
4. The settings on the System tab screen (shown at
right) are configured by DCM automatically,
but may need to be changed. Modify the
following settings to the specified value.
Parameter
Value
BLTAddress
d0000
BLTInterrupt
7
ISABusWidth
16-bit
5. Click Apply when finished.
6. Repeat
Substeps 3
~
5
above for any additional
boards.
7. From the DCM Main screen, select Service,
Startup Mode, then Automatic to enable the
Dialogic Services to start automatically when
the Windows NT system powers on.
Notes
•
If the Dialogic Service does not start, double-click on the board name shown on the
configuration tree
...or from the Main menu, click Action then Configure Device. The board configuration tab
screens (i.e., System, Misc, Country) display. Verify the settings.
•
It can be helpful to run the Universal Dialogic Diagnostics Utility in the Dialogic System
Software program group to identify any problem(s).
9. Click File, then Exit. The DCM Main screen closes.
10.Go to
Step 9: Connect Voice Board(s) to Telephone Lines
on
page 7
to continue the system
installation procedure.
Step 9: Connect Voice Board(s) to Telephone
Lines
Note
A standard telephone does not function when directly attached to the board jack.
8. From the DCM Main screen, click the Start icon on the toolbar
...or select Service, then Start Service. Click OK when the process is finished.
45
38
IN
OUT
Voice
Channel 1 (RJ11C)
Voice
Channel 2
To PBX or
Central Office
To PBX or
Central Office
MIC
2
1
5960
(RJ11C)
1
2
3
4
1
2
3
4
1
2
3
4
Ring
Tip
Ring
Tip
Rear Bracket
Corresponding J1 and J2
Channel assignments
J2
J1
Chan. 1 Chan. 2
1
2
3
4
Ring
Tip
Ring
Tip
Chan. 3 Chan. 4
5977
(RJ14C)
(RJ14C)
ProLine/2V
Dialog/4
Rear Bracket
on Board
Channel 1
Channel 2
Channel 3
Channel 4
To PBX or
Public
Telephone
Network
(Central
Office)
5978
RJ11C
RJ11C
RJ11C
RJ11C
D/41ESC
Summary of Contents for C1
Page 15: ......


