22
Getting Started
Function modes
2
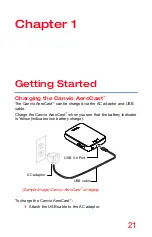
Plug the USB cable into the USB 3.0 Host port on the Canvio
AeroCast
™
.
3
Plug the AC adapter into a live electrical wall outlet.
While charging, the battery indicator light will blink slowly
(interval time is 2 seconds).
Function modes
There are two available function modes on the Canvio AeroCast
™
. You
can either connect to it directly with the included USB cable (DAS
mode) or connect wirelessly (Wireless LAN mode).
DAS mode (Direct-Attached Storage)
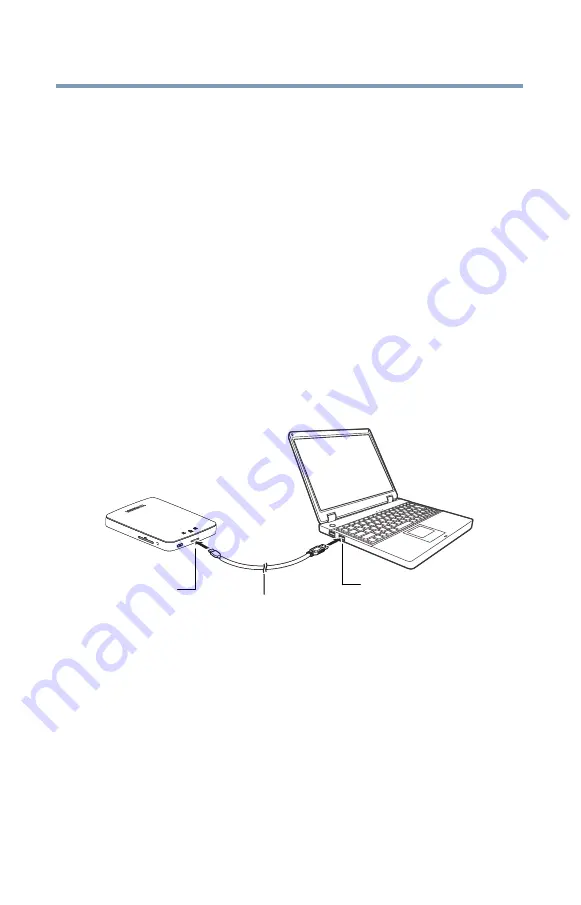
To operate via DAS mode, connect the Canvio AeroCast
™
to the
computer’s USB port using the included USB cable.
For Mac users:
To write files in DAS mode, you will need to install the “NTFS driver for
Mac” to your Mac. Refer the pre-loaded manual stored on the Canvio
AeroCast’s HDD.
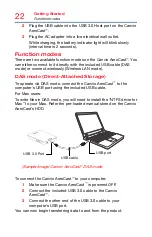
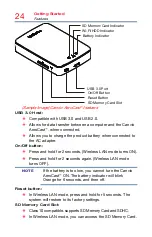
USB cable
USB 3.0 Port
USB port
(Sample Image) Canvio AeroCast
™
DAS mode
To connect the Canvio AeroCast
™
to your computer:
1
Make sure the Canvio AeroCast
™
is powered OFF.
2
Connect the included USB 3.0 cable to the Canvio
AeroCast
™
.
3
Connect the other end of the USB 3.0 cable to your
computer’s USB port.
You can now begin transferring data to and from the product.


