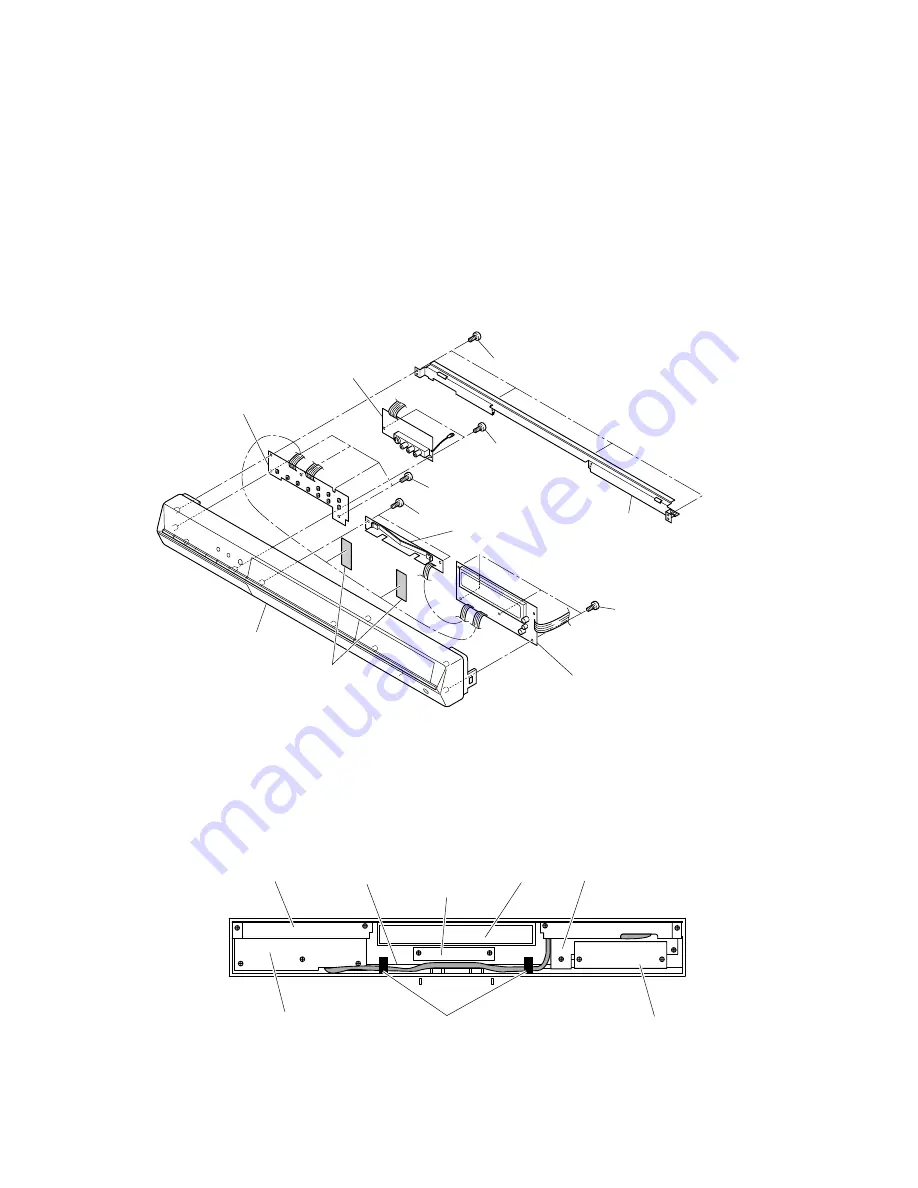
1-2-5. Front (R), Front (L), Front (LED) and Front Jack PC Boards
1. Remove the front panel. (Refer to item 1-1-2.)
2. Peel off two tapes (1).
3. Remove four screws (2), then remove the stay (3).
4. Remove four screws (4) and two screws (5), then remove the Front (R) PC board (6) and Front (LED) PC board (7).
5. Remove two screws (8), then remove the Front Jack PC board (9).
6. Remove four screws (10), then remove the Front (L) PC board (11).
Note:
• After replacing, attach the tape (1) to its original position.
Fig. 2-1-10
Screws (2)
Screws (8)
Screws (4)
Screws (5)
Screws (10)
Front (LED)
PC Board (7)
Stay (3)
Front (L) PC board (11)
Front (R) PC board (6)
Tapes (1)
Front Jack
PC board (9)
Front panel
Stay
Front (L) PC board
Tray door
Wire
Front (R) PC board
Front Jack
PC board
Fasten with the tape.
Front (LED)
PC board
Note:
• Fasten with the tape, taking care so that the wire does not hang over the tray door.
Fig. 2-1-11


