background image

Summary of Contents for D-R420KU

Page 1: ...ommunicC tewith your Toshiba dealer about this DVD Recorder Model number I Serial number I HIGH OEfINITION MULTIMEDIA INTERfACE db RW Digital Out COIIPATlBLE _ _ _ _ r l _ __ _ __ o o r _ _ _ _ rOSHIBA DVD rQlCDMPACr lQ o i D i R L JO ili R W R 4 7 DIGITAL AUDIO IReWritableI M Ji ijijtl l 2009 Toshiba Corporation DVDVIDEO RECORDER DR420KU OWNER S MANUAL TOSHIBA I DOLBY DIGITAL I RECORDING ...

Page 2: ...outlet 10 Protect the power cord from being walked on or pinched particularly at plugs convenience receptacles and the point where they exit from the apparatus 11 Only use attachments accessories specified by the manufacturer 12 Use only with the cart stand tripod I bracket or table specified by the manufacturer or sold with the apparatus When a cart is used use caution when moving the cart appara...

Page 3: ...ER SAFETY This apparatus employs a laser Only a qualified service person should remove the cover or attempt to service this apparatus due to possible eye injury CAUTION Use of controls or adjustments or performance of procedures other than those specified herein may result in hazardous radiation exposure CAUTION Visible and invisible laser radiation when open and interlock defeated Do not stare in...

Page 4: ...le position Do not place anything directly on top of the unit Do not place the unit directly on top of the TV Shield it from direct sunlight and keep it away from devices of intense heat Avoid dusty or humid places Avoid places with insufficient ventilation for proper heat dissipation Do not block the ventilation holes on the sides of the unit Avoid locations subject to strong vibration or strong ...

Page 5: ... Inc 1996 2008 DTS Inc All Rights Reserved HDMI the HDMIIogo and High HOrnl Definition Multimedia Interface are trademarks or registered HIGH DEFINITION MULTIMEDIA INTERFACE trademarks of HDMI Licensing LLC Cleaning the Disc Lens Handle the discs so that fingerprints and dust do not adhere to the surfaces of the discs Always store the disc in its protective case when it is not used When a disc bec...

Page 6: ...ion 22 Bask Setup INITIAL SETIING 24 SETTING THE CLOCK 25 Clock Setting 25 SETIINGS FOR THE VIDEO INPUT 26 Q _ ge e FORMATTING A DISC 27 Choosing the Recording Format of a Brand New DVD RW 27 Reformatting a Disc Manually 28 SETTING A DISC TO PROTECT 29 PLAYING THE DISCS IN OTHER DVD PLAYERS 30 Auto Finalizing 30 Finalizing a Disc 31 6 EN Recording INFORMATION ON DVD RECORDING 33 Recording Mode 33 ...

Page 7: ...LECTING THE FORMAT OF AUDIO AND VIDEO 63 Switching Subtitles 63 Switching Audio Soundtrack 63 Switching Virtual Surround System 64 Switching Camera Angles 64 Reducing Block Noise 64 Adjusting Black Level 65 Editing INFORMATION ON DISC EDITING 66 Guide to a Title List 66 Editing Discs 66 DELETING TITLES 67 CREATING DELETING PLAYLlST 69 Adding Titles to a Playlist 69 Erasing All Playlist 70 EDITING ...

Page 8: ...rch for what you want to watch You can easily find the part you want to watch using the search function Search for a desired point on a disc by title chapter track or time Virtual surround system You can enjoy stereophonic space through your existing 2 channel stereo system Playing back MP3 JPEG files You can enjoy MP3 JPEG files which are recorded on CD RW R Editing Deleting titles You can delete...

Page 9: ...cm 144 min 8cm 144 min 8cm 144 min 8cm 1X 6X 1X 16X Ver l l 1 2 Ver 2 0 2 1 1X 4X 1X 16X Ver l l 1 2 CPRM compatible Playable on Playable on Playable on Playable on DVD RW I most DVD Playable only most DVD compatible most DVD iA players on VR mode players players players Finalization compatible unit Finalization Finalization Finalization necessary Finalization necessary recommended recommended tit...

Page 10: ...ding quality and are proven to be compatible with this unit However depending on the media condition the unit may not read the disc properly Verbatim DVD R 8x DVD RW 4x DVD R 8x DVD RW 2x JVC DVD RW 4x Maxell DVD R 4x 8x 16x DVD R 8x 16x SONY DVD R 4x 8x 16x DVD RW 4x TDK DVD R 4x 8x 16x Performance of any other discs are not guaranteed Toshiba is not liable for any damage or loss caused directly ...

Page 11: ...ct the DV output of external device with a DV cable 10 AUDIO input jacks L2 Use to connect external device with an RCA audio cable 11 VIDEO input jack L2 Use to connect external device with an RCA video cable 12 S VIDEO input jack L2 Use to connect the S video output of external device with an S video cable 13 REC button Press once to start a recording Press repeatedly to start one touch timer rec...

Page 12: ...Remote control for different devices can interfere with each other Avoid using remote control for other device located close to the unit Replace the batteries when you notice a fall off in the operating range of the remote control The maximum operable ranges from the unit are as follows Line of sight approx 23 feet 7m Either side of the center approx 23 feet 7m within 30 Open the cover 2 Insert ba...

Page 13: ...ing r IJ L aVE F U 1 INPUT SELECT button Press to select the appropriate input 2 OPEN CLOSE A button Press to open or close the disc tray 3 Number Character buttons Press to select a title chapter tracklfile on display Press to enter values for the settings in the main menu Press to enter title names 4 SETUP button Press to display the main menu During DVD playback press and hold for more than 3 s...

Page 14: ... playback MP3 Tag Information only when a MP3 file is in playback HDMI Information only for the images output through the HOMI output 14 EN Disc Information I Menu This is an example screen only for explanation 1 lndicates a disc type and format mode 2 lndicates a type of titles for VR mode OVO RW 3 Indicates a selected external input mode 4 Indicates a recording mode and possible recording time l...

Page 15: ...played when it does not have any information Title File Name Information MP3 Tag Information File name information Title name information First track name will be displayed If you press DISPLAY one more time artist name will be displayed I _ _ T 0 ii li ii m_ j m I If there is no artist track or album name Not Available will be displayed o l 1 Il EN 15 ...

Page 16: ... S Clock To set up the clock of the unit as you need 6 HDMI To set up the HDMI connection setting 7 Reset All To reset the setting to the factory default DVD Menu I DISC Playback Mode DVD Menu DISC Playback Mode menu When an Audio CD is inserted When a JPEG I MP3 disc is inserted 16 EN 1 Format DVD RW DVD RW only Allows you to format the disc 2 Finalize Allows you to finalize a disc containing rec...

Page 17: ...apsed playback time Current title chapter track file number Recording time remaining time Clock Selected external input position Remaining time for one touch timer recording Selected HOMI video resolution tI ro n 10 iQ I 0 Display Message iii 0 IAppe when the dl C teay I Appears when HOMI video n r n I n n n resolution 480p is selected C II opening n U II IAppe when the dl C teay IAppe when HDMI v...

Page 18: ...V company After making the connection as described above make sure to select the appropriate input type by following the steps on page 26 Note Required cables and connecting methods differ depending on the external tuner For more information please contact your external tuner provider With this setup You can record any unscrambled channel by selecting the channel on the external tuner Be sure that...

Page 19: ...t protection system called HOCP high bandwidth digital content protection system HOCP is copy protection technology that comprises data encryption and authentication of the connected AV device This unit supports HOCP Please read the operating instructions of your display device or AV amplifier for more information Note for HDMI Connection Because HDMI is an evolving technology it is possible that ...

Page 20: ... RCA audio cable L R x 1 Please purchase the rest of the necessary cables at your local store n 1 r rf r r rrnlr M n trnl ln rear of this unit R L AUDIO IN video cable RCA audio cable AUlllOOllT s r d bl d thO t f II RCA audio cable L R x 1 Please purchase the rest of the necessary cables at your local store 20 EN ...

Page 21: ...audio cable RCA audio cable J RCA video cable I 0 0 0 __ 0 v rear ofthis unit F modulator r RF coaxial cable e R L AUDIO OUT VIDEO OUT tt external tuner RF coaxial cable VHF UHF antenna 1 n o m cable TV company s r d bl d th0 t f II RCA audio cable LlR x 1 RCA video cable x 1 Please purchase the rest of the necessary cables at your local store 1 It IGElI 5fi J _ _IlliW l e U Ilf __ n _ fl 2 J _ _ ...

Page 22: ... an HDMI input jack rear ofthis unit To set up HDMI Audio refer to pages 82 and 91 92 N r d bl d th ct Please purchase the necessary cables at your local store Mult Channel Digital Au io 5etting l 4 I t _ _ To set up Dolby Digital refer to pages 81 and 83 85 Dolby Digital Setting of this unit refer to HDMIOUT page 8S Stream Dolby Digital Dolby Digital PCM 2 channel PCM DTS DTS No output Stream 2 c...

Page 23: ...hfully as possible Multi channel Surround System is developed by the DTS Inc Playing back a DVD using incorrect settings m ay generate noise distortion and may also damage the speakers For audio CDand MP3 files 2 channel PCM will be output regardless of the Dolby Digital setting If the connected device is not compatible with HDMI BITSTREAM audio will be output as PCM even if youselect Stream in Do...

Page 24: ...l fji f input channel It may be labeled SPMCE Pr CG J SOURCE AV or SELECT refer to SEHW l UD1U your TV s user manual Or press 2 l jf f ENU 1r t i rl i i on the TV s remote control then press channel down button repeatedly until you see the Initial Setting menu CI_fA P fTIJI H lP lEV f JI Sl j I lol flAu r W t l II III _ Mr iP l h 1 1 I r t y h Pthl P Ct fE LUl f 4 Use LA I Y to select your desired...

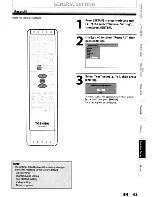
Page 25: ...k menu wil 1 appear Press SETUP and use 1T to select General Setting then press ENTER 2 4 3 1 o 11 i tJ o 0 0 0 r prl i LI L t c T 1 1 TOSHIBA SE R0265 5 Your setting will be activated The clock start counting when you press ENTER Press SETUP to exit o 0 0 0 0 r s o s v 1 r J Note Your clock setting will be lost if either there is a power failure or this unit has been unplugged for more than 30 se...

Page 26: ...f I II If P 1 OJ f 1 t t 5 L 1 C SETUP II TOSHIBA SE R0265 iU 4 5 6 Use T to select Select Video then press ENTER Use T to select the desired external input position then press ENTER Use T to select the input jack type to connect then press ENTER If you want to use VIDEO IN jack select Video In then press ENTER If you want to use S VIDEO IN jack select S Video In then press ENTER 26 EN o 0 0 0 0 7...

Page 27: ...ew DVD RW or DVD RW the unit automatically starts to initialize the disc DVD RW will always be formatted in VR mode and DVD RW will be formatted either video or VR mode according to the recording format mode setting of the unit Before insert a brand new DVD RW you need to set the recording format to the desired mode You can also manually format a DVD RW once it has been used Note The recording for...

Page 28: ...o 5 Selection menu will appear and prompt you to confirm For DVD RW use T to select Yes then press ENTER Use 1 to select Yes then press ENTER Formatting will start If you want to cancel formatting select No N Jte __ 7 When yOl l reformatthe_ isc thecontentsQftheqisc are erasect _ t _ For DVD RW make SOre tharthe recording format is set to the desired mode See step 1 to 6 in Choosing the Recording ...

Page 29: ...4 3 1 SETTING A DISC TO PROTECT To prevent accidental recording editing or erasing the titles you can protect them from DVD Menu menu TOSHIBA SE R0265 m c a s I Q o 0 0 0 0 o r II c s cr s VI II l C Note To cancel the disc pr0t eet Whef you insert a discpro ected ith Jhls unit Disc Protect ON OFF will appear insteadofUOFr ON Jorelease the protection forthe disc select Disc Protect ON OFFUatstep 3 ...

Page 30: ...SKI II f III 1F SLIP 1 I I i i r TM OP TOSHIBA SE R0265 0 0 0 0 0 Note This function is not available after finishing daily or weekly prog am _ _J 30 EN 1 2 3 4 5 6 Press SETUP and use to select General Setting then press ENTER General Setting menu will appear Use I to select Recording then press ENTER Recording menu will appear Use to select Auto Finalize then press ENTER Use 1 to select Disc Ful...

Page 31: ...start 2 4 3 5 Finalizing is completed 1 You will need to finalize discs to play back on other DVD players Finalizing may take several minutes up to an hour Since the process of the finalization fills empty space of the disc a shorter recording period on the disc will require a longer time period for finalization Do not unplug the power cord during finalization TOSHIBA TI l SE R0265 f o VI III l Q ...

Page 32: ...e the DVD RW you can call up the title list by pressing TOP MENU oryou can call up the title menu by pressing MENU LIST Even afterDVD RW is finalized you can still record or edit After you finalize DVD RW R orDVD R you cannotedit orrecord anything else on that disc If you insert a DVD RW finalized with this unit Undo Finalization will appear instead of Finalize at step 3 To releasethe finalization...

Page 33: ...op automatically and an error message appears on the screen Copy once only video can only be recorded to CPRM compatible DVD RW formatted in VR mode XP 60 min 18 min SP 120 min 36min LP 240 min 72 min EP 360 min 108 min SLP 480 min 144 min Note This unit cannot record to CD RW or CD R I DVD RW R DVD RW R and CD RW R recorded on a personal computer or a DVD or CD recorder may not be played back if ...

Page 34: ...e additional recordings to the discs recorded by other units OFF Prohibiting additional record to the disc that has a title list created by other units 5 Press SETUP to exit Note This function is also available for unfinalizedDVD tR 34 EN You can set a specified time for chapter marks 1 Press SETUP and use T to select General Setting then press ENTER 2 Use T to select Recording then press ENTER Re...

Page 35: ...regardless of the Aspect Ratio Video mode setting For DVD RW R the image will always be recorded in aspect ratio of 4 3 4 Press SETUP to exit 3 Use T to select your desired setting then press ENTER 2 Use T to select Aspect Ratio Video mode then press ENTER PCM Records PCM audio for the best quality sound Dolby Digital Records Dolby Digital audio for good quality sound 5 Press SETUP to exit 4 Use T...

Page 36: ...n the disc tray and insert your disc with its label facing up Press I O ON STANDBY Turn on the TV and be sure to select the input to which the unit is connected 2 3 1 SlOP 0 0 0 j A t 0i L I Xv Lh I PAUSE fEl l Pe REC MODE REC 71 U 4 Press REC MODE repeatedly to select a recording mode Refer to Recording Mode on page 33 TOSHIBA SE R0265 o 0 DOD 5 Press INPUT SELECT E to select the appropriate exte...

Page 37: ...cified time press STOP __ i f lor r r Ql roo I I m 0 _ l 0 n yo pr s c rdi g i I c t t l When the umt clO ck has not be en set the space for a date and tIme of tItle names WIll t e blank You cannot change the recording mode dur ng the recording pause mode f Note for one touch timer recording I I The remaining rec rding til e will be displayed on the front panel display during one touch timer recor...

Page 38: ...L1 or L2 and set it to output audiolvideo signals when it comes to the time you want to start recording Do not change the external tuner s channel while you are recording You cannot watch one channel and record another at the same time Set the clock before setting a timer programming Insert a recordable disc with enough recordable space SKIP II Note If you have not s tthe clock yet d 0 Clock Setti...

Page 39: ... may be cut short when the available recording space of the disc is too limited rA ec ding mode select IWhen Auto is selected as a recording mode the unit calculates how much time is available on the disc and Idetermines the appropriate recording mode to I complete recording the program i I I MER RECORDING When pressing T at the current date the date will change as follows e g January 1st JAN 31 J...

Page 40: ...ress When the tlmerrecording is proceeding that program will be highlighted in red In this case you cannot select any other program 40 EN If the timC r program did not completec frectly the errOr number Clippearsinthe timer progrcunming list Each error number means El 22 Recording error other i E40 Some portion has E37 39 than below i not been recorded E 2 3 i4 I u d bi di 1 l I f t rogram Recordi...

Page 41: ...erted disc is not recordable finalized DVD RW R finalized DVD RW a fully recorded disc etc on the front panel display flashes and timer recording cannot be performed In some cases will appear momentarily around the start point as the unit attempts to record Please insert a recordable disc When all the timer recording is completed flashes To play back or eject the recorded disc press I O ON STANDBY...

Page 42: ...y mode when you finish setting Preparation on this unit You must let the unit know which video input jack you are using before making a recording Refer to SETIINGS FOR THE VIDEO INPUT on page 26 0 0 0 0 1 1 INH LOSE S LEt 1 l B _ or e i 1 1 f il C F S t rJ SAUhlfE I til SF iV f flMFH r OG S ETUP D P Aj ICI T n TOSHIBA SE R0265 o 0 DOD 42 EN 1 2 Select the desired recording mode Refer to Recording ...

Page 43: ...e satellite link by using video input jackson the rear panel Refer to page 44 for more information _ When a regular timer recording andthe satellite link timer recording are overlapped those recordings are recorded as illustrated below 0 c c n o I f I 0 I l Ii o I timer recording satellite link actual recording example 1 I timer recording satellite link actual recording example 2 example 3 timer r...

Page 44: ... or the RCA audiolvideo cables for this connection When connecting a DVC digital video camcorder use the DV IN jack on the front panel instead of S VIDEO IN or VIDEO IN jack S video cable external device cam C order VCR etc I or Mfij front of this unit 0 VIDEO S VIDEO OUT OUT rear of this unit s r d bl ed thO cf f II RCA audio cable UR x 1 RCA video cable x 1 Please purchase the rest of the necess...

Page 45: ...front of this unit Select L2 Front or L3 DV IN by using INPUT SELECT E Press OPEN CLOSE A to open the disc tray Place the disc to record properly Press OPEN CLOSE A again to close the disc tray lftakes awhne oload the dJ Turn on the TV and press I O ON STANDBY and be sure to select the input of the TV to which the unit is connected 7 5 4 2 6 3 1 2 TOI I D F 1NO o 0 WlR SETTINGS FOR nd EXTER JAl DE...

Page 46: ... icon 2 Indicator of active device When the Control is highlighted press ENTER to display the item selection Use L I T to select the device you wish to operate then press ENTER to activate Select DVD to control this unit Select DVe to control your DVC 3 Recording audio mode Other than the DVC is in stop mode the DV Audio can be selected Press ENTER to display the item selection and then use I T to...

Page 47: ... select a recording mode Refer to Recording Mode on page 33 2 5 4 3 DV DUBBU 1G 0 0 0 0 INPUT SELECT HC Ut i ARt 0 1 r SATEi rr PQ l TU 2 NK J DISPLAY T REfT Af REC MODE RL r Before recording from DVC see page 44 for connection instructions I L _ DVCtpDV Preparing for DV to DVD dubbing Insert a recordable disc and make sure your DVC is in video mode 1 TOSHIBA SE R0265 Use INPUT SELECT to select L3...

Page 48: ...en The recording will r sum e when th e unit d tects thevideo signai again When the DVC is in camera mode refer to GtJideto DVaodOn Sc eenOtspiay on page 46 You cannot dub fromDVC durin timer standby mode 1 During timer standby of either component you cannot sehict L3 DV IN even on the component which is not in timer standby Dat time and cassette memory data will not betecorded Pictures with a cop...

Page 49: ...er number or file number respectively Some discs may not have these numbers Track Folder Chapter Title Track 1 INFORMATION ON PLAYBACK MP3 JPEG j folder 1 folder 2 DVD Title 1 I Title 2 ChaP C I Chaple Audio CD Track 2 Track 3 Track 4 Track 5 f Jo Jn L IJn IIJJoJo IIJJon IJoJJn _ Structure ofDisc Contents The contents of DVD are generally divided into titles and the titles are subdivided into chap...

Page 50: ...Y SlOP F I 3J TOSHIBA SE R0265 0 0 0 0 0 Note Some discs may start playback automatically SO EN 3 4 5 Align the disc to the disc tray guide Press OPEN CLOSE to close the disc tray E1 i ayt ke a btleto lo c1 f ecdlsccompletely Press PLAY to start playback If you are playing back a DVD video a menu may appear Refer to Using the Title Disc Menu on page 53 Press STOP once to stop playback temporarily ...

Page 51: ...t the disc press OPEN CLOSE j to open the disc tray then remove the disc before turning off the unit 4 5 7 3 6 o 0 DOD Press I O ON STANDBY Turn on the TV and be sure to select the input to which the unit is connected SE R0265 TOSHIBA Note You can also start playback by pressing PLAY instead of ENTER At step 4 you can press SKIP or press when the title on the lower right of the title list is highl...

Page 52: ...there are no files in the folder No Files will be displayed It is recommended that files to be played back in this unit are recorded under the following specifications MP3 Sampling frequency Constant bit rate JPEG Upper limit 6 300 x 5 100 dots Lower limit 32 x 32 dots File size of image maximum 12 MB Note The audio source of MP3 files cannot be recorded as iii digital sound by an MD or OAT deck i...

Page 53: ...election and then press ENTER to enable your selection 3 Press STOP to exit the disc menu F i_ s 4 1 aT W 1 Note You can select a numbered menu with the Number I buttonslalso Menus vary among discs Refer tothe information accompanying the disc for details MENU LIST or TOP MENU will not always be I effective for all DVDs _ II 2 Press PLAY to return to the normal playback I N _ For DVD set StillMode...

Page 54: ...ning press STOP again while the playback is stopped You can play back from where you stopped playing back the disc last 1 During playback press STOP The resume message will appear l oN f Note For MP3 JPEG files playback will resume from the l beginning of the file at which playback was stopped r I _ i _ l forwarding 30 seconds Fast Eo 0 ard Fast Rever se Pia b ck 1 During playback press FWD or REV...

Page 55: ...l duringrapidplayba ck _ __ 1 During playback press PAUSE II Playback will be paused and sound will be muted 2 Press SKIP repeatedly Playback will advance one frame at a time when you press SKIP with the sound muted To play back step by step backward Press SKIP repeatedly Every time you press the button the playback will go backward by one frame Press and hold SKIP SKIP to reverse advance continuo...

Page 56: ...play the marker list e g DVD video 3 Use A f T to select a desired marker number When it reaches the desired point press ENTER The title track number and the time will be displayed 4 To return to the marker Use A f T to select the desired marker number then press ENTER Zoom playback will start Note To dear amarker select the marker number to be cleared then press CLEAR All markers will be erased w...

Page 57: ...a TV broadcast via this unit press TIME SLIP This unit start to record the TV broadcast 2 Press TIME SLIP again Playback will start from the point at which you press TIME SLIP first while recording continues While viewing the recorded content you can pause and resume the playback by pressing TIME SLIP 3 Press STOP once to stop playback To stop recording press STOP again To cancel the resume press ...

Page 58: ...scene recorded 1 minute before the forwarding playback will automatically return to the normal playback 58 EN 3 Press STOP J once to stop playback The resume message will appear Screen for the current recording If rc R9 0 To stop recording press STOP J again To cancel the resume press STOP J again Note Playbackimage may freeze momentarily using this function However this does not affect the record...

Page 59: ...e in quick successions to go to the previous track file The track file will move backward one at a time I Note In search mode display total numbers of each search contents titlelchapter time are shown asa denominator total number total time of titl es of the title total number of chapters 3 Title Use I T or the Number buttons to enter a desired title number to search then press ENTER Title search ...

Page 60: ...ideo e g audio CD l ijjjijji 14 jiiiiiiiiiiiiEi JI UlIJliI i iI m The number next to iiiwill be highlighted To move to the number next to I J press When time search is not available I Jand time counter are not displayed 3 Use T or the Number buttons to enter a desired time to search then press ENTER After the search playback will start automatically 60 EN ...

Page 61: ...ed forward or backward During the A B repeat if you reaches the point A Iwith a ny rev e rse playback the reverse PlaYba ck will be canceled and the A B repeat playback resumes from point A L __ tI i e g audio CD e g DVD video ff 1C 10 0 e g MP3 JPEG files Title The current title will be played back repeatedly Chapter The current chapter will be played back repeatedly All The current disc will be ...

Page 62: ...splay time between 5 seconds and 10 seconds l Follow steps 1 and 2 in Program Playback on the left 2 Use T to select Photo then press ENTER 3 Use T to select Slide Show then press ENTER 4 Use T to select the display time then press ENTER 5 Press SETUP to exit Note L rge size JPEG files take afew mQments to be displayed I og OC 10 oe _ Program playback will start Note Toera et acksyou sele qea pres...

Page 63: ...select to display the selection menu e g DVD video _ J J I r 1 101 l l I S n I 1 3 In I L __ 1 2d1 Ioh If the title contains both main and sub audio you can further select L main R sub L R mixed of main and sub For audio CD Audio channel will switch e g audio CD ff Ie 10 0 3 Use T to select a desired audio soundtrack or audio channel then press ENTER For DVD video or VR mode DVD RW Audio soundtrac...

Page 64: ... press DISPLAY 2 Use 1 1to select IC I then press ENTER Angle icon appears when a switching camera angle is available Angle will switch each time you press ENTER N i Angle icon does not appear on the TV screen if you if set Angle kon to OFF in Playback menu Refer to page 86 N 1 IlM1IIIfiI l l 2E mal1 4 1 During playback press DISPLAY 2 Use 1 to select milto display the selection menu e g DVD video...

Page 65: ...R IT IC 1 9 0 I Itl IQJ 1 In I Ie 1 0 t _ r I I III 0 I iii i3 n I til I i BIac kl eYel OFF T1 l S a o s III til l 0 0 I til In 0 9 I 110 i L _ 1 1m 10 I 15 110 1 Note You can adjust black level setting onlyduring playback The setting will bekepteven wn n th euniiistu ned off _The default setting is uON OFF Shows the original picture as recorded ON Make the darker parts of the picture more visible...

Page 66: ...venient edit functions which are possible only with DVD RW R and DVD RW R You can edit the following from a title list Assigning a name to a title Dividing a title Combining titles Adding titles to a playlist Erasing all playlist Setting or releasing the title protection Adding or deleting chapter marks Deleting titles or parts of titles Possible editing functions depend on the recording format an...

Page 67: ...ecordable space will be increased QJ I e fY g You ca record a new title QJ Delete I a new title When a title is deleted from DVD RW in VR mode the recordable disc space will be increased The Full Recorded disc Once all editings are made press RETURN several times to exit the editing mode Writing to Disc appears momentarily It also appears when pressing OPEN CLOSE or I O ON STANDBY before exiting t...

Page 68: ... mode press TOP MENU Title list original or playlist will appear For VR mode DVD RW press MENU LIST to switch between Original and Playlist Use A to select a desired title then press ENTER e g VR mode DVD RW original Use to select Title Delete then press ENTER Use A to select Yes then press ENTER After that Are you sure will appear select Yes and then press ENTER Title will be deleted Press RETURN...

Page 69: ...o Playlist then press ENTER Follow the step 1 in DELETING TITLES on page 68 to display the original 5 2 4 3 1 p i i 1 r u A STOP II t Jl CREATING DELETING PLAYLIST For VR mode DVD RW you can create the playlist as you wish You can add up to 99 titles to a playlist as long as the total number of the playlist does not exceed 999 chapters PI Itt TOSHIBA SE R0265 0 0 0 0 0 I l f I 1 0 l 1 1 1 I c J i ...

Page 70: ...lect Delete All Playlists then press ENTERJ Use to select Yes then press ENTERJ Are you sure will appear Use LA to select Yes and then press ENTER 4 to Opl SETUP Formal Anallze Dis oteetO Delete All Play TOSHIBA SE R0265 Playlist is deleted Data will be written onto the disc momentarily o 0 DOD Note Deleting a playlist will notincreasetheayailable recording time on the disc 70 EN ...

Page 71: ... name press ENTER Use to select Ves then press ENTER To enter a title name follow the steps of Guide to Edit Title Name on page 72 Use to select Edit Title Name then press ENTER 7 5 6 4 Jr DOD EDITING DISCS tfl S F j es on Iitle STOP Use to select Edit then press ENTER Use to select a desired title then press ENTER e g VR mode DVD RW original In stop mode press TOP MENU Title list original or play...

Page 72: ...set To delete letters press CLEAR repeatedly Press and hold CLEAR to delete all letters Use to move the cursor to the left and right You can enter up to 30 letters ABC DEF GHI JKL MNO PQRS TUV WXVZ SPACE III TOSHIBA SE R0265 J J J J J _ m space space 0 OJ 1 1 ij 2 ABC abc 2 DEF def 3 m GHI ghi 4 f JKL jkl 5 m MNO mno 6 m PQRS pqrs 7 ij 8 I TUV tuv 8 m WXYZ wxyz 9 space 1 1Il 72 EN Note Undefined l...

Page 73: ... III 0 c o 4 Use T to select Add or 1l 1II 3t 1 Delete then press ENTER Il j e g VR mode DVD RW original ITING DISC RETURN DOD SKIP REV FWD SKIP Q PAUSE PLAY STOP F jil 1 0 0 0 0 0 0 5 SE R0265 TOSHIBA You can put chapter marks in each title Once a chapter is marked you can use it for the chapter search feature L _ _ __ _ i il Jj O A I a 1IIG r t M 6 Maximum numbers of chapter for each DVO I VR mo...

Page 74: ...LFE ruv Nn t Ni i SPo f e f lt lur Dt I L 1 Y PAUSE Pi V II SKJP REV HEPEt t nEe MODE P GC TIME 5liP S I C P p In stop mode press TOP MENU Title list will appear Note Hidden wUl be isplayedinthe previe window while prE vieyving the hidden chaJ ter Wh n you make all chapters in the title Hidden Hidden is displayed in a thumbnail of the title list c _ _ _ _ 1 e You can hide chapfers from the title l...

Page 75: ...ou can delete a specific part of a title Even when parts of title are deleted from the playlist the original title will remain as it is TOSHIBA SE R0265 0 0 0 0 0 Note When ascene is deleted from an original the playHst related to th j riglnalr i11l e deleted You cannot select Scene Delete ifthe numbed f haptel marks in the originalor playlist is more than 999 Depends on the content there is acase...

Page 76: ...r deletion is indicated in red You can check the preview by pressing ENTER Before and after 5 seconds of the deleted point will be playback for preview start point end point 4 5 6 Use T to select Delete then press ENTER Use 6 T to select Ves then press ENTER Are you sure will appear Select Yes using and then press ENTER The part of the title is deleted Press RETURN and then RETURN or STOP to exit ...

Page 77: ...a will be written onto the disc momentarily Use 1T to select liEdit then press ENTER e g VR mode DVD RW playlist Use SKIP II SKIP REV FWD PAUSE II and PLAY to df cide the point at which you will divide the title 7 5 4 3 6 I EDITU G DISCS I lIIIiIIiIiiiiM Iiiiiii lIiiiiiii iIiiIiiIliiiilliilill1 0 0 0 0 0 O 4 i i JPUT c SE SELlel H f i H t BC DE 2 j OK JKL MNO 4 o 6 SATELLH Pf flS TUV W AYZ liNK 9 ...

Page 78: ...e of the next title becomes yellow Use I I I to select another title to combine then press ENTER Selection menu will appear Use I to select Yes then press ENTER The two titles will combine into a single title 0 0 0 0 0 Note You cannot select the same title twice and combine it into asihgle title If either one of thetwo original titles is deleted the combined new title is also deleted 78 EN 5 Press...

Page 79: ...le will be released from protection If the title is protected cr Jicon will appear in the original list Follow the steps 1 to 3 in Putting Names on Titles on page 71 to display Edit menu Use I to select Protect then press ENTER cr J icon will appear on the title in the original list 2 4 3 1 tection 0 0 0 0 lNPl T S UCl HD J r o I i i A8C Off JKL 1NO 6 3ATELL 1 E TOV JXYl LlNK _ 8 e s c S E m l 1 A...

Page 80: ...ayeddepen 1ing on the recording content Maximum number of chapter for video mode DVD is 99 chapters per title The interval for auto chapter may be upto two minutes different from the time option you set 80 EN 1 2 3 4 5 Follow the steps 1 to 3 in Putting Names on Titles on page 71 to display Edit menu Use LA to select Chapter Mark then press ENTER Use A to select the desired interval then press ENT...

Page 81: ...e 85 OFF English French Spanish Other i udlo Ca riguage O i i I Set the ianguage for audfo 7 page 86 English French Spanish Other Playback Angle Icon ON Set whether to display the angle icon or not 7 page 86 OFF g StiiiMo ae A Set th e ty pe of stiiiimage in pausing piaybacf OJ 7 page 86 Field V Frame 1ti1 __ t 1__ _ __ i Display OSD Language English Set the language for OSD on screen display 7 pa...

Page 82: ...7 page 35 Dolby Digital mode is set to XP A uto Ofsc F uii ON Sei itle iriit tofina lii e it e di sc a utomatic ciiiy Finalize OFF 7 page 30 End o Timer Rec ON OFF _ _ _ _ _ Aspect Ratio Video mode Auto Set a aspect ratio for video mode recording 7 page 35 4 3 16 9 rVi ike R cordfrig Co riipa iiI ie ON Set io proii iblt addlifona l recordi rig loF F o r to 7 page 34 OFF replace the title list afte...

Page 83: ...NTER _ __ l n I Il k III I 0 I 19 l 0 l ____ Submenu will appear a i Refer II to II on pages 84 to 86 and j 4 cr 111I in set the selected item I I 1 ___ r I 5 When you finish with the setting 1m press SETUP to exit CI I a i l 1 0 I L __ 1 GENERAL SETTING SE R0265 TOSHIBA 0 0 0 0 0 0 0 0 0 0 OPEN INPUI CLOSE Sf u cr HDf i OCO l I C ABC DEF i 11 3 tiHI Jt i iNO L Q5 t SATELL rr POi1S ruv NXYZ umc nr...

Page 84: ... inactive all discs can play 8 Adult DVD software of any grades adult general children can be played back 7 NC 17 No one under 17 admitted 6 R Restricted under 17 requires accompanying parent or adult guardian 5 PG R Parental Guidance Recommended 4 PG13 Unsuitable for children under 13 3 PG Parental Guidance suggested 2 G General Audience 1 Kid Safe Suitable for children f o _ _ iii Parental lock ...

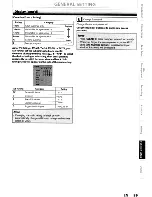
Page 85: ...SETTII JG Choose the appropriate audio setting for your external device It will only affect a disc playback Use I T to select a desired item then press ENTER 001Dynamic Range Control Default ON Set to ON to compress the range between soft and loud sounds Use I T to select a setting then press ENTER Note Dynamic range control function is available only on I the discs which are recorded in the Dolby...

Page 86: ... Refer to the language code table on page 98 r I Only the languages supported by the disc can be I selected Audio language setting may not be available to some discs t You can also change or switch off the subtitles on a DVD from the disc menu if it is available 2 w ly 86 EN Angle Icon Default ON Set to ON to show the angle icon during the playback Use T to select a setting then press ENTER Your s...

Page 87: ...ess ENTER o q o o 1 r or i ll ll i A 1 1 SETUP _ t It e r f f _ 1 i I L _ FL Dimmer Default Bright Set the front panel display brightness Use IA I to select a setting then press ENTER STOP G II to iL E t Y TOSHIBA SE R0265 Press STOP if you are playing back a disc You can choose one from Auto Bright or Dark If Auto is selected the display gets dark when the power is off 1 Press SETUP and use to se...

Page 88: ...ars and you are not allowed to view the program j __ _gi _l _ I i rKllMPAA Rating I 001TV Rating I 1Canadian English Rating I lIDlCanadian French Rating I You can set the viewing limitation according to MPAA rating US movie ratings TV Rating US TV program ratings Canadian English Rating Canadian English language ratings Canadian French Rating Canadian French language ratings 1 Use T to select the ...

Page 89: ...ming Press ITI 1 to select the desired rating or sub rating then press ENTER repeatedly to switch between view and block Sub rating status will appear on the side of the main rating Rating Category 18ans Adult audience only higher 16ans Unsuitable for ages under 16 13ans Unsuitable for ages under 13 8ans Unsuitable for ages under 8 G General audience lower E Exempt program Canadian French Rating t...

Page 90: ...n lSsecondsatstep3 progr ssivescan remains to be OFF interlace scank _ _ _ _li _ _ IMIlll 3 Use T to select Yes within 15 seconds then press ENTER Your setting will be activated _ IR MI j t t _mm t PS tortmm_m STOP SETUP l i II r fIT l Press SETUP and use A I to select General Setting then press ENTER 1 2 3 4 5 Use A I to select Video then press ENTER Use A I to select a desired item then press EN...

Page 91: ...0when an HOMI cable is not connected the items will be shown in grey 2 4 3 1 GENERAL SETTING STOP SE R0265 TOSHIBA i P R FWD K1P I f l I i 0 0 0 W l s f DtF ii JK r r 0 r I T YZ 0 0 Svj CF nr il oup 1 l oJ PlAY o 0 0 0 0 Format Default RGB You can select the color space for HOMI output Set the appropriate color space for your display device Use LA I T to select a setting then press ENTER When the ...

Page 92: ...vated III You can adjust the RGB range to make the dark areas of the HDMI images brighter Use A I to select a setting then press ENTER Select Enhanced if the black white contrast is not clear This setting is effective only for HDMI RGB output l If you do not want to output the audio through HDMI when you digitally output the audio through the COAXIAL DIGITAL AUDIO OUT jack to your audio system etc...

Page 93: ... select Reset All then press ENTER Select Ves using 6 I then press ENTER 2 3 1 GENERAL SETTU lG r 10 6 SATELLITE 1J YZ lINK JKI SPACE SETUP i 2 1 GHI PORB TlN 0 0 0 0 0 OPEN INPUT ClO5 E SELECT HDM i lit REPEAT REC tAOOE BEe Reset the setting to default L TOSHIBA SE R0265 m e 20 l I Q o 0 DOD Note The settings listed below wilfremain uncha ged even after resetting to the factory default Clock sett...

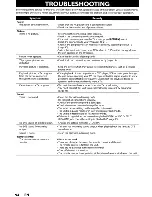
Page 94: ...all the connections are made correctly page 18 Keep the device which may cause electrical disturbances such as a cellular phone away If the playback picture output from a DVD player VCR or tuner goes through the unitbefore reaching your TV the copy protection signal applied to some programs could affect picture quality Disconnect the playback device in question and connect it directly to your TV T...

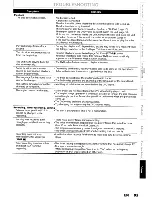
Page 95: ...the 1st layer switches to the 2nd layer This is not a malfunction Resume playback was activated page 54 Press STOP twice You have inserted a disc whose title menu or DVD menu automatically appears on the TV screen when it is first inserted The DVD video features an auto playback function Depending on the disc you may not be able to do some of the operations Refer to the instruction manual supplied...

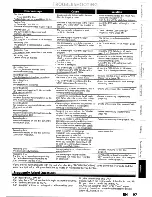
Page 96: ...ording with the DVC the recording audio signal can be set to 12 bits or 16 bits However when 16 bit recording mode is selected audio signal cannot be switched To record an audio signal set it to 12 bits Check the HDMI connection Check the status of the HDMI related indications Check whether the connected monitor device or other device supports HDCP This unit will not output a video signal unless t...

Page 97: ...this disc page 32 o Delete unnecessary chapter marks page 73 o Delete unnecessary titles pages 67 68 o Insert a new disc No this unit records only DVD Possible when the region code of the disc is 1 and All No you cannot control the unit by Pc Yes you can Select L1 Rear or L2 Front as your recording channel and leave the cable satellite box on pages 18 26 and 38 41 o You are trying to record onto t...

Page 98: ...n Lettish Lingala Lithuanian Macedonian Malagasy Malay Malayalam Maltese Maori Marathi Moldavian Mongolian Nauru Nepali Norwegian Occitan Oriya Oromo Afan Panjabi Pashto Pushto Persian Polish Portuguese Quechua Rhaeto Romance Romanian em 5467 5565 5560 5547 5551 5557 5347 5566 5647 5669 5760 5765 5757 6469 5771 6460 5761 5767 5861 5847 5868 5860 5866 5957 5953 5965 5958 5966 5955 5964 5961 5960 60...

Page 99: ...ers CD MD and OAT and AV amplifiers with digital inputs this unit can convert Dolby Digital and MPEG audio to PCM See also Digital Audio Progressive Scan 480p PCM pulse code modulation An indirect representation of sound by numbers During recording the sound is measured at discrete intervals 44 100 times a second for CD audio by an analog to digital converter generating a stream of numbers On play...

Page 100: ... level Jacks HDMloutput Jack Audio input During audio input Jacks Audio output During audio output Jacks Digital audio output Output level Jack DVinput Jack 100 EN AC120 V 60 Hz 17 W standby 2 5 W 5 3 Ibs 2 4 kg 16 6 x 2 4 x 9 8 420 x 59 0 x 247 mm 41 F to 104 of 5 C to 40 C Less than 80 no condensation NTSC TV standard VR video recording format Video format VR format DVD Rewritable Recordable DVD...

Page 101: ... responsibility 5 Warranties extend only to defects in materials or workmanship as limited above and do not extend to any DAV Product or parts that have been lost or discarded by you or to damage to the DAV Product or parts caused by fires misuse accident Acts of God such as lightning or fluctuations in electric power improper installation improper maintenance or use in violation of instructions f...

Page 102: ...t made necessary by accident misuse abuse moisture liquids dust dirt neglect accident damage 24 7 applications improper installation improper operation improper cleaning improper maintenance normal wear and tear or any other external cause or event act or omission outside the control of TCl including fire theft acts of God alteration power failures power surges or power shortages lightning other e...

Page 103: ...o change modify or extend the terms of these warranties in any manner whatsoever Arbitration and Dispute Resolution To the extent not precluded by law any claim dispute controversy or disagreement whether for breach of warranty breach of contract tort including negligence under a statute or under any other law or form of action against any of the Related Parties arising out of or otherwise relatin...

Page 104: ...Printed in China TOSHIBA 1VMN26773 E7PCAUD ...

Page 105: ...u moke the connections C011luctillg to an Exurnlll un I Make the connection as illustrated below RCA video cable cableTV comp any Rl Oilx al able n m RF co JXl ll cabk _ lIl OUl VI OC 3 z r M f RCA video cable re lf of lh Unit VIDEO IN AUDIO IN RCA audiO l _ II 2 Plug in the power cords of the devices to the AC outlet 3 After making the connection as described above make sure to select the appropr...

Page 106: ...pment connect this unit to your TV with a commercially available HDMI cable 2 Turn on your TV first then turn on this unit Set the video input on your TV to HOMI in best picture HDMIOUTI 3 Press HOMIl repeatedly until the HOMI indicator light matches your TV s resolution There are four HOMI video resolution choices 480p nop 1080i and 1080p o II II II II i A display equipment with an HOMI compatibl...

Page 107: ... to which the unit is connected Use T to select your desired language then press ENTER to set language TOSHIBA Press ENTER to activate Clock Setting There is no Auto Clock Setting function in the unit You need to set the dock manually II II II Q 1I Use to select an item to set and use T to select the contents to suit your preference then press ENTER EN ...

Page 108: ...in 480 min Select the input of the recorder Ll rear or L2 front to which the external tuner is connected by pressing INPUT SELECT I I Press REC MODEl to select a recording mode I__ p_ ul 0 0 0 ii 0 TOSHIBA 0 0 0 Press STOP _l to stop recording For how to set up timer recording refer to pages 38 to 41 in the owner s manual CO wttt OIl with a Digital Vidto C c Jtr Dl Cj Connect a DVe with the Front ...

Page 109: ...une the digital signal received with a TV antenna Watch your local stations to find out when they will turn off their analog signal and switch to digital only broadcasting Analog only TVs should continue to work as before to receive low power Class A or translator televi sion stations and with cable and satellite TV services gaming consoles VCRs DVD players and similar products Information about t...

Page 110: ...uestions including Single DVD players DVDNCR Combos Portable DVD players and LCD TV DVD Combos please call 1 866 583 7353 For DVD Recorders please call 1 800 319 6684 We are available to answer all of your questions Monday Friday 10 00am to 7 00pm EST Many questions regarding parts service and warranties can be answered by visiting the Customer Support section of our website www tacp toshiba com T...

Reviews: