background image

English 

73

E

diting

72

English

R

ecording

E

diting

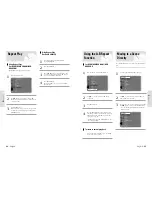
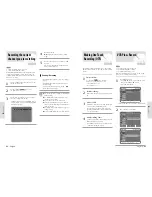
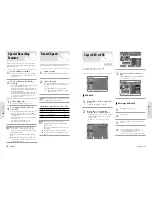
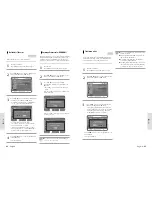
Viewing the Menu
Functions for a Disc

There are a variety of menu functions depending on the disc
type. Press the MENU button.

Setup
Timer Rec.
Title Menu
Disc Menu

No Disc

DVD-RAM DVD-RW

DVD-R

No Disc

DVD-VIDEO

DVD-VIDEO

Viewing the Menu Functions for a Disc  73

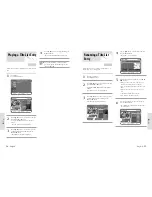
Viewing Title List  . . . . . . . . . . . . . 75

Playing a Title List Entry  . . . . . . . . 76

Renaming a Title List Entry   . . . . . . . 77

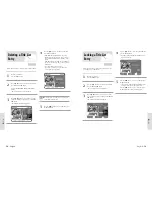
Deleting a Title List Entry   . . . . . . 78 

Locking a Title List Entry   . . . . . . . 79

Deleting a Section from a Title List 
Entry   . . . . . . . . . . . . . . . . . . . . . . 80

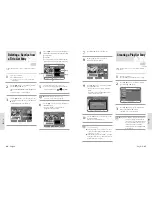
Creating a Playlist Entry . . . . . . . . . . . . . 81

Editing a Playlist Entry  . . . . . . . . . 83

Editing Scene for a Playlist Entry  . 84

Copying a Playlist Entry to the VCR  . . 88

Deleting a Playlist Entry from the 
Playlist  . . . . . . . . . . . . . . . . . . . . . 88

Disc Manager  . . . . . . . . . . . . . . . . 89

Setup
Timer Rec.

Press ENTER button to select the

start position.

You can use 

II

l

➛➛

or 

❿❿

l

,

➛➛

or 

❿❿

buttons to

search for the Start position.

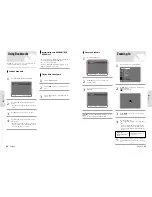
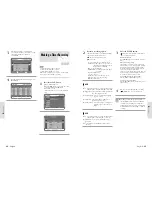
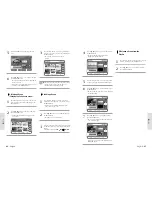
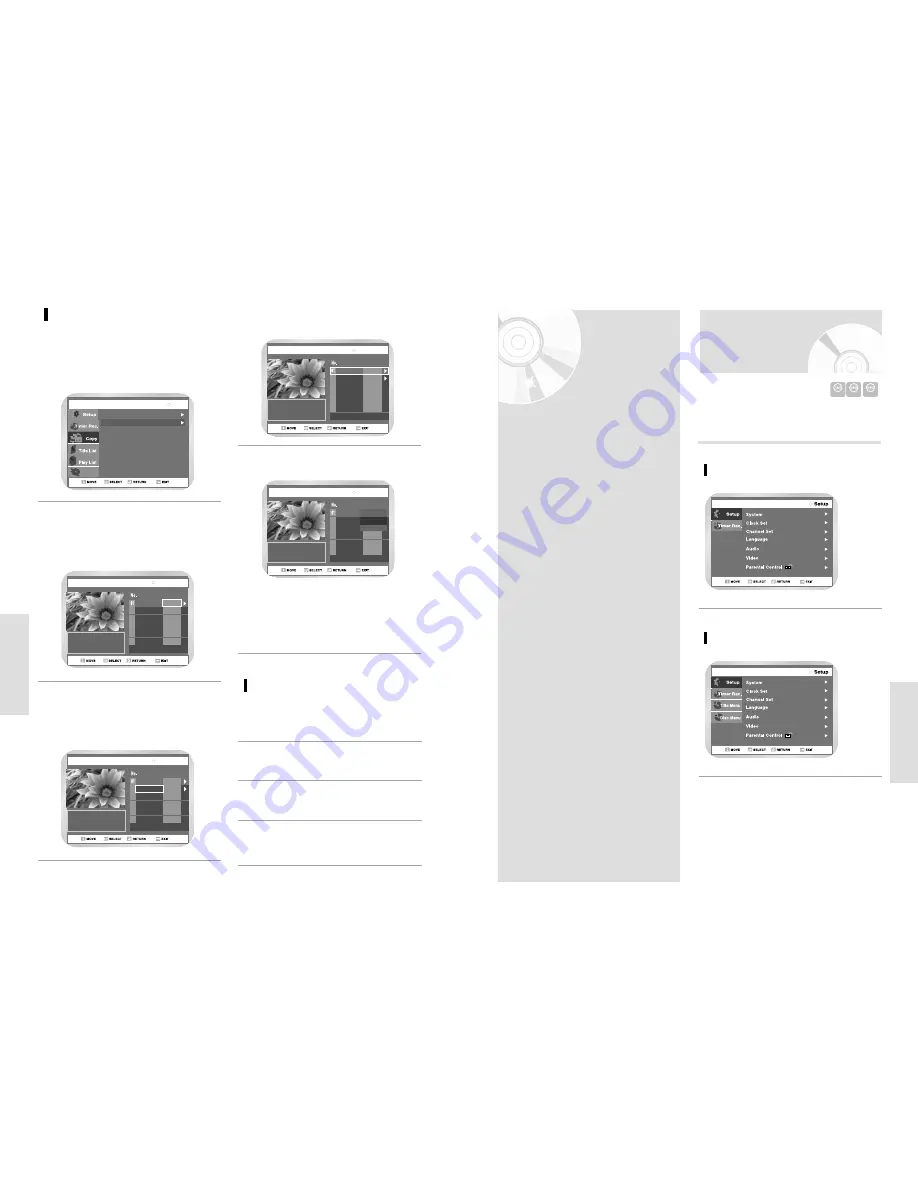
2

VCR-->DVD

00:00:21

Start

End

--:--:--

00:00:25

PLAY

Copy All

DVD-RAM(VR)

Select the End position in the same

way.

A copylist will be generated.
•  In VCR mode, the copylist cannot be saved.

3

VCR to DVD

Select VCR --> DVD to copy VCR

to DVD.

VCR --> DVD scene will be displayed.

•  Check the remaining time on the disc.

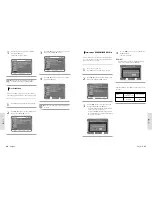
1

DVD-RAM(VR)

Copy

Disc Manager

DVD --> VCR

VCR --> DVD

VCR-->DVD

00:00:21

Start

End

--:--:--

--:--:--

02

00:01:04

PLAY

00:01:04

Copy All

DVD-RAM(VR)

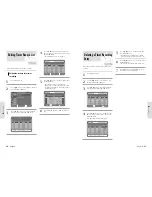
Press Enter button to choose the

list you want to copy.

4

VCR-->DVD

00:00:21

Start

End

--:--:--

--:--:--

02

00:01:10

PLAY

00:01:04

Copy All

DVD-RAM(VR)

To copy Copylist, select “Copy”.

5

VCR-->DVD

00:00:21

Start

End

--:--:--

02

00:00:43

PLAY

Copy All

Play

Copy 

Delete

DVD-RAM(VR)

•  The VCR will fast forward, searching for a start

position and then automatically start a copy. 

•  It may not be match up with Start and END point

exactly. 

•  If you want to copy all content, select “Copy All”.

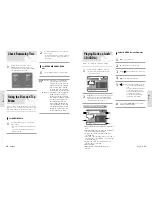
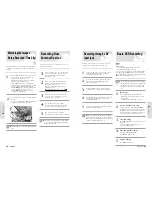
Direct copy VCR to DVD

Insert the VHS tape you want to copy.

1

Insert Recordable DVD disc.

2

To stop recording press the stop button.

4

Press DVD copy button on front panel or remote
control.

3

Summary of Contents for D-VR3

Page 1: ...DUBBING TO DVD TO VCR ON STANDBY I D VR3SU 2004 Toshiba Corporation DVD RECORDER VCR Read this booklet first OWNER S MANUAL C ...

Page 2: ...storted Note Precaution Important Safety Instructions CAUTION PLEASE READ AND OBSERVE ALL WARN INGS AND INSTRUCTIONS GIVEN IN THIS OWNER S MANUAL AND THOSE MARKED ON THE UNIT RETAIN THIS BOOKLET FOR FUTURE REFERENCE This set has been designed and manufactured to assure per sonal safety Improper use can result in electric shock or fire hazard The safeguards incorporated in this unit will protect yo...

Page 3: ...de to the outside of the disc Disc Handling Use discs with regular shapes If an irregular disc a disc with a special shape is used this DVD Recorder VCR may be damaged Avoid touching the surface of a disc where recording is performed Holding discs This is used to prevent damage by dirt scratches etc when using a DVD RAM RW R disc Cartridge Clean with an optional DVD RAM PD disc cleaner Do not use ...

Page 4: ...DVD RW blank disc is initialized to VR Mode when first initialized DVD RW VR mode This is a format that is used for recording data on a DVD RAM or DVD RW disc You can repeat recording editing deleting partial deletion creation of playlist and etc A disc that is recorded in this mode may not be played by existing DVD players DVD RW Video mode This is a format that is used for recording data on a DV...

Page 5: ...D RAM DVD RW DVD R 96 Troubleshooting 97 Problems and Solutions VCR 98 Specifications 99 Contents Getting Started Warning 2 Precaution 3 General Features 10 Before Reading the User s Manual 11 How to use the DVD Recorder VCR 11 Front Panel 13 Front Panel Display 13 Rear Panel 14 Tour of the Remote Control 15 Connecting Setting Up Quick Overview 16 Unpacking 17 Connecting the Antenna Cable 17 Conne...

Page 6: ...ormat After formatting is complete you can record on the disc You can play this type of disc on various DVD components only when they have been finalized You can only use one format on a DVD RW You can change the DVD RW format to anoth er format It should be noted that the data of the disc will be lost when changing formats Note General Features The D VR3 allows you to record and playback high qua...

Page 7: ...t and stop recording DVD R DVD RW discs in Video mode can automatically create chapters according to the recording mode when finalized There are two different recording methods Direct Recording and Timer Recording Timer recording is classified as record ing type Once Daily or Weekly or recording mode XP high quality mode SP standard quality mode LP long recording mode and EP extended mode accordin...

Page 8: ...n 24 MARKER Button Use this to bookmark a position while playing a disc 25 QUICK Button Use this to view the status of the disc that is being played 26 PLAY LIST TOP MENU Button Use this to return to the Top menu or to view the recorded files list 27 CLEAR Button 28 SUBTITLE Button Press this to switch the DVD s subtitle language 29 REC SPEED Button 30 REC PAUSE Button Use this to pause during rec...

Page 9: ...channels by selecting the channel on the DVD Recorder VCR Also use this Method if you watch channels without cable box Method 2 Antenna Cable box DVD Recorder VCR TV Cable box with many scrambled channels You can record channels by selecting the channel on the cable box You cannot record one channel while watching another channel Be sure that the cable box is turned on Connecting Setting Up Quick ...

Page 10: ...nnels that require a cable box Method 1 Connecting to a video input jack Connect a video yellow cable between the VIDEO yellow OUT jack on DVD Recorder VCR and VIDEO yellow IN jack on the TV or AV amplifier You will enjoy regular quality images Connect audio cables white and red between the ANA LOG AUDIO OUT jack on the DVD Recorder VCR and AUDIO IN jack on TV or AV amplifier There are several way...

Page 11: ... mode select yes If 480P is dis played on the front panel display now your DVD Recorder VCR is operated on 480P Mode Make sure that the color coded connections match That is the Y Pb and Pr component output jacks of your DVD Recorder VCR should be connected to the exact corresponding component input jacks on your TV Otherwise red or blue images will be displayed on the TV screen Once 480p video ou...

Page 12: ...g the Remote Control Method 1 Connecting a VCR Settop Box STB or DVD player to the AUDIO VIDEO LINE IN 1 jacks This allows you to connect your DVD Recorder VCR to other external devices and view or record their outputs Method 1 Connecting a VCR Set Top Box STB or DVD player to the AUDIO VIDEO LINE IN 1 jacks Method 2 Connecting a Camcorder to the LINE IN 2 in jacks Method 3 Connecting a Camcorder ...

Page 13: ... Point the remote control towards the television 3 Hold down the TV button and enter the two figure code corresponding to the brand of your television by pressing the appropriate numeric buttons Result If your television is compatible with the remote con trol it will switch off It is now programmed to operate with the remote control You can then control the television using the following buttons B...

Page 14: ... Setup Using the buttons move the selection bar to Setup then press ENTER to select 2 Select Clock Set Use the buttons to highlight Clock Set then press the ENTER button 3 Select Manual Clock Set Move the highlight to Manual Clock Set then press the ENTER button The Clock Set will change as shown 4 Note Auto Clock Set This menu is used to set the current time You need to set the time to use timer ...

Page 15: ...on to select from the following options Antenna Select if the DVD Recorder VCR is con nected to an indoor or outdoor VHF UHF Antenna Cable TV Select if the DVD Recorder VCR is connected to Cable TV 4 Set the Clock Use the LEFT RIGHT buttons to select each of the following options then use the buttons to set each option Month Set the month Day Set the day Year Set the year Hour Set the hour Minute ...

Page 16: ...the screen 0 IRE This is the standard NTSC reference black level for consistent bright ness contrast across all sources 7 5 IRE This will enhance the black level for increased brightness contrast when viewing DVDs 3D NR Noise Reduction On Select to reduce noise from the screen Off Normal Note Note Note Digital Output Setting Up the Audio Options Use the buttons to select the desired item Then pres...

Page 17: ...le channels in the selected Tuner Band This procedure may take a few minutes to complete When finished the lowest channel found will be displayed Press ENTER button to STOP or cancel scan ning 4 Select Rating Level you want using buttons then press the or ENTER button For example if you select up to Level 6 discs that contain Level 7 8 will not play Larger number indicates the program is more inte...

Page 18: ...Select Channel to Add Delete Use the CH buttons to tune in the channel number you wish to add or delete Use the number buttons to move the channel direct ly If you use the navigation button the chan nel will be moved to the next memorized channel 5 Select Setup Using the buttons move the selection bar to Setup then press ENTER to select 2 Select Channel Set Using the buttons move the selection bar...

Page 19: ... is inserted as long as the safety tab of the cassette has been removed Off Auto play is disabled 6 T 120 T 160 T 180 Select VCR Using the buttons move the selection bar to VCR then press ENTER to select 4 On Off VCR Setting If you want your videotapes to play automatically when you insert them turn on Auto Play Open MENU With the VCR in Stop or Play mode press the MENU button 1 Select System Use ...

Page 20: ... Back an Audio CD CDDA 51 Play Option Mode 52 To Program Tracks 53 Photo CD Playback 54 Playing back an MP3 CD 55 Using PIP 56 Playing the VCR 57 Tracking 57 Special VCR Playback Features 58 S VHS Playback 58 Variable Search System 59 Front Display You can set the Front Panel Display to be bright all the time dim all the time dim during power off Open MENU With the DVD in Stop or Play mode press t...

Page 21: ...ul that children s fingers are not caught between the disc tray and the tray chassis when it closes After turning power on it will take a few seconds until the DVD operates CAUTION Press the OPEN CLOSE button 1 Place a disc gently into the tray with the disc s label facing up 2 Playing a Disc Discs that cannot be played DVD Video with a region number other than 1 or ALL 3 9 GB DVD R Disc for Autho...

Page 22: ...remote for more than 1 second Each time you press the button Slow X 1 8 Slow X 1 4 Slow X 1 2 Each time you press the button Slow X 1 8 Slow X 1 4 Slow X 1 2 To return to normal speed playback press the II button Step Motion Play DVD VIDEO DVD RAM DVD RW DVD R During pause mode press the F ADV button on the remote Each time the button is pressed a new frame will appear To return to normal speed pl...

Page 23: ...nt where you want the repeat play to start A and then press the ENTER button at the point where you want the repeat play to Stop B Your DVD Recorder VCR will playback the select ed section repeatedly 4 44 English Using Repeat Play For DVD VIDEO DVD RAM DVD RW DVD R DVD VIDEO only supports chapter repeat Repeat Play Press the QUICK button 1 Use buttons to select Repeat and use button to select the ...

Page 24: ...tles may overlap with your TVs subtitles If this occurs disable the caption function on your TV Some discs allow you to select languages from the disc menu only 2 Press the QUICK button when the Angle is shown on the screen during playback 1 Use to select Angle and use button to select the desired angle 2 When a DVD contains multiple angles of a particular scene you can select the Angle function C...

Page 25: ...scenes can be marked If you press the ENTER button during playback book marks are saved in the order of title Bookmarking with DVD RAM DVD RW VR disc Playing Back a Bookmark Zooming In Press the QUICK button during playback 1 Use buttons to select Zoom and then press the ENTER button will be displayed 2 Press buttons to move to the area you want to enlarge 3 Press the ENTER button The screen will ...

Page 26: ...ck song 3 Playing Back an Audio CD CDDA Press buttons to select the track song to start playback from and then press the ENTER button You can also select the track song by pressing the number buttons on the remote 2 Insert an audio CD CDDA into the disc tray The audio CD menu appears and the tracks songs are played back 1 Each disc has a variety of menu functions available Title List Title refers ...

Page 27: ...utton The play option screen will appear 2 During Playback repeat mode will be highlighted During Stop Play option will be highlighted To Program Tracks You can register a maximum 30 tracks in the playlist 1 Press the QUICK button Repeat Mode will be highlighted 2 Select Play Option using the buttons 3 Press the ENTER button The play option screen will appear Select Playlist using the buttons Play...

Page 28: ...utton Returns to the Album screen The unit enters slide show mode Before the slide show can begin the photo interval slide show speed must be set Each title the ENTER button is speed the picture rotates 90 degree clockwise Each time ENTER button is pressed the photo is enlarged up to 4X Normal 2X 4X 2X Normal 4 Photo CD Playback Insert a photo CD JPEG into the disc tray 1 The screen shown below wi...

Page 29: ...Auto Play to enable the VCR deck to play automatically when you insert a videotape that is missing the Record Safety Tab See pages 36 37 Playing the VCR The Tracking adjustment removes almost the white lines that sometimes appear during playback because of slight dif ferences in recording decks The TRK button will automati cally align the recorded tracks with the playback heads to solve this probl...

Page 30: ...Forward Intro Scan then press the ENTER button Reverse Intro Scan Highlight Reverse Intro Scan then press the ENTER button 3 Use this feature when you want to search for the 0 00 00 counter position on a cassette Press the CLEAR button at the point on the tape where you want to set the counter to 0 00 00 While a cassette is stopped press the QUICK but ton The VCR will rewind or fast forward search...

Page 31: ...D recording methods Before Recording This unit can record on various types of discs Before recording read the following instructions and select the disc type according to your preference Recordable discs This recorder can record on the following discs Disc Types Recording Recording Device Finalizing Additional Recording in format the DVD Recorder VCR DVD RAM VR Mode VR Mode V Mode V Mode Toshiba O...

Page 32: ...e to format your unformatted discs before recording Press the OPEN CLOSE button and place a record able disc on the disc tray 1 Press the CHANNEL button to select the channel you want to record 2 Press the REC Speed button on remote control to select the recording speed quality XP High approx 1 hour SP Standard approx 2 hours LP Low approx 4 hours EP Extended Play approx 6 hours 3 RAM Timer Record...

Page 33: ... 02 Once MOVER SELECC VOLVER SALIDA DVD RAM VR Turn the power off to finish the timer recording will blink if disc or tape is not inserted 4 The timer recording time may differ from the set time depending on disc status and overall timer recording status for example recording times overlapping or when the previous recording ends within 2 minutes before the start time of the next recording Note Pre...

Page 34: ...ss the button to select scheduled Record List and then press the ENTER or button Press the MENU button 1 Timer Record Timer Record Scheduled Record List Setup Timer Rec Copy Title List Playlist Disc Manager MOVE SELECT RETURN EXIT DVD RAM VR VCR Plus Record Press the button to select Timer Rec and then press the ENTER or button 2 3 Editing the settings for a timer recording Editing Timer Record Li...

Page 35: ...ty Tab If the tab is missing you can cover the opening with a small piece of tape Do not cover this opening unless you are sure you want to record over the tape Note Pause Resume Recording Press the REC PAUSE button Press REC again to resume 4 Stop Recording Press the STOP button 5 Note Also refer to the user manual for your External Devices when recording through Line In mode using Audio Video ca...

Page 36: ...change to the VCR and start playback Only if tape is missing the safety tab 2 Add Recording Time Refer to the One Touch Recording OTR 3 Recording DVD and VCR at the same time You can record DVD and VCR at the same time but both modes must be set up to record separately Press the DVD VCR button to set the unit to DVD or VCR mode Choose Line input mode Ch Line1 Line2 or DV for DVD or VCR Choose REC ...

Page 37: ... DVD 00 00 21 Start End 00 00 25 PLAY Copy All DVD RAM VR Select the End position in the same way A copylist will be generated In VCR mode the copylist cannot be saved 3 VCR to DVD Select VCR DVD to copy VCR to DVD VCR DVD scene will be displayed Check the remaining time on the disc 1 DVD RAM VR Copy Disc Manager DVD VCR VCR DVD VCR DVD 00 00 21 Start End 02 00 01 04 PLAY 00 01 04 Copy All DVD RAM...

Page 38: ...title is deleted that title cannot be played again Note Press the button to select an entry to edit and then press the ENTER or button Play Playbacks the selected entry Rename Renames the title of the selected entry Delete Deletes the selected entry from the list Edit Deletes a desired section DVD RAM DVD RW VR mode Protect Locks or unlocks the selected entry 1 Press the MENU button after the oper...

Page 39: ...ves the cursor to the right Delete Deletes the character at the cursor posi tion Clear Deletes all the character inputs Save Registers the character inputs 5 Press the arrow buttons to select Save and then press the ENTER button The changed title is displayed on the title item of the selected entry 6 DVD RAM VR Press the button to select Play and then press the ENTER button The selected entry titl...

Page 40: ...le Protection 5 Follow these directions to delete an entry from the Title List Insert the recorded disc Press the MENU button 1 Press the button to select Title List and then press the ENTER or button or press the TITLE LIST button on the remote control The View Title List screen is displayed 2 Press the button to select an entry you want to delete from Title List and then press the ENTER or butto...

Page 41: ...seconds long If the length of the section to delete is less than 5 seconds you will be prompted with the message The range is too short If the end time precedes the start time you will be prompted with the message End point cannot be marked earlier than start point Note Follow these directions to delete a section from a Title List entry Insert the recorded disc Press the MENU button You cannot rec...

Page 42: ...e ENTER or button or press the PLAY LIST button on the remote con trol The Edit Playlist screen is displayed 3 Press the button to select an entry title you want to edit from the Playlist and then press the ENTER or button The Edit Playlist menu is displayed Play Rename Edit Scene Copy Delete 4 VR mode Search the end point of the section from which you want to create a new scene using the playback...

Page 43: ...NTER button The image and time at the start point are displayed on the Start window 4 Press the arrow buttons to select save and then press the ENTER button The Name you changed is displayed on the title item of the selected playlist entry 3 Renaming Playlist Entries Press the button to select Rename and then press the ENTER button The Rename screen is displayed 1 Select the desired characters usi...

Page 44: ...NTER button The scene you wanted to modify is changed with the selected section If you want to cancel a modification select cancel and then press the ENTER button 6 C Moving a Scene Changing the Position of a Scene Press the arrow buttons to select the scene you want to move change the position and then press the ENTER button 1 Press the buttons to select Move and then press the ENTER button A yel...

Page 45: ... is stopped 1 Press the button to select Playlist and then press the ENTER or button 2 Press the button to select Edit Playlist and then press the ENTER or button or press the PLAY LIST button on the remote control The Edit Playlist screen is displayed 3 Press the button to select an entry title you want to copy to the VCR and then press the ENTER or button The Edit Playlist menu is displayed Play...

Page 46: ... format disc If you press ENTER you will be prompted with the confirmation message All data will be deleted Do you want to continue 3 Use these instructions to format a disc The cartridge write protect tab should be set to the unprotect position The disc protection should also be cleared Press the arrow buttons to select Save and then press the ENTER button A disc name is given to the disc 5 You m...

Page 47: ...n mes sage Do you want to delete all title lists You cannot delete a protected entry If you want to delete a protected entry disable Protection for it on the Lock item Disc Protection When Protected or Cartridge Protection has been set or when a DVD RAM is used data cannot be deleted from a disc 3 Press the buttons to select Yes and then press the ENTER button The disc is deleted 4 Delete All Titl...

Page 48: ...then press the ENTER or button You will be prompted with the message Do you want to unfinalize disc If you select Yes you will be prompted again with the message Disc will be unfinalized Do you want to continue 3 Press the buttons to select Yes and then press the ENTER button The disc is unfinalized A DVD RW can be finalized or unfinalized in Video mode Finalize Unfinalize Mark DVD VIDEO RW DVD RW...

Page 49: ...AM DVD RW DVD R Troubleshooting You cannot use the operation or function due to one of the following reasons 1 Your DVD disc does not support the feature for example angles 2 You ve requested a title chapter or scan time that is out of the correct range The disc does not support all the selected functions In this case some settings you configure on the Setting menu may not work properly Aspect rat...

Page 50: ... cleaning cassette Incorrect head cleaning can permanently damage the video heads If you are unable to solve the problem after reading the above instructions note The model and serial number on the rear of your DVD Recorder VCR The warranty information A clear description of the problem Then contact nearest Toshiba authorized service center Power requirements 120V AC 60Hz Power consumption 45 Watt...

Page 51: ... a period of one 1 year after the date of original retail purchase DURING THIS PERIOD TACP WILL AT TACP S OPTION REPAIR OR REPLACE A DEFECTIVE PART WITH A NEW OR REFURBISHED PART WITHOUT CHARGE TO YOU FOR THE PART PROVIDED THAT IF A DEFECTIVE PART IS REPAIRED OR REPLACED AFTER NINE TY 90 DAYS FROM THE DATE OF ORIGINAL RETAIL PURCHASE THE CONSUMER PAYS ALL LABOR CHARGES INVOLVED IN THE REPAIR OR RE...

Page 52: ...ta dounidenses número 4 631 603 4 577 216 4 819 098 4 907 093 y 6 516 132 Este producto incorpora la tecnología de protección de copyright que está protegida por las patentes estadounidenses y otros derechos de propiedad intelectual El uso de esta tecnología de protección de copyright debe estar autorizada por Macrovision y está prevista sólo para uso doméstico y otros usos de visual ización limit...

Page 53: ... está fabricado bajo licencia de Gemstar Development Corporation Excepciones Notas acerca de la grabación y edición Corte de luz Notas acerca del copyright Precauciones de manejo Maintenance of Cabinet For safety reasons be sure to disconnect the power cord from the wall outlet Do not use benzene thinner or other solvents for cleaning Wipe the cabinet with a soft cloth Antes de conectar otros comp...

Page 54: ... compatibilidad con estos discos DVD RAM con sulte el manual del usuario del reproductor Esta unidad es compatible con DVD RAM sin cartucho o con él pero las lengüetas de protección contra escritura de los discos con cartucho ofrecen más protección en las grabaciones Grabación y reproducción de discos DVD RAM Una vez finalizado un DVD R RW grabado en el modo de vídeo se convierte en DVD Vídeo Pued...

Page 55: ...do VR permite una edición más variada Utilización de un DVD R Este tipo de disco puede formatearse en el formato de vídeo DVD Tras completarse el formateo puede grabar en el disco Puede reproducir este tipo de disco en varios componentes de DVD sólo después de finalizarse Sólo puede utilizar un formato en un DVD RW Puede cambiar del formato de DVD RW a otro Tenga en cuenta que los datos del disco ...

Page 56: ...r canales no codificados seleccionando el canal en el grabador de DVD y vídeo Use este método también si ve canales sin caja de conexiones Método 2 Antena caja de conex iones grabador de DVD y vídeo TV Caja de conexiones con muchos canales codificados Puede grabar canales seleccionando el canal en la caja de conexiones No puede grabar un canal mientras está viendo otro Asegúrese de que la caja de ...

Page 57: ... de conexiones Método 1 Conexión a una clavija de entrada de vídeo Conecte un cable de vídeo amarillo entre la clavija de SAL IDA de VÍDEO amarillo del grabador de DVD y vídeo y la clavija de ENTRADA de VÍDEO amarillo del TV o ampli ficador AV Disfrutará de imágenes de calidad normal Conecte los cables de audio blanco y rojo entre la clavija de SALIDA DE AUDIO ANALÓGICO del grabador de DVD y vídeo...

Page 58: ...ntal ahora el grabador de DVD y vídeo fun cionará en el modo 480P Asegúrese de que el disco se ha detenido completamente antes de cambiar el modo Asegúrese de que coincidan las conexiones con códigos de color Es decir las clavijas de salida de componentes Y Pb y Pr del grabador de DVD y vídeo deben estar conectadas a las clavijas exactas de entrada de componetes correspondientes en el TV de lo con...

Page 59: ...ador o reproductor de DVD a los jacks AUDIO VIDEO LINE IN 1 Esto permite conectar el grabador de DVD y vídeo a otros dispositivos externos y ver o grabar sus salidas Método 1 Conexión de un VCR Receptor STB o reproduc tor de DVD a las clavijas de ENTRADA DE LÍNEA 1 DE AUDIO VÍDEO Método 2 Conexión de una videocámara a los jacks LINE IN 2 Método 3 Conexión de una videocámara a la clavija de ENTRADA...

Page 60: ...nuación podrá controla el televisor utilizando estos botones Marca Código Marca Código TOSHIBA 01 SHARP NEW 08 13 RCA GE 02 SANYO 09 SONY 03 MAGNAVOX 10 MITSUBISHI 04 GOLDSTAR 11 JVC 05 SAMSUNG 12 HITACHI 06 ZENITH 14 PANASONIC 07 15 PIONEER 16 Botón Función POWER Utilizado para encender y apagar el televisor INPUT SEL Utilizado para seleccionar una fuente externa VOL o Utilizado para ajustar el v...

Reviews: