2 SETTING ITEMS (ADMIN)
58 GENERAL
Setting the calibration and registration display level
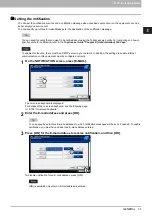
You can set whether this equipment will use the calibration and registration settings set by a user or the administrator.
The relevant buttons ([CALIBRATION], [REGISTRATION]) will appear under the ADMIN menu only or under both the
USER and ADMIN menus according to this setting..
Setting the calibration
You can automatically calibrate the color gradation when the shading and hue are not reproduced accurately in the images
scanned by this machine.
This function allows you to make more precise adjustments than the “AUTO CALIBRATION” in the USER menu.
Whether to allow calibration by not only administrators but also users, is set by DISPLAY LEVEL.
P.58 “Setting the calibration and registration display level”
Place LT or A4 paper (recommended paper) in the drawer
*1
before starting the calibration. If any other paper is
used, calibration may not be performed properly.
If the glass is dirty or any foreign objects are stuck to it, calibration may not be performed properly. Keep the glass
clean.
Do not raise the original cover or the Reversing Automatic Document Feeder
*2
, or open the front cover while the
calibration is in progress. If this does happen, calibration cannot be finished properly.
Interrupt copying is not available during the calibration.
If the color often deviates, call your service technician.
*1 Place paper in the Large Capacity Feeder if one is installed. If not, place paper in the uppermost drawer in which A4 or LT has been
registered.
*2 The Reversing Automatic Document Feeder is an option depending on the model.
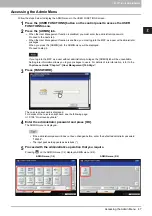
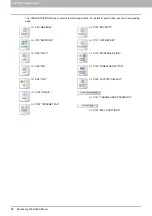
For instructions on how to display the CALIBRATION screen, see the following page:
P.47 “Accessing the Admin Menu”
1
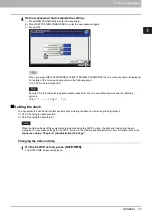
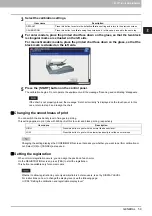
Press the button to calibrate.
The available buttons differ depending on the model.
2
Select the paper type and press [OK].
Depending on the machine settings, the screen to select the paper type may not be displayed. In this case,
proceed to the next step.
Item name
Description
CALIBRATION
USER
— Press this button to display [CALIBRATION] in the ADMIN menu as well as the
USER menu
ADMIN
— Press this button to display [CALIBRATION] only in the ADMIN menu
REGISTRATION
USER
— Press this button to display [REGISTRATION] in the ADMIN menu as well as the
USER menu
ADMIN
— Press this button to display [REGISTRATION] only in the ADMIN menu
Item name
Description
COPY
Press this button to calibrate for copy jobs.
Press this button to calibrate for print jobs.
600 dpi PRINT
Press this button to calibrate for 600 dpi print jobs.
1200 dpi PRINT
Press this button to calibrate for 1200 dpi print jobs.
Summary of Contents for DIGITAL Series
Page 1: ...MULTIFUNCTIONAL DIGITAL COLOR SYSTEMS MULTIFUNCTIONAL DIGITAL SYSTEMS MFP Management Guide ...
Page 8: ...6 CONTENTS ...
Page 34: ...1 SETTING ITEMS USER 32 ADDRESS 6 The new group is created and it appears on the touch panel ...
Page 114: ...2 SETTING ITEMS ADMIN 112 SECURITY 4 Press OK to reboot the equipment The equipment reboots ...
Page 130: ......
Page 154: ......
Page 184: ...4 APPENDIX 182 List Print Format PS3 font list Output example of the PS3 Font List ...
Page 185: ...4 APPENDIX List Print Format 183 4 APPENDIX PCL font list Output example of the PCL Font List ...
Page 186: ......
Page 190: ...188 INDEX ...


