background image

2

EN

2

EN

PRECAUTIONS

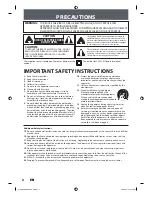
WARNING: 


TO REDUCE THE RISK OF FIRE OR ELECTRIC SHOCK, DO NOT EXPOSE THIS 
APPARATUS TO RAIN OR MOISTURE.
APPARATUS SHALL NOT BE EXPOSED TO DRIPPING OR SPLASHING AND NO OBJECTS 
FILLED WITH LIQUIDS, SUCH AS VASES, SHALL BE PLACED ON THE APPARATUS.

CAUTION:


TO REDUCE THE RISK OF ELECTRIC SHOCK, DO NOT 
REMOVE COVER (OR BACK). NO USER SERVICEABLE 
PARTS INSIDE. REFER SERVICING TO QUALIFIED 
SERVICE PERSONNEL.

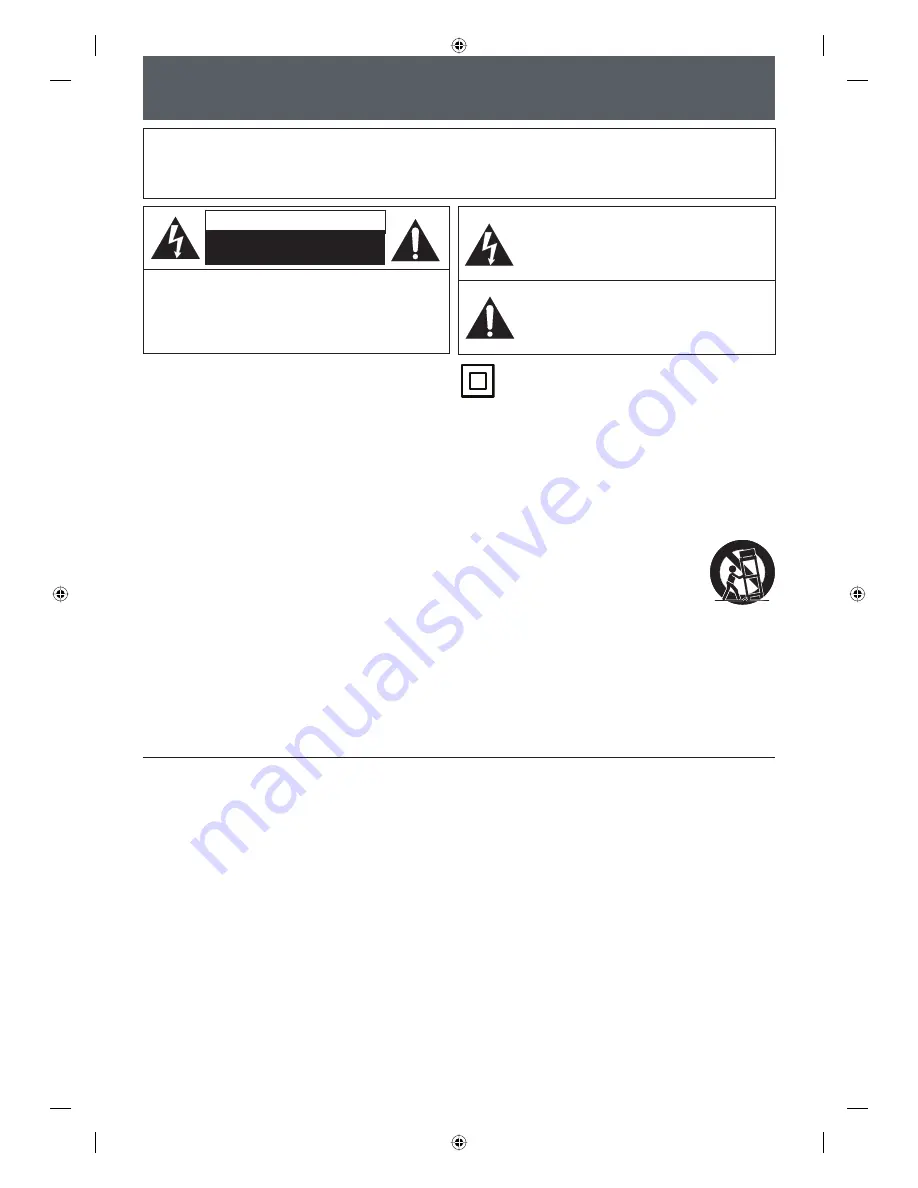
CAUTION

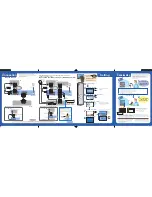
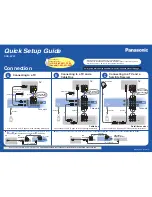
RISK OF ELECTRIC SHOCK 

DO NOT OPEN

The exclamation point within an equilateral triangle is 
intended to alert the user to the presence of important 
operating and maintenance (servicing) instructions in 
the literature accompanying the appliance.

The lightning flash with arrowhead symbol, within an 
equilateral triangle, is intended to alert the user to the 
presence of uninsulated “dangerous voltage” within the 
product’s enclosure that may be of sufficient magnitude 
to constitute a risk of electric shock to persons.

IMPORTANT SAFETY INSTRUCTIONS

1.  

Read these instructions.

2.  

Keep these instructions.

3.  

Heed all warnings.

4.  

Follow all instructions.

5.  

Do not use this apparatus near water.

6.  

Clean only with dry cloth.

7.    

Do not block any ventilation openings. Install in 
accordance with the manufacture’s instructions.

8.    

Do not install near any heat sources such as radiators, 
heat registers, stoves, or other apparatus (including 
amplifiers) that produce heat.

9.    

Do not defeat the safety purpose of the polarized or 
grounding-type plug. A polarized plug has two blades 
with one wider than the other. A grounding type plug 
has two blades and a third grounding prong. The wide 
blade or the third prong are provided for your safety. If 
the provided plug does not fit into your outlet, consult 
an electrician for replacement of the obsolete outlet.

10.    

Protect the power cord from being walked on 
or pinched particularly at plugs, convenience 
receptacles, and the point where they exit from the 
apparatus.

11.    

Only use attachments/accessories specified by the 
manufacturer.

12.    

Use only with the cart, stand, tripod, 

bracket, or table specified by the 
manufacturer, or sold with the apparatus. 
When a cart is used, use caution when 
moving the cart/apparatus combination to 
avoid injury from tip-over.

13.    

Unplug this apparatus during lightning storms or 
when unused for long periods of time.

14.    

Refer all servicing to qualified service personnel. 
Servicing is required when the apparatus has been 
damaged in any way, such as power-supply cord or 
plug is damaged, liquid has been spilled or objects 
have fallen into the apparatus, the apparatus has 
been exposed to rain or moisture, does not operate 
normally, or has been dropped.

The important note is located on the rear or bottom of the 
cabinet.


The symbol for CLASS ll (Double Insulation)

Additional Safety Instructions
15.  

Do not overload wall outlets; extension cords, or integral convenience receptacles as this can result in a risk of fire or 
electric shock.

16.  

Apparatus shall not be exposed to dripping or splashing and no objects filled with liquids, such as vases, shall be 
placed on the apparatus.

17. 

Keep your fingers well clear of the disc tray as it is closing. Neglecting to do so may cause serious personal injury.

18. 

 Do not place a heavy object on or step on the apparatus. The object may fall, causing serious personal injury and 
serious damage to the apparatus.

19. 

 Do not use a cracked , deformed, or repaired disc. These discs are easily broken and may cause serious personal 
injury and apparatus malfunction.

20.  

If the apparatus should smoke or smell, immediately disconnect the power cord from the wall outlet. Wait until the 
smoke or smell stops, then ask your dealer for a check and repair. Neglecting to do so may cause fire.

21. 

While it is thundering, do not touch the connecting cables or the apparatus.

22. 

Warning: To prevent the spread of fire, keep candles or other open flames away from this product at all times.

E7PCBUD_DKR40KU_EN.indd   2

E7PCBUD_DKR40KU_EN.indd   2

2/5/2009   10:32:33 AM

2/5/2009   10:32:33 AM

Summary of Contents for DKR40 - DVD Recorder With 1080p Upconversion

Page 1: ...e they exit from the apparatus 11 Only use attachments accessories specified by the manufacturer 12 Use only with the cart stand tripod bracket or table specified by the manufacturer or sold with the apparatus When a cart is used use caution when moving the cart apparatus combination to avoid injury from tip over 13 Unplug this apparatus during lightning storms or when unused for long periods of t...

Page 2: ...re or the like LASER SAFETY This apparatus employs a laser Only a qualified service person should remove the cover or attempt to service this apparatus due to possible eye injury CAUTION Use of controls or adjustments or performance of procedures other than those specified herein may result in hazardous radiation exposure CAUTION Visible and invisible laser radiation when open and interlock defeat...

Page 3: ...lied Accessories remote control with batteries AAx2 Installation Location Avoid the Hazards of Electrical Shock and Fire About Copyright Note to CATV system installer RCA audio video cables quick setup guide owner s manual OWNER S MANUAL return stop sheet HDMI cable High Speed HDMI Cable Dew Condensation Warning Dew condensation may form inside the unit in the following conditions If so do not use...

Page 4: ...he surfaces of the discs Always store the disc in its protective case when it is not used Maintenance If the remote control does not work properly you can test if the remote control sends out the infrared signal with AM radio or a digital camera including built in camera of cellular phone It will help to define the cause of malfunction With an AM radio Tune an AM radio to a station with no broadca...

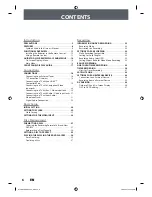
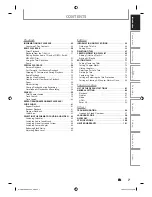
Page 5: ...OCK 25 Clock Setting 25 SETTINGS FOR THE VIDEO INPUT 26 Disc Management FORMATTING A DISC 27 Choosing the Recording Format of a Brand New DVD RW 27 Reformatting a Disc Manually 28 SETTING A DISC TO PROTECT 29 PLAYING THE DISCS IN OTHER DVD PLAYERS 30 Auto Finalizing 30 Finalizing a Disc 31 Recording INFORMATION ON DVD RECORDING 33 Recording Mode 33 Restrictions on Recording 33 SETTINGS FOR A RECOR...

Page 6: ...ram Playback 62 Slide Show 62 SELECTING THE FORMAT OF AUDIO AND VIDEO 63 Switching Subtitles 63 Switching Audio Soundtrack 63 Switching Virtual Surround System 64 Switching Camera Angles 64 Reducing Block Noise 64 Adjusting Black Level 65 Editing INFORMATION ON DISC EDITING 66 Guide to a Title List 66 Editing Discs 66 DELETING TITLES 67 CREATING DELETING PLAYLIST 69 Adding Titles to a Playlist 69 ...

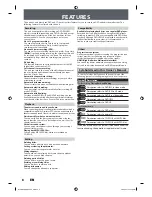
Page 7: ...a desired point on a disc by title chapter track or time Virtual surround system You can enjoy stereophonic space through your existing 2 channel stereo system Playing back MP3 JPEG files You can enjoy MP3 JPEG files which are recorded on CD RW R Playback Available for playing back discs on a regular DVD player Recorded discs can be played back on regular DVD players including computer DVD drives ...

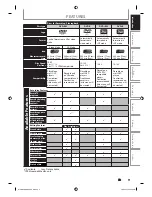
Page 8: ... menu will be created Playable only on VR mode compatible unit Finalization recommended Playable on most DVD players Finalization necessary title menu will be created Playable on DVD RW compatible players Finalization recommended title menu will be created Playable on most DVD players Finalization recommended title menu will be created Available Features Recording Features Record TV programs Reuse...

Page 9: ...ed directly or indirectly by the malfunction of this recorder including without limitation any one of the following Failure to record contents intended to be recorded by the consumer Failure to edit contents as intended by the consumer When a DVD RW R DVD RW R disc created on this recorder is used e g insertion playback recording or editing in another DVD player recorder or personal computer drive...

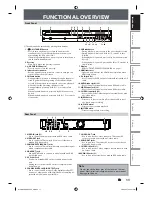
Page 10: ...ble 7 S VIDEO OUT jack Use to connect the S video input of a TV monitor AV receiver or other device with an S video cable 8 AUDIO OUT jacks Use to connect a TV monitor AV receiver or other device with an RCA audio cable 9 S VIDEO IN jack L1 Use to connect the S video output of external device with an S video cable 10 AUDIO IN jacks L1 Use to connect external device with an RCA audio cable Note Do ...

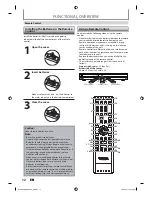
Page 11: ...teries in accordance with applicable laws and regulations If the remote control does not operate correctly or if the operating range becomes reduced replace batteries with new ones When necessary to replace batteries in the remote control always replace both batteries with new ones Never mix battery types or use new and used batteries in combination Always remove batteries from remote control if t...

Page 12: ...nues VR mode DVD RW with the recording mode of LP EP or SLP only 13 REPEAT button Press to display the repeat menu 14 REC MODE button Press to switch the recording mode 15 HDMI button Press to set the HDMI video resolution 16 I y ON STANDBY button Press to turn on the unit or to turn the unit into the standby mode To completely shut down the unit you must unplug the AC power cord If timer programm...

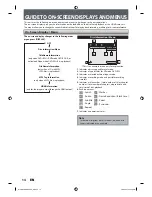
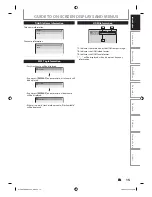
Page 13: ... in playback MP3 Tag Information only when a MP3 file is in playback HDMI Information only for the images output through the HDMI output L1 Rear 1 5 1 5 RW VR ORG 0 01 00 1 23 45 SP 1 53 2 5 6 1 3 7 4 4 This is an example screen only for explanation 1 Indicates a disc type and format mode 2 Indicates a type of titles for VR mode DVD RW 3 Indicates a selected external input mode 4 Indicates a recor...

Page 14: ...Information GUIDE TO ON SCREEN DISPLAYS AND MENUS Title name information Title Name My Title File name information File Name My File Title File Name Information First track name will be displayed Track Name If you press DISPLAY one more time artist name will be displayed Artist Name If you press DISPLAY one more time album name will be displayed Album Name If there is no artist track or album name...

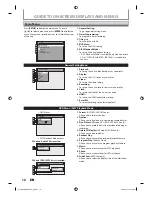
Page 15: ...g To program a timer recording 3 Title List To call up the title list 4 DVD Menu To set up the DVD setting 5 DISC Playback Mode To set up the disc playback setting DISC Playback Mode is available only when an audio CD a CD RW R with MP3 JPEG files is inserted into the unit Setup Timer Programming Title List DVD Menu DISC Playback Mode General Setting 1 2 3 4 5 1 2 3 4 5 DVD Menu DISC Playback Mode...

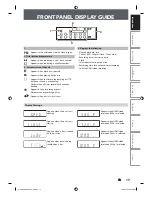
Page 16: ...on with the clock display 2 Title track and chapter mark Appears when indicating a title track number Appears when indicating a chapter number 3 Current status of the unit Appears when playback is paused Appears when playing back a disc Appears when the timer programming or OTR has been set and is proceeding Flashes when all timer recordings have been finished Appears during recording process Flas...

Page 17: ...in this connection are as follows RCA audio cable L R x 1 RCA video cable x 1 Please purchase the rest of the necessary cables at your local store TV Connection Overview If Your TV has Refer to Standard Quality Higher Quality If your device has only an ANT IN jack page 19 COMPONENT VIDEO IN AUDIO IN L R VIDEO IN page 21 page 20 page 20 page 21 S VIDEO IN HDMI IN ANT IN VIDEO IN AUDIO IN L R IN L R...

Page 18: ...n AV amplifier support a copyright protection system called HDCP high bandwidth digital content protection system HDCP is copy protection technology that comprises data encryption and authentication of the connected AV device This unit supports HDCP Please read the operating instructions of your display device or AV amplifier for more information Note for HDMI Connection Because HDMI is an evolvin...

Page 19: ...A audio cable Y PB CB PR CR Green Blue Red Green Blue Red COMPONENT VIDEO IN AUDIO IN L R IN Y PR CR PB CB L R L R S VIDEO AUDIO IN L1 AUDIOOUT HDMI OUT COMPONENT VIDEO OUT COAXIAL DIGITAL AUDIO OUTPUT PCM BITSTREAM OUT S VIDEO VIDEO IN VIDEO OUT VIDEO IN RCA component video cable Supplied cables used in this connection are as follows RCA audio cable L R x 1 Please purchase the rest of the necessa...

Page 20: ... antenna cable TV company or Set channel 3 or 4 Set channel 3 or 4 RF coaxial cable RF coaxial cable RF coaxial cable ANT IN ANT OUT L R VIDEO OUT AUDIO OUT external tuner Note RF modulator is not supplied with this unit You need to purchase it at your local store The quality of picture may become poor if this unit is connected to an RF modulator Supplied cables used in this connection are as foll...

Page 21: ...XIAL rear of this unit Dolby Digital decoder digital audio coaxial cable digital audio coaxial input jack IN Y PR CR PB CB L R VIDEO OUT S VIDEO AUDIOOUT HDMI OUT COMPONENT VIDEO OUT VIDEO IN L R AUDIO IN L1 OUT S VIDEO COAXIAL DIGITAL AUDIO OUTPUT PCM BITSTREAM HDMI OUT rear of this unit AV receiver amplifier with an HDMI input jack HDMI IN IN Y PR CR PB CB L R VIDEO OUT S VIDEO AUDIOOUT COMPONEN...

Page 22: ...can enjoy Multi channel Surround System which reproduces the original sound as truthfully as possible Multi channel Surround System is developed by the DTS Inc Playing back a DVD using incorrect settings may generate noise distortion and may also damage the speakers For audio CD and MP3 files 2 channel PCM will be output regardless of the Dolby Digital setting If the connected device is not compat...

Page 23: ...the Initial Setting menu Initial Setting Select the language for Setup display OSD Language English Français Español 4 Use K L to select your desired language then press ENTER to set language 5 Press ENTER to activate Clock Setting Initial Setting ENTER Set Clock RETURN Exit Initial Setting Clock Setting 6 Proceed to step 4 in Clock Setting on page 25 SE R0265 OPEN CLOSE INPUT SELECT HDMI ABC GHI ...

Page 24: ...00 AM Your setting will be activated The clock start counting when you press ENTER 5 Press SETUP to exit Note Your clock setting will be lost if either there is a power failure or this unit has been unplugged for more than 30 seconds For setting the day year hour and minute the Number buttons can also be used You can set the built in calendar from the year 2008 up to 2058 Clock Setting SE R0265 OP...

Page 25: ...to use VIDEO IN jack select Video In then press ENTER If you want to use S VIDEO IN jack select S Video In then press ENTER General Setting Playback Display Video Recording Clock HDMI Reset All Progressive TV Aspect Select Video L1 Rear Video In S Video In 7 Press SETUP to exit SE R0265 OPEN CLOSE INPUT SELECT HDMI ABC GHI PQRS TUV SPACE SETUP DISPLAY AUDIO TOP MENU CLEAR RETURN MENU LIST WXYZ JKL...

Page 26: ... press ENTER DVD Menu Format Finalize Start Format Mode 5 Use K L to select Video mode or VR mode then press ENTER 6 Press SETUP to exit 7 Insert a brand new disc Formatting will start Formatting 90 8 Formatting is completed 100 is indicated Note The recording format setting is effective only for DVD RW You cannot change the recording format for a DVD R and DVD RW R You cannot mix two formats on o...

Page 27: ...K L to select Yes then press ENTER 5 Use K L to select Yes then press ENTER Formatting will start If you want to cancel formatting select No Are you sure Yes No 6 Formatting is completed 100 is indicated Formatting 100 Note When you reformat the disc the contents of the disc are erased For DVD RW make sure that the recording format is set to the desired mode See steps 1 to 6 in Choosing the Record...

Page 28: ...sing the titles you can protect them from DVD Menu menu Note To cancel the disc protect When you insert a disc protected with this unit Disc Protect ON OFF will appear instead of OFF ON DVD Menu Format Finalize Disc Protect ON OFF Delete All Playlists To release the protection for the disc select Disc Protect ON OFF at step 3 then follow rest of the procedures SE R0265 OPEN CLOSE INPUT SELECT HDMI...

Page 29: ...ng will be activated 6 Press SETUP to exit You can finalize discs automatically using this function You can use this function to finalize discs after finishing timer recordings and at the end of the disc space Auto Finalizing Note This function is not available after finishing daily or weekly program recording SE R0265 OPEN CLOSE INPUT SELECT HDMI ABC GHI PQRS TUV SPACE SETUP DISPLAY AUDIO TOP MEN...

Page 30: ...ed You will need to finalize discs to play back on other DVD players Finalizing may take several minutes up to an hour Since the process of the finalization fills empty space of the disc a shorter recording period on the disc will require a longer time period for finalization Do not unplug the power cord during finalization SE R0265 OPEN CLOSE INPUT SELECT HDMI ABC GHI PQRS TUV SPACE SETUP DISPLAY...

Page 31: ...ll up the title menu by pressing MENU LIST Even after DVD RW is finalized you can still record or edit After you finalize DVD RW R or DVD R you cannot edit or record anything else on that disc If you insert a DVD RW finalized with this unit Undo Finalization will appear instead of Finalize at step 3 To release the finalization of the DVD RW disc select Undo Finalization at step 3 DVD Menu Format U...

Page 32: ... copy of those recordings CPRM recordings can only be made on CPRM compatible DVD RW formatted in VR mode and CPRM recordings can only be played back on DVD players that are specifically compatible with CPRM Making discs playable in other DVD players Finalize For DVD RW R it is necessary to finalize the disc after recording in order to play back the disc on other DVD players Refer to pages 30 32 F...

Page 33: ...ng additional record to the disc that has a title list created by other units 5 Press SETUP to exit Note This function is also available for unfinalized DVD R Make Recording Compatible Setting for Auto Chapter You can set a specified time for chapter marks 1 Press SETUP and use K L to select General Setting then press ENTER 2 Use K L to select Recording then press ENTER Recording menu will appear ...

Page 34: ...the recording mode is set at other than XP the unit records Dolby Digital audio automatically even if you selected PCM Recording Audio Select XP Setting Aspect Ratio for Video Mode Recording You can set aspect ratio for video mode recording 1 Follow step 1 to 2 on Recording Audio Select XP 2 Use K L to select Aspect Ratio Video mode then press ENTER 3 Use K L to select your desired setting then pr...

Page 35: ... exit the title list 4 Press REC MODE repeatedly to select a recording mode Refer to Recording Mode on page 33 SP 1 53 5 Press INPUT SELECT to select the appropriate external input position L1 L2 to which your external tuner is connected Then select the desired channel to record on the external tuner Follow the steps to record TV programs SE R0265 OPEN CLOSE INPUT SELECT HDMI ABC GHI PQRS TUV SPAC...

Page 36: ...cording within the specified time press STOP C Note When you press REC I recording starts immediately and continues until the disc is full or you stop recording When the unit clock has not been set the space for a date and time of title names will be blank You cannot change the recording mode during the recording pause mode Note for one touch timer recording The remaining recording time will be di...

Page 37: ...of a Timer Program Contains date time external input recording mode of the program 2 Current date and time 3 Recording mode and length of the recording 4 Timer program list 5 Total number of pages and current page 2 pages maximum Note If you have not set the clock yet Clock Setting menu will appear instead of the timer programming list at step 1 Continue with the step 3 in Clock Setting on page 25...

Page 38: ... complete recording the program Date Auto 1 00 Start End L1 L2 Mode JAN 02 1 00AM 2 00AM L1 Auto Auto is only available for one program in the timer program list The recording may be cut short when the available recording space of the disc is too limited 7 Press ENTER when all items are entered After displaying an instructive message for 10 seconds timer program list will appear Press ON STANDBY t...

Page 39: ...pping Recording did not start at the start time E23 24 Unrecordable disc E25 28 Copy prohibited program E29 Disc protected E41 Power failed E30 Disc full E42 No disc when recording E31 32 Already 99 titles recorded E43 Already 49 titles recorded E33 Already 999 chapters recorded E44 Already 254 chapters recorded E34 No space for Control information E45 Copy prohibited program E35 PCA full 1 E46 It...

Page 40: ...it attempts to record Please insert a recordable disc When all the timer recording is completed flashes To play back or eject the recorded disc press I y ON STANDBY first then select the recorded title and press PLAY B or OPEN CLOSE A to remove the disc During timer recording or timer standby mode will appear any operations on the unit will not be available To make these operations available press...

Page 41: ...u are using before making a recording Refer to SETTINGS FOR THE VIDEO INPUT on page 26 1 Select the desired recording mode Refer to Recording Mode on page 33 2 Press SATELLITE LINK In a second the unit will be turned into the standby mode automatically as it goes into the satellite link standby mode To cancel the satellite link function while in the satellite link standby mode Press SATELLITE LINK...

Page 42: ...can record the satellite link by using S video input jacks on the rear panel Refer to page 44 for more information When a regular timer recording and the satellite link timer recording are overlapped those recordings are recorded as illustrated below example 2 actual recording timer recording satellite link example 3 actual recording timer recording satellite link The first 2 minutes at the longes...

Page 43: ...nnection to an External Device IN OUT PR CR L R VIDEO IN S VIDEO AUDIO IN L1 S VIDEO HDMI OUT COMPONENT VIDEO OUT DIGITAL AUDIO OUTPUT PCM BITSTREAM COAXIAL IN L R VIDEO VIDEO IN IN VIDEO VIDEO OUT OUT S VIDEO AUDIO IN L1 VIDEO IN VIDEO OUT VIDEO OUT I y ON STANDBY DVD VIDEO RECORDER DKR40 DV IN S VIDEO VIDEO L R L2 L3 1080p 1080i 720p 480p OPEN CLOSE OPEN CLOSE SKIP STOP PLAY REC AUDIO OUT L R VI...

Page 44: ... using INPUT SELECT 4 Press REC MODE repeatedly to select a recording mode Refer to Recording Mode on page 33 5 Press I REC on the unit to start recording 6 Start playback on the external device to record from 7 Press CSTOP on the unit to stop recording This operation may take awhile to be completed Before recording from an external device refer to the instructions for the connection on page 44 I ...

Page 45: ...NTER to display the item selection and then use K L to select the audio you wish to output Press ENTER again to activate Select Stereo1 to dub the stereo sound Select Stereo2 to dub the sound with after recording sound Select Mix to dub the stereo1 and stereo2 4 Indicator of dubbing function When the unit is ready for dubbing Start Rec will appear When the unit is in dubbing Pause Rec will appear ...

Page 46: ...k the DVC and find the point where you wish to start dubbing Then press STOP C when you come to the desired start point 6 Use K L to select Start Rec then press ENTER The dubbing will start 7 To stop dubbing Use K L to select Control then press ENTER Use K L to select DVD then press ENTER Then press STOP C Preparing for DV to DVD dubbing Insert a recordable disc and make sure your DVC is in video ...

Page 47: ...e when the unit detects the video signal again When the DVC is in camera mode refer to Guide to DV and On Screen Display on page 46 You cannot dub from DVC during timer standby mode During timer standby of either component you cannot select L3 DV IN even on the component which is not in timer standby Date time and cassette memory data will not be recorded Pictures with a copy guard signal cannot b...

Page 48: ... stories Chapter Divided contents of a title This corresponds to a chapter in a story Track Divided contents of an audio CD Folder Divided contents of a MP3 JPEG data disc Consists of number of files Each title chapter or track folder or file is assigned a number which is called title number chapter number track number folder number or file number respectively Some discs may not have these numbers...

Page 49: ...u are playing back a DVD video a menu may appear Refer to Using the Title Disc Menu on page 53 5 Press STOP C once to stop playback temporarily Refer to Resume Playback on page 54 Note Some discs may start playback automatically SE R0265 OPEN CLOSE INPUT SELECT HDMI ABC GHI PQRS TUV SPACE SETUP DISPLAY AUDIO TOP MENU CLEAR RETURN MENU LIST WXYZ JKL MNO DEF ENTER SKIP REV PLAY REC MODE ZOOM REC REP...

Page 50: ...nce to stop playback temporarily Refer to Resume Playback on page 54 To eject the disc press OPEN CLOSE A to open the disc tray then remove the disc before turning off the unit Note You can also start playback by pressing PLAY B instead of ENTER At step 4 you can press SKIP G or press B when the title on the lower right of the title list is highlighted to display the next page and press SKIP H or ...

Page 51: ...s PLAY B ENTER or B to move to any lower hierarchies Press s or RETURN to move back to the previous hierarchy Hints for audio CD tracks and MP3 JPEG files Folders are shown by Audio CD tracks are shown by MP3 files are shown by 3 JPEG files are shown by The system can recognize up to 255 folders and up to 99 tracks 999 files Letters of a file folder name overflowing the given space will be display...

Page 52: ...TER to enable your selection 3 Press STOP C to exit the disc menu 1 During playback press PAUSE F Playback will be paused and sound will be muted F 2 Press PLAY B to return to the normal playback Note You can select a numbered menu with the Number buttons also Menus vary among discs Refer to the information accompanying the disc for details MENU LIST or TOP MENU will not always be effective for al...

Page 53: ...standby mode To cancel the resume playback and start playing back the disc from the beginning press STOP C again while the playback is stopped Resume Playback Note For MP3 JPEG files playback will resume from the beginning of the file at which playback was stopped Note Forward reverse speed will be indicated with icons as follows forward approx speed 2x 20x 40x reverse approx speed 5x 20x 40x 1 Du...

Page 54: ...M 2 channel during rapid playback Step by Step Playback 1 During playback press PAUSE F Playback will be paused and sound will be muted 2 Press SKIP i repeatedly Playback will advance one frame at a time when you press SKIP i with the sound muted To play back step by step backward Press SKIP j repeatedly Every time you press the button the playback will go backward by one frame Press and hold SKIP...

Page 55: ... press ENTER Zoom playback will start This feature allows you to assign a specific point on a disc to be called back later 1 During playback press DISPLAY to bring up the display menu If the display menu is already shown skip to step 2 2 Use B to select to display the marker list e g DVD video 1 5 1 5 DVD 0 01 00 1 23 45 Video 3 Use K L to select a desired marker number When it reaches the desired...

Page 56: ... 1 1 0 01 00 1 23 45 RW VR ORG LP 1 01 Resume ON If you play back the fast forward playback and the playback reaches the scene recorded 1 minute before the forwarding playback will automatically return to the normal playback 2 Press STOP C once to stop playback The resume message will appear Screen for the current recording L1 Rear 6 1 1 23 45 LP 1 01 Resume ON RW VR ORG To stop recording press ST...

Page 57: ...e normal playback Simultaneous Playback and Recording SPECIAL PLAYBACK 3 Press STOP C once to stop playback The resume message will appear Screen for the current recording L1 Rear 3 1 1 30 25 LP 1 01 Resume ON RW VR ORG To stop recording press STOP C again To cancel the resume press STOP C again Note Playback image may freeze momentarily using this function However this does not affect the recordi...

Page 58: ...Search Note In search mode display total numbers of each search contents title chapter time are shown as a denominator 1 5 1 5 0 01 00 1 23 45 DVD Video total number of titles total number of chapters total time of the title Using SKIP j SKIP i 1 During playback press SKIP i to skip the current track file and move to the next The track file will move forward one at a time To go back to the beginni...

Page 59: ...r next to will be highlighted To move to the number next to press B When time search is not available and time counter are not displayed 3 Use K L B or the Number buttons to enter a desired time to search then press ENTER After the search playback will start automatically Note Time search is available only in the same track file or title Time Search SEARCH E7PCBUD_DKR40KU_EN indd 60 E7PCBUD_DKR40K...

Page 60: ... track or file will be played back repeatedly Group The current folder will be played back repeatedly You can play back a disc randomly instead of playing back in the original order 1 Press SETUP in stop mode 2 Use K L to select DISC Playback Mode then press ENTER DISC Playback Mode menu will appear For MP3 use K L to select Music then press ENTER For JPEG use K L to select Photo then press ENTER ...

Page 61: ...ogram Play then press ENTER 4 Use K L to select a desired track then press ENTER or B DISC Playback Mode Program Play 0 00 00 Total Repeat this step until you program all the desired tracks 5 Press PLAY B DISC Playback Mode Program Play 0 31 07 Total 09 04 10 06 Program playback will start Slide Show You can select the display time between 5 seconds and 10 seconds 1 Follow steps 1 and 2 in Program...

Page 62: ...on the contents of the disc you are playing back When playing back a DVD video recorded with 2 or more soundtracks these are often in different languages you can switch them during playback When playing back audio CD you can switch L R stereo L left or R right 1 During playback press DISPLAY or AUDIO to bring up the display menu If the display menu is already shown skip to step 2 If you press AUDI...

Page 63: ...s DISPLAY 2 Use B to select then press ENTER 1 5 1 5 DVD 0 01 00 1 23 45 Video Angle icon appears when a switching camera angle is available Angle will switch each time you press ENTER 1 During playback press DISPLAY 2 Use B to select to display the selection menu e g DVD video 1 5 1 5 DVD 0 01 00 1 23 45 Video 3 Use K L to select Noise Reduction then press ENTER 1 5 1 5 DVD 0 01 00 1 23 45 Noise ...

Page 64: ...NTER 1 5 1 5 DVD 0 01 00 1 23 45 Noise Reduction OFF Black Level OFF Video 4 Use K L to select OFF or ON then press ENTER Your setting will be activated 1 5 1 5 DVD 0 01 00 1 23 45 OFF Video ON OFF Shows the original picture as recorded ON Make the darker parts of the picture more visible Note You can adjust black level setting only during playback The setting will be kept even when the unit is tu...

Page 65: ...t the title list Edit the recorded disc You will find editing discs is easy This unit offers convenient edit functions which are possible only with DVD RW R and DVD RW R You can edit the following from a title list Assigning a name to a title Dividing a title Combining titles Adding titles to a playlist Erasing all playlist Setting or releasing the title protection Adding or deleting chapter marks...

Page 66: ...ord a new title You cannot record a new title You cannot record a new title You can record a new title Delete The Full Recorded disc The Full Recorded disc Delete The Full Recorded disc After the disc is fully recorded DVD RW DVD RW DVD R DVD R When a title is deleted from DVD RW in VR mode the recordable disc space will be increased When the last title is deleted from DVD RW in video mode or DVD ...

Page 67: ...lect Title Delete then press ENTER Play From Start Edit Title Delete Add To Playlist 4 Use K L to select Yes then press ENTER Delete this title Yes No After that Are you sure will appear select Yes and then press ENTER Title will be deleted 5 Press RETURN or STOP C to exit Data will be written onto the disc momentarily Writing to Disc 90 This operation may take awhile to be completed SE R0265 OPEN...

Page 68: ... Add To Playlist 4 Use K L to select Yes then press ENTER Create a Playlist Yes No The title is added to playlist 5 Press RETURN or STOP C to exit Data will be written onto the disc momentarily This operation may take awhile to be completed Note When a playlist contains 99 titles or more or 999 chapters or more Add to Playlist cannot be selected CREATING DELETING PLAYLIST SE R0265 OPEN CLOSE INPUT...

Page 69: ...nu Format Finalize Disc Protect OFF ON Delete All Playlist Delete entire play list Yes No Are you sure Yes No Playlist is deleted Data will be written onto the disc momentarily This operation may take awhile to be completed Note Deleting a playlist will not increase the available recording time on the disc SE R0265 OPEN CLOSE INPUT SELECT HDMI ABC GHI PQRS TUV SPACE SETUP DISPLAY AUDIO TOP MENU CL...

Page 70: ... exit Data will be written onto the disc momentarily This operation may take awhile to be completed You can put a name on the title and change it from this menu 1 In stop mode press TOP MENU Title list original or playlist will appear For VR mode DVD RW press MENU LIST to switch between Original and Playlist 2 Use K L s B to select a desired title then press ENTER e g VR mode DVD RW original Title...

Page 71: ...lete all letters Use s B to move the cursor to the left and right You can enter up to 30 letters Note Undefined letters in a title name are shown by If you delete them adjoining letters may change to or other Guide to Edit Title Name EDITING DISCS Putting Names on Titles cont d SE R0265 OPEN CLOSE INPUT SELECT HDMI ABC GHI PQRS TUV SPACE SETUP DISPLAY AUDIO TOP MENU CLEAR RETURN MENU LIST WXYZ JKL...

Page 72: ...No JAN 1 09 1 00AM L1 LP 1 Chapter 2 3 ORG 1 25 47 A new chapter mark will be added 6 Press RETURN 7 Press RETURN again and then RETURN or STOP C to exit Data will be written onto the disc momentarily This operation may take awhile to be completed You can put chapter marks in each title Once a chapter is marked you can use it for the chapter search feature Note Maximum numbers of chapter for each ...

Page 73: ...l appear 5 Use SKIP H or SKIP G to decide the chapter to be hidden 6 Use K L to select Hidden then press ENTER Edit Hide Chapter Visible Hidden JAN 15 09 1 00AM L1 LP 1 Chapter 2 3 Hidden VR 1 25 47 7 After this operation is completed press RETURN thrice to exit Data will be written onto the disc momentarily This operation may take awhile to be completed If you want hidden chapters to be Visible s...

Page 74: ... a scene is deleted from an original the playlist related to the original will be deleted You cannot select Scene Delete if the number of chapter marks in the original or playlist is more than 999 Depends on the content there is a case that you cannot select Scene Delete before the number of chapter marks reaches 999 The recordable disc space will not increase even after deleting a part of a title...

Page 75: ...dicated in red You can check the preview by pressing ENTER Before and after 5 seconds of the deleted point will be playback for preview EDITING DISCS Deleting a Part of a Title cont d 4 Use K L to select Delete then press ENTER Edit Scene Delete Start End Preview Delete JAN 1 09 1 00AM L1 LP 1 PL 1 47 00 5 Use K L to select Yes then press ENTER Are you sure will appear Select Yes using K L and the...

Page 76: ...K L to select Title Dividing then press ENTER 6 Use K L to select Yes then press ENTER e g VR mode DVD RW playlist Edit Title Dividing Yes No JAN 1 09 1 00AM L1 LP 1 PL 1 25 47 The title will be divided into two new titles Both title names are identical For DVD RW Data will be written onto the disc momentarily Writing to Disc 90 This operation may take awhile to be completed For VR mode DVD RW Pro...

Page 77: ... No The two titles will combine into a single title Title List 1 6 PL 1 4 5 6 2 3 JAN 1 09 12 00AM L1 LP 12 00AM 2 30 00 JAN 1 09 L1 LP 5 Press RETURN or STOP C to exit Data will be written onto the disc momentarily This operation may take awhile to be completed Playlist You can combine two titles into a single title Note You cannot select the same title twice and combine it into a single title If...

Page 78: ...ll appear on the title in the original list 4 Press RETURN and then RETURN or STOP C to exit Data will be written onto the disc momentarily This operation may take awhile to be completed To protect a whole disc VR mode DVD RW DVD RW R only Select Disc Protect OFF ON from the DVD Menu then select Yes Refer to SETTING A DISC TO PROTECT on page 29 To prevent the accidental editing or erasing of the t...

Page 79: ...ode DVD RW you can set or edit chapter at every time interval You can clear the chapter mark too You can specify the interval of chapter marks for titles last more than 5 minutes Note You cannot select a chapter mark interval that exceeds the length of a title The length of chapters may slightly deviate from the one specified at the step 3 A chapter mark may be delayed depending on the recording c...

Page 80: ...anguage page 86 Original English French Spanish Other Set the language for audio Subtitle Language page 86 OFF English French Spanish Other Set the language for subtitles Angle Icon page 86 ON OFF Set whether to display the angle icon or not Still Mode page 86 Auto Field Frame Set the type of still image in pausing playback Display OSD Language page 87 English Français Español Set the language for...

Page 81: ...page 30 Disc Full ON OFF Set the unit to finalize the disc automatically End of Timer Rec ON OFF Aspect Ratio Video mode page 35 Auto 4 3 16 9 Set a aspect ratio for video mode recording Make Recording Compatible page 34 ON OFF Set to prohibit additional recording OFF or to replace the title list after recording ON Clock Clock Setting page 25 Set the clock HDMI Format page 91 RGB YCbCr Set the col...

Page 82: ...4 5 6 7 Parental Lock Audio Out Disc Menu Language Audio Language Subtitle Language Angle Icon Still Mode Submenu will appear 4 Refer 1 to 7 on pages 84 to 86 and set the selected item 5 When you finish with the setting press SETUP to exit Playback SE R0265 OPEN CLOSE INPUT SELECT HDMI ABC GHI PQRS TUV SPACE SETUP DISPLAY AUDIO TOP MENU CLEAR RETURN MENU LIST WXYZ JKL MNO DEF ENTER SKIP REV PLAY R...

Page 83: ...are compatible with parental lock Be sure to check if the parental lock function operates in the way that you have set Record the password in case you forget it If there is a DVD in the unit when you set up the parental lock press OPEN CLOSE A to activate the parental lock level A A password has not been set yet Use K L to select Yes then press ENTER Use the Number buttons to enter a new password ...

Page 84: ... PCM select 48kHz 96kHz sound will be output in 48kHz 96kHz If your amplifier decoder is compatible with 96kHz PCM select 96kHz 96kHz sound will be output Note When playing back disc with copyright protection Even if you select 96kHz the sound will be down sampled at 48kHz C Settings for Dolby Digital Default Stream Use K L to select a setting then press ENTER Dolby Digital PCM Stream Your setting...

Page 85: ...efer to the language code table on page 98 Note Only the languages supported by the disc can be selected Audio language setting may not be available to some discs You can also change or switch off the subtitles on a DVD from the disc menu if it is available Press CLEAR to erase numbers entered incorrectly 6 Angle Icon Default ON Set to ON to show the angle icon during the playback Use K L to selec...

Page 86: ...ess ENTER FL Dimmer Auto Bright Dark You can choose one from Auto Bright or Dark If Auto is selected the display gets dark when the power is off Press STOP C if you are playing back a disc 1 Press SETUP and use K L to select General Setting then press ENTER 2 Use K L to select Display then press ENTER 3 Use K L to select a desired item then press ENTER OSD Language Screen Saver FL Dimmer V Chip 1 ...

Page 87: ...anadian English language ratings Canadian French Rating Canadian French language ratings 1 Use K L to select the desired rating then press ENTER repeatedly to switch between view and block When it is blocked a key icon will appear e g MPAA rating MPAA Rating X NC 17 R PG 13 PG G NR MPAA Rating Rating Category X Mature audience only higher NC 17 No one under 17 admitted R Restricted under 17 requir...

Page 88: ...ll appear on the side of the main rating TV Rating TV MA TV 14 TV PG TV G TV Y7 TV Y FV V S L D TV Rating TV MA TV 14 TV PG TV G TV Y7 TV Y None FV V S L D Sub Rating Category Rating FV Fantasy Violence TV Y7 V Violence TV PG TV 14 TV MA S Sexual Situation L Coarse Language D Suggestive Dialogue TV PG TV 14 Note Changing the main rating to block or view automatically changes all its sub ratings to...

Page 89: ...at step 3 progressive scan remains to be OFF interlace scan 2 TV Aspect Default 16 9 Wide You can select the TV aspect ratio to match the formats of what you are playing back with the unit and your TV screen 4 3 standard or 16 9 widescreen TV Use K L to select a desired option then press ENTER TV Aspect 4 3 Letter Box 4 3 Pan Scan 16 9 Wide If you have a standard TV Select 4 3 Letter Box so that b...

Page 90: ...hown in grey 4 When you finish with the setting press SETUP to exit 1 Format Default RGB You can select the color space for HDMI output Set the appropriate color space for your display device Use K L to select a setting then press ENTER When the connected device is not compatible with the Y Cb Cr HDMI signal is output as RGB regardless of the setting Format RGB YCbCr Your setting will be activated...

Page 91: ... setting will be activated GENERAL SETTING HDMI cont d Functions available for the HDMI CEC One touch play When the operations with following buttons of this unit s remote control are performed the TV will automatically turned on and switch to appropriate input channel Buttons for one touch play TIMER PROG SETUP INPUT SELECT PLAY B TOP MENU MENU LIST System information Get Set Menu Language This u...

Page 92: ...t Yes using K L and then press ENTER Your setting will be initialized Reset All Note The settings listed below will remain unchanged even after resetting to the factory default Clock setting OSD language setting Parental lock setting V chip setting Timer programs GENERAL SETTING SE R0265 OPEN CLOSE INPUT SELECT HDMI ABC GHI PQRS TUV SPACE SETUP DISPLAY AUDIO TOP MENU CLEAR RETURN MENU LIST WXYZ JK...

Page 93: ...ching your TV the copy protection signal applied to some programs could affect picture quality Disconnect the playback device in question and connect it directly to your TV Cannot record a TV program This unit does not have a tuner to receive TV broadcasting You must connect this unit to an external tuner to record TV programs page 18 Sound There is no sound Clean the disc with a cleaning cloth Re...

Page 94: ...e sound track cannot be changed The titles does not have the multilingual audio tracks The DVD video prohibits the changing of the language for the sound track The subtitle language cannot be changed or turned off Multilingual subtitle are not recorded on the DVD video The angles cannot be changed Multi angles are not recorded on the DVD video being played back The angle change operation is whenev...

Page 95: ... device supports HDCP This unit will not output a video signal unless the other device supports HDCP Check the setting of HDMI Check whether the output format of this unit HDMI FORMAT matches the supported input format of other connected device If the unit is connected to the unauthorized display device with an HDMI cable the audio video signal may not be output when playing back a commercial DVD ...

Page 96: ... Delete unnecessary titles pages 67 68 Recording Error You cannot record more than 999 chapters on one disc The maximum is 999 You are trying to record onto the VR mode DVD RW on which the number of recording chapters comes up to the maximum 999 Delete unnecessary chapter marks page 73 Recording Error You cannot record more than 49 titles on one disc The maximum is 49 You are trying to record onto...

Page 97: ...60 Korean 5761 Kurdish 5767 Laothian 5861 Latin 5847 Latvian Lettish 5868 Lingala 5860 Lithuanian 5866 Macedonian 5957 Malagasy 5953 Malay 5965 Malayalam 5958 Maltese 5966 Maori 5955 Marathi 5964 Moldavian 5961 Mongolian 5960 Nauru 6047 Nepali 6051 Norwegian 6061 Occitan 6149 Oriya 6164 Oromo Afan 6159 Panjabi 6247 Pashto Pushto 6265 Persian 5247 Polish 6258 Portuguese 6266 Quechua 6367 Rhaeto Rom...

Page 98: ...uter and play back the files on this unit PCM pulse code modulation The most common system of encoding digital audio found on CD and DAT Excellent quality but requires a lot of data compared to formats such as Dolby Digital and MPEG audio For compatibility with digital audio recorders CD MD and DAT and AV amplifiers with digital inputs this unit can convert Dolby Digital and MPEG audio to PCM See ...

Page 99: ...uminance Input level C color Input level Jacks Input 1 rear 2 front 1 Vp p 75Ω 286 mVp p 75Ω 4 pin mini DIN S video output Y luminance Output level C color Output level Jack Output 1 rear 1 Vp p 75Ω 286 mVp p 75Ω 4 pin mini DIN Component video output Output level Jacks Output 1 rear Y 1 0 Vp p 75Ω PB CB PR CR 0 7 Vp p 75Ω RCA jacks HDMI output Jack HDMI jack Audio input During audio input Jacks In...

Page 100: ...a systems are not covered by this warranty Reception problems caused by inadequate antenna systems are your responsibility 5 Warranties extend only to defects in materials or workmanship as limited above and do not extend to any DAV Product or parts that have been lost or discarded by you or to damage to the DAV Product or parts caused by fires misuse accident Acts of God such as lightning or fluc...

Page 101: ...H QHFHVVDU E DFFLGHQW PLVXVH DEXVH PRLVWXUH OLTXLGV GXVW GLUW QHJOHFW DFFLGHQW GDPDJH DSSOLFDWLRQV LPSURSHU LQVWDOODWLRQ LPSURSHU RSHUDWLRQ LPSURSHU FOHDQLQJ LPSURSHU PDLQWHQDQFH QRUPDO ZHDU DQG WHDU RU DQ RWKHU H WHUQDO FDXVH RU HYHQW DFW RU RPLVVLRQ RXWVLGH WKH FRQWURO RI 7 LQFOXGLQJ ILUH WKHIW DFWV RI RG DOWHUDWLRQ SRZHU IDLOXUHV SRZHU VXUJHV RU SRZHU VKRUWDJHV OLJKWQLQJ RWKHU HOHFWULFDO IDXOWV...

Page 102: ...WHQW QRW SUHFOXGHG E ODZ QR FODLP GLVSXWH FRQWURYHUV RU GLVDJUHHPHQW RI DQ RWKHU SHUVRQ PD EH MRLQHG RU FRPELQHG ZLWK DQ LVSXWH E RX ZLWKRXW WKH SULRU ZULWWHQ FRQVHQW RI 7 ULWLFDO SSOLFDWLRQV 7KH 9 3URGXFW RX KDYH SXUFKDVHG LV QRW GHVLJQHG IRU DQ FULWLFDO DSSOLFDWLRQV µ ULWLFDO DSSOLFDWLRQVµ PHDQV OLIH VXSSRUW V VWHPV PHGLFDO DSSOLFDWLRQV FRQQHFWLRQV WR LPSODQWHG PHGLFDO GHYLFHV FRPPHUFLDO WUDQVSR...

Reviews: