background image

Summary of Contents for DR430KU

Page 1: ...se numbers whenever you communicate with your Toshiba dealer about this unit I1IGH DEFINITION MVlTlMEDIA INTERFACE 2XP rQlCOMPACT DD D R U JD R4 7 OIGITALAUOIO IReWritable lij1 Jitmi1fij TOSHIBA I db RW Digital Out COMPAT18LE RW DVDVIDEO RECORDER DR430KU OWNER S MANUAL TOSHIBA V IDE 0 I DOLBY RECgWJr I 201OToshiba Corporation Model number Serial number ...

Page 2: ...re they exit from the apparatus 11 Only use attachments accessories specified by the manufacturer 12 Use only with the cart stand tripod bracket or table specified by the manufacturer or sold with the apparatus When a cart is used use caution when moving the cart apparatus I combination to avoid injury from tip over 13 Unplug this apparatus during lightning storms or when unused for long periods o...

Page 3: ...re or the like LASER SAFETY This apparatus employs a laser Only a qualified seNice person should remove the cover or attempt to service this apparatus due to possible eye injury CAUTION Use of controls or adjustments or performance of procedures other than those specified herein may result in hazardous radiation exposure CAUTION Visible and invisible laser radiation when open and interlocks defeat...

Page 4: ...le position Do not place anything directly on top of the unit Do not place the unit directly on top of the TV Shield it from direct sunlight and keep it away from devices of intense heat Avoid dusty or humid places Avoid places with insufficient ventilation for proper heat dissipation Do not block the ventilation holes on the sides of the unit Avoid locations subject to strong vibration or strong ...

Page 5: ...e to the surfaces of the discs Always store the disc in its protective case when it is not used I _ __ _ _ I IR Signal Check If the remote control does not work properly you can test if the remote control sends out the infrared signal with a digital camera including built in camera of cellular phone It will help to define the cause of malfunction With a digital camera including built in camera of ...

Page 6: ... 22 Basic tue INITIAL SETTING 24 SETTING THE CLOCK 2S Clock Setting 25 SETTINGS FOR THE VIDEO INPUT 26 Qisc M _ ment FORMATTING A DiSC 27 Choosing the Recording Format of a Brand New DVD RW 27 Reformatting a Disc Manually 28 SETTING A DISC TO PROTECT 29 PLAYING THE DISCS IN OTHER DVD PLAYERS 30 Auto Finalizing 30 Finalizing a Disc 31 6 EN c if l9 INFORMATION ON DVD RECORDING 33 Recording Mode 33 R...

Page 7: ... Program Playback 62 Slide Show 62 SELECTING THE FORMAT OF AUDIO AND VIDEO 63 Switching Subtitles 63 Switching Audio Soundtrack 63 Switching Virtual Surround System 64 Switching Camera Angles 64 Reducing Block Noise 64 Adjusting Black Level 65 Editi 9 INFORMATION ON DISC EDITING 66 Guide to a Title List 66 Editing Discs 66 DELETING TITLES 67 CREATING DELETING PLAYLlST 69 Adding Titles to a Playlis...

Page 8: ... using the search function Search for a desired point on a disc by title chapter track or time Virtual surround system You can enjoy stereophonic space through your existing 2 channel stereo system Playing back MP3 JPEG files Y JU can enjoy MP3 JPEG files which are recorded on CD RW R or a USB device Editing Deleting titles You can delete titles which you do not need anymore Setting or clearing ch...

Page 9: ...X 16X Ver 1 1 1 2 CPRM compatible Playable on Playable on Playable on Playable on DVD RW most DVD Playable only most DVD compatible most DVD players on VR mode players players players Finalization compatible unit Finalization Finalization Finalization necessary Finalization necessary recommended recommended title menu will recommended title menu will title menu will title menu will be created be c...

Page 10: ...ng discs are recommended for good recording quality and are proven to be compatible with this unit However depending on the media condition the unit may not read the disc properly Verbatim DVD R 8x DVD RW 4x DVD R 8x DVD RW 2x JVC DVD RW 4x Maxell DVD R 4x 8x 16x DVD R 8x 16x SONY DVD R 4x 8x 16x DVD RW 4x TDK DVD R 4x18x 16x Performance of any other discs are not guaranteed Toshiba is not liable ...

Page 11: ...playback 11 REC button Press once to start a recording Press repeatedly to start one touch timer recording 12 DV IN jack L3 o Use to connect the DV output of external device with a DV cable 13 AUDIO Input jacks L2 Use to connect external device with an RCA audio cable 14 VIDEO input jack L2 Use to connect external device with an RCA video cable 1S USB input jack You can plug your USB deVice here a...

Page 12: ...l The maximum operable ranges from the unit are as follows Line of sight approx 23 feet 7m Either side of the center approx 23 feet 7m within 30 Insert batteries Open the cover I s alling the Batteries in the Remote 2 Install 2 AA 1 5 V batteries matching the polarity indicated inside battery compartment of the remote control 1 SE A0265 3 4 01 ABC DEF mmm GHI JKl MHO 0 m SATELLITE PaRS TUV WXYZ lI...

Page 13: ...TIONAL OVERVIEW The unit can also be turned on by pressing these buttons 1 INPUT SELECT E button Press to select the appropriate input 2 OPEN CLOSE button Press to open or close the disc tray 3 Number Character buttons Press to select a title chapter tracklfile on display Press to enter values for the settings in the main menu Press to enter title names 4 SETUP button Press to display the main men...

Page 14: ... in playback MP3 Tag Information only when a MP3 file is in playback HDMI Information only for the images output through the HOMI output 14 EN This is an example screen only for explanation 1 Indicates a disc type and format mode 2 Indicates a type of titles for VR mode OVO RW 3 Indicates a selected external input mode 4 Indicates a recording mode and possible recording time left S lndicates a tit...

Page 15: ...enus provide entries to all main functions of the unit ri ij d i i i Ej 1 c G e I ni g 1 111IIT 11 il 111 JII 1 General Setting To go to general setting menu 2 Timer Programming To program a timer recording 3 Title List To call up the title list 4 DVDMenu To set up the DVD setting 5 DISC Playback Mode To set up the disc playback setting DISC Playback Mode is available only when an audio CD a CD RW...

Page 16: ...ly Allows you to activate the program playback feature 7 Music Allows you to make settings for MP3 playback S Photo Allows you to make settings for JPEG playback 9 Slide Show JPEG files only Allows you to select the display time of the slide show mode DVD Menu 1 rl fj lIll H Photo 5 6 DISC Playback Mode menu When an Audio CD is inserted t i ijft 1t1 A USB Playback Mode MUSic Photo J l Random Play ...

Page 17: ... time Current title chapter track file number Recording time remaining time Clock Selected external input position Remaining time for one touch timer recording Selected HOMI video resolution r u 1 to III 1 n i Display Message If f Appears when the disc tray is Appears when HOMI video r IlP C Jl opening IJ Jl Jl II resolution 480p is selected L II I II IAppea 5 when the disc tray is IAppea 5 when H...

Page 18: ...satellite dish RF coaxial cable In cable TV company After making the connection as described above make sure to select the appropriate input type by following the steps on page 26 N Requiredcablesand connecting methods differdepending on the externaltuner For more i formation please contact your external tuner provider With thi tup yq i an r cof d ny unscr mbied channel by s le ing thechannel 00 t...

Page 19: ...support a copyright protection system called HOCP high bandwidth digital content protection system HOCP is copy protection technology that comprises data encryption and authentication of the connected AV device This unit supports HOCP Please read the operating instructions of your display device or AV amplifier for more information Note for HDMI Connedion Because HDMlis an evolVing techr 0logy it ...

Page 20: ...ection are as follows RCA audio cable L R x 1 Please purchase the rest of the necessary cables at your local store AUDIO IN S VIDEO IN S video cable OUT S VIDEO AUllIOOIJT 00 o o o o o o o o RCA audio cable rear of this unit L R Supplied cables used in this connection are as follows RCA audio cable L R x 1 Please purchase the rest of the necessary cables at your local store 20 EN ...

Page 21: ...able 3 4 CHANNEL RCA audio cable RCA audio cable 1 RCA video cable I RF modulator 1 c Jr rc J r RF coaxial cable i i external tuner e RF coaxial cable VHF I UHF antenna 1 n tiD cable TV company Su redc bl s d thO t f II RCA audio cable LlR x 1 RCA video cable x 1 Please purchase the rest of the necessary cables at your local store Ji jt dti f it YoU n tchopurchase it at yourI IQCal st re u e ri ia...

Page 22: ...dio refer to pages 82 and 90 91 No supplied cables are used in these connections Please purchase the necessary cables at your local store Multi C hannel OigitaIAudioSetting To set up Dolby Digital refer to pages 81 and 83 85 I I Dolby Digital DTS LPCM 22 EN Dolby Digital Setting of this unit refer to page 85 Stream PCM Stream PCM b SSetti g oi this unit referto page 85 HDMIOUT Dolby Digital 2 chan...

Page 23: ... channel PCM will be output regardless of the Dolby Digital setting If the connected device is not compatiblewith HOMI BITSTREAM audio will be output asPCM even ifyou select Streani in lIDolby Digital setting Refer to page 85 The audio signals from the HDMI connector including the sampling frequency the number of channels and bit length maybe limited by the device that is connected o Among themoni...

Page 24: ... may be labeled IISOURCE IIAV or IISELECT refer to your TV s user manual Or press 112 on the TV s remote control then press channel down button repeatedly until you see the Initial Setting menu 2 3 1 9 TE LL TE WXY2 UN o 0 0 lilEI lU iST 2 3 JK _ f iNC iUV os 6 SETUP OISPL W l UOIO GHI PQRS TOP M ll SKIP REV I 1 SKIP REPEAT lEe MO jE REG c TOSHIBA SE R0265 ZOOM 4 5 Use A I to select your desired l...

Page 25: ...TTING THE CLOCK Set the clock before you try the timer programming 3 c c o j o OPEN CLOSE 1m 1 GHI TOP MENU lNO SATELLITE WXYZ LINK SPACE l SETUP OfSPLAY ZOOt r i TOSHIBA SE R0265 o 0 DOD EN 25 o r f1l IF ...

Page 26: ...s SETUP Use I to select General Setting then press ENTER Use I to select Video then press ENTER Use 1 to select Select Video then press ENTER Use I to select the desired external input position then press ENTER Use to select the input jack type to connect then press ENTER If you want to use VIDEO IN jack select Video In then press ENTER If you want to use S VIDEO IN jack select S Video In then pre...

Page 27: ...UTE WXY7 LlNK f 9 j SPACE Co 1h P TUV C ill 0 0 0 OPEN INPUT CLOSE SELECT rr 1 Gl 0 ABC OEF 1 2 iL k GHI JKL t lNO PORS iJ SKIP f J o 0 0 0 0 TOSHIBA SE R0265 I r J d REPEAT REC MODE REC J PAUSE riiJ1 TIME SUP 1 3xi08 rPLAV iNSTAlifSKl TOP MENU r When inserting a brand new DVD RW or DVD RW the unit automatically starts to initialize the disc DVD RW will always be formatted in VR mode and DVD RW wi...

Page 28: ...PROG 0 SETUP DiSPlA T rOPMPh l II c III REPEAT RE G 1 tQ F EC ZOC SKIP RE FWD S P i CLEAR TOSHIBA o o SE R0265 o o o 5 Selection menu will appear and prompt you to confirm For DVD RW use T to select Yes then press ENTER Use to select Yes then press ENTER Formatting will start If you want to cancel formatting select No 1100 I IFormlnlng Formatting is completed 100 is indicated 6 N t 1 JK j rr f wHe...

Page 29: ...011 OPEn iN UI CLO E S l Eer HOi li _ 1 2 Press SETUP Use I to select DVD Menu then press ENTER 3 Use I T to select Disc Protect OFF ON then press ENTER e g VR mode DVO RW TOSHIBA SE R0265 o 0 000 4 Use I T to select Yes then press ENTER A disc will be protected rhisoper iOJ1maytake awhilelo beeOinpleted EN 29 ...

Page 30: ...ETUP o TOSHIBA SE R0265 o II 2 3 4 5 6 Use A I T to select Recording then press ENTER Recording menu will appear Use A I T to select Auto Finalize then press ENTER Use A I T to select Disc Full or End of Timer Rec then press ENTER i Disc Full eRcf Use A I T to select ON then press ENTER I O 0 1 i H 1b 1 oFF Your setting will be activated Press SETUP to exit 0 0 0 0 0 r u Ultimt liAJ H fHtJo t ti N...

Page 31: ... hour Since the process of the finalization fills empty space of the disc a shorter recording period on the disc will require a longer time period for finalization Do not unplug the power cord during finalization Finalizinaa Dis _ TwrnmKtrPTTTTnnrfltt rrWr rn t TTPT t ftlPtPi rwt tht 11 r rntttt L __ _ __ PL_A_Y_IN_G __ T_ _ S_ _S IN OTHER DVD PLAYERS u D Q C 1 _ 190 I Iflnollzlng This operation m...

Page 32: ... is canceled and the unit switches to stop mode I Do you _110 1 1 Ve No IFlnallzlng If S appears when STOP is pressed you cannot cancel finalizing because the finalizing has already reached at a critical point in its process If No is selected and ENTER or RETURN is pressed finalizing is continued You cannot cancel finalizing a DVD R DVD R and DVD RW once it has started J ...

Page 33: ...ssage appears on the screen Copy once only video can only be recorded to CPRM compatible DVD RW formatted in VR mode Making discs playable in other DVD players Finalize For DVD RW R it is necessary to finalize the disc after recording in order to play back the disc on other DVD players Refer to pages 30 32 For DVD RW R it is recommended to finalize the disc in order to make the disc more compatibl...

Page 34: ... Compatible then press ENTER 4 Use Y to select ON or OFF then press ENTER ON Title list will be replaced when you make additional recordings to the discs recorded by other units OFF Prohibiting additional record to the disc that has a title list created by other units 5 Press SETUP to exit 34 EN You can set a specified time for chapter marks 1 Press SETUP and use Y to select General Setting then p...

Page 35: ...hat the program you started to record are broadcasted with 4 3 Recorded in the aspect ratio of 4 3 16 9 Recorded in the aspect ratio of 16 9 3 Use A I T to select your desired setting then press ENTER 2 Use A I T to select Aspect Ratio Video mode then press ENTER 4 Press SETUP to exit PCM Records PCM audio for the best quality sound Dolby Digital Records Dolby Digital audio for good quality sound ...

Page 36: ... disc with its label facing up Press OPEN CLOSE to close the disc tray t Q When inserting a brand new DVD RW or DVD RW the unit automatically starts to format If titles have been recorded on the disc the title list is displayed Press STOP to exit the title list Press REC MODE repeatedly to select a recording mode Refer to Recording Mode on page 33 Press INPUT SELECT E to select the appropriate ext...

Page 37: ...ording OTR This is a simple way to set the recording time in blocks of 30 minutes Press REC e repeatedly until the desired recording time 30 minutes to 8 hours appears on the TV screen One touch timer recording will start 1 _0 30 1 0 30 normal recording 1 00 8 00 7 30 To change the recording length during one touch timer recording press REC e repeatedly until the desired length appears To cancel o...

Page 38: ...ording make sure Connect the external tuner to either L1 or L2 and set it to output audio video signals when it comes to the time you want to start recording Do not change the external tuner s channel while you are recording You cannot watch one channel and record another at the same time Set the clock before setting a timer programming Insert a recordable disc with enough recordable space SKIP RE...

Page 39: ...g mode the unit calculates how much time is available on the disc and determines the appropriate recording mode to complete recording the program Auto is only available for one program in the timer program list The recording may be cut short when the available recording space of the disc is too limited 7 8 When pressing T at the current date the date will change as follows e g January 1st i JAN 31...

Page 40: ...6t I Press TIMER PROG to check the timer recording in II I progress c I When the timer recording is proceeding that program will be highlighted in red In this case you I cannot select any other program b _ _ _ IIti __ 40 EN If the timer program did not complete correctly the error number appears in the timer programming list Some portion has not been recorded because of program Ei3 2 4 i d bi di 1...

Page 41: ...timer recording or timer standby mode will appear any operations on the unit will not be available To make these operations available press STOP or STOP to stop the timer recording or I O ON STANDBY to cancel timer standby mode will disappear The Priority of Overlapped Settings This unit records the programs according to priority if the timer programmings are overlapped The timer programming set p...

Page 42: ...e turned into the standby mode automatically as it goes into the satellite link standby mode TOSHIBA SE R0265 To cancel the satellite link function while in the satellite link standby mode Press SATELLITE LINK or I O ON STANDBY To cancel the satellite link function while the satellite link recording is in progress Press STOP o 0 0 0 0 i N L 1f r i ifctn S i9rt 1 ofe eman put Dr eaks up over 5 seco...

Page 43: ...nit use AUDIO Ljack of L2 Front Use the RCA audiolvideo cables for this connection When connecting a DVC digital video camcorder use the DV IN jack on the front panel instead of VIDEO IN jack VIDEO OUT DV OUT external device camcorder VCR etc Ul c2 or front of this unit UOjO OU e1 VIDEO OUT r s red bl ed thO cf f II RCA audio cable UR x 1 RCA video cable x 1 Please purchase the rest of the necessa...

Page 44: ...close the disc tray It takes awhile to load the disc t RECMQlJE 3 4 5 6 Select the input of the unit which the external device is connected L1 L2 or DV L3 To use the input jacks on the rear of this unit Select L1 Rear by using INPUT SElECT To use the input jacks on the front of this unit Select L2 Front or L3 DV INl by using INPUT SElECT i Press REC MODE repeatedly to select a recording mode Refer...

Page 45: ...yback DVC is in recording l l oo DVC is in pause mode DVC is fast forwarding standard speed DVC is fast forwarding faster than above DVC is fast forwarding faster than above DVC is slow forwarding standard speed DVC is slow forwarding faster than above DVC is slow forwarding faster than above 00 6 Product name of your DVC If the unit cannot recognize the input signal from the DVC or the unknown pr...

Page 46: ...with the remote control of this unit Press PLAY to start playing back the DVC and find the point where you wish to start dubbing Then press STOP when you come to the desired start point 2 3 4 5 REC MODE filiill1 11 0 0 0 0 0 II c a C1RCDr Before recording from DVC see page 43 for connection instructions Preparing for DV to DVD dubbing Insert a recordable disc and make sure your DVC is in video mod...

Page 47: ...ill resume when the unit detects the video signal again j When the DVe is in camera mode refer to Guide to DV and On Screen Display on page 45 You cannot dub from DVe during timer standby mode During timerstandby of either component you cannot select L3 DV IN even on the component which is not in timer standby j fDate time and cassette memory data will not be recorded i Pictures with a copy guard ...

Page 48: ... of a DVD video Roughly corresponds to a story title in short stories Divided contents of a title This corresponds to a chapter in a story Divided contents of an audio CD Divided contents of a MP3 JPEG data disc Consists of number of files Audio CD Track 1 Track 2 Track 3 Track 4 Track 5 f l IJJj IIJ 1 IIJ I JJJj Each title chapter or track folder or file is assigned a number which is called title...

Page 49: ...Wit K Wu rnirrtr r rrrrnmrpm rrr ttl rr nTKO W Tor 11 0 0 0 0 0 OPEW r CLOSE e PLAY SlOP f H il I II TOSHIBA SE R0265 o 0 0 0 0 J c m b E o _t I oi u rC i _ loC u iNote l if Some discs may start playback automatically r ____ _ _ _ J EN 49 I ...

Page 50: ... Ii ou can also start playback by pressing PLAY n Instead of ENTER 1 At step 4 you can press SKIP or press when the title on the lower right of the title list is R highlighted to display the next P age and press I M SKIP 1 4 or press when the title on the upper r 1 leftofthe title list is highlighted to display the previous page U II tW l M tit ft _ t tb Il ClJ9 lJI t CMi muwu i 1 0 0 0 0 0 Press ...

Page 51: ... owner s manual are meant only as a guide Use of CD RW for MP3 files is not recommended You must obtain any required permission from copyright owners to download or use copyrighted content Toshiba cannot and does not grant such permission li t t h 1 1 e e jj The audio source of MP3 files cannot be recorded as il 1 digital sound by an MD or OAT d e c k Files whose extension is other than mp3 MP3 or...

Page 52: ...ters excluding the extension are 1 IdiSPlaYed as a fil e and folder names 9 or more characters cannot be displayed C tedevlce I USB flash memory maximum size 32GB r 1Inc ompatlble device USB hub t USB device with inner hub 1 tt PC t R T Cameras j n K Devices that need to install drivers km 2 le r mm m l r t l Il rJF f f ltI 3 Follow the step 3 in Playing Back an Audio CD or a CO RW R with MP31 JPE...

Page 53: ...ction and then press ENTER to enable your selection 3 Press STOP _ to exit the disc menu _ 1 iNote Youcan select a numbered menu with the Number m buttonsl also e M enus v a ry among discs Refer to the informati on l i accompanying the disc for details MENU LlST or TOP MENU will not always be II effective for all D V D s tlJ inlmnirfl fflrtm nm fR l nmmmftm flmnn ntm i lsn unn llnlrrmm lfm 2 Press...

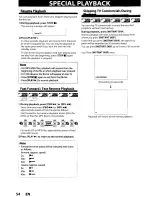
Page 54: ...it m f rnl 1f i UliY 1 Hi ilUtfu tn 1Ut Hlm 1 n1 ifHun n f ff H li tJ ftt4tn e f i 1 During playback press FWD or REV Every time you press FWD or REV approximate speed will be changed as follows Fast forward or fast reverse playback across titles for DVD or files for MP3 files is not possible For audio CD or MP3 files approximate speed is fixed at 8x with sound 2 Press PLAY to return to the normal...

Page 55: ... 2 channel during rapid playback r M I N tl t lHfU l it lYtJ_t al_l m1 t l tll 1 During playback press PAUSE II Playback will be paused and sound will be muted 2 Press SKIP repeatedly Playback will advance one frame at a time when you press SKIP with the sound muted To play back step by step backward Press SKIP I repeatedly Every time you press the button the playback will go backward by one frame...

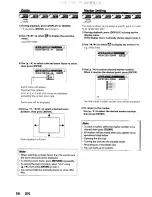
Page 56: ...sired zoom position then press ENTER 4 To return to the marker Use Ao to select the desired marker number then press ENTER JJ lKt_um1tMtt RI UllU n n o1i un llrnT km li I n l tfmt rH s nt Ht1IUUiHtl tt l l Ht Hil n U i When selecting a smaller factor than the current one f U the zoomarea will not be displayed Ii 0 To exit the zoom menu press RETURN repeatedly J RoTa cancel the zoom function select...

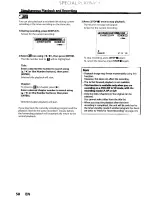
Page 57: ...ayback is not available REC ei is not available duringthis function You must cancel this function first by pressing STOP once Then you can use REC e to use OTR one touch timer recording function ofchange i recording time for the OTR Wait for a moment will bedisplayed on the creeri Iif y o upre ss P Y befOf el minu te 0 f re c or din g ThiS fUl etion IS available only when y ouare recording on it D...

Page 58: ...rn to the normal playback 58 EN 3 Press STOP _ once to stop playback The resume message will appear Screen for the current recording amIlt1rm t f IiWt To stop recording press STOP again To cancel the resume press STOP again t ttt 1N 1ItftIII flMP 4 RMfl1 8f ftIStMMttJDJI IlZilJ I l n INote Playback image may freeze momentarily using this j function IHowever this does not affect the recording The 2...

Page 59: ...sing DISPLAY 1 During playback press DISPLAY to bring up the display menu If the display menu is already shown skip to step 2 2 Use I to select then press ENTER e g audio CD i J 5 S n n 0 I t The number next to 0 will be highlighted o r ll III e g MP3 files j cm The number next to 0 will be highlighted 3 Use 1 or the Number buttons to enter a desired track file number to search then press ENTER Af...

Page 60: ...ENTER e g DVD video e g audio CD The number next to 0 will be highlighted To move to the number next to rt l press When time search is not available rY and time counter are not displayed 3 Use or the Number buttons to enter a desired time to search then press ENTER After the search playback will start automatically t t time arch ls a i1ableonfy Mihe same track file9r titl 60 EN ...

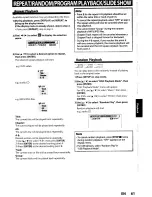
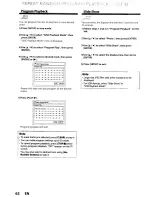
Page 61: ...rack is skipped forward or backward e During the A B repeat ifyou reaches the point A j i with any reverse playback the reverse playback will I be canceled and the A B repeat playback resumes L point A t HJ iIflm HfH UtW l t U UUHfl 1L e g audio CD Title The current title will be played back repeatedly Chapter The current chapter will be played back repeatedly All The current disc will be played b...

Page 62: ... A to select the display time then press ENTER S Press SETUP to exit 4 ITOIlI 0 00 00 I Repeat this step until you program all the desired tracks 5 Press PLAY I DISC Ployblck 09 04 10 06 4 ITotl Q 31 071 Program playback will start r NM 9 f N ole i I Toe se tracks you selected press CLEAR at step 4 i You can make ptogram settings up to 50 tracks j To cancel program playback press STOP J twice r du...

Page 63: ...ess AUDIO aD skip to step3 2 Use I to select to display the selection menu 3 Use I f to select a desired subtitle language then press ENTER Subtitle will be displayed in the selected language When OFF is selected subtitle will disappear t ii mUl ii tl n w um MUI Wote IffiiSome discs will only allow you to change the subtitle ft fromthe discmenu Press MENU LIST or I Ur TOPMENU to display the disc m...

Page 64: ...ISPLAY 2 Use to select E I then press ENTER JIJl iill I ril gli 5 lm I Angle icon appears when aswitching camera angle is available Angle will switch each time you press ENTERI _ j iNote i Angle icon does notappearontheTVscreen if you Set Angle Icon to OFF in Play ack menu i Refertopage 8 i l__ 1 During playback press DISPLAY 2 Use 1to select 1m to display the selection menu e g DVD video i l J1Jl...

Page 65: ... display the selection menu e g DVD video 3 Use to select Black Level then press ENTER 4 Use to select OFF or ON then press ENTER Your setting will be activated OFF Shows the original picture as recorded ON Make the darker parts of the picture more visible H _ 1 te 04 t1 adjust black level settingonlydudng Im lay pac theset ingwill be k pteven when the unit is turned 1 pff the jefaolt setting is O...

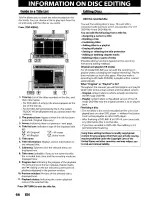
Page 66: ...rs convenient edit functions which are possible only with DVD RW R and DVD RW R You can edit the following from a title list Assigning a name to a title Dividing a title Combining titles Adding titles to a playlist Erasing all playlist Setting or releasing the title protection Adding or deleting chapter marks Deleting titles or parts of titles Possible editing functions depend on the recording for...

Page 67: ...de press RETURN several times to exit the editing mode Writing to Disc appears momentarily It also appears when pressing OPEN CLOSE or 110 ON STANDBY before exiting the editing mode after editing t11lUUJU1UIUiUiHlF UtuUJfUUIU IUUUUUILUUU uf i IIHPUn 7llw rn umtmfmUnFOju u wm rurrnl f lll iIWUTm l i IH r t H lm m u tI w t ft1 t aIIHH t H H HtlUIU H 1Jf Note il iPlfyou delete the title in DVD RW del...

Page 68: ...t 11m After that Are you sure will appear select Yes and then press ENTER Title will be deleted 2 4 3 1 STOP j 0 0 0 0 0 You can delete titles which you do not need anymore Please be advised that the titles once deleted cannot be brought back to the disc Be sure to read Notes for deleting titles on page 67 before you delete the title rlil li1 TOSHIBA SE R0265 5 Press RETURN or STOP to exit Data wi...

Page 69: ...P j II 1 I I t l Addinar 1 a Plav WWBtiiiiiltt 1 FilS ZilPlIir WIIlIPIilr llrIiPilll l ilOlifillm Ill rll ill Il li iITlliii qplilltllilW cl lHITlurltlell lillrul nl TIPI 1 lItlrl Follow the step 1 in DELETING For mode DVD RW you can create the playlist as you 1 TITLES on page 68 to display the wish original You can add up to 99 titles to a playlist as long as the total number of the playlist does...

Page 70: ... SETUP TOSHIBA 4 Use I to select Yes then press ENTER Are you sure will appear Use I to select Yes and then press ENTER SE R0265 o 0 ODD Playlist is deleted Data will be written onto the disc momentarily This operation may take awhile to be completed l j i q it t lNu HjHlli l t l m HlftJ H Ul tUtt tJr um l t tU U 1 l l lil i l_ni i tkti ft Hl f M 1 I ii Deleting a playlist will not increase the av...

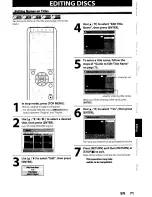
Page 71: ...his operation may take awhile to be completed The name you entered will be activated for the title r i 4 5 7 6 o II STOP S o 0 o I I J I Oi I 1 t i CPL l l U C i I nun EDITING DISCS In stop mode press TOP MENU Title list original or playlist will appear For VR mode DVD RW press MENU LIST to switch between Original and Playlist Use A I T I I to select a desired title then press ENTER e g VR mode DV...

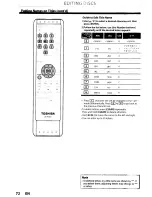
Page 72: ... IP f Ui hF p U II lJo 13 nt li SI C h h l i l i i TOSHIBA SE R0265 1 Press OJ character set will be chmed to the mode automatically Press mto 9 to go back to the previous character set To delete letters press CLEAR repeatedly Press and hold CLEAR to delete all letters Use to move the cursor to the left and right You can enter up to 30 letters o 0 0 0 0 ut l u a iH I1aNl1 i jQma tleUt k S l T J No...

Page 73: ...te Use T to select IIAdd or IIDelete then press ENTER e g VR mode DVD RW original Use T to select IIYes then press ENTER If you select Add at step 4 a new chapter mark will be added and if you select Delete at step 4 the chapter mark will be deleted e g Add f jMHHii iffl il i lmlIjflm m 7 t mumnum l 6 1 vR mode DVD 999 chapters per entire original II l l and playlist fi VR mode DVD 254 chapters pe...

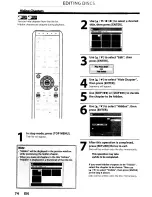
Page 74: ...decide the chapter to be hidden Use to select Hidden then press ENTER 3 5 4 6 0 0 0 0 0 t f 0sr L L 1 ul _ I SKIP v F vr SKIP II II AdSl P r II _ 1 1 JE S 5 J 1_p I I t f TOP MENU 1 In stop mode press TOP MENU Title list will appear 7 After this operation is completed press RETURN thrice to exit Data will be written onto the disc momentarily This operation may take awhile to be completed If you wa...

Page 75: ... to 3 in IIPutting Names on Titlesll on page 71 to display Edit menu 2 1 EDITING DISCS tr iir ii1 j s rn nnrlil tly U irrmotr rt Y 11WnmrrmrnTW lWUWtrHtI tl titV You can delete a specific part of a title Even when parts of title are deleted from the playlist the original title will remain as it is L_ TOSHIBA SE R0265 o 0 0 0 0 EN 75 ...

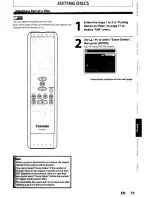
Page 76: ... deletion is indicated in red You can check the preview by pressing ENTER Before and after 5 seconds of the deleted point will be playback for preview start point end point J J 4 5 6 Use I T to select Delete then press ENTER Use I T to select Ves then press ENTER Are you sure will appear Select Yes using I T and then press ENTER The part of the title is deleted Press RETURN and then RETURN or STOP...

Page 77: ...mode press TOP MENU For VR mode DVD RW press MENU LIST to select Playlist Use to select a desired title then press ENTER 7 The title will be divided into two new titles Both title names are identical For DVD RW Data will be written onto the disc momentarily IWriting to Disc 1 190 I This operation may take awhile to becomplet d For VR mode DVD RW Proceed to step 7 Press RETURN or STOP to exit Data ...

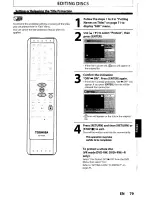
Page 78: ...title becomes yellow STOP iID iiill rJ iL C J TOSHIBA SE R0265 3 4 Use A I T I lIf to select another title to combine then press ENTER Selection menu will appear Use A I T to select Yes then press ENTER The two titles will combine into a single title o 0 0 0 0 1 5 Note I y u ann ot selectthe same title twice and combine it into a single title Ifei r o neohhe t w 0 original titles is deleted Jthe c...

Page 79: ...tle is protected crJicon will appear in the original list Confirm the indication OFF ON Press ENTER again If the title is already protected ON OFF will appear If you press ENTER the title will be released from protection CD icon will appear on the title in the original list Press RETURN and then RETURN or STOP to exit Data will be written onto the disc momentarily This operation may take awhile to...

Page 80: ...Use I to select Yes then press ENTER Chapter marks are added If you select OFF at step 3 all the chapter marks are erased TOSHIBA SE R0265 5 Press RETURN and then RETURN or STOP to exit Data will be written onto the disc momentarily This operation maytake awhile to be ompleted o 0 0 0 0 NO e yO ql 09t ach pter markrntE rval that exceedsmeJefI 1thofa tit orhe terigtl1ofchapters may sf ightlydevi lt...

Page 81: ...sh Other _ _ _ _ _ _ Audio Language Original Set the language for audio page 86 English French Spanish Other Playback Angle Icon ON Set whether to display the angle icon or not illF g StiifMo de A Set iti e ty pe ofstililmage iii iiauslng piayback t page 86 Field tOf f c 1 Display OSD Language English Set the language for OSD on screen display page 87 Franc ais p _ _ _ _ Screen Saver OFF Set the i...

Page 82: ...Full ON Set the unit to finalize the disc automatically Finalize OFF 7 page 30 End o rimerRec ON OFF Set a aspect ratio for video mode recording Auto Aspect Ratio Video mode 7 page 35 4 3 16 9 ___________________ a _ Make Recording Compatible ON Set to prohibit additional recording OFF or to 7 page 34 OFF replace the title list after recording ON Clock Clock Setting 7 page 25 Set the clock HOMI Fo...

Page 83: ...S J iX Z K l r SP CE H J SETUP l l f 1 L v Ill TOP I IU U ii EN IS f TOSHIBA SE R0265 o 0 DOD 1 2 3 4 5 Press SETUP and use A I to select General Setting then press ENTER Use A I to select Playback then press ENTER Use A I to select a desired item then press ENTER Submenu will appear Refer II to I1J on pages 84 to 86 and set the selected item When you finish with the setting press SETUP to exit EN...

Page 84: ...tible with parental lock Be sureto check if the p a rent allock function operates in the way that you i i h aveset I Record the password in case you forget it Ifthere is a OVO in the unitwhen you set up the I i parental lock press OPEN CLOSE to activate the parental lock level f 84 EN em t mrsPrl i nrPTTfiCn itt KJILb A password has not been set yet Use I to select Yes then press ENTER Use the Num...

Page 85: ... desired item then press ENTER k ette pyl mjcrang control function is available Qnly on piscswhicharerecorded inthe Dolby Digital g format Your setting will be activated tr m Wi trl rw t WHt Hm lItt uvrrnE 1 rh H T W TPl II II Settings for Dolby Digital Default Stream Use to select a setting then press ENTER KliDynamic Range Control Default ON Set to ON to compress the range between soft and loud ...

Page 86: ...he code press ENTER Refer to the language code table on page 98 U _I1 i I h I m mHuHmu jl Note Only the languages supported by the disc can be l selected i tl Audio I nguage setting may not be available to I D some dIscs You can also change or switch off the subtitles on a I DVD from the disc menu if it is available I Press CLEAR to erase numbers entered incorrectly U a1tm ni ft t1m flif nn trf fm...

Page 87: ...the external tuner or recorded on DVDs to prevent your children from watching inappropriate programs If the unit detects a blocked program a restriction message appears and you are not allowed to view the program 1 Use the Number buttons to enter the access password If you have not set the password first use the Number buttons to set the access password then press ENTER The number you entered will...

Page 88: ...G TV 14 001Change Password Change the current password Use the Number Buttons to enter new access password Note Press CLEAR to erase numbers entered incorrectly o When you forgot the access password enter 4737 using the Number buttons in password input window Password will be cleared 2 Use A to select a desired item then press ENTER MPAA Rating TV Rating I MPAA Rating 001TV Rating I Canadian Engli...

Page 89: ...fyour TV is compatible with progressive scan 480p you ij are recommended to use the HOMI or component video cable commercially available to connect this unit to the 11 TV Refer to pages 19 20 If not use the RCA video cable 11 and set the progressive scan to OFF If the Progressive Scan image is distorted you can r cancel Progressive Scan by pressing and holdingf SETUP for more than 3 seconds during...

Page 90: ...then press ENTER mml You cannot select jJ through I when an HOMI cable is not connected the items will be shown in grey When you finish with the setting press SETUP to exit 90 EN o 0 0 0 0 Format Default RGB You can select the color space for HOMI output Set the appropriate color space for your display device Use I T to select a setting then press ENTER When the connected device is not compatible ...

Page 91: ...the unit Receiving operational signal from TV s remote control You can operate this unit with TV s remote control Check your TV owner s manual for details GENERAL SETTING iJ If you do not want to output the audio through HOMI when you digitally output the audio through the COAXIAL DIGITAL AUDIO OUT jack to your audio system etc you can set the HOMI audio output off Use T to select a setting then p...

Page 92: ...ect Reset All then press ENTER Select Ves using IT then press ENTER Are you sure will appear Select Yes using LA and then press ENTER Your setting will be initialized _ _ _ I l 8f4 m tIUl a1I ffifihlMi1m tljllf t Jt l i_ M U The settings listed below will remain unchanged i eve n after resetting to the factory default tl I Clock setting i 050 language setting jJ Patentallock setting f V hipsetting...

Page 93: ...ct picture quality Disconnect the playback device in question and connect it directly to your TV This unit does not have a tuner to receive TV broadcasting You must connect this unit to an external tuner to record TV programs page 18 Clean the disc with a cleaning cloth Re connect all connections securely Check if the connecting cord is damaged Check the connections to the amplifier input The inpu...

Page 94: ... There was a power failure during recording The unit s internal clock stopped due to a power failure that lasted for more than 30 seconds Reset the clock page 25 The program contains copy protection signals that restricts copying The timer setting overlapped with another setting that has priority It will take a few seconds for the unit to input disc data before recording stops The timer setting ov...

Page 95: ...again It may take several minutes up to about several hours Ifyou intend to cancel the repairing process press A OPEN CLOSE on the front panel then select Yes and press ENTER After that press OPEN CLOSE A to take out the disc The disc canceled during the repairing process MAY NOT work Error message Disc Error Please eject the disc Playback feature may not be available on this disc Unknown USB Devi...

Page 96: ...le disc and ensure the disc status satisfies the recording requirements page 9 o Clean the disc with a cleaning cloth o Replace the disc Insert the DVD RW disc in VR mode ver 1 1 or 1 2 compatible with CPRM o Release the disc protect setting in DVD Menu menu page 29 o Insert the recordable disc with enough recording space o Delete unnecessary titles pages 67 68 o Delete unnecessary chapter marks p...

Page 97: ...h Lingala Lithuanian Macedonian Malagasy Malay Malayalam Maltese Maori Marathi Moldavian Mongolian Nauru Nepali Norwegian Occitan Oriya Oromo Afan Panjabi Pashto Pushto Persian Polish Portuguese Quechua Rhaeto Romance Romanian 5467 5565 5560 5547 5551 5557 5347 5566 5647 5669 5760 5765 5757 6469 5771 6460 5761 5767 5861 5847 5868 5860 5866 5957 5953 5965 5958 5966 5955 5964 5961 5960 6047 6051 606...

Page 98: ...er and play back the files on this unit 98 EN PCM pulse code modulation The most common system of encoding digital audio found on CD and DAT Excellent quality but requires a lot of data compared to formats such as Dolby Digital and MPEG audio For compatibility with digital audio recorders CD MD and DAT and AV amplifiers with digital inputs this unit can convert Dolby Digital and MPEG audio to PCM ...

Page 99: ...ut Output level Jacks HDMloutput Jack Audio input During audio input Jacks Audio output During audio output Jacks Digital audio output Output level Jack DVinput Jack AC120 V 60 Hz 20 W standby 2 6 W 4 86 Ibs 2 2 kg 16 6 x2 4 x 10 2 420 x59 0 x259 mm 41 F to 104 of 5 C to 40 C Less than 80 no condensation NTSC IV standard VR video recording format Video format VR format DVD Rewritable Recordable DV...

Page 100: ...uate antenna systems are your responsibility 5 Warranties extend only to defects in materials or workmanship as limited above and do not extend to any DAV Product or parts that have been lost or discarded by you or to damage to the DAV Product or parts caused by fires misuse accident Acts of God such as lightning or fluctuations in electric power improper installation improper maintenance or use i...

Page 101: ... PURCHASER OR TRANSFEREE DAV PRODUCTS PURCHASED IN CANADA AND USED ANYWHERE OUTSIDE OF CANADA INCLUDING WITHOUT LIMITATION THE UNITED STATES AND MEXICO ARE NOT COVERED BY THESE WARRANTIES DAV PRODUCTS PURCHASED ANYWHERE OUTSIDE OF CANADA INCLUDING WITHOUT LIMITATION THE UNITED STATES AND MEXICO AND USED IN CANADA ARE NOT COVERED BY THESE WARRANTIES Limited One 1 Year Warranty on Parts and labour S...

Page 102: ...arises To the extent not precluded by law no claim dispute controversy or disagreement of any other person may be joined or combined with any Dispute by you without the prior written consent of TCL Critical Applications The DAV Product you have purchased is not designed for any critical applications Critical applications means life support systems medical applications connections to implanted medi...

Page 103: ...MEMO EN 103 ...

Page 104: ...D 1VMN28958 E7PEAU Printed in China TOSHIBA 11 II III II III llljlll IIIIJIII lllljllll 1 ...

Page 105: ...n you make the connections Connecting to an E i i n a Make the connection as illustrated below RCA video cable nsatellite 4 dish n m cableTV company R L AUDIO OUT VIDEO OUT RF coaxial cable external tuner RCA audio cable R VIDEO IN rear of this unit RCA video cable AUDlOOlIT 2 Plug in the power cords of the devices to the AC outlet 3 After making the connection as described above make sure to sele...

Page 106: ...let OR HDMI ConnectilL1J 1 Before turning on any equipment connect this unit to your TV with a commercially available HOMI cable 2 Turn on your TV first then turn on this unit Set the video input on your TV to HOMI in 0 0 0 0 0 3 Press HOMI repeatedly until the HOMI indicator light matches your TV s resolution There are four HOMI video resolution choices 480p 720p 1080i and 1080p best picture HOMI...

Page 107: ...tting 080 Language English Fra ls Espanol ISelect the language for Setup display Press ENTER to activate Clock Setting There is no Auto Clock Setting function in the unit You need to set the clock manually IInitial Setting IENTER Set Clock RETURN Exit Initial Seltlng Use to select an item to set and use T to select the contents to suit your preference then press ENTER I Initial Setting Clock Seltl...

Page 108: ... 0 0 0 0 Select the input of the recorder L1 rear or L2 front to which the external tuner is connected by pressing INPUT SELECT E I L1 Rear I Select the channel you wish to record on your external tuner Press REC e to start recording Press STOP to stop recording For how to set up timer recording refer to pages 38 to 41 in the owner s manual Connect a DVC with the Front DV input with a commercially...

Page 109: ... product questions including Single DVD players DVDNCR Combos Portable DVD players and LCD TV DVD Combos please call 1 866 583 7353 For DVD Recorders please call 1 800 319 6684 We are available to answer all of your questions Monday Friday 10 00am to 7 00pm EST Many questions regarding parts service and warranties can be answered by visiting the Customer Support section of our website www tacp tos...

Reviews: