Diagnostic Information
2-71
e-STUDIO 16P
Using the Special Function Menu
on Menu
Printer settings for solving print quality problems are in the special
quality problems are in the special
function menu: restore factory defaults, Hex Trace, print quality test
pages, and advanced troubleshooting mode.
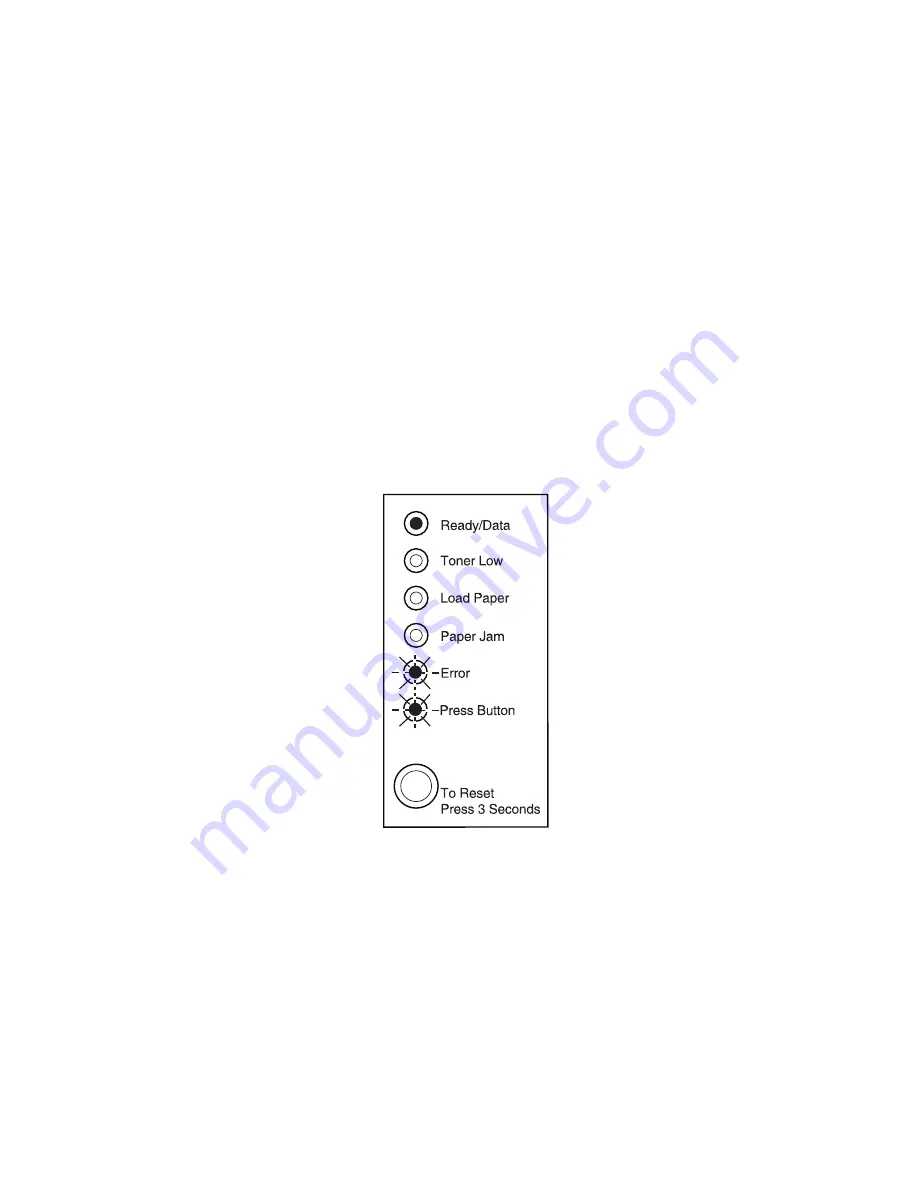
To enter the special function menu:
1. Turn off the printer.
2. Open the top cover.
3. Turn the printer back on.
4. When the Error LED comes on, indicating the top cover is open,
dicating the top cover is open,
press and release the operator panel button twice quickly
(double-button press).
5. When the Error LED and
D and Press Button LED blink, close the
cover.
The special function menu is activated.
Summary of Contents for e-STUDIO 16P
Page 1: ...TOSHIBA TOSHIBA SERVICE MANUAL SERVICE MANUAL PAGE PRINTER e e STUDIO 16P STUDIO 16P ...
Page 6: ...vi Service Manual e STUDIO 16P ...
Page 10: ...x Service Manual e STUDIO 16P ...
Page 12: ...Safety Information xii e STUDIO 16P ...
Page 93: ...2 76 Service Manual e STUDIO 16P ...
Page 148: ...6 2 Service Manual e STUDIO 16P ...
Page 150: ...7 2 Service Manual e STUDIO 16P Assembly 1 Covers embly 1 Covers vers ...
Page 152: ...7 4 Service Manual e STUDIO 16P Assembly 2 Frame y 2 Frame ...
Page 154: ...7 6 Service Manual e STUDIO 16P Assembly 3 Fuser Fuser ...
Page 156: ...7 8 Service Manual e STUDIO 16P Assembly 4 Main Drive ly 4 Main Drive ve ...
Page 158: ...7 10 Service Manual e STUDIO 16P Assembly 5 Paper Feed 5 Paper Feed ...
Page 160: ...7 12 Service Manual e STUDIO 16P Assembly 6 Printhead Printhead ...
Page 162: ...7 14 Service Manual e STUDIO 16P Assembly 7 Electronics Electronics ...
Page 164: ...7 16 Service Manual e STUDIO 16P Assembly 8 Options Options ...
Page 170: ...7 22 Service Manual e STUDIO 16P ...


