e-STUDIO202S DISASSEMBLY AND ASSEMBLY 8 - 2
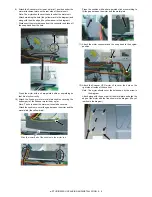
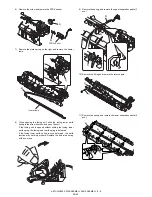
6) Clean the cleaning section and the waste toner pipe to remove
waste toner completely with a vacuum cleaner.
7) Remove the felt and duplex tape completely.
Note: Be careful not to scratch or bend the sub blade.
8) Attach the cleaning blade.
Securely insert the plate section of the cleaning blade into the
unit and fix it with a screw.
Do not touch the cleaning blade rubber with your hand.
When attaching the cleaning blade, press the cleaning blade
in the arrow direction and attach.
9) Attach the felt.
Attach the mocket with slightly pressing section A of the clean-
ing blade.
Do not touch the tip of the cleaning blade.
Do not put the mocket under the cleaning blade.
Do not put the mocket on the sub blade.
Do not press the sub blade with the mocket.
10) Attach the main charger.
Securely set the MC holder on the projection of the process
frame.
Securely insert two projections of the MC holder into the
groove in the process frame.
When attaching the MC holder ass'y, be careful not to make
contact with the cleaning blade.
11) Attach the drum fixing plate and the photoconductor drum.
Apply grease to the inside of the photoconductor drum. (Dia.
2)
Attach the drum from (b). (Prevention against the sub blade
edge breakage)
Attach the drum so that its position with the sub blade is as
shown.
0 – 0.3 mm
0 – 0.3 mm
0 – 0.5 mm
0 – 0.5 mm
0.2 – 0.5 mm
0.2 – 0.5 mm
Cleaning blade
Cleaning blade
Moquette R
Sub blade
Sub blade
Moquette F
Moquette R
Moquette F
∗
∗
∗
: Check while pressing the blade.
Be careful not to allow the
moquette to cover the sub blade.
Example of NG

