Repair Information
4-3
5060-XXX
4.
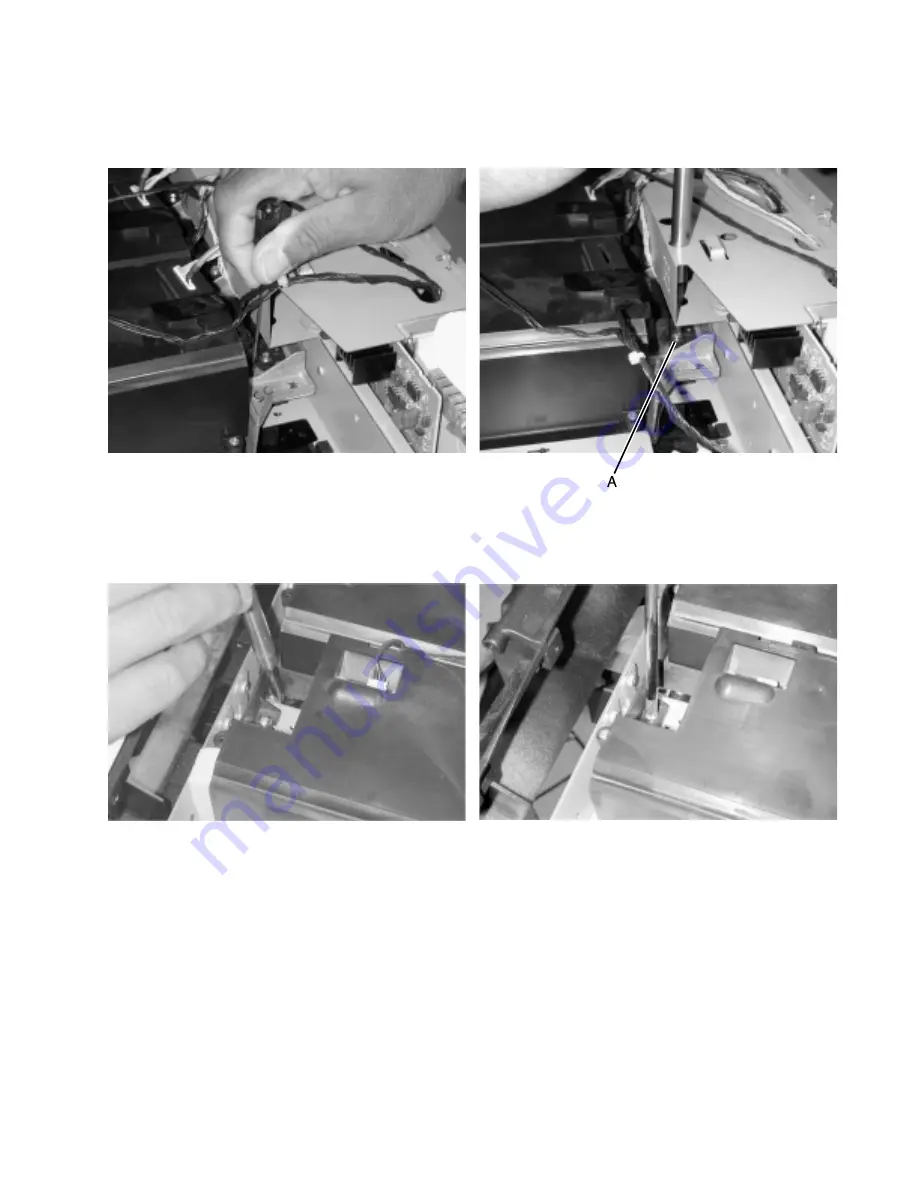
Move the rear of the printhead to a position that allows the color of the printhead
being adjusted to align over the black target on the left side of the Alignment Test
Page. Tighten the right rear mounting screw (A).
5.
Run an Alignment Test Page to verify the printhead rear adjustment.
6.
Move the front of the printhead to a position that allows the printhead color to align
over the black target on the right side of the Alignment Test Page. Tighten the front
mounting screw.
7.
Run an Alignment Test Page to verify the printhead front adjustment.
Note: You may be required to make both front and rear printhead adjustments several
times to obtain correct manual alignment on both sides of the Alignment Test Page.
8.
After you obtain correct front and rear printhead adjustments, tighten the left rear
printhead mounting screw.
Summary of Contents for e-STUDIO 20CP
Page 2: ...COLORPRINTER e STUDIO20CP ...
Page 3: ... ii ...
Page 5: ......
Page 19: ...xvi Service Manual 5060 XXX ...
Page 37: ...1 18 Service Manual 5060 XXX ...
Page 161: ...2 124 Service Manual 5060 XXX ...
Page 200: ...Repair Information 4 15 5060 XXX 4 Remove the right rear cover screw type 121 on page 4 4 A ...
Page 246: ...Connector Locations 5 17 5060 XXX RIP Board ...
Page 254: ...Connector Locations 5 25 5060 XXX HVPS Board ...
Page 256: ...Connector Locations 5 27 5060 XXX HVPS Developer Board ...
Page 257: ...5 28 Service Manual 5060 XXX ...
Page 261: ...7 2 Service Manual 5060 XXX Assembly 1 Covers ...
Page 263: ...7 4 Service Manual 5060 XXX Assembly 1 1 Covers ...
Page 269: ...7 10 Service Manual 5060 XXX Assembly 5 Paper Feed Output Redrive ...
Page 271: ...7 12 Service Manual 5060 XXX Assembly 6 Multipurpose Feeder MPF ...
Page 273: ...7 14 Service Manual 5060 XXX Assembly 7 500 Sheet Integrated Tray ...
Page 277: ...7 18 Service Manual 5060 XXX Assembly 9 1 ITU Assembly ...
Page 279: ...7 20 Service Manual 5060 XXX Assembly 10 Cartridge Contact Assembly ...
Page 281: ...7 22 Service Manual 5060 XXX Assembly 11 Electronics ...
Page 283: ...7 24 Service Manual 5060 XXX Assembly 11 1 Electronics ...
Page 291: ...7 32 Service Manual 5060 XXX Assembly 12 Output Expander ...
Page 293: ...7 34 Service Manual 5060 XXX Assembly 12 1 Output Expander ...
Page 295: ...7 36 Service Manual 5060 XXX Assembly 13 5 Bin Mailbox ...
Page 297: ...7 38 Service Manual 5060 XXX Assembly 13 1 5 Bin Mailbox ...
Page 299: ...7 40 Service Manual 5060 XXX Assembly 14 500 Sheet Tray Option ...
Page 301: ...7 42 Service Manual 5060 XXX Assembly 14 1 500 Sheet Tray Option ...
Page 303: ...7 44 Service Manual 5060 XXX Assembly 15 Duplex Unit ...
Page 305: ...7 46 Service Manual 5060 XXX Assembly 15 1 Duplex Unit ...
Page 307: ...7 48 Service Manual 5060 XXX Assembly 16 HCIT ...
Page 309: ...7 50 Service Manual 5060 XXX Assembly 16 1 HCIT ...
Page 323: ...I 8 Service Manual 5060 XXX ...


