1
2
3
4
5
6
7
8
9
10
11
12
8-7
15
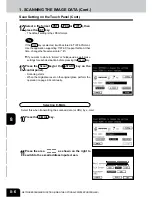
Select an attachment format ( ATTACHMENT or
URL ), then press the SET key.
- ATTACHMENT ...Attaches the scanned image data to the
e-mail and sends them to the set mail address from the
printer controller. However, if the mail sever capacity
for ‘ATTACHMENT’ (the initial setting is 1MB when setting
the machine) is exceeded, it is automatically changed to ‘URL’
and sent.
- URL ...Sends the mail with the URL address where the
scanned image data are stored.
If you want to store in ‘mailbox’ or ‘holdqueue’ as well, make
settings for each destination before pressing the Scan! key.
12
Enter the e-mail address using the alphabet (touch
panel) and numbers (digital keys), then press the
SET key.
- For one address, 80 letters can be entered at a maximum.
For 2 addresses or more, 128 letters (including ‘,’ ) can be
entered at a maximum in total.
- Use the following keys as necessary.
...Press these keys to move the cursor.
Space ...Press this key to enter a space.
B Space ...Press this key to delete a letter before
the cursor.
Cancel ...Press this key to cancel entry and go back to the
screen in step 11.
c Clear (control panel)...Press this key to delete all letters.
14
Select a file format ( PDF , JPEG or TIFF ).
- The default setting is the JPEG format.
13
Confirm the entered e-mail address.
- Perform steps 11 to 12 if any correction is required.
Summary of Contents for e-studio 210c
Page 1: ...OPERATOR S MANUAL FOR COPYING FUNCTIONS DIGITAL COLOUR PLAIN PAPER COPIER ...
Page 26: ...1 2 3 4 5 6 7 8 9 10 11 12 1 12 BEFORE MAKING COPIES ...
Page 60: ...1 2 3 4 5 6 7 8 9 10 11 12 3 16 SETTING OF BASIC COPY MODES ...
Page 70: ...1 2 3 4 5 6 7 8 9 10 11 12 4 10 COLOUR EDITING AND ADJUSTMENT ...
Page 92: ...1 2 3 4 5 6 7 8 9 10 11 12 USING THE EDITING FUNCTIONS 5 22 ...
Page 172: ...1 2 3 4 5 6 7 8 9 10 11 12 9 30 WHENTHE GRAPHIC SYMBOLS FLASH ONTHETOUCH PANEL ...


