1
2
3
4
5
6
7
8
9
10
11
12
3-4
SETTING OF BASIC COPY MODES
2
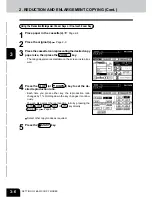
Press the desired cassette, then the ZOOM··· key.
- The copy paper size is selectable on the screen in step 3 as
well.
Automatic Magnification Selection (AMS)
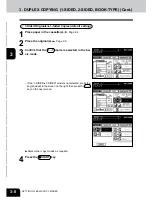
1
Place paper in the cassette(s).
Page 2-4
3
Press the AMS key.
- OTHER key
Page 6-15
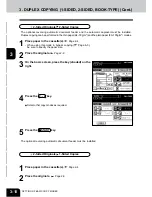
4
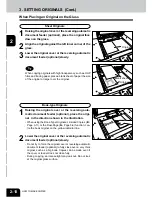
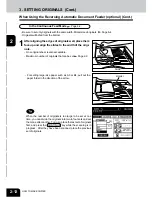
Place the original(s).
Page 2-9
- The built-in sensors automatically detect the size of the
original(s) and compute the reproduction ratio using the speci-
fied paper size.
- If the following messages are shown, proceed as directed:
Change direction of original
Use reduced-size cassette
Select other copy modes as required.
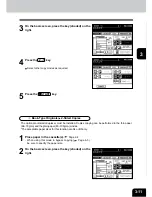
5
Press the
START key.
2. REDUCTION AND ENLARGEMENT COPYING
There are the following three ways of making copies in the reduction and enlargement mode:
• Using Automatic Magnification Selection (AMS)
• Specifying both original size and copy size
• Using the reduction/enlargement zoom keys or the one-touch zoom keys
* It is not possible for the device to perform Automatic Magnification Selection with highly transparent
originals such as OHP films and tracing paper, wholly dark originals or originals with dark borders, or
irregular sized originals such as newspapers and magazines. For these types of originals, use the other
reduction/enlargement modes.
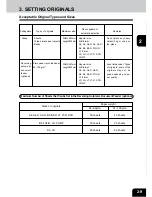
Original sizes for which Automatic Magnificaton Selection (automatic detection) is available
Page
2-9
* Set the paper size for “the OTHER” key as required (
Page 6-15). When the set originals or paper are
a non-standard size other than A3, A4, B4 or A5, you will select the OTHER key on the screen of step
3 below. Before pressing it, you need to make the OTHER key recognize the same size as the originals
or paper that have been set.
Summary of Contents for e-studio 210c
Page 1: ...OPERATOR S MANUAL FOR COPYING FUNCTIONS DIGITAL COLOUR PLAIN PAPER COPIER ...
Page 26: ...1 2 3 4 5 6 7 8 9 10 11 12 1 12 BEFORE MAKING COPIES ...
Page 60: ...1 2 3 4 5 6 7 8 9 10 11 12 3 16 SETTING OF BASIC COPY MODES ...
Page 70: ...1 2 3 4 5 6 7 8 9 10 11 12 4 10 COLOUR EDITING AND ADJUSTMENT ...
Page 92: ...1 2 3 4 5 6 7 8 9 10 11 12 USING THE EDITING FUNCTIONS 5 22 ...
Page 172: ...1 2 3 4 5 6 7 8 9 10 11 12 9 30 WHENTHE GRAPHIC SYMBOLS FLASH ONTHETOUCH PANEL ...


