1
2
3
4
5
6
7
8
9
10
11
12
8-10
NETWORK SCANNING FUNCTION (USING THE OPTIONAL PRINTER CONTROLLER)
1
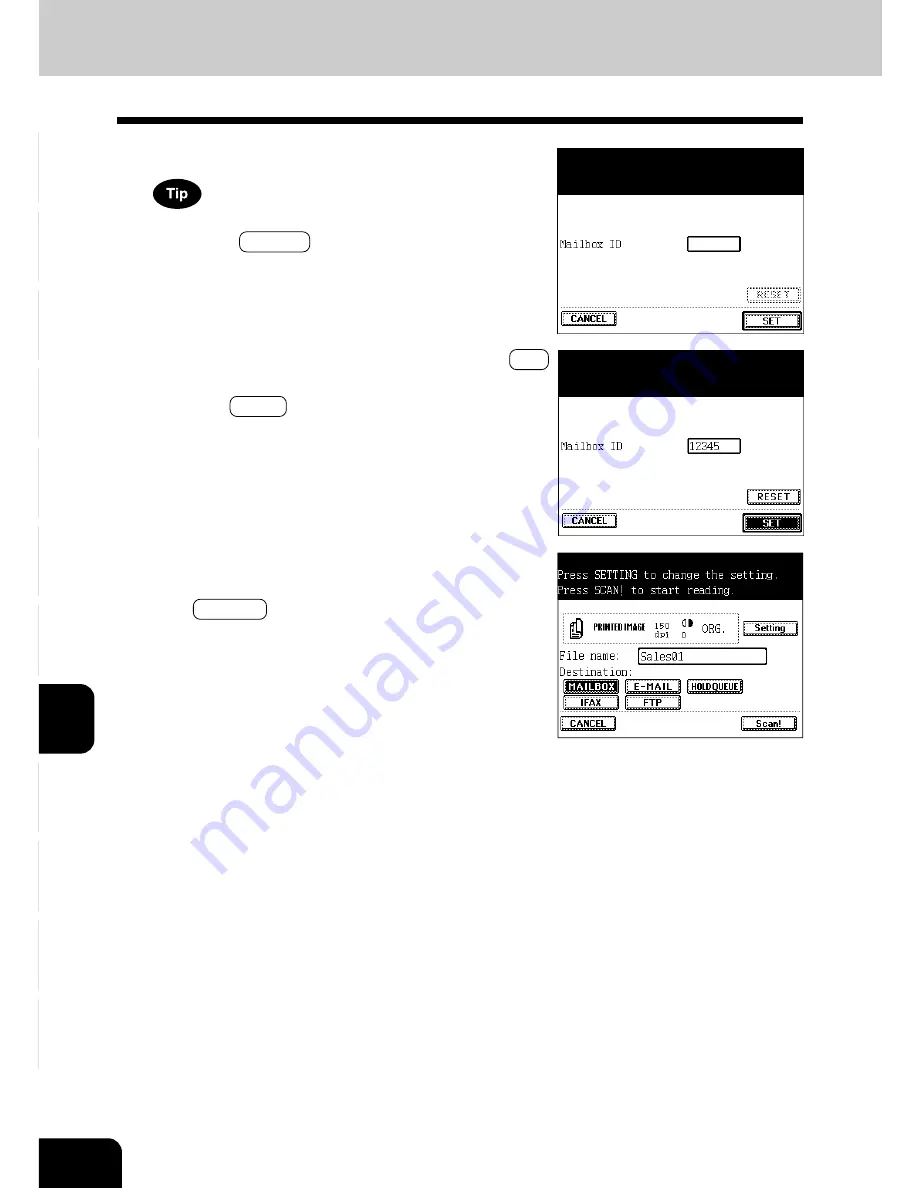
Key in the mailbox ID (0-99999).
You can delete the mailbox ID which has been keyed in by
pressing the C CLEAR key on the control panel.
2. PROCEDURE OF SCAN SETTING (Cont.)
2
Confirm the entered mailbox ID, then press the SET
key.
- Press the RESET key to clear the setting.
3
The preparation to send to the set mailbox ID is
completed.
- The MAILBOX key is highlighted.
- If you want to select more than one destination, press the
corresponding keys in destination continuously.
- When all settings of destination are completed, go back to
in step 9 in page 8-5.
Summary of Contents for e-studio 211c
Page 1: ......
Page 2: ......
Page 61: ...1 2 3 4 5 6 7 8 9 10 11 12 3 18 SETTING OF BASIC COPY MODES ...
Page 71: ...1 2 3 4 5 6 7 8 9 10 11 12 4 10 COLOR EDITING AND ADJUSTMENT ...
Page 93: ...1 2 3 4 5 6 7 8 9 10 11 12 USING THE EDITING FUNCTIONS 5 22 ...
Page 129: ...1 2 3 4 5 6 7 8 9 10 11 12 6 36 USING THE SPECIAL FUNCTIONS ...
Page 199: ...1 2 3 4 5 6 7 8 9 10 11 12 9 30 WHENTHE GRAPHIC SYMBOLS FLASH ONTHETOUCH PANEL ...
Page 222: ...1 2 3 4 5 6 7 8 9 10 11 12 11 17 MEMO ...
Page 223: ...1 2 3 4 5 6 7 8 9 10 11 12 11 18 SPECIFICATIONS OPTIONS MEMO ...
Page 224: ......
Page 225: ......


