1
2
3
4
5
6
7
8
9
10
11
12
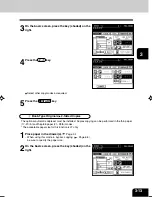
3-15
2
Place the original(s).
Page 2-9
3
Press the AUTO key.
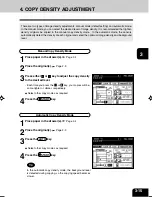
4. COPY DENSITY ADJUSTMENT
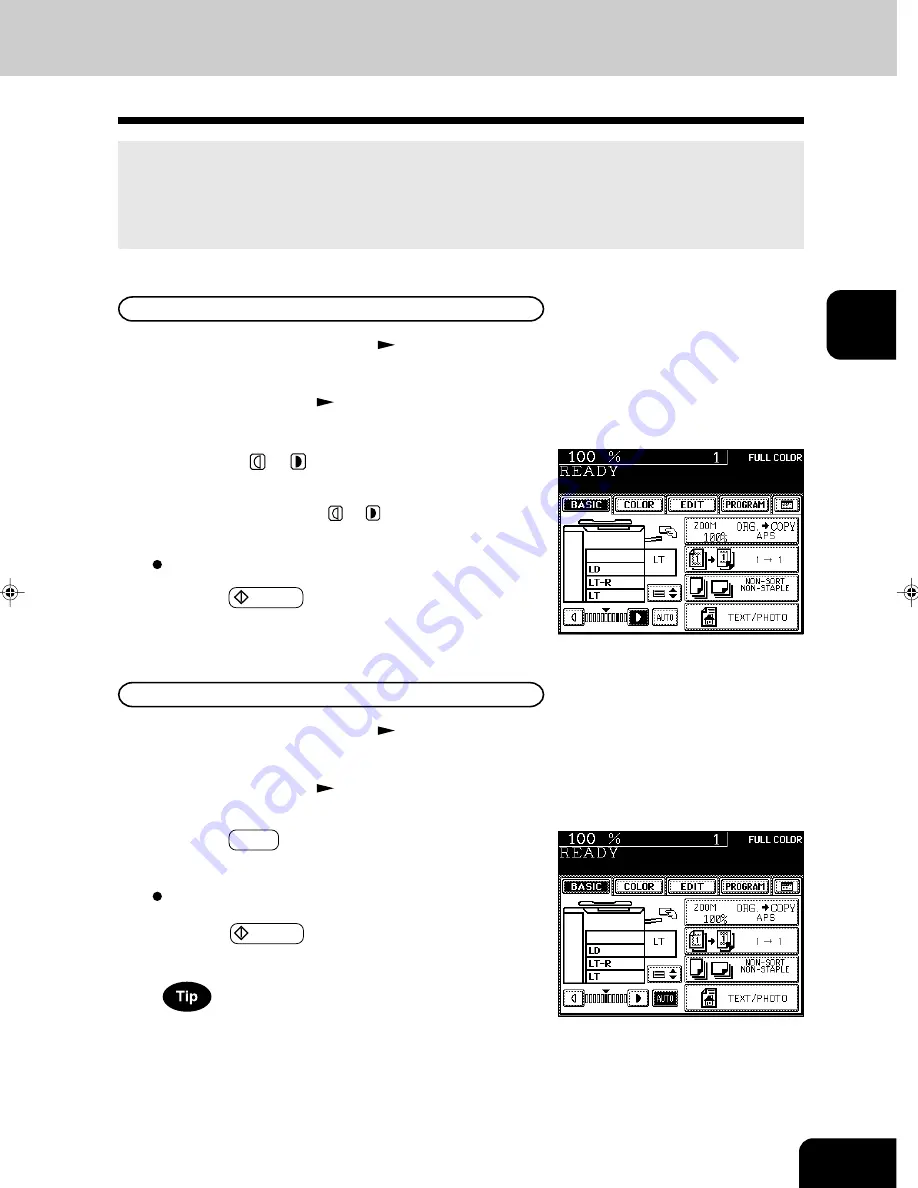
Automatic Copy Density Mode
1
Place paper in the drawer(s).
Page 2-4
4
Press the START key.
In the automatic copy density mode, the background level
is detected during copying, so the copying speed becomes
slower.
Select other copy modes as required.
Manual Copy Density Mode
1
Place paper in the drawer(s).
Page 2-4
3
Press either or
key to adjust the copy density
to the desired level.
- Each time you press the
or
key, y our copies will be-
come lighter or darker, respectively.
4
Press the START key.
2
Place the original(s).
Page 2-9
Select other copy modes as required.
There are two types of image density adjustments: manual mode (default setting) and automatic mode.
In the manual mode, you can select the desired level of image density. It is recommended that lighter-
density originals be copied in the manual copy density mode. In the automatic mode, the sensors
automatically detect the density of each original and select the optimum image density and background
level.
Summary of Contents for e-studio 211c
Page 1: ......
Page 2: ......
Page 61: ...1 2 3 4 5 6 7 8 9 10 11 12 3 18 SETTING OF BASIC COPY MODES ...
Page 71: ...1 2 3 4 5 6 7 8 9 10 11 12 4 10 COLOR EDITING AND ADJUSTMENT ...
Page 93: ...1 2 3 4 5 6 7 8 9 10 11 12 USING THE EDITING FUNCTIONS 5 22 ...
Page 129: ...1 2 3 4 5 6 7 8 9 10 11 12 6 36 USING THE SPECIAL FUNCTIONS ...
Page 199: ...1 2 3 4 5 6 7 8 9 10 11 12 9 30 WHENTHE GRAPHIC SYMBOLS FLASH ONTHETOUCH PANEL ...
Page 222: ...1 2 3 4 5 6 7 8 9 10 11 12 11 17 MEMO ...
Page 223: ...1 2 3 4 5 6 7 8 9 10 11 12 11 18 SPECIFICATIONS OPTIONS MEMO ...
Page 224: ......
Page 225: ......


