© 2003 - 2008 TOSHIBA TEC CORPORATION All rights reserved
e-STUDIO350/352/353/450/452/453
REMOTE SERVICE
8 - 27
8
•
Notify Date 1 and Notify Date 2 ([DATE] button)
Pressing the [DATE] button sets up to 2 dates on which you wand to send data.
* This is not affected by the specified day of the week.
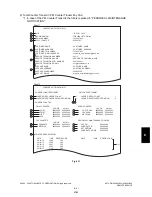
Fig. 8-8
Key in the date (acceptable values: 0-31) in "Notify Date 1" or "Notify Date 2" and press the [SET]
button.
([SET] button not pressed: Correct the value after pressing the [CLEAR] button.
[SET] button already pressed: Correct the value after pressing the [RESET] button to move the
cursor back to the digit to be rectified.)
•
Time setting ([CHANGE] button)
Pressing the [CHANGE] button sets the time at which you wand to send data.
This is the time when data are sent with "Day of the week", "Notify Date 1" and "Notify Date
2".
Fig. 8-9
Key in the time (acceptable values: 00:00-23:59) in "Time".
Key in the time in the hour column of "Time", press the [SET] button, key in the time in the minute
column of "Time" and press the [SET] button.
([SET] button not pressed: Correct the value after pressing the [CLEAR] button.
[SET] button already pressed: Correct the value after pressing the [RESET] button to move the
cursor back to the digit to be rectified.)
After all the settings are completed, press the [ENTER] button. The display returns to the screen
in step (5).
07/05


