6.INTERNET FAX
Sending Internet Faxes 93
6 INTERNET FAX
6
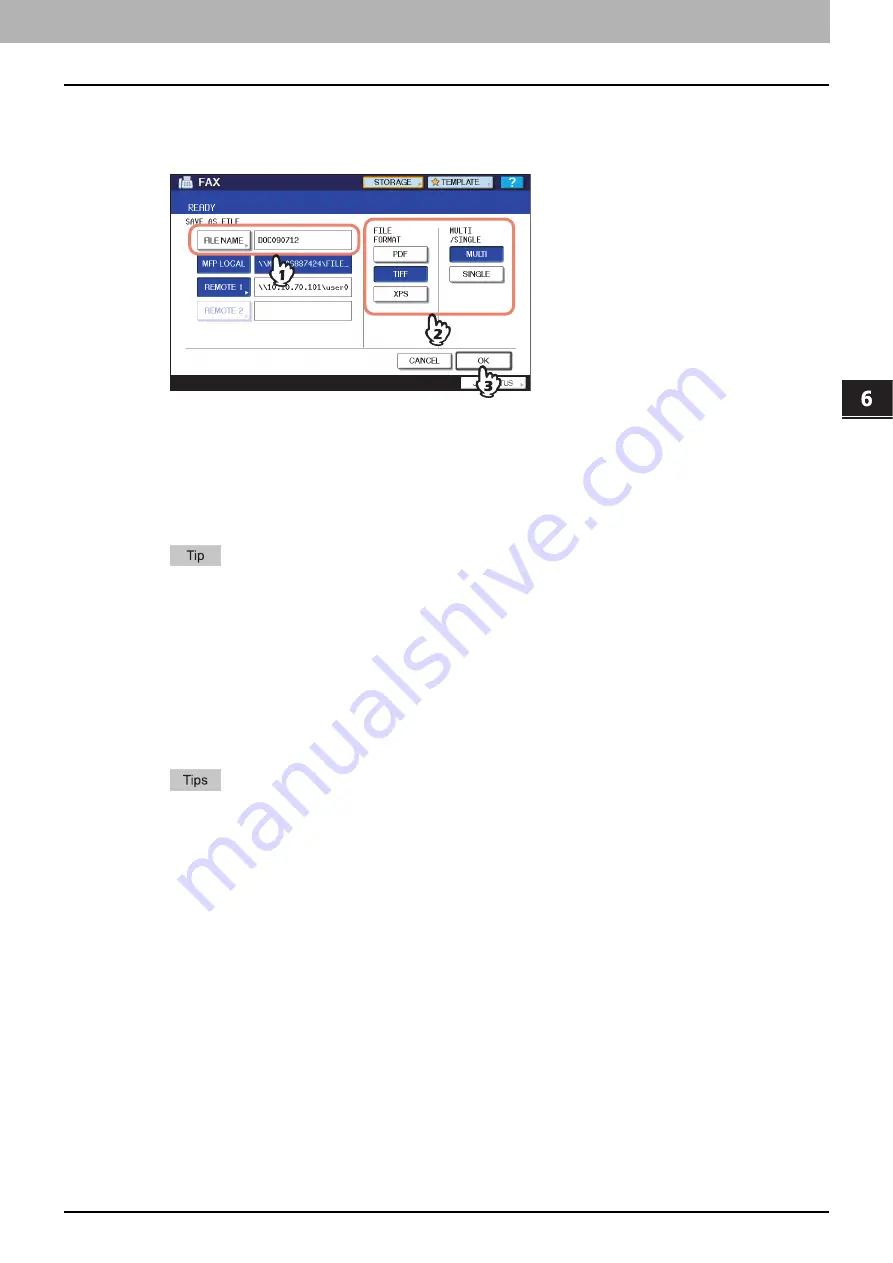
Define the settings for the new file(s) as required.
1) Press [FILE NAME] and change the file name.
2) Select an option for the FILE FORMAT and/or MULTI/SINGLE PAGE settings.
3) Finally, press [OK].
y
[FILE NAME]
Pressing the button displays an on-screen keyboard. Change the file name using the keyboard and digital keys,
and then press [OK] to set the entry. The file name can consist of a maximum of 45 characters.
y
FILE FORMAT
[PDF]
—Press this button to store your scan as a PDF file.
[TIFF]
—Press this button to store your scan as a TIFF file.
[XPS]
—Press this button to store your scan as an XPS file.
XPS files are supported by Windows Vista or Windows Server 2008 SP1; they can also be used on a computer
running Windows XP SP2 or Windows Server 2003 SP1 or later versions with. NET Framework 3.0 installed.
y
MULTI/SINGLE PAGE
[MULTI]
—Press this button to store your scan as a multiple page file. When you scan several pages, the
equipment stores all the pages as a single file.
[SINGLE]
—Press this button to store your scan as a single file for each page. When you scan several pages, the
equipment stores each page as a separate file.
7
Refer to “Sending Internet Fax”(
P.87) and follow Steps 7 and 8 to send your
documents.
y
When the transmission is complete, the equipment saves the sent data. If the transmission results in failure
even after several retries, the equipment saves the data in the selected folder(s). The number of retries to
be made can be specified by the administrator on TopAccess.
y
If the data is saved in the equipment's shared folder, it will be found in the “TXFAX” folder under the
“file_share” folder. To learn more about the “file_share” folder, see the following section:
Summary of Contents for e-STUDIO455 Series
Page 1: ...MULTIFUNCTIONAL DIGITAL SYSTEMS Scanning Guide ...
Page 12: ......
Page 84: ......
Page 104: ......


