10
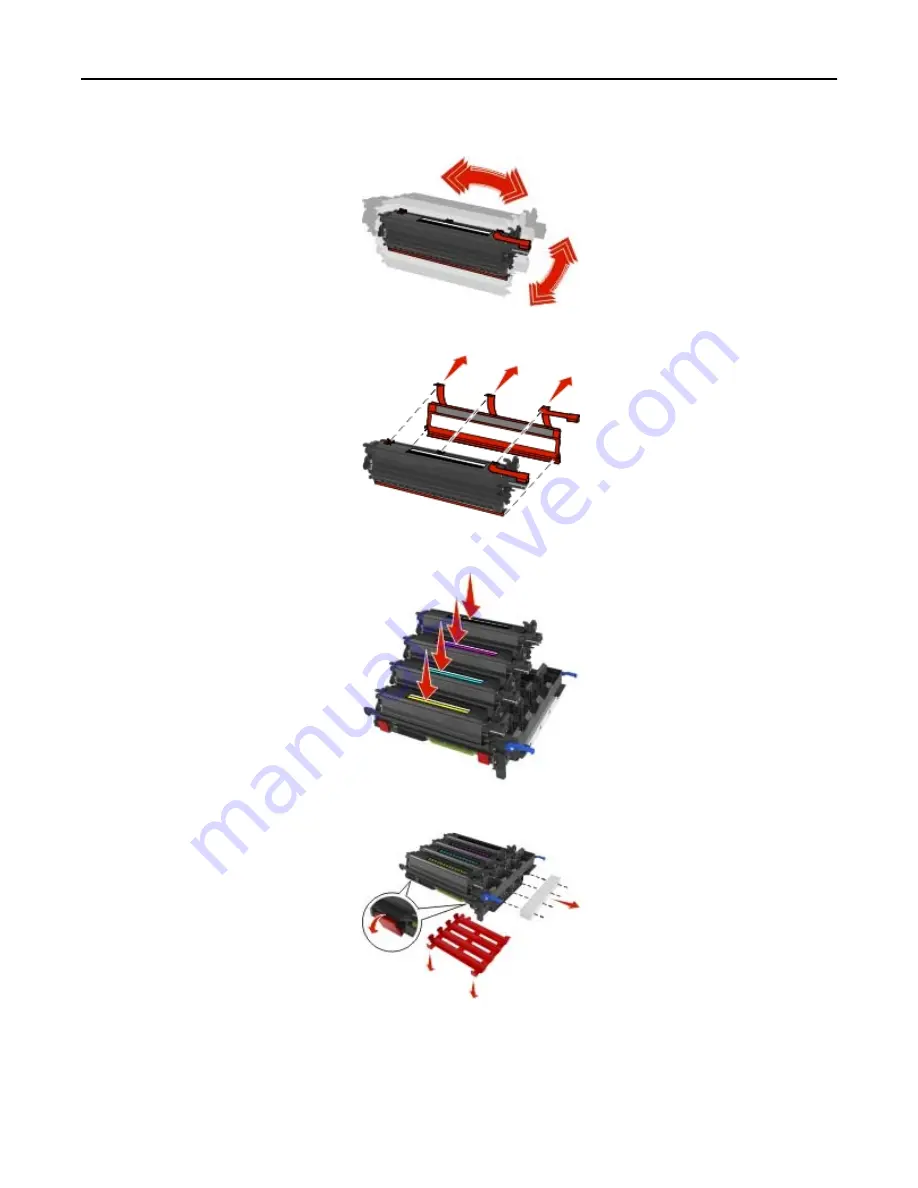
Gently shake the yellow, cyan, magenta, and black developer units side
‑
to
‑
side.
11
Remove the red packing strip and the attached fabric from the developer units.
12
Insert the yellow, cyan, magenta, and black developer units into the matching color slots.
13
Remove the red packing strip from the imaging kit.
Warning—Potential Damage:
Do not touch the shiny photoconductor drum under the imaging kit. Doing so may
affect the quality of future print jobs.
Maintaining the printer
128
Summary of Contents for eS305CP
Page 125: ...2 Open the top door 3 Remove the toner cartridges Maintaining the printer 125 ...
Page 130: ...16 Insert the waste toner bottle 17 Insert the right side cover Maintaining the printer 130 ...
Page 134: ...2 Open the top door 3 Remove the toner cartridges Maintaining the printer 134 ...
Page 138: ...14 Insert the waste toner bottle 15 Insert the right side cover Maintaining the printer 138 ...


