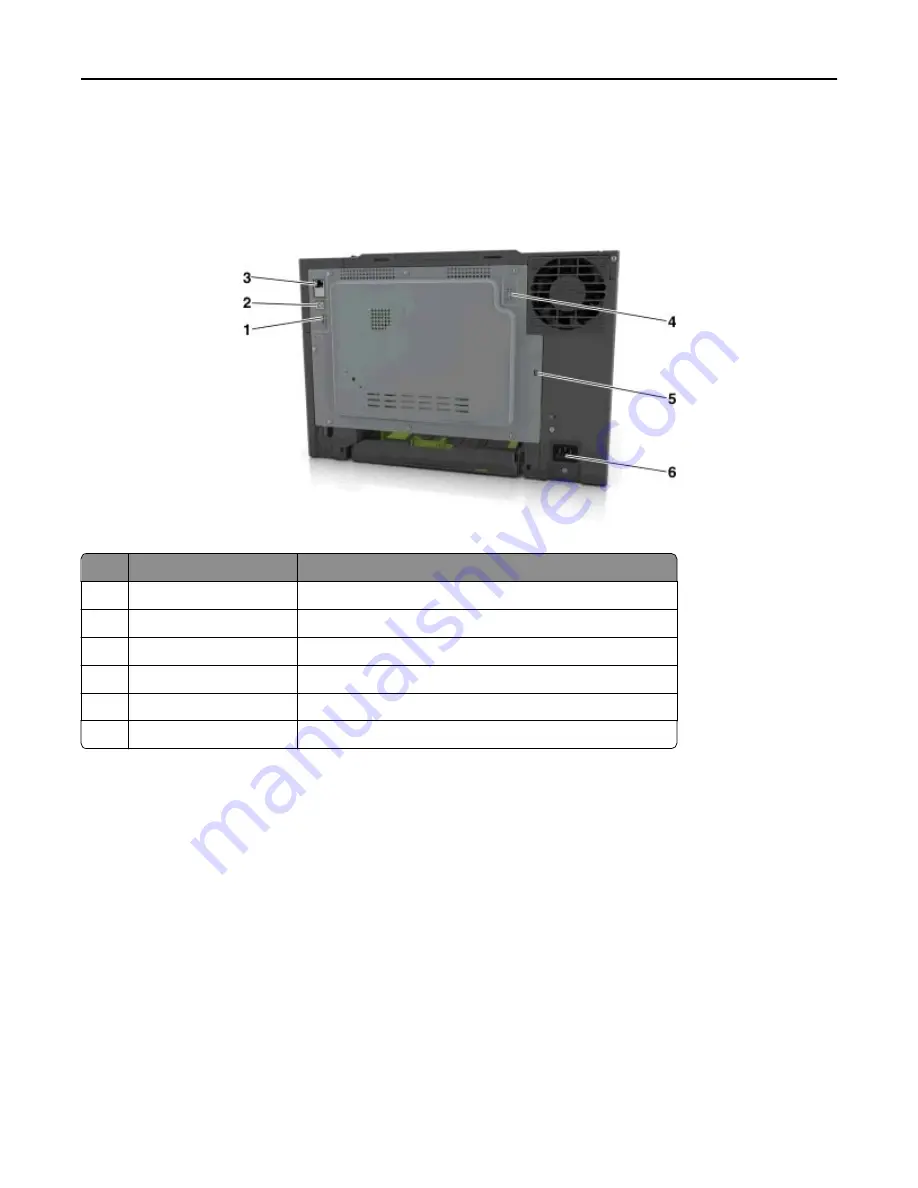
Attaching cables
Make sure to match the following:
•
The USB symbol on the cable with the USB symbol on the printer
•
The appropriate Ethernet cable to the Ethernet port
Use the
To
1
Rear USB port
Attach a keyboard to the printer.
2
USB printer port
Connect the printer to a computer.
3
Ethernet port
Connect the printer to a network.
4
USB wireless port
Attach an optional wireless network adapter.
5
Security lock port
Lock the system controller board.
6
Printer power cord socket Connect the printer to a properly grounded electrical outlet.
Networking
Notes:
•
Purchase a wireless network adapter before setting up the printer on a wireless network. For more information,
contact the place where you purchased the printer.
•
A Service Set Identifier (SSID) is a name assigned to a wireless network. Wired Equivalent Privacy (WEP), Wi-Fi
Protected Access (WPA), WPA2, and 802.1X - RADIUS are types of security used on a network.
Preparing to set up the printer on an Ethernet network
To configure your printer to connect to an Ethernet network, organize the following information before you begin:
Additional printer setup
33
Summary of Contents for eS305CP
Page 125: ...2 Open the top door 3 Remove the toner cartridges Maintaining the printer 125 ...
Page 130: ...16 Insert the waste toner bottle 17 Insert the right side cover Maintaining the printer 130 ...
Page 134: ...2 Open the top door 3 Remove the toner cartridges Maintaining the printer 134 ...
Page 138: ...14 Insert the waste toner bottle 15 Insert the right side cover Maintaining the printer 138 ...


