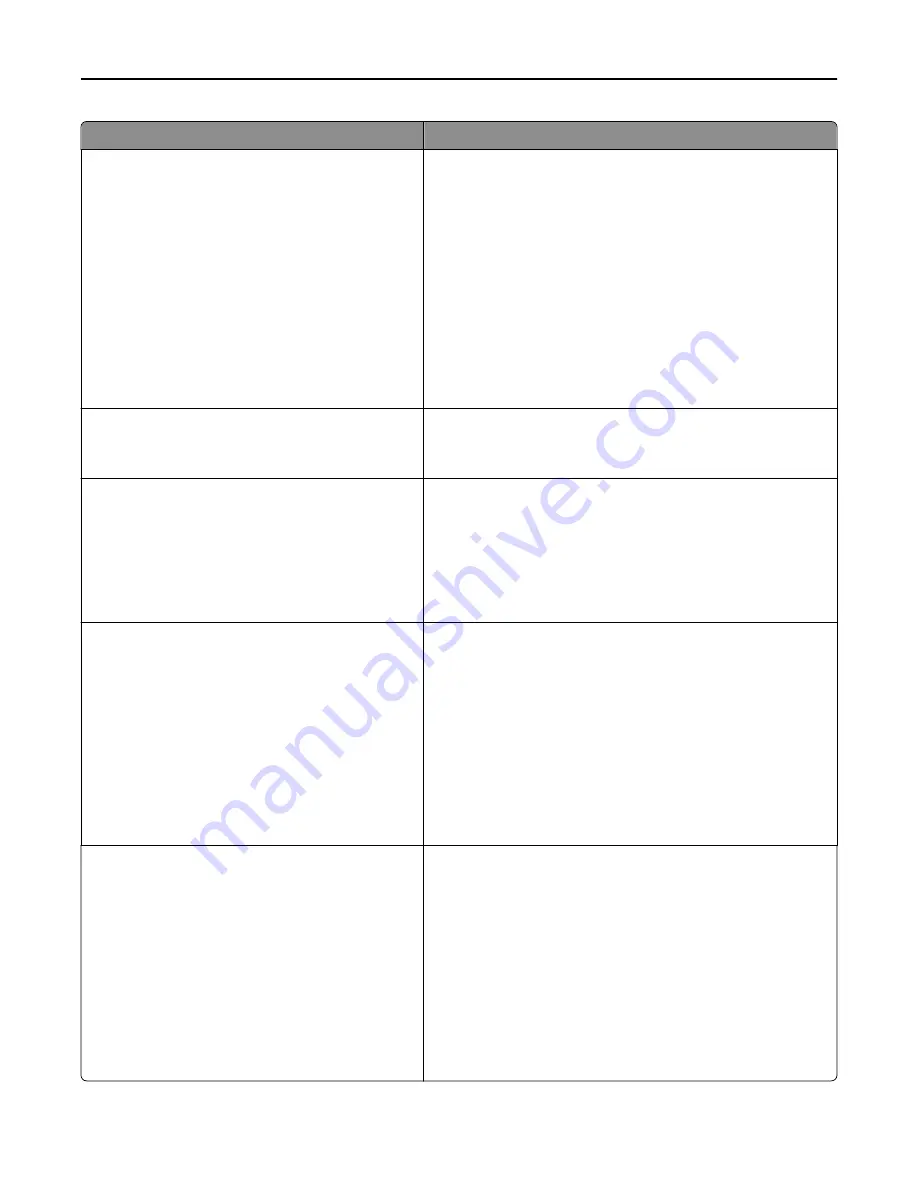
Use
To
Print Area
Normal
Fit To Page
Whole Page
Set the logical and physical printable area.
Notes:
•
Normal is the factory default setting. When attempting to
print data in the non
‑
printable area defined by the Normal
setting, the printer clips the image.
•
Fit to Page fits the page content into the selected paper size.
•
Whole Page allows the image to be moved into the
non
‑
printable area defined by the Normal setting, but the
printer clips the image at the Normal setting boundary. This
setting affects only pages printed using a PCL 5e interpreter
and has no effect on pages printed using the PCL XL or
PostScript interpreter.
Printer Usage
Max Yield
Max Speed
Set color toner use in printing.
Note:
Max Yield is the factory default setting.
Black Only Mode
On
Off
Set the printer to print text and graphics using only the black toner
cartridge.
Notes:
•
Off is the factory default setting.
•
The setting value does not affect the ability of the printer to
generate color output from flash drive print jobs.
Download Target
RAM
Flash
Disk
Set the storage location for downloads.
Notes:
•
RAM is the factory default setting. Storing downloads in the
RAM is temporary.
•
Storing downloads in a flash memory or on a printer hard
disk places them in permanent storage. Downloads remain in
the flash memory or printer hard disk even when the printer
is turned off.
•
This menu item appears only if an optional flash memory or
printer hard disk is installed.
Resource Save
On
Off
Specify how the printer handles temporary downloads, such as
fonts and macros stored in the RAM, when the printer receives a
job that requires more memory than is available.
Notes:
•
Off is the factory default setting. Off sets the printer to retain
the downloads only until memory is needed. Downloads are
deleted in order to process print jobs.
•
On sets the printer to retain downloads during language
changes and printer resets. If the printer runs out of
memory,
38 Memory full
appears, but downloads are
not deleted.
Understanding the printer menus
89
Summary of Contents for eS305CP
Page 125: ...2 Open the top door 3 Remove the toner cartridges Maintaining the printer 125 ...
Page 130: ...16 Insert the waste toner bottle 17 Insert the right side cover Maintaining the printer 130 ...
Page 134: ...2 Open the top door 3 Remove the toner cartridges Maintaining the printer 134 ...
Page 138: ...14 Insert the waste toner bottle 15 Insert the right side cover Maintaining the printer 138 ...


