background image

37

Bienvenido a

T

oshiba

Conectando su

TV

Configurando su

TV

Usando las

funciones de la

TV

Ap
é

ndice

Usando el control

remoto

Informaci

ó

n

importante sobre

seguridad

Ap
é

ndice

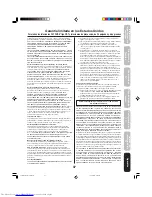
Garantía limitada en los Estados Unidos

Para todos los televisores FST PURE

®

 tipo CRT y televisores de proyección, de 26 pulgadas y más grandes

Toshiba America Consumer Products, L.L.C. (“TACP”) ofrece las siguientes
garantías limitadas al consumidor original de estos televisores en los  Estados
Unidos.  ESTAS GARANTÍAS LIMITADAS SE EXTIENDEN AL COMPRADOR/
CONSUMIDOR ORIGINAL DE ESTE TELEVISOR, O A CUALQUIER OTRA
PERSONA QUE LO RECIBA COMO REGALO DEL COMPRADOR/
CONSUMIDOR ORIGINAL, Y NO A NINGÚN OTRO COMPRADOR O
CONSUMIDOR.
LOS TELEVISORES COMPRADOS EN LOS ESTADOS UNIDOS Y USADOS
EN CUALQUIER LUGAR FUERA DE LOS ESTADOS UNIDOS, INCLUYENDO
PERO SIN LIMITARSE AL CANADÁ Y MÉXICO, NO ESTÁN AMPARADOS POR
ESTAS GARANTÍAS.
LOS TELEVISORES COMPRADOS EN CUALQUIER LUGAR FUERA DE LOS
ESTADOS UNIDOS, INCLUYENDO PERO SIN LIMITARSE AL CANADÁ  Y
MÉXICO, Y USADOS EN LOS ESTADOS UNIDOS, NO ESTÁN AMPARADOS
POR ESTAS GARANTÍAS.

Garantía limitada de un (1) año en las piezas y en la mano de obra

TACP garantiza este televisor y sus piezas contra defectos en los materiales o
en la elaboración, por un período de un (1) año contado a partir de la fecha de
la compra original al por menor.  DURANTE ESTE PERÍODO DE TIEMPO,
TACP TENDRÁ LA OPCIÓN DE REPARAR O REEMPLAZAR CUALQUIER
PIEZA QUE RESULTE DEFECTUOSA POR PIEZAS NUEVAS O
RECONSTRUÍDAS, SIN CARGO ALGUNO PARA USTED POR LAS PIEZAS
NI POR LA MANO DE OBRA.  Cuando sea necesario prestar servicio de
garantía durante este período de tiempo, empleados de un Centro de Servicio
autorizado por TACP vendrán a su casa, y, según el tipo de reparación
necesaria, ellos prestarán ese servicio en su casa o se llevarán el televisor al
Centro de Servicio para repararlo, devolviéndoselo después sin cargo alguno
para usted.

Garantía limitada de dos (2) años en el tubo-pantalla

TACP garantiza el tubo-pantalla de este televisor contra defectos en los
materiales o en la elaboración, por un período de dos (2) años contados a
partir de la fecha de compra original al por menor.  DURANTE ESTE
PERÍODO DE TIEMPO, TACP TENDRÁ LA OPCIÓN DE REPARAR O
REEMPLAZAR UN TUBO-PANTALLA QUE HUBIERE RESULTADO
DEFECTUOSO POR UN TUBO-PANTALLA NUEVO O RECONSTRUÍDO, SIN
CARGO ALGUNO PARA USTED, EXCEPTO QUE SI REPARA O
REEMPLAZA UN TUBO-PANTALLA DESPUÉS DE UN (1) AÑO PASADA LA
FECHA DE COMPRA ORIGINAL AL POR MENOR, TODOS LOS GASTOS
POR CONCEPTO DE MANO DE OBRA RELACIONADOS CON ESA
REPARACIÓN O REEMPLAZO LE CORRESPONDERÁN A USTED.  Cuando
sea necesario prestar servicio de garantía durante este período de tiempo,
empleados de un Centro de Servicio autorizado por TACP vendrán a su casa,
y, según el tipo de reparación necesaria, ellos prestarán ese servicio en su
casa o se llevarán el televisor al Centro de Servicio para repararlo,
devolviéndoselo después sin cargo alguno para usted.

Televisores de alquiler

La garantía para los televisores de alquiler comienza a partir de la fecha del
primer alquiler, o treinta (30) días después de la fecha en que ese televisor es
enviado a la empresa que los alquila, lo que suceda primero.

Garantía limitada para televisores comerciales

TACP garantiza los televisores que se venden y utilizan para propósitos
comerciales, de la manera siguiente: Todas las piezas están garantizadas
contra defectos en los materiales o en la elaboración por un período de
noventa (90) días, contados a partir de la fecha de compra original al por
menor.  DURANTE ESTE PERÍODO DE TIEMPO, TACP TENDRÁ LA OPCIÓN
DE REPARAR O REEMPLAZAR CUALQUIER PIEZA QUE RESULTE
DEFECTUOSA POR UNA PIEZA NUEVA O RECONSTRUIDA, SIN CARGO
ALGUNO PARA USTED.

Manual del propietario y tarjeta de registro del producto

Lea el manual del propietario en su totalidad antes de usar este televisor.
Llene y devuelva por correo la tarjeta de registro del producto adjunta al
presente, o registre su televisor lo más pronto posible en línea en

www.tacp.toshiba.com/service.

  Al registrar su televisor, TACP podrá

ofrecerle nuevos productos específicamente diseñados para satisfacer sus
necesidades, y permitirá que podamos contactarlo en el caso improbable que
fuere necesario enviarle alguna notificación de seguridad conforme al Acta de
Seguridad de Productos del Consumidor de Estados Unidos.  Sus derechos de
garantía no disminuyen si usted no llena ni devuelve dicha tarjeta de registro
del producto.

Sus responsabilidades

LAS GARANTÍAS ANTERIORMENTE MENCIONADAS ESTÁN SUJETAS A LAS
SIGUIENTES CONDICIONES:

(1) Usted deberá conservar su comprobante de compra o proporcionar

alguna otra prueba de la compra.

(2) Todos los servicios de garantía relacionados con este televisor deberán

ser realizados por Centros de Servicio autorizados por TACP.

(3) Las garantías de TACP son válidas solamente si este televisor se

compra y se usa dentro del territorio continental de los Estados Unidos
o en Puerto Rico.

(4) Estas garantías no se extienden al servicio de mano de obra para

instalar y colocar el televisor o ajustar los controles del cliente, ni por la
instalación o reparación de sistemas de antena.  Usted es responsable
por cualquier problema en la recepción causado por un sistema
inadecuado de antena, antenas satelitales mal alineadas, la distribución
de televisión por cable, videograbadoras (VCRs), grabador / reproductor
DVD,  dispositivos IEEE-1394 de computadoras personales, y cualquier
otro dispositivo conectado a la fuente de la señal.

(5) Las garantías sólo se extienden a defectos en los materiales o en la

elaboración, conforme se limitan anteriormente, y no a ningún producto
o a piezas que usted haya perdido o descartado; ni por daños al
televisor o a sus piezas ocasionados por incendios, un uso inadecuado,
accidentes, fuerza mayor (tales como relámpagos o fluctuaciones de la
energía eléctrica), instalación inadecuada, mantenimiento inadecuado,
uso en violación de las instrucciones proporcionadas por TACP, mal
funcionamiento debido al uso de este producto simultáneamente con el
equipo conectado; a unidades que hayan sido modificadas o a las
cuales se les haya quitado, alterado o borrado el número de serie, o
cuando éste se encuentre ilegible.

Cómo obtener servicios de garantía

Si después de seguir todas las instrucciones de funcionamiento incluidas en
este manual y de verificar la sección de solución de problemas titulada
“Localización de fallas”, usted estima todavía que necesita servicio:

(1) Para encontrar el Centro más cercano de Servicio Autorizado por TACP,

visite el sitio Web de TACP en 

www.tacp.toshiba.com/service

, o

póngase en contacto con el Centro de Soluciones para el Consumidor
de TACP, llamando gratis al 1-800-631-3811.

(2) Usted deberá presentar su contrato de venta original o cualquier otra

prueba de compra, al Centro de Servicio autorizado por TACP.

TODAS LAS GARANTÍAS IMPLÍCITAS EN LAS LEYES DE CUALQUIER ESTADO
DE LOS ESTADOS UNIDOS, INCLUSO LAS GARANTÍAS IMPLÍCITAS DE
COMERCIALIZACIÓN E IDONEIDAD PARA UN FIN EN PARTICULAR, SE LIMITAN
EXPRESAMENTE A LA DURACIÓN DE LAS GARANTÍAS LIMITADAS INDICADAS
ANTERIORMENTE.  CON EXCEPCIÓN DE CUALESQUIERA GARANTÍAS
IMPLÍCITAS EN LAS LEYES DE CUALQUIER ESTADO DE LOS EE.UU.,
CONFORME SE LIMITAN POR EL PRESENTE, LA GARANTÍA ANTERIORMENTE
MENCIONADA ES EXCLUSIVA Y EN LUGAR DE TODA OTRA GARANTÍA,
ACUERDOS Y OBLIGACIONES SIMILARES DE TACP CON RESPECTO A LA
REPARACIÓN O EL REEMPLAZO DE CUALQUIER PIEZA.  EN NINGÚN
MOMENTO TACP SE RESPONSABILIZARÁ POR DAÑOS INCIDENTALES O
INDIRECTOS   (INCLUYENDO PERO SIN LIMITARSE AL LUCRO CESANTE,
INTERRUPCIÓN POR EL CESE DE NEGOCIOS, MODIFICACIONES O
ELIMINACIONES DE DATOS GRABADOS CAUSADOS POR EL USO, EL MAL
USO O INEPTITUD EN EL MANEJO DE ESTE TELEVISOR).
Ninguna persona, agente, distribuidor, comerciante o compañía está autorizada
a cambiar, modificar o prorrogar los términos de esta garantía en forma alguna.
El período de tiempo dentro del cual se pueda entablar una demanda para hacer
cumplir alguna obligación de TACP que surja bajo esta garantía o bajo las leyes
de los Estados Unidos o de cualquiera de sus estados, se limita por este medio
a noventa (90) días contados a partir de la fecha en que usted tenga conocimiento
del defecto, o en la que se debería haber tenido conocimiento del mismo.  Esta
limitación no se extiende a las garantías implícitas que surjan conforme a las
leyes de cualquier estado de los Estados Unidos.

ESTA GARANTÍA LE PROPORCIONA DERECHOS LEGALES ESPECÍFICOS,
Y PUDIERA SER QUE USTED TENGA OTROS DERECHOS LOS CUALES
PUEDEN VARIAR DE UN ESTADO A OTRO EN LOS EE.UU.  ALGUNOS
ESTADOS DE LOS EE.UU. NO PERMITEN LIMITACIONES EN CUANTO A LA
DURACIÓN DE UNA GARANTÍA IMPLÍCITA, NI DE CUÁNDO PUEDE
ENTABLARSE UNA DEMANDA, NI DE LA EXCLUSIÓN O LIMITACIÓN POR
DAÑOS INCIDENTALES O INDIRECTOS.  POR LO TANTO, PUDIERA SER
QUE LAS LIMITACIONES O EXCLUSIONES QUE PRECEDEN NO LE
CORRESPONDAN A USTED BAJO ESAS CIRCUNSTANCIAS.

Para más información, visite el sitio en la red de TACP:

www.toshiba.com/tacp.

J3W20521A(S)_P31-Back

14/03/2006, 2:37 PM

37

Summary of Contents for FSTPure ColorStream 27DF46

Page 1: ...27DF46 2006 Appendix Using the TV s Features Setting up your TV Using the Remote Control Connecting your TV Welcome to Toshiba Important Safeguards J3W20521A E _COVER 14 03 2006 2 06 PM 1 ...

Page 2: ...ons WARNING TO REDUCE THE RISK OF FIRE OR ELECTRIC SHOCK DO NOT EXPOSE THIS APPLIANCE TO RAIN OR MOISTURE Dear Customer Thank you for purchasing this Toshiba TV This manual will help you use the many exciting features of your new TV Before operating the TV please read this manual completely and keep it nearby for future reference NOTE TO CATV INSTALLERS This is a reminder to call the CATV system i...

Page 3: ...Heed all warnings 4 Follow all instructions 5 Do not use this apparatus near water 6 Clean only with a dry cloth 7 Do not block any ventilation openings Install in accordance with the manufacturer s instructions 8 Do not install near any heat sources such as radiators heat registers stoves or other apparatus including amplifiers that produce heat 9 Do not defeat the safety purpose of the polarized...

Page 4: ...on to evaporate 31 For added protection of your TV from lightning and power surges always unplug the power cord and disconnect the antenna from the TV if you leave the TV unattended or unused for long periods of time 32 During normal use the TV may make occasional snapping or popping sounds This is normal especially when the unit is being turned on or off If these sounds become frequent or continu...

Page 5: ... 19 Adding channels to the TV s memory 20 Using the TV s features 21 Adjusting the channel settings 21 Using the LOCKS menu 22 Selecting a password 22 Using the V Chip parental control feature 23 Locking channels 24 Locking the video inputs 25 Setting the GameTimerTM 25 Using the front panel lock feature 26 Labeling channels 26 Selecting the video input source 27 Setting the clock 27 Setting the O...

Page 6: ...The STARTING SETUP feature appears the first time you turn on the TV See page 19 for details Welcome to Toshiba Notes To open the menu system you can either press MENU on the remote control or simultaneously press both VOLUME buttons and on the front panel When a menu is open to select the desired setting you can use either the arrow buttons on the remote control or the CHANNEL and VOLUME buttons ...

Page 7: ...ect you to civil and criminal liability Connecting your TV NOTICE RISK OF EQUIPMENT DAMAGE Do not plug in any power cords until you have finished connecting all equipment Connecting your TV A coaxial cable is the standard cable that comes in from your antenna or cable converter box Coaxial cables use F connectors Standard A V audio video cables are usually color coded accord ing to use yellow for ...

Page 8: ...ut of the Converter Descrambler box usually channel 3 or 4 and use the Converter Descrambler box to select channels Option 3 For Subscribers to Unscrambled Basic Cable with Scrambled Premium Channels If you subscribe to a cable service in which basic cable channels are unscrambled and premium channels require the use of a Converter Descrambler box you may wish to use a two set signal splitter some...

Page 9: ...io cable For better picture quality if your VCR has S video you can use an S video cable instead of the standard video cable Do not connect both an S video cable and a standard video cable at the same time or the picture performance will be unacceptable Satellite IN OUT VIDEO AUDIO L R OUT to TV IN OUT VIDEO AUDIO L R IN from ANT CH 3 CH 4 OUT to TV DVD player Satellite Receiver TV Stereo VCR From...

Page 10: ...Y L R S VIDEO DVD player with Component video TV Stereo VCR From antenna Note The ColorStream inputs on this TV are for use with devices that output 480i interlaced signals ONLY This TV will not accept or display 480p or 720p progressive scan signals or 1080i interlaced high definition signals If you connect a high definition set top receiver 480p progressive scan DVD player or other similar devic...

Page 11: ... video and standard audio connections instead Do not connect both an S video and a standard video cable at the same time or the picture performance will be unacceptable The unauthorized recording use distribution or revision of television programs videotapes DVDs and other materials is prohibited under the Copyright Laws of the United States and other countries and may subject you to civil and cri...

Page 12: ...e quality if your camcorder has S video you can use an S video cable plus the standard audio cables instead of a standard video cable Do not connect both a standard video cable and an S video cable at the same time or the picture performance will be unacceptable VIDEO AUDIO L R OUT S VIDEO S VHS Camcorder Back panel of TV VHS Camcorder Front Panel of TV VIDEO AUDIO L R OUT S VIDEO J3W20521A E _P07...

Page 13: ...ital broadcasts with digital audio To hear analog broadcast audio you also must connect analog audio cables from the L R ANALOG AUDIO jacks to the receiver s inputs Consult the owner s manual for your receiver to determine the best way to switch between the analog and digital signals Connecting an audio system This connection allows you to use an audio amplifier with built in digital surround and ...

Page 14: ... TV Channel 3 4 Volume TV TV VCR Using the Remote Control Power CH RTN Channel Return Channel Numbers Input TV Pic Size TV Channel 3 4 Volume TV VCR controls Mute TV CBL SAT VCR Note The TV remote control may not operate your VCR DVD player or cable TV converter Refer to the owner s manual supplied with your other devices to see which features may be available Additionally the remote control for t...

Page 15: ...ayer and press POWER to test the code If the device responds you entered the correct code If the device does not respond repeat steps 1 4 using another code 5 Press TV to control the TV For future reference write down the codes you used Cable TV converter satellite receiver code _____________________ VCR code ______________________________________________ DVD player code __________________________...

Page 16: ...eo Goldstar Gradiente Harman Kardon Hitachi JBL JC Penney Jensen JVC Kenwood Kodak LG Lloyds Logik LXI Magnasonic Magnavox 004 041 018 073 018 001 002 009 040 042 048 056 056 059 061 081 005 010 014 054 056 065 067 018 065 005 024 025 035 037 042 063 070 080 076 005 006 007 008 009 010 023 024 025 026 035 056 061 063 065 024 025 037 005 006 007 014 037 043 062 063 068 082 005 006 007 012 014 037 0...

Page 17: ...18 020 024 025 031 035 049 051 056 057 060 065 066 079 073 018 005 006 007 014 037 053 004 032 034 041 047 069 086 Brand Code Code Brand Code TV VCR Combo Brand Action GE Goldstar Panasonic 078 059 062 065 065 078 065 079 074 Precision Quasar Realistic Sony Toshiba Zenith Totevision 057 065 009 010 065 Brand Code Brand Code Portable DVD Brand Code Aiwa Audiovox 093 094 095 024 096 099 Panasonic RC...

Page 18: ...els you programmed as favorite channels page 21 MENU ENTER accesses the menu system also sets menu selections page 19 EXIT closes on screen menus page 19 DVD MENU accesses the DVD menu PAUSE pauses a videotape DVD SKIP SEARCH skips DVD chapter REW rewinds a videotape DVD TOP MENU accesses the DVD TOP menu REC starts recording a videotape PLAY plays a videotape DVD STOP stops a videotape DVD FF fas...

Page 19: ...he STARTING SETUP function begins and the language setup menu appears on the screen Press or to select your desired language then press ENTER 2 Press or to select TV or CABLE then press ENTER 3 Press or to select START and then press ENTER which starts the AUTO SETUP Note To cancel the setup and return to the regular TV screen press or to select CANCEL and press ENTER 4 When the AUTO SETUP is comp...

Page 20: ... the ADD ERASE selection is highlighted 3 Press or to display the ADD ERASE menu 4 Press or to select ADD ERASE then press 5 Select the desired channel to be memorized or deleted using or Press or to select either ADD or ERASE 6 Repeat step 5 for other channels you want to add or erase then press ENTER 7 Press EXIT to return to the normal screen To erase all channels from the channel memory Press ...

Page 21: ... menu 3 Press or to highlight FAVORITE CH 4 Press or to display the FAVORITE CH menu SET CLEAR will be highlighted 5 Press or to highlight SET and press ENTER 6 Press EXIT to return to normal viewing 7 Repeat steps 1 6 for up to 12 channels To select your favorite channels Press the FAV buttons on the remote control to select your favorite channels The FAV buttons will not work until you have prog...

Page 22: ...firm it and then press ENTER The LOCKS menu appears 5 You may now set up the LOCKS menu See Using the V Chip parental control feature page 23 Locking channels page 24 Locking the video inputs page 25 Setting the GameTimerTM page 25 and Using the front panel lock feature page 26 To change your password 1 Press MENU then press or to display the LOCKS menu 2 Press or to display the password entering ...

Page 23: ...ars old and above TV MA 17 years old and above When you select TV Y7 TV PG TV 14 or TV MA press RECALL to explain the rating Press or to select the desired rating you want Press or to select the setting ON or OFF 7 Press or to highlight MOVIE RATING Then press or to display the RATING SET menu Press or to select the desired rating then press or to select ON or OFF G All ages PG Parental guidance P...

Page 24: ...normal viewing If you try to tune a locked channel the TV will not display it but will display the nearest unlocked channel Notes After programming CH LOCK change channels before turning off the television To return to the LOCKS menu from the CH LOCK menu press or to highlight LOCKS MENU then press or Menu Enter Exit Channel Numbers LOCKS LOCK CH LOCK VIDEO LOCK GAME TIMER FRONT PANEL LOCK NEW PAS...

Page 25: ... playing a video game 30 60 90 or 120 minutes To set up the GameTimer 1 Press MENU then press or to display the LOCKS menu 2 Press or to display the password entering mode 3 Use the Channel Number buttons 0 9 to enter your password then press ENTER The LOCKS menu appears 4 Press or to highlight GAME TIMER 5 Press or to select a time limit 30 minutes 60 minutes 90 minutes 120 minutes or OFF 6 Press...

Page 26: ...ess or to display the CH LABEL menu SET CLEAR will be highlighted 5 Press or to highlight SET 6 Press ENTER to highlight LABEL 7 Repeatedly press or until the character you want appears Press ENTER Note The character will change as follows 8 Repeat step 7 to enter the rest of the characters If you would like a blank space in the label name you must choose an empty space from the list of characters...

Page 27: ...s automatically 5 Press EXIT to return to the normal screen Note After a power failure or disconnection of the power the clock settings will be lost Menu Enter Exit SETUP LANGUAGE CLOCK SET TV CABLE CH PROGRAM ADD ERASE ENGLISH CABLE SELECT ADJUST ON OFF TIMER ON TIMER 6 00AM OFF TIMER 12 00AM OPTION MENU CH 3 CLEAR CLEAR SELECT ADJUST EXIT END CLOCK SET MONTH DAY YEAR TIME 1 1 SUN 2006 12 00AM SE...

Page 28: ...ontrol to cycle among the three picture sizes as described below Available picture sizes for the various input sources available not available 4 3 16 9 ZOOM 4 3 picture size If receiving a 4 3 format analog or digital program selecting 4 3 PIC SIZE will typically display the image in its original formatted proportion If receiving a 16 9 format digital program selecting 4 3 PIC SIZE will typically ...

Page 29: ...screen can become permanently ingrained in the cathode ray tube s of the TV and cause subtle but permanent ghost images This type of damage is NOT COVERED BY YOUR WARRANTY Using the TV s Features 16 9 picture size If receiving a 4 3 format digital program the 16 9 PIC SIZE is not available If receiving a 4 3 format analog program selecting 16 9 PIC SIZE will typically display the image stretched w...

Page 30: ...en press or to display the PICTURE menu 2 Press or to highlight RESET and then press Setting the sleep timer You can use the sleep timer to automatically turn off the TV at a set time To set the sleep timer Repeatedly press SLEEP on the remote control to set the length of time until the TV turns off The clock will increase 10 minutes for each press of the SLEEP button 0h00m 0h10m 1h50m 2h00m After...

Page 31: ...then press 4 Press or to select the desired item to adjust then press or 5 Press or to select the desired setting then press ENTER You can select from among the following items and parameters TEXT SIZE AUTO SMALL STANDARD LARGE TEXT TYPE AUTO DEFAULT MONO W SERIF PROP W SERIF MONO W O SERIF PROP W O SERIF CASUAL CURSIVE SMALL CAPITALS TEXT COLOR AUTO BLACK WHITE RED GREEN BLUE YELLOW MAGENTA CYAN ...

Page 32: ...d MTS also can transmit a second audio program SAP containing a second language or other audio information when available Note The MTS feature is not available in VIDEO mode When the TV receives a stereo or SAP broadcast the word STEREO or SAP displays on screen every time you turn on the TV change the channel or press RECALL To listen to stereo sound 1 Press MENU then press or to display the AUDI...

Page 33: ...languages To select the audio language 1 Press MENU then press or to display the AUDIO menu 2 Press or to highlight AUDIO LANGUAGE then press 3 Press or to select the desired language then press ENTER 4 Press EXIT to return to normal viewing Selecting the digital output format You can choose the format of the digital audio output signal To select the digital output format 1 Press MENU then press o...

Page 34: ...O menu 2 Press or to highlight RESET and then press Digital output PCM Stable sound OFF Surround OFF SELECT ADJUST AUDIO STABLE SOUND SURROUND RESET OFF OFF Using the surround sound feature The surround sound feature expands the audio listening field wider and deeper to create exceptional sound quality from the TV s speakers The feature uses stereo signals from a TV broadcast or video input To tur...

Page 35: ...dd erase feature Cannot access signal input sources Video1 Check the VIDEO LOCK feature Video2 and ColorStream and or Channels 3 and 4 Multiple images The station may have broadcast difficulties Try another channel Use a highly directional outdoor antenna Poor color or no color The station may have broadcast difficulties Try another channel Adjust the TINT and or COLOR in the PICTURE menu If you c...

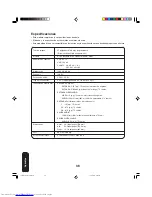
Page 36: ...io power 2 5 W 2 5 W Speaker type 2 x 4 11 16 in 50 8 x 119 4 mm x 2 pcs Video Audio terminals S VIDEO INPUT Y INPUT 1V p p 75 ohm negative sync C INPUT 0 286V p p burst signal 75 ohm VIDEO AUDIO INPUT VIDEO 1V p p 75 ohm negative sync AUDIO 150 mV rms 30 modulation equivalent 47k ohm ColorStream component video INPUT Y 1V p p 75 ohm PR 0 7V p p 75 ohm PB 0 7V p p 75 ohm AUDIO OUTPUT 150 mV rms 30...

Page 37: ...ct Failure to complete and return the product registration card does not diminish your warranty rights Your Responsibility THE ABOVE WARRANTIES ARE SUBJECT TO THE FOLLOWING CONDITIONS 1 You must retain your original bill of sale or provide other proof of purchase 2 All warranty servicing of this television must be performed by an Authorized TACP Service Station 3 The warranties from TACP are effec...

Page 38: ... FST Pure TheaterView and StableSound are registered trademarks of Toshiba America Consumer Products L L C GameTimer is a trademark of Toshiba America Consumer Products L L C PRINTED IN THAILAND J3W20521A E _P31 Back 14 03 2006 2 20 PM 38 ...

Page 39: ...s los derechos reservados 2006 L Información importante sobre seguridad Conectando su TV Configurando su TV Usando las funciones de la TV Apéndice Usando el control remoto Bienvenido a Toshiba J3W30421A S _COVER 15 03 2006 2 08 PM 1 ...

Page 40: ...s familiares y amigos nuestro mensaje de seguridad acerca de este peligro oculto en el hogar Gracias AVISO A LOS INSTALADORES DE TELEVISIÓN POR CABLE CABLE TV CATV Este es un recordatorio para los instaladores de sistemas de CATV sobre el Artículo 820 40 de la NEC que dispone pautas para la conexión a tierra correcta y especifica en particular que el cable de tierra se debe conectar al sistema de ...

Page 41: ...de alimentación o del enchufe derrame de líquidos o caída de objetos en el interior o exposición a la lluvia o a la humedad 15 CUIDADO Para prevenir descargas eléctricas no usar este enchufe polarizado con un cable de extensión receptáculo u otro tomacorriente a menos que las clavijas puedan insertarse para prevenir su exposicón Instalación cuidado y servicio Instalación Siga estas recomendaciones...

Page 42: ...tina para determinar que el televisor funciona sin peligro 36 Cuando el televisor llegue al fin de su vida útil pídale a un técnico de servicio calificado que lo deseche de manera adecuada Desecharlo de manera incorrecta puede causar implosión del tubo de imagen y posibles lesiones personales 24 Conecte este equipo únicamente a una fuente de alimentación de 120 V CA 60 Hz 25 Verifique siempre que ...

Page 43: ... en la pantalla 19 Agregando canales a la memoria del televisor 20 Usando las funciones del televisor 21 Ajustando la configuración de los canales 21 Usando el menú de BLOQUEAR 22 Seleccionando una Contraseña 22 La función del V Chip control paterno 23 Bloqueando los canales 24 Bloqueando la entrada de video 25 Configurando el GameTimer Tiempo de juego 25 Usando la función de bloqueo del panel fro...

Page 44: ...todas las entradas que necesitará para conectar otro equipo a su televisor Notas Para abrir el sistema de menú puede presionar MENU en el mando a distancia o apretar simultáneamente los botones de VOLUMEN y en el panel delantero Cuando un menú está abierto para seleccionar el ajuste deseado puede usar los botones de flecha sobre el mando a distancia o los botones de CANAL y VOLUMEN en el panel del...

Page 45: ... la imagen Sólo pueden usarse los cables de S video con los componentes compatibles de S video Los cables de video de componentes y proporcionan el mejor desempeño de la imagen Los cables de video de componentes sólo podrán usarse con componentes que sean compatibles con el video de componentes El cable de Interfaz para digital audio coaxial es para usarse con equipos de video que tengan salida di...

Page 46: ...ador y conecte la salida de éste a la entrada de antena en la parte trasera del televisor Siga la conexión como se muestra en la figura Sintonice el televisor en el canal de salida del convertidor descodificador usualmente canal 3 ó 4 y utilice el convertidor descodificador para la selección de canales Para los Abonados a un Servicio de Cable BÁSICO con Canales Especiales Codificados Si Ud está su...

Page 47: ... juegos de cables normales de A V Nota Si usa una videograbadora monofónica conecte L Mono a Audio OUT de la videograbadora usando sólo un cable de audio Para obtener una mejor calidad en la imagen si su videograbadora tiene S video podrá usar un cable de S video en lugar del cable normal de video No conecte un cable normal de video y un cable de S video simultáneamente o la calidad de la imagen n...

Page 48: ...autorizada el uso la distribución o la revisión de los programas televisivos videos DVD y otros materiales se prohíben bajo las Leyes de Copyright de los Estados Unidos y otros países y podrían estar sujetos a la responsabilidad civil y penal Reproductor de DVD con composante de video A la antena Videograbadora estereofónica Conectando su TV Nota Las entradas del ColorStream en esta televisión son...

Page 49: ...coaxiales Dos juegos de cables normales de A V Un par de cables normales de audio Un par de caldes composante de video Conectando su TV La grabación no autorizada el uso la distribución o la revisión de los programas televisivos videos DVD y otros materiales se prohíben bajo las Leyes de Copyright de los Estados Unidos y otros países y podrían estar sujetos a la responsabilidad civil y penal Video...

Page 50: ...ideo Un par de cables normales de audio Nota Para obtener una mejor calidad en la imagen si su videocámara tiene S video podrá usar un cable S video más los cables normales de audio en lugar de un cable normal de video No conecte un cable normal de video y un cable de S video simultáneamente o la imagen será inaceptable Videocámara S VHS VIDEO AUDIO L R OUT S VIDEO Videocámara VHS Panel delantero ...

Page 51: ...conectores de audio izquierdo y derecho L R en las entradas del receptor Consulte el manual del usuario para determinar la mejor forma de elegir entre las señales análogas o digitales para su receptor Conectando un sistema de audio Esta conexión le permite usar un amplificador de audio con sonido surround digital incorporado y altavoces externos Conectando un amplificador AV con sonido surround di...

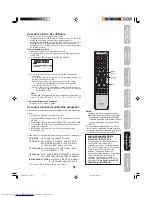
Page 52: ... control remoto para operar otros aparatos en la página 15 Los botones mostrados a la derecha controlarán luego la videograbadora Presione primero el botón de VCR Usando el control remoto para operar otros aparatos Nota El control remoto del televisor prodría no operar su videograbadora reproductor de DVD o convertidor de cable TV Refiérase al manual del propietario proporcionado con el equipo res...

Page 53: ...Reproductor de DVD Presione DVD 3 Mientras retiene RECALL presione los botones de números para los canales e ingrese el código de tres dígitos para la marca de su Convertidor de Cable TV Receptor Satelital Videograbadora o Reproductor de DVD 4 Apunte el control remoto al Convertidor de Cable TV Receptor Satelital Videograbadora o Reproductor de DVD y presione POWER para probar el código Si el Conv...

Page 54: ...23 057 064 068 070 071 079 Fuji Funai Garrard GE Go Video Goldstar Gradiente Harman Kardon Hitachi JBL JC Penney Jensen JVC Kenwood Kodak LG Lloyds Logik LXI Magnasonic Magnavox 004 041 018 073 018 001 002 009 040 042 048 056 056 059 061 081 005 010 014 054 056 065 067 018 065 005 024 025 035 037 042 063 070 080 076 005 006 007 008 009 010 023 024 025 026 035 056 061 063 065 024 025 037 005 006 00...

Page 55: ...35 049 051 056 057 060 065 066 079 073 018 005 006 007 014 037 053 004 032 034 041 047 069 086 Marca Código Código Marca Código Conjunto de TV con videograbadora Marca Action GE Goldstar Panasonic 078 059 062 065 065 078 065 079 074 Precision Quasar Realistic Sony Toshiba Zenith Totevision 057 065 009 010 065 Marca Código Marca Código DVD portátil Marca Código Aiwa Audiovox 093 094 095 024 096 099...

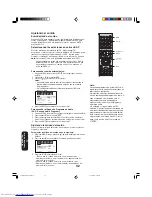
Page 56: ...CH RTN Channel Return regresa al último canal visto página 21 VOL ajusta el nivel del volumen VCR selecciona el modo de CABLE página 14 DVD selecciona el modo de DVD página 15 PIC SIZE hace los ciclos por tres tamaños de la imagen 4 3 16 9 ZOOM página 28 FAV Favorite Channels hace ciclos a través de los canales favoritos página 21 MENU ENTER permite el acceso a los menús de programación y fija la ...

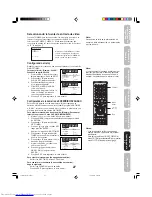
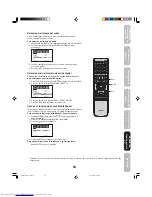
Page 57: ...ce una selección Sus cambios todavía se guardarán Cuando haya terminado de programar los menús presione EXIT Empezando configuración La función de EMPEZANDO CONFIGURACION aparecerá la primera vez que encienda el televisor y le ayudará a seleccionar el idioma del menú especificar la configuración de TV CABLE y programar los canales automáticamente IMPORTANTE Debe primero conectar un sistema de ante...

Page 58: ...específicos manualmente Para agregar o borrar los canales manualmente haga lo siguiente 1 Presione MENU y luego presione o despliegue el menú de SETUP 2 Presione o para resaltar ADD ERASE 3 Presione o despliegue el menú de ADD ERASE 4 Presione o seleccione ADD ERASE luego presione 5 Seleccione los canales deseados a agregar o borrar mediante o Presione o para seleccionar ADD agregar o ERASE borrar...

Page 59: ...do en la memoria del televisor o los números de canales para sintonizar directamente un canal Para programar sus canales favoritos 1 Seleccione un canal que desee programar como un canal favorito 2 Presione MENU luego presione o para desplegar el menú de OPTION 3 Presione o para resaltar FAVORITE CH 4 Presione o para desplegar el menú de FAVORITE CH SET CLEAR se resaltará 5 Presione o para resalta...

Page 60: ...menú de LOCKS por primera vez seleccione un número de cuatro dígitos para que sea su contraseña Presione ENTER 4 Ingrese la contraseña de nuevo para confirmarla y luego presione ENTER El menú de LOCKS aparecerá 5 Podrá configurar ahora el menú de LOCKS Vea La función del V Chip control paterno página 23 Bloqueando los canales página 24 Bloqueando la entrada de video página 25 Configurando el GameT...

Page 61: ...Todos los niños TV Y7 7 años de edad y más arriba TV G Público general TV PG Guía paterna TV 14 14 años de edad y más arriba TV MA 17 años de edad y más arriba Cuando seleccione TV Y7 TV PG TV 14 o TV MA presione RECALL para explicar la clasificación Presione o para seleccionar la clasificación deseada Presione o para seleccionar la configuración ON o OFF 7 Presione o para resaltar MOVIE RATING Lu...

Page 62: ...os los canales de la lista de los canales bloqueados Luego presione ENTER 7 Repita los pasos del 1 al 6 para bloquear los otros canales Cuando termine de bloquear los canales presione EXIT para regresar a la vista normal Si intenta sintonizar un canal bloqueado el televisor no lo desplegará pero desplegará el canal no bloqueado más cercano Para desbloquear los canales 1 Presione MENU luego presion...

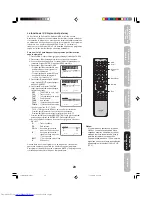
Page 63: ...eo Seleccione OFF del paso 5 de arriba Configurando el GameTimerTM Tiempo de juego Con la función de GameTimerTM podrá automáticamente activar la función de VIDEO LOCK configuración de VIDEO para fijar un límite de tiempo para reproducir un juego de televisión 30 60 90 ó 120 minutos Para configurar el cronómetro del juego haga lo siguiente 1 Presione MENU luego presione o para desplegar el menú de...

Page 64: ...s Las etiquetas del canal aparecen sobre el despliegue del número del canal cada vez que encienda el televisor seleccione un canal o presione el botón de Recall Podrá escoger cualquiera de los cuatro caracteres para identificar un canal Para crear las etiquetas del canal haga lo siguiente 1 Seleccione un canal que desee etiquetar 2 Presione MENU luego presione o hasta que el menú de OPTION aparezc...

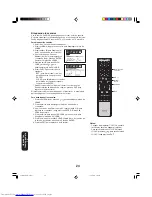
Page 65: ...esplegar el menú de SETUP 2 Presione o para resaltar CLOCK SET luego presione 3 Presione o para ajustar la hora luego presione 4 Fije el DÍA el AÑO y la HORA como en el paso 3 Después de programar la hora la fecha y el tiempo comienzan a funcionar automáticamente 5 Presione EXIT para regresar a la vista normal Configurando el cronómetro de ENCENDIDO APAGADO Esta función le permite a usted programa...

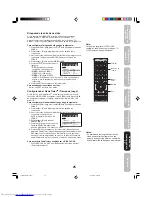
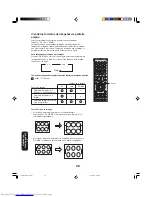
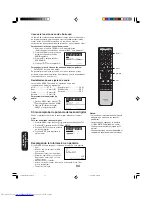
Page 66: ...lo hace los ciclos por tres tamaños de la imagen cuando descrito abajo Pic Size Tamaños de imágenes disponibles para las distintas fuentes de entrada válido inválido 4 3 16 9 ZOOM Tamaño 4 3 de la imagen Si recibe un programa de formato 4 3 análogo digital seleccionando 4 3 PIC SIZE la imagen se verá en la proporción formateada originalmente Si recibe un programa de formato 16 9 digital selecciona...

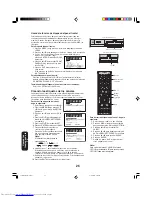
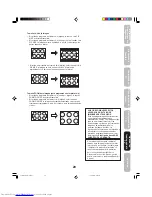
Page 67: ...eo los logotipos de las estaciones de televisión y los subtítulos ocultos pueden quedar marcadas permanentemente en el tubo de imágenes Este tipo de daño NO SE CUBRE POR SU GARANTÍA Tamaño 16 9 de la imagen Si recibe un programa de formato 4 3 digital la función 16 9 PIC SIZE no estará disponible Si recibe un programa de formato 4 3 análogo seleccionando 16 9 PIC SIZE la imagen se verá estirada a ...

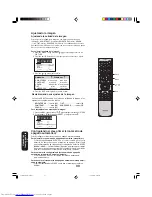
Page 68: ... de PICTURE 2 Presione o para resaltar RESET y luego presione BRIGHTNESS centro 25 CONTRAST max 50 COLOR centro 25 Configurando el sleep timer cronómetro de apagado automático Podrá configurar el televisor para que se apague automáticamente Para ajustar el cronómetro de apagado automatico sleep timer Presione repetidamente SLEEP en el control remoto para fijar la duración de tiempo hasta que el te...

Page 69: ... o texto 1 Sintonice el televisor en el programa deseado 2 Presione MENU y luego presione o para desplegar el menú de SETUP 3 Presione o para resaltar CLOSED CAPTION 4 Presione o para seleccionar el modo deseado de Subtítulos como sigue Para ver subtítulos seleccione C1 o C2 C1 despliega la traducción del idioma primario en su área Nota Si el programa o video que haya seleccionado no tiene subtítu...

Page 70: ...l de televisión MTS Multi channel TV proporciona sonido estereofónico de alta fidelidad MTS también podrá transmitir un segundo programa de audio SAP Second Audio Program conteniendo un segundo idioma u otra información de audio Nota La función MTS no está disponible en el modo de VIDEO Cuando el televisor reciba una transmisión en estéreo o SAP la palabra STEREO o SAP aparecerá en la pantalla cad...

Page 71: ...a normal Para apagar la función de StableSound haga lo siguiente Resalte OFF del paso 3 de arriba Selección del idioma del audio Si una señal digital incluye dos o más idiomas de audio puede seleccionar cuál desea escuchar Para selección del idioma del audio 1 Presione MENU luego presione o despliegue el menú deAUDIO 2 Presione o para resaltar AUDIO LANGUAGE luego presione 3 Presione o para selecc...

Page 72: ...r la calidad excepcional de sonido de las bocinas de la televisión La función usa señales estereofónicas de una transmisión de televisión o una entrada de video Para encender la función de sonido surround 1 Seleccione el modo STEREO si está disponible vea Seleccionando las estaciones en estéreo SAP en la página 32 2 Presione MENU y luego presione o hasta que el menú de AUDIO aparezca 3 Presione o ...

Page 73: ...ón de Add erase No puede acceder a las fuentes de entrada de Verifique la función de VIDEO LOCK la señal Video1 Video2 y ColorStream y o Canales 3 y 4 Imágenes múltiples La estación podría tener dificultades de transmisión Pruebe otro canal Use una antena altamente direccional para exteriores Color pobre o sin color La estación podría tener dificultades de transmisión Pruebe otro canal Ajuste la o...

Page 74: ...s sincronización negativa AUDIO 150 mV rms 30 modulación equivalente 47k ohmios ENTRADA ColorStream video de componente Y 1V p p 75 ohmios PR 0 7V p p 75 ohmios PB 0 7V p p 75 ohmios SALIDA AUDIO 150 MV rms 30 modulación equivalente 47k ohm SALIDA DIGITAL AUDIO AUDIO 0 5 V p p 75 ohmios Dimensiones Ancho 29 1 8 pulgadas 740 mm Alto 22 5 8 pulgadas 574 5 mm Fondo 19 1 2 pulgadas 495 mm Peso 88 2 lb...

Page 75: ...a ni devuelve dicha tarjeta de registro del producto Sus responsabilidades LAS GARANTÍASANTERIORMENTE MENCIONADAS ESTÁN SUJETASALAS SIGUIENTES CONDICIONES 1 Usted deberá conservar su comprobante de compra o proporcionar alguna otra prueba de la compra 2 Todos los servicios de garantía relacionados con este televisor deberán ser realizados por Centros de Servicio autorizados por TACP 3 Las garantía...

Page 76: ...ST PURE TheaterView y StableSound son marcas registradas de Toshiba America Consumer Products L L C GameTimer es una marca comercial de Toshiba America Consumer Products L L C IMPRESO EN TAILANDIA J3W20521A S _P31 Back 14 03 2006 2 37 PM 38 ...

Reviews: