3-11
3
Replacing GA-1121 board components
Replacing GA-1121 board components
This section describes how to remove and install the following replaceable parts on the
GA-1121 board:
• CPU cooling assembly
• DIMM(s)
• Battery
To access GA-1121 board components, remove and open the GA-1121 assembly as
described on page 3-4 and page 3-5.
CPU cooling assembly
The CPU cooling assembly consists of two components: a heatsink and an air intake fan.
The CPU fan runs continuously when the copier is on.
T
O
REMOVE
THE
CPU
COOLING
ASSEMBLY
1.
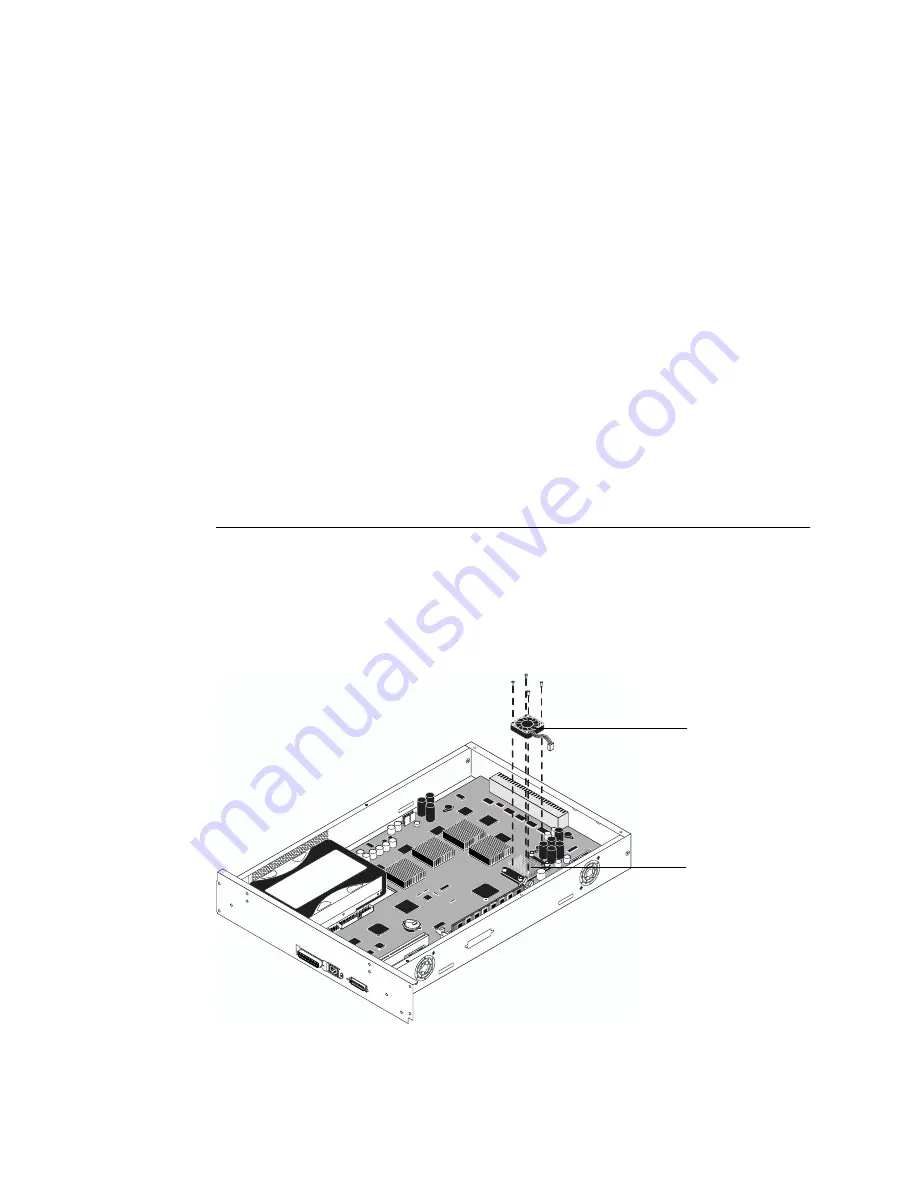
Remove the CPU fan cable from board connector J351.
2.
Using a Phillips screwdriver, remove the four screws that fasten the CPU fan to the CPU
heatsink. Set aside the screws so that you can replace them later.
When using the screwdriver, make sure not to apply excessive pressure on the board.
F
IGURE
3-5
Removing the CPU fan
CPU fan
CPU heatsink


