


7 TROUBLESHOOTING AND SPECIFICATIONS
120 Troubleshooting
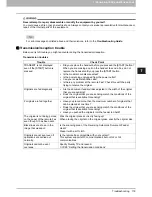
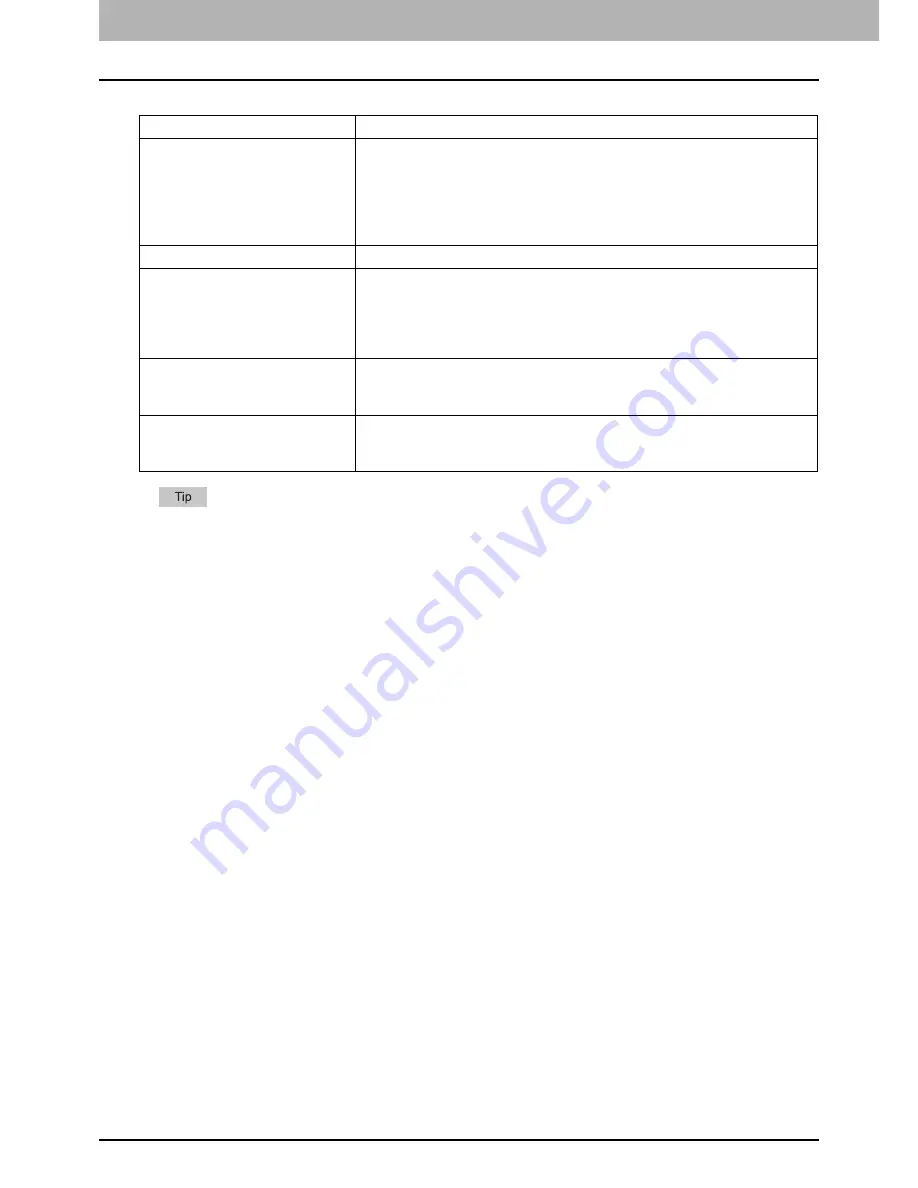
Reception troubles
If the suggested action does not solve the trouble or you encounter trouble not listed above, contact your
service technician or service representative.
Trouble Check
Point
Originals cannot be received
even if “RECEIVE” is displayed
and the [START] button is
pressed.
Did you replace the handset before you pressed the [START] button?
When you answer a call on the handset to receive a Fax, do not
replace the handset until you press the [START] button.
Is the modular cord disconnected?
Is there a problem at the remote Fax? Check this with the party trying
to send the original.
Paper is not output.
Is the equipment out of paper?
The received original is printed
dark and is illegible or black
stripes are printed on the
original.
Make a local copy and confirm proper printing.
Is the original being sent a dirty copy? Check this with the party trying
to send the original.
Is the trouble due to a problem or operation error at the remote Fax?
Check this with the party trying to send the original.
Paper is output but not printed.
Is there enough toner?
Is the original placed correctly on the remote Fax? Check this with the
party trying to send the original.
Paper often misfeeds.
Is the paper drawer size setting correct?
Is the paper drawer properly inserted?
Is the specified paper type being use?
Summary of Contents for GD-1260
Page 50: ......
Page 100: ......
Page 118: ......
Page 124: ......
Page 127: ...Printed in Malaysia GD 1320 GD 1350 GD 1270 GD 1260 OME120024E0 ...


