52
Viewing
・
Listening
and Operation
Set up
Recording
Introduction
Others
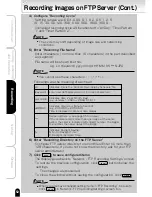
4) Configure "Recording Cycle"
・Setting ranges are: 0.03, 0.06, 0.1, 0.2, 0.5, 1, 2, 5,
10, 15, 30, 60,120, 300, 600, 900, 1800, 3600.
・Configured recording cycle will be reflected to "All Day", "Timer Pattern
1" and "Timer Pattern 2".
NOTE
●
The cycle may shift depending of image size and networking
conditions.
5) Enter "Recording File Name"
・Enter characters ( no more than 16 characters) in the part described
as (keyword).
File name will be shown like this:
e.g. LV (Keyword) yyyy mm dd HH MM SS ***N.JPG
NOTE
●
You cannot use these characters:
\ / : ; , ” | ? * < >
Followings are the meaning of each part.
LV
(Keyword)
yyyymmdd
HHMMSS
***
N
Indicates this is the "Periodic Recording by Schedule" file.
Enter user defined keyword in 16 or less characters.
Indicates date (Year, Month, Day).
(e.g. January 1, 2004 → 2004 01 01)
Indicates time (Hour, Minute, Second).
(e.g. 23:59:00 → 23 59 00).
Time is displayed in 24-hour time display.
Series numbers. (→see page 55 for detail)
If the camera records more than one image at the same
period, the order is indicated with 3-digit number. The bigger
the number, the newer (latest) the image.
Indicates Daylight Saving.
N: Not in Daylight Time
D: Daylight (Summer) Time
6) Enter "Recording Directory on the FTP Server"
・Configure FTP server directory to record files (Enter no more than
128 characters). If you do not know the directory, ask for your FTP
server administrator.
7) Click
save
to save configured items
・The display goes back to "Network - FTP Recording Settings" screen.
・To restore the previous configuration, click
reset
button below the
settings.
・The changes are discarded.
・To close the window without saving the configuration, click
close
.
NOTE
●
When you also have changed setting items in "FTP Recording ", be sure to
click
save
in "Network - FTP Recording Settings" screen, too.
Recording Images on FTP Server (Cont.)


