background image

81

Viewing

Listening

and Operation

Introduction

Set up

Recording

Others

NOTE

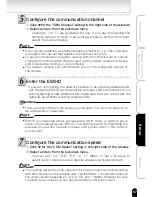
Some providers verify users (POP before SMTP) by receiving mail. If you
cannot send mail even if these items are correctly configured, enter the ID
and password for verifying the IP address or server name (host name) of the
POP3 server.

POP3 is a protocol for receiving (retrieving) mail from the mailbox. However,
these settings will not result in received mail, for example, being deleted
because the network camera does not retrieve mail.

The mail function of the network camera does not support "SMTP Auth".

4)Enter the administrator mail address

・Correctly enter the mail address specified by the provider.

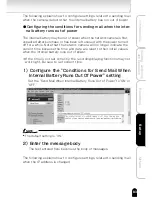
The following explains how to configure settings related to when mail should
be sent.

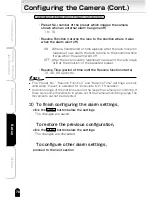
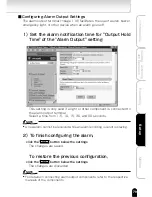
●Configuring the conditions of sending mail when an external

alarm goes off or motion is detected.

1)Configure the "Conditions for Sending Mail When

An External Alarm Goes Off" setting

・Set the sending of mail when an external alarm goes off to "ON" or

"OFF."

NOTE

The default setting is "OFF."
Summary of Contents for IK-WB01A

Page 1: ... www toshiba com taisisd The above URL is subject to change without prior notice If the URL changes refer to the Toshiba website http www toshiba com taisisd This User s Guide applies to the firmware version 2 2 2 1 and the later versions NETWORK CAMERA Model IK WB01A IK WB11A Advanced User s Guide ...

Page 2: ...ncouraged to try to correct the interference by one or more of the following measures Reorient or relocate the receiving antenna Increase the separation between the equipment and receiver Connect the equipment into an outlet on a circuit different from that to which the receiver is connected Consult the dealer or an experienced radio TV technician for help Warning Changes or modifications made to ...

Page 3: ...ems compatible with this product Windows 98SE Microsoft Windows 98 operating system Second Edition Windows 2000 Microsoft Windows 2000 operating system Windows XP Microsoft Windows XP operating system The formal name of Windows is Microsoft Windows Operating System Microsoft and Windows are trademarks or registered trademarks of Microsoft Corporation in the United States and other countries Other ...

Page 4: ...n with a tripod screw hole x1 Wall bracket x1 Sun visor x1 Screw set M4 screws x6 Silver M3 screws x4 Black Self tapping screw x1 Black Wood screws x4 Silver LAN cable Straight through cable x1 Wire clamp x1 Basic User s Guide x1 Quick Start Guide x1 Accessories for IK WB01A Wall attachment for indoor use x1 Screw set Self tapping screw x1 Black Wood screws x4 Silver Wire clamp x1 LAN cable Straig...

Page 5: ... Images by Administrator 21 Using Playback Function 24 Presetting of Camera Angle by Administrator 26 Selecting a Preset 27 Configuring a Preset 28 Deleting Preset Settings 29 Naming Renaming Individual Presets 30 Playing Recorded Alarm Images by Administrator 31 Playing Recorded Normal Images by Administrator IK WB11A 34 Viewing and Listening Users 37 User Login 37 Viewing Images in Single View M...

Page 6: ...arm Output Settings 79 Configuring Mail Settings 80 Configuring Privacy Mask Settings 85 Freeze Activity Settings 87 Setting Items 90 Camera Settings 90 Network Settings 96 Security Settings 102 Multi screen Mode Settings 103 Administrator Functions 103 Log Management 104 Returning to the Default Settings 105 Default Settings 106 Camera Settings 106 Network Settings 107 Security Settings 110 Multi...

Page 7: ...ors heat registers stoves or other devices including amplifiers that produce heat 7 Protect the power cord from being stepped on or pinched particularly at plugs convenience outlet and the point where they exit from the unit 8 Use only specified attachments accessories such as stands tripods and brackets 9 Do not touch the camera or the AC adaptor during lightning storms 10 Unplug the power cord w...

Page 8: ...atly affected by the capacity of the SD memory card The use of a 128 256 or 512 MB large capacity SD memory card is recommended for loop recording To achieve maximum performance of the camera the use of a Toshiba SD memory card is recommended If a card of another company is used the recording intervals may lengthen and the erasure time during overwriting may increase As a result the number of deli...

Page 9: ...its plug Do not disconnect the cable by pulling on the cable Do not drop the AC adaptor or subject it to strong impact Do not use the AC adaptor in hot and humid places Do not use the supplied AC adaptor with devices other than this camera Temperature increasing on the surface of the adaptor is normal Before moving the adaptor to another location unplug it from the wall outlet and wait until its t...

Page 10: ......

Page 11: ...d Listening Administrator Operation of Live Camera Images by Administrator Using Playback Function Presetting of Camera Angle by Administrator Playing Recorded Alarm Images by Administrator Playing Recorded Normal Images by Administrator IK WB11A Viewing and Listening Users ...

Page 12: ...ministrator and the user is determined for both standpoints from consideration of what will be done with the network camera Administrator indicates the standpoint where all the functions of the camera can be used and user indicates the standpoint where functions such as the configuring of camera parameters are restricted The camera differentiates between the administrator and the user via authenti...

Page 13: ...erate cameras are explained after the following administrator login procedure Install JAVATM 2 to display images and output sound correctly on an administrator s personal computer Basic User s Guide page 12 Administrator Login You must enter the administrator s login ID and password first so that you can be verified as an administrator on the network camera With the Internet browser displayed on t...

Page 14: ...g in again Viewing Images by Administrator Viewing Images in Single View Mode by Administrator If the Administrator Login was performed correctly a window containing the Admin Menu appears Click the LIVE button NOTE The boosted single view mode screen by clicking the LIVE button is displayed in the same size as that of the sent image size from the camera However 1280x960size of IK WB11A is compres...

Page 15: ...rent time and date of the network camera are shown when is displayed and the recorded time and date are shown when is displayed on the screen When in PLAYBACK mode S or E may be shown with the time and date S Start indicates that the image is at the top of the playback images and E End indicates that the image is at the end In this state image or the time and date will not be renewed Perform playb...

Page 16: ... of the current camera image The magnification of the camera can be controlled with Administrator controller page 23 SD memory card SD memory card has been inserted IK WB11 Card error Recording Playing functions won t work normally Remove the card once and change to new one or check the card by performing formatting and scan disk You may format the card from the network camera directly see 96 page...

Page 17: ...tton in the left side of the Admin Menu The message Settings Completed will be displayed Click Close button NOTE Do not close the Admin Menu when the single view or multi view screen is displayed If you click the button when image screen is still displaying the camera perceives it as the proof that you are still logged in Remember if this happens you cannot log in again for 5 minutes ...

Page 18: ...mes in accordance with the Multi screen mode setting page 103 for the number of cameras to display For details on the number of cameras and multi view mode refer to Multi Screen Mode Window Configuration page 19 Multi view button will not be displayed when you set Multi Screen Mode setting to OFF page 103 Operating the multi view mode For an explanation on each component of the window refer to Mul...

Page 19: ...current time and date Time and date The current time and date of the network camera are shown on the upper left screen of the Multi View mode when is displayed and the recorded time and date are shown when is displayed on the screen When in PLAYBACK mode S or E may be shown with the time and date S Start indicates that the image is at the top of the playback images and E End indicates that the ima...

Page 20: ...the back door image to operate only that image Therefore if you want to operate other images display each respective controllers Move image center Clicking a point in the image display area moves the lens up down left or right accordingly and the clicked point becomes the center of the image If the lens cannot move all the way in the specified direction the clicked point does not become the center...

Page 21: ... multi view mode click the button The basic administrator controller is displayed in a separate window Use the controller to operate images For an explanation on each component of the administrator controller refer to Basic Administrator Controller Components page 22 To close the controller click the Close button in the upper right corner of the window ...

Page 22: ...g up down 1 Each time you click the button the lens moves up You can move the lens in a range of eight different vertical positions When the camera lens reaches its upper limit clicking on the button has no effect 2 Each time you click the button the lens moves left You can move the lens in a range of eight different horizontal positions When the camera lens reaches its left most limit clicking on...

Page 23: ...the window continuously enlarges the images Zoom out This feature enables you to the reduce camera images enlarged with Zoom in Each click of the button gradually reduces the images in the window Once the images have been reduced to their actual size you cannot zoom out anymore Dragging the mouse pointer to reduce the size of the window continuously reduces the images Control buttons for For detai...

Page 24: ... The length of the time of recorded images differs depending on the picture size and the quality It plays for approximately 1 minute when the size is 640x480 and the quality is MIDDLE In administrator single view or multi view mode click the button The basic administrator controller is displayed in a separate window Use the controller to operate For an explanation on each component of the controll...

Page 25: ...he Frame Forward feature Clicking the button forwards the recorded images in the window by one frame This is the Fast Forward feature Clicking the button fast forwards the recorded images in the window When E is shown on the time and date display the playback image is forwarded to the end This feature returns the mode from Playback to Live Clicking the button displays live images in the window Pla...

Page 26: ...s The presets function enables you to register up to ten different angles and names for the camera Clicking the Preset button on the basic administrator controller opens the preset controller You cannot register zoom information Presetting of Camera Angle by Administrator ...

Page 27: ... lens angle In the list click the radio button on the left of the preset you want to select Click the Go Go button The lens moves to the pre registered position of the preset If a position was not registered for the preset you selected the lens does not move Moving the lens using this feature requires the position of the preset to be registered beforehand See Configuring a Preset in next page ...

Page 28: ...position in the Preset list Click the button to move the camera lens to the position you want to set In the list click the radio button on the left of the preset you want to configure Click the button Register the current lens position in the selected preset NOTE Any existing settings of a preset will be overwritten when you register new settings to the preset ...

Page 29: ...an delete the lens position setting of a preset in the Preset list In the list click the radio button of the preset setting you want to delete Click the Clear Clear button The settings registered for the selected preset are deleted NOTE Clicking Clear Clear button also deletes the registered preset name ...

Page 30: ...n name each preset in the Preset list This makes it easier to distinguish individual preset settings In the list click the radio button on the left of the preset you want to name Click the Name Name button A window for naming the preset and the Save Save button appears Enter a new name and click the Save Save button The name appears instead of the preset number ...

Page 31: ...ixed intervals regardless of the setting at the time of recording Image settings such as Camera Picture Size correspond to the settings at the time the alarm went off How to play a recorded image In administrator single view or multi view mode click the button The basic administrator controller is displayed in a separate window Click the Alarm button The administrator controller for the Alarm list...

Page 32: ...List controller turns back to Administrator controller automatically You cannot use or click on the Alarm tab after that Some browser may close the controller automatically To be able to use or click on the Alarm tab set the FTP Recording function to OFF In the list click the button on the right of the recording you want to play The recording selected in the Alarm list plays NOTE You can use the c...

Page 33: ... one frame This is the Fast Forward feature Clicking the button fast forwards the recorded alarm images in the window When E is shown on the time and date display the Alarm image is forwarded to the end This feature returns the mode from alarm Playback to Live Clicking the button displays live images in the window This is the alarm Playback feature Clicking on this button during Live image mode pl...

Page 34: ...the time of recording Image settings such as Camera Picture Size correspond to the settings at the time of recording How to play the recording In administrator single view or multi view mode click the button The basic administrator controller is displayed in a separate window Click the Record button The administrator controller for the Record list is displayed PlayingRecordedNormalImagesbyAdminist...

Page 35: ... when the FTP Recording Function is set to ON the Record List controller turns back to Administrator controller automatically You cannot use or click on the Record tab after that Some browser may close the controller automatically To be able to use or click on the Record tab set the FTP Recording Function to OFF In the list click the button on the right of the recording you want to play The record...

Page 36: ...en E is shown on the time and date display the recorded normal image is forwarded to the end This feature returns the mode from Recorded Normal Image Playback to Live Clicking the button displays live images in the window This is the Recorded Normal Image Playback feature Clicking on this button during Live image mode plays back the images recorded in the period which configured in Normal Recordin...

Page 37: ...nd password which the administrator configured Viewing Images in Single View Mode by Users With the Internet browser displayed on the user s personal computer enter the following URL and press ENTER http 192 168 0 30 When IP address is in default setting If you enter this URL the User Login screen appears NOTE The login screen differs depending on whether or not the administrator is restricting th...

Page 38: ...en click the login button The camera images appear in single view mode NOTE The configuration and way of performing operations for this window are the same as that of the administrator single view window except LIVE icon display For details on the configuration and way of performing operations refer to Viewing Images in Single View Mode by Administrator page 14 ...

Page 39: ...to display For details on the number of cameras and multi view refer to Multi Screen Mode Window Configuration page 19 Only the administrator can select which cameras will appear in multi view mode screen When the user switches to multi view the multi view configuration corresponds to the cameras selected by the administrator The configuration and way of performing operations for this window are t...

Page 40: ...w mode click the button The basic user controller is displayed in a separate window Use the controller to operate For an explanation on each component of the user controller refer to Basic User Controller Components page 41 To close the controller click the Close button in the upper right corner of the window Viewing and Listening Users Cont ...

Page 41: ...e you click the button the lens moves right You can move the lens in a range of eight different horizontal positions When the camera lens reaches its right most limit clicking on the button has no effect Zoom in This feature enables you to enlarge camera images by up to 5 times Each click of the button gradually enlarges the images appearing in the window This feature enlarges images on the comput...

Page 42: ......

Page 43: ...Recording About Recording Images Recording Images on Net work Camera Recording Images on SD Memory Card IK WB11A only Recording Images on FTP Server ...

Page 44: ...K WB11A only FTP Server Recordable Contents Images of external alarm Images of detected motion IK WB11A only Buffering temporarily stored images of last some seconds Recording time will differ depending on Camera Picture Size and Picture Quality page 90 settings Alarm Recording images configured in Alarm Recording settings page 95 Normal Recording images configured in Normal Recording settings pag...

Page 45: ...tion Sensor IK WB11A only Pre Recording Pre Recording records image s of right before alarm has generated You can set numbers of frames you want to record An image of the moment alarm has generated will not be included Post Recording Post Recording records image s of right after alarm has generated You can set numbers of frames you want to record An image of the moment alarm has generated will not...

Page 46: ...ion Settings 1 Insert SD memory card to the camera Basic User s Guide page 15 2 Perform administrator login page 13 3 In the left side of the window click the toggle of Camera Settings 4 Click Recording in the sub menus The settings appear in the right side of the window This picture is an example of IK WB11A 5 Configure each setting items Setting Alarm Recording Follow the instructions of Step 4 ...

Page 47: ...ng is set to ON Over Writing This function overwrites the old data when SD memory card becomes full 6 To finish configuring Recording Function Settings click the save button below the settings The changes are saved To restore the previous configuration click the reset button below the settings The changes are discarded a SD Memory Card Formatting All the data in SD memory card will be deleted by c...

Page 48: ... time FTP function is set to on selecting other than OFF Therefore if there are necessary image data saved on SD memory card insert another SD memory card to the camera or make the backup data before setting FTP function to on Recording Function Settings 1 Perform administrator login page 13 2 In the left side of the window click the toggle of Network Settings 3 Click FTP Recording in the sub menu...

Page 49: ...rk environment is protected by Firewall or the like access from outside FTP server may not be possible with PORT active mode In this case chose PASV passive mode Connection to FTP Server Select Stay connected when transferring data frequently like Periodic Recording by Schedule In this way you can record images faster NOTE When selecting Periodic Recording by Schedule network camera logs in to FTP...

Page 50: ...Image Accumulation SD memory card will be formatted If there are necessary data on SD memory card make backup data first Image Accumulation Cycle Configure recording cycle of accumulated images Possible setting ranges are as follows 1 2 5 10 15 30 60 120 300 600 900 1800 3600 seconds When image size is 1280x960 or 800x600 minimum cycle will be 2 seconds Over Writing Configures whether to overwrite...

Page 51: ...h day of a week OFF No recording at all All Day Records images all day Timer Pattern 1 Records images in a period you configured in Timer Pattern 1 Timer Pattern 2 Records images in a period you configured in Timer Pattern 2 3 Configure timer pattern You may configure both Timer Pattern 1 and Timer Pattern 2 and use them according to your need Possible setting timer range is between 0 am and 11 pm...

Page 52: ...04 01 01 Indicates time Hour Minute Second e g 23 59 00 23 59 00 Time is displayed in 24 hour time display Series numbers see page 55 for detail If the camera records more than one image at the same period the order is indicated with 3 digit number The bigger the number the newer latest the image Indicates Daylight Saving N Not in Daylight Time D Daylight Summer Time 6 Enter Recording Directory on...

Page 53: ...When Camera Picture Size and Picture Quality are in default setting image size is 640x480 VGA and quality is MIDDLE approximately 200 frames will be recorded Numbers of recorded image frame may decrease depending on networking conditions and recording cycle 3 Configure the numbers of frames you want to record for Post Recording Enter the number between 0 and 1000 NOTE Numbers of recorded image fra...

Page 54: ...the same period the order is indicated with 3 digit number The bigger the number the newer latest the image Indicates Daylight Saving N Not in Daylight Time D Daylight Summer Time Indicates total number of generated alarm s when the number reaches to 99 it returns to 00 and starts adding again A Pre Recording images B Image when alarm has generated C Post Recording images 6 Enter Recording Directo...

Page 55: ... than 1 second series number will be displayed as 000 Ranges of attached series number for recording cycle less than a sec ond are as follows fps 30 15 10 7 5 5 2 5 Ranges of Attached Series Number 000 029 000 014 000 009 000 007 000 004 000 002 fps frame second see nextpage NOTE Numbers attached as series numbers will not necessarily increase by one There may be a lack of numbers depending on Rec...

Page 56: ...LOW VGA QVGA QQVGA 7 5fps 0 13sec 5fps 0 2sec 2 5fps 0 4sec JPEG Encode Output Rate IK WB01A comparison with frame rate QVGA zoom QQVGA zoom 15fps 0 067sec 10fps 0 1sec 5fps 0 2sec Image Size Image Quality HIGH MIDDLE LOW VGA SVGA SXVGA 7 5fps 0 13sec 7 5fps 0 13sec 7 5fps 0 13sec IK WB11A comparison with image quality QVGA QQVGA 7 5fps 0 13sec 30fps 0 03sec 30fps 0 03sec NOTE When using Slow Shut...

Page 57: ... may be a lack of some files if condition of unable to transfer files continues for a long period of time NOTE Depending on the conditions of networking and FTP server there may be occasions that cannot transfer files In this case only IK WB11A is able to make backup data in SD memory card Go to Network FTP Recording menu screen and set Image Accumulation function under Conditions for the Image Ac...

Page 58: ...images will not be recorded therefore the images will not be attached to the mails All the Alarm List images and Record Normal List images IK WB11A only accumulated on the network camera will be deleted when FTP recording function is set to ON SD memory card will be formatted automatically and its contents will be deleted when FTP recording function is set to ON IK WB11A only You will not be able ...

Page 59: ...Set up Configuring the Camera Setting Items Returning to the Default Settings Updating the Firmware ...

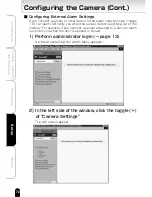
Page 60: ...n explanations hereafter Configuring General Settings The following explains the procedure for configuring settings The procedure for performing operations here and other settings are exactly the same For details on configuring some of the main settings refer to Main Setting Items page 63 For details on all other settings refer to Setting Items page 90 Perform administrator login page 13 A window ...

Page 61: ...ck the toggle of Network Settings or other menus while the menus are as above the Camera Settings sub menus disappear and the sub menus of Network Settings or other menus appear Click a sub menu The settings appear in the right side of the window This image is the example of IK WB11A ...

Page 62: ...d 5 above Important If the settings were configured incorrectly they are not registered in the network camera and an input error message appears Read the error message and reconfigure the settings accordingly To register the settings in the network camera be sure to click the save button The settings are not registered in the network camera when You close the setting window before saving the chang...

Page 63: ... network that uses a DHCP server without any settings If the DHCP server cannot be found the camera automatically uses the own IP address 192 168 0 30 Entering an IP address manually Enter an IP address manually if you do not want to use the DHCP server or the network does not use a DHCP server If you use the DHCP server the IP address changes from time to time Therefore the IP address you set las...

Page 64: ...appear From the list of sub menus click General The settings appear in the right side of the window Enter the camera name NOTE The camera name is displayed along with images in single view mode or multi view mode If there are multiple cameras enter a name that will make it easy to identify what the camera is monitoring Set DHCP to OFF The default setting is ON When you will set your own IP address...

Page 65: ...at Step 7 restores the previous configuration The network camera has a feature useful for multi view to automatically detects and remember other cameras on the same network If there are other cameras on the same network it is recommended to set Auto Identification of Other Cameras to ON page 96 For details on configuring multi view refer to configuring Multi Screen Mode Settings page 69 You need t...

Page 66: ...Perform administrator login page 13 to open the Admin menu In the left side of the window click the toggle of Network Settings The sub menus appear From the list of sub menus click Wireless LAN The settings appear in the right side of the window Configure the communication mode Click for the COM Mode setting in the right side of the window Select an item from the pull down menu If you are going to...

Page 67: ...N set the same ESS ID as the existing wireless LAN environment If you are configuring a new wireless LAN make sure that you do not set the same ID as another existing wireless LAN Important There are restrictions on the values you can enter You can only enter up to 32 alphanumeric characters NOTE ESS ID is sometimes simply expressed as SS ID SSID or network group name In this manual we use ESS ID ...

Page 68: ...tring for the 128 bit WEP Key Configure the WEP Key by referring tables below Sometimes 64 bit WEP is described as 40 bit WEP in here we use the term 64 bit WEP This means that other wireless devices using 40 bit WEP are using the same level of security as and are compatible with devices that use 64 bit WEP When you do not perform encryption of the data by WEP your wireless communication could be ...

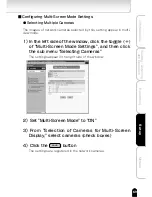
Page 69: ...ng appear in multi view mode 1 In the left side of the window click the toggle of Multi Screen Mode Settings and then click the sub menu Selecting Cameras The settings appear in the right side of the window 2 Set Multi Screen Mode to ON 3 From Selection of Cameras for Multi Screen Display select cameras check boxes 4 Click the save button The settings are registered in the network cameras ...

Page 70: ...Multi View screen Even if you are able to reconnect with these cameras if these cameras are considered as not registered in the system the selectin check marks may have been taken off In this case reconfirm whether the check is marked or not to the network camera The auto detection of other network cameras registered contents will be cleared each time you turn on or off the camera Along with this ...

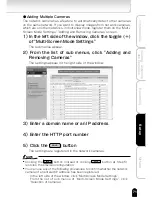
Page 71: ...b menus appear 2 From the list of sub menus click Adding and Removing Cameras The settings appear in the right side of the window 3 Enter a domain name or an IP address 4 Enter the HTTP port number 5 Click the save button The settings are registered in the network cameras NOTE Clicking the reset button instead of clicking save button at Step 5 restores the previous configuration You can use any of...

Page 72: ...rm input terminal page 116 an alarm will notify you when the sensor detects anything out of the ordinary For example if you connect a sensor attached to a door an alarm can notify you when the door is opened or closed 1 Perform administrator login page 13 A window containing the Admin Menu appears 2 In the left side of the window click the toggle of Camera Settings The sub menus appear ...

Page 73: ...tion Introduction Set up Recording Others 3 From the list of sub menus click Alarm Settings The settings appear in the right side of the window This image is the example of IK WB11A 4 Set Function of the External Alarm setting to ON ...

Page 74: ... for Preset No Auto Patrol The lens moves each preset positions in order and after one lap moves back to the position where before the Alarm has generated Available Settings when Preset is Selected Above Preset No number of the preset which shows the camera images when an external alarm has gone off 1 to 10 For example you can select the preset number of a lens position for showing the area around...

Page 75: ...click the reset button below the settings The changes are discarded To configure other alarm settings proceed to the next section NOTE For details on connecting alarm input components refer to the respective manuals of the components Configuring Motion Sensor Settings IK WB11A If you set Function of the Motion Sensor to ON an alarm will notify you a change detected 1 Set Function of the Motion Sen...

Page 76: ...DLE If an alarm is detected frequently when there are no abnormalities reduce the level of sensitivity Size detection size Configures the ability to detect movement Large Generates an alarm upon detection even to the slightest movement The camera can detect easily any movement Medium Detection size is at a size between Large and Small Small Generates an alarm upon detection of significant movement...

Page 77: ... saved and the window for configuring the range closes Clicking the close button closes the window for configuring the range without saving the changes NOTE The squares you have selected as the motion detection range will be turned to transparent green Squares set for Privacy Mask page 85 are already painted out in dark black Clicking the reset button discards all unsaved changes Associate to P T ...

Page 78: ...l at the position of the selected preset Resume Time period of time until the Resume function starts 10 30 60 seconds NOTE The Preset No Resume Function and Resume Time settings are only valid when Preset is selected for Associate to P T Operation Detection range of the motion sensor is the range the camera is monitoring If there were some movements in where out of the camera monitoring range the ...

Page 79: ...etting is only valid if a light or other component is connected to the alarm output terminal Select a time from 1 5 10 15 30 and 60 seconds NOTE A new alarm cannot be received while an alarm recording sound is playing 2 To finish configuring the alarm click the save button below the settings The changes are saved To restore the previous configuration click the reset button below the settings The c...

Page 80: ...oes off Motion is detected IK WB11A The internal battery runs out of power The IP address is changed Configuring conditions for sending mail 1 In the left side of the window click the toggle of Network Settings The sub menus appear 2 From the list of sub menus click Mail The settings appear in the right side of the window 3 Enter the IP address or server name host name of the SMTP Enter the SMTP s...

Page 81: ...ceived mail for example being deleted because the network camera does not retrieve mail The mail function of the network camera does not support SMTP Auth 4 Enter the administrator mail address Correctly enter the mail address specified by the provider The following explains how to configure settings related to when mail should be sent Configuring the conditions of sending mail when an external al...

Page 82: ...tected setting Set the sending of mail when motion is detected to ON or OFF NOTE The default setting is OFF 4 Enter the Message Body and configure the Attach Motion Picture To Mail setting The text entered here becomes the body of messages To the actual body of a message the time date when a motion was detected and the camera name are added to the text entered here If ON is set for Attach Motion P...

Page 83: ...hile Note that the network camera will no longer indicate the current time because the time and date are reset to their initial values when the internal battery runs out of power If the time is not set correctly the recording playing functions may not work right Be sure to set correct time 1 Configure the Conditions for Send Mail When Internal Battery Runs Out Of Power setting Set the Send Mail Wh...

Page 84: ...ave not been configured The following fixed information are also added to the body of messages The new IP address The subnet mask The default gateway The time and date The camera name Configuring the conditions for sending mail when the IP ad dress is changed If the network camera is set to obtain an IP address automatically from the DHCP server the IP address is changed when the power of the net ...

Page 85: ... the Admin Menu appears 2 In the left side of the window click the toggle of Camera Settings The sub menus appear Configuring Mail Address Settings for Sending Mail Enter mail addresses and select the conditions for sending mail 1 Configure the Address For Sending Mail settings and Address For Sending Mail Copy settings Enter mail addresses and click the boxes beside each address to select the con...

Page 86: ... mask range For details on how to specify a range for the mask see the explanation for the Detection Range setting in Configuring Motion Sensor Settings page 76 6 Click the save button below the settings The changes are saved 3 From the list of sub menus click Privacy Mask The settings appear in the right side of the window 4 Set Function to ON ...

Page 87: ...ction allows you to view a still image while the lens is moving When you set this function to ON the screen shows the regular motion images when the lens is at the preset positions and shows a still image an image right before the lens moves when the lens is moving 1 Perform administrator login page 13 A window containing the Admin Menu appears ...

Page 88: ...n Set up Recording Others Configuring the Camera Cont 2 In the left side of the window click the toggle of Camera Settings The sub menus appear 3 From the list of sub menus click PAN TILT Settings The settings appear in the right side of the window ...

Page 89: ... Others 6 Click the save button below the settings The changes are saved 4 Set the Freeze Activity Function to ON 5 Set the Auto Patrol Stopping Time setting Select a time from 1 2 5 and 10 minutes The period of time that the lens stops at the preset position is set ...

Page 90: ...and file size LOW Lower picture quality but the file size becomes smaller NOTE The picture quality and the file size change depending on the conditions of an object splendor resolution movement The smaller the file size the network system will have less influence As a result frame rate next page may become higher IK WB11A 1280 x 960 800 x 600 640 x 480 320 x 240 160 x 120 HIGH MIDDLE LOW HIGH MIDD...

Page 91: ...view mode screen becomes faster The lower the frame rate sensitivity of the camera heightens HIGH 15 fps MIDDLE 10 fps LOW 5 fps fps frame second Actual frame rate changes depending on picture size and setting environment use of network cable performance of a PC etc The maximum frame rate for HIGH setting are HIGH 15fps 320 240 ZOOM 160 120 ZOOM 7 5fps 640 480 320 240 160 120 MIDDLE 10fps 320 240 ...

Page 92: ... becomes darker it turns the image into black and white picture and helps the sensitivity of the camera to have better image When the image turns to black and white the image may have some noise ON Auto B W takes action OFF Auto B W does not take action Shutter Speed IK WB11A Configures the speed of electronic shutter When setting the Shutter Speed to AES Automatic Electronic Shutter the camera au...

Page 93: ... takes action OFF The auto sensitivity boost does not take action Sound Sensitivity Configures the sensitivity of microphone sound Change the settings depending on installation environment IK WB11A HIGH Heightens the sensitivity of sound input MIDDLE Standard sound input sensitivity LOW Lowers the sensitivity of sound input STOP Disables sound function IK WB01A HIGH Heightens the sensitivity of a ...

Page 94: ...itivity Size Detection Range Associate to P T Operation Preset No Resume Function Resume Time IK WB01A IK WB11A ON OFF HIGH MIDDLE LOW LARGE MEDIUM SMALL Set from screen ranges of 8X8 squares OFF Preset Auto Patrol 1 to 10 ON OFF 10 30 60 seconds Depending on what the camera is monitoring the sensor may not work properly 3 Alarm Output Item Output Hold Time IK WB01A 1 5 10 15 30 60 seconds IK WB11...

Page 95: ...en picture sizes are 800 600 1280 960 The frame rate renewal speed may become slower when recording images Actual Recording Cycle may differ from your setting when the slow shutter is in use 3 Timer Recording Item Time Setting IK WB01A IK WB11A Start 0 to 23 Stop 0 to 23 4 Overwriting Item Function IK WB01A ー IK WB11A ON OFF If you d like to use this function use SD memory card bigger than 128MB O...

Page 96: ...ress Subnet Mask Default Gateway IK WB01A Enter up to 32 single byte characters ON OFF ON OFF Enter the static IP address Enter the subnet mask Enter the default gateway IK WB11A Enter up to 32 single byte characters ON OFF ON OFF Enter the static IP address Enter the subnet mask Enter the default gateway 2 DNS Settings Item Primary DNS Server IP Address Secondary DNS Server IP Address IK WB01A En...

Page 97: ...rver Settings Item SMTP Server Name SMTP IP Address POP3 Server Name POP3 IP Address IK WB01A Enter the server name Enter the IP address Enter the server name Enter the IP address IK WB11A Enter the server name Enter the IP address Enter the server name Enter the IP address 2 Verification Settings Item User ID Password Password Confirm IK WB01A Enter the user ID Enter the password Reenter the pass...

Page 98: ... When FTP Recording Function is set to ON you cannot attach image s to a mail 7 Conditions for Sending Mail when Internal Battery Runs Out Of Power Item Send Mail When Internal Battery Runs out Out Of Power Message Body IK WB01A ON OFF Enter up to 256 single byte characters IK WB11A ON OFF Enter up to 256 single byte characters 8 Conditions for Sending Mail When IP Address Is Changed Item Send Mai...

Page 99: ...re individually whether mail is sent when an external alarm goes off the internal battery runs out of power or the IP address is changed IK WB11A Enter mail addresses For each address you can configure individually whether mail is sent when an external alarm goes off the internal battery runs out of power or the IP address is changed 4 Routing Table Settings Item Static Routing Table Settings IK W...

Page 100: ...g by Schedule When Alarm goes off OFF IK WB11A Periodic recording by Schedule When Alarm goes off Selection of External Alarm and Motion Detection OFF 2 FTP Server Setup IK WB11A Enter the server name Enter the IP address Enter the User ID Enter the password Reenter the password 21 PORT PASV Stay connected Re connect IK WB01A Enter the server name Enter the IP address Enter the User ID Enter the p...

Page 101: ...OFF All Day Timer Pattern 1 Timer Pattern 2 OFF All Day Timer Pattern 1 Timer Pattern 2 OFF All Day Timer Pattern 1 Timer Pattern 2 OFF All Day Timer Pattern 1 Timer Pattern 2 OFF All Day Timer Pattern 1 Timer Pattern 2 OFF All Day Timer Pattern 1 Timer Pattern 2 OFF All Day Timer Pattern 1 Timer Pattern 2 Starting Time 0 am to11 pm Ending Time 0 am to11 pm Starting Time 0 am to11 pm Ending Time 0...

Page 102: ...ed images of the Alarm List and the Record List IK WB11A on the camera will be deleted SD Memory Card will be formatted automatically and all the data in the card will be deleted IK WB11A Security Settings 1 Access Restriction Settings Item Restrict Access by IP Address IP Address IK WB01A ON OFF Enter up to 20 IP addresses IK WB11A ON OFF Enter up to 20 IP addresses 2 Filtering Settings Item Filt...

Page 103: ...cameras IK WB11A Select cameras that were registered by searching automatically or by using the administrator function for adding cameras Administrator Functions 1 Changing the Password Item Current Login ID Current Password New Login ID New Password New Password Confirm IK WB01A Enter the current login ID Enter the current password Enter the new login ID Enter the new password Reenter the passwor...

Page 104: ...er only if the Normal Recording function is set to ON You cannot set the time between 2 00AM to 3 00AM on the first Sunday of April manually if the Daylight saving is set to valid 3 Firmware Update Item File Name IK WB01A Download the firmware Then select the file by entering the file path or browsing IK WB11A Download the firmware Then select the file by entering the file path or browsing Log Man...

Page 105: ...et button shown in the figure on page 14 15 in Basic User s Guide for at least 5 seconds The settings return to the defaults The following shows the default settings NOTE Pressing the reset button for less than a second switches ON OFF of the video output This function the video output is only for checking images on the screen when installing the camera At this moment the camera stops image record...

Page 106: ...nsor Function Input Type Associate to P T Operation Preset No Resume Function Resume Time Function Sensitivity Size Detection Range Associate to P T Operation Preset No Resume Function Resume Time IK WB11A 640X480 MIDDLE HIGH Desktop Wall 0 OFF AES OFF OFF MIDDLE None 5 minutes FAST CENTER OFF OFF Normal Open NO OFF 1 Thissettingisonlyvalidwhen Associate toP Toperation issetto Preset OFF 30 second...

Page 107: ...on General Settings DNS Settings Http Port Setting Camera ID Wireless LAN Settings Communication Mode Communication Channel ESS ID Communication Speed Encryption WEP Key Camera Name AutoIdentificationofOtherCameras DHCP IP Address Subnet Mask Default Gateway Primary DNS Server IP Address Secondary DNS Server IP Address Http Port No Camera ID IK WB11A nwcam01 OFF ON 192 168 0 30 This setting is onl...

Page 108: ...tions for Sending Mail when Motion is Detected Message Body Attach Motion Picture to Mail Attached Picture Size Send Mail when Internal Battery Runs Out of Power Message Body Send Mail when IP Address is Changed Message Body Input fields for up to 10 addresses To Input fields for up to 10 addresses Cc IK WB11A TOSHIBA Network Camera OFF External Alarm Detection OFF OFF Motion Detection OFF 640X480...

Page 109: ...S DDNS User Name DDNS Password DDNS Server IK WB11A 1 Brows ARP table This changes depending on communication status OFF www netcam zaantek net 1 Brows ARP table This changes depending on communication status OFF www netcam zaantek net FTP Recording Settings Image Recording by FTP FTP Server Setup Image Recording by FTP FTP Server IP Address User ID Password Password Confirm FTP Port Number FTP Mo...

Page 110: ...st Recording Recording Cycle Recording File Name Recording Directory on the FTP Server Image Accumulation Image Accumulation Cycle Over Writing IK WB11A OFF OFF OFF OFF OFF OFF OFF Start 8am Stop 5pm Start 8am Stop 5pm 1 second 10 frames 100 frames 1 second OFF 60 seconds OFF OFF OFF OFF OFF OFF OFF OFF Start 8am Stop 5pm Start 8am Stop 5pm 1 second 10 frames 100 frames 1 second ー ー ー Security Set...

Page 111: ...00 GMT 12 00 The date currently set The time currently set OFF valid GMT 12 00 GMT 12 00 The date currently set The time currently set OFF valid Log Management Item IK WB01A Forwarding Settings Forward Log to Another Server Name of Destination Server IP Address of Destination Server Browse and Delete Settings Log List IK WB11A OFF This changes depending on camera operation status OFF This changes ...

Page 112: ...ate a folder in which to save the latest firmware Access the following Toshiba Web page via the Internet URL http www toshiba com taisisd Download the latest firmware according to the explanation on the Web page Perform administrator login For details on how to login refer to page 13 In the Admin menu click the toggle of Administrator Functions The sub menus appear ...

Page 113: ...e indicated with four 3 digit numbers The last 3 digit numbers indicates a model type IK WB01A Model nnn nnn nnn 001 IK WB11A Model nnn nnn nnn 011 Click The following screen appears Select the latest firmware file that was saved in the folder created in the section Initial Procedure The name of the selected file appears in the screen shown in Step 3 ...

Page 114: ... After a while the firmware update finishes and the camera restarts automatically Important Updating the firmware is the responsibility of the customer The camera stops moving during the firmware update Do not turn off the power of the camera during the firmware updating It causes failure in updating firmware Updating the Firmware Cont ...

Page 115: ...Others Alarm Terminals Glossary Index Errors and Messages Before Calling Service Personnel Specifications Appearance Diagram IK WB01A Appearance Diagram IK WB11A ...

Page 116: ...the camera When you place IK WB11A outside be sure to waterproof the devices and cables just like the power cord and LAN cable by using conduit pipes or the like ALARM OUT Alarm output terminal ALARM IN Alarm input terminal GND Name ALARM IN ALARM OUT GND Function Alarm Input Alarm Output GND Description Inputs External Alarm signal You can choose the type of input signal Normal Opened NO or Norma...

Page 117: ...l Circuit Signal Condition Alarm Input Alarm Output DC3 3V 3 3V 0V 100ms or more 3 3V 0V 100ms or more Non Voltage point signal CMOS 3 3V GND signal inputs Normal Opened Normal Closed Max DC24V 50mA 47kΩ 220Ω Inside the Camera To CMOS input To CMOS Output 220Ω Inside the Camera Door Sensor Network Camera ALARM IN ALARM OUT GND Light Buzzer etc ...

Page 118: ...register max of 10 presets of the lens directions This function patrols these preset positions in fixed time intervals Auto sensitivity boost 93 Auto Slow Shutter 93 B Before calling service personnel 128 Browser 13 Software to view WEB screens There are browser of Microsoft s Internet ExplorerTM and NetscapeTM Communications s NetscapeTM Navigator C Camera ID 96 Camera searching application Camer...

Page 119: ...anage Thus we use domain name which consists of alphabet and some symbols as alias to operate computers This system to correspond the IP address and the domain name is called DNS Download 112 Taking and saving data from a device in remote place by using network E Encryption WEP 68 Adopted encryption method by I E E E 8 0 2 1 1 b a s s t a n d a r d technique There are 2 methods using 64 bit and 12...

Page 120: ...programs from web server despite the differences of hardware or OS Compare to JAVATM JAVATM 2 has improved performance stability security and correlation The network camera uses JAVATM 2 for displaying images and outputting sound on Internet ExploreTM and NetscapeTM Navigator JPEG 22 41 Joint Photographic Experts Group Standard gauge for compression of colored still image by ITU TS International T...

Page 121: ...139 P T operation restriction 93 R Rear cover 4 Record list 34 Recording normal images 95 Returning to the default settings 105 Reset button 105 Resolution 90 Resume function 74 RNCP 139 Retrieve Neighborly Cameras Protocol Protocol for mutual communication Because of this protocol the cameras can identify each other The camera searching application Camera Finder also uses this protocol Routing ta...

Page 122: ...ernet resource http www toshiba com is the example of when accessing a website on the Internet V Video output BUG15 W Wall bracket 4 WEP 68 Wired Equivalent Privacy Encryption Standard encryption method in IEEE802 11b Even if someone intruded to your computer and try to read the data it makes difficult to decode the data if you perform the encryption Wire clamp BUG22 Wired LAN BUG24 Wireless LAN B...

Page 123: ...uption from Camera in the last one minute File System was automatically formatted by error detection SD memory card error SD memory card is full The main unit of the camera may be in trouble There is an error s in the File System SD memory card has been damaged Using unsupported SD memory card SD memory card is full Turn the power ON and OFF Formatted automatically Use undamaged and supported SD m...

Page 124: ... the LAN cable are correctly connected to the network Make sure that the DHCP server is turned on If you set the DHCP setting to OFF it means that you are not using the DHCP Server In that case make sure to enter correct IP address and other information in the setting menu Re check the DHCP server settings CODE Message Cause How to Manage FTP Client 2041001 2041002 FTP couldn t connect to server F...

Page 125: ...ailed to resolve DDNS server name Failed to connect to DDNS server Failed to update DDNS database DDNS server information is wrong DDNS server information setting page 100 is wrong Network Camera and the LAN are not connected properly Using unsupported DDNS service DDNS server information setting page 100 is wrong Network Camera and the LAN are not connected properly Using unsupported DDNS service...

Page 126: ...n the TOSHIBA website are the same If they don t match download the matched firmware CODE Message Cause How to Manage Others 4000001 Battery is empty The internal battery of the camera has run out of power The internal battery is rechargeable Even if the power is turned off for a long period of time it will be recharged when the power is turned on again If it s not rechargeable anymore or usable t...

Page 127: ...settings were updated Camera PAN TILT settings were updated Camera alarm settings were updated Camera motion sensor settings were updated Camera privacy mask settings were updated Camera recording settings were updated Network settings were updated Wireless network settings were updated HTTP port was updated Mail settings were updated DHCP settings were updated DNS settings were updated NTP settin...

Page 128: ...fore connecting the LAN cable the camera perceives it as wireless LAN mode Connect the LAN cable to the hub or router first and then turn on the camera again Be sure to turn on the power of the hub and router If you connect the LAN cable to the powered on hub or router first the camera perceives it as wired LAN mode Even if you disconnect the cable after the camera started as the wired it will not...

Page 129: ...mera via wireless router or access point AP set the network camera in infrastructure mode page 97 The network camera is set in adhoc mode in default Assign the directory where you are going to install the browser Start Camera Finder and go to View Customize Browser Selection Set the correct IP address of the network camera Set the correct IP address of your PC Usually the network camera uses 80 fo...

Page 130: ...isplayed shows up and cannot login to the camera even if you start Camera Finder Enter right login ID and password The default login ID is root and the password is ikwb The camera discriminates capital letter and lower case letter Enter your right login ID and password The camera keeps the last login information for 5 minutes Try to login again 5 minutes later or restart the camera by turning On a...

Page 131: ...y page 65 Configure port forwarding function static IP masquerade NAPT to your broadband router For details read the user s guide of your broadband router Change the restriction setting For details read the user s guide of your broadband router When accessing via the Internet you need to set global IP address provided from your Internet provider to the broadband router For details read the user s ...

Page 132: ... more than 5 minutes Try login procedure again 5 minutes later Usually the network camera uses 80 for the HTTP port number If you set the number other than 80 enter the number registered as the HTTP port number in Camera Finder and then try administrator login procedure again When entering the IP address of the network camera directly to the browser assign the port number after like the example be...

Page 133: ...mera in wired mode there is no problem to access the camera even if you made some changes in wireless LAN settings Make sure that the settings and conditions of wireless LAN mode of all devices including the network camera are all the same Some wireless devices recognize COM Channel automatically however you need to configure the right COM Channel on the network camera When using the network camer...

Page 134: ...d to reset the setting information in the network camera Remember that if you perform reset procedure of the camera all the settings you have made will be deleted and the camera goes back to its default settings See page 105 for details on how to perform reset procedures You need technical knowledge of the network to configure this item You need to reset the setting information in the network came...

Page 135: ... the picture quality becomes poor When many users access to the camera at the same time the renewal speed of the image becomes slow Display speed of the images in wireless mode is slower than that of wired mode If you d like to have faster display speed connect the camera in wired connection mode Change the Auto B W setting to OFF Go to Camera Settings General Settings Auto B W and set the Auto B ...

Page 136: ...icrophone is facing wrong way Set the monitor color higher than 16bit Wipe off the lens with dried cloth The camera cannot focus at close range less than 80cm Use the camera at the minimum distance of 80cm or more for IK WB11A and 35cm or more for IK WB01A from an object Install JavaTM2 Runtime Environment SE Ver1 4 2 Adjust the volume of your PC Install commercial microphone Basic User s Guide pa...

Page 137: ...ondary in DNS Settings page 96 Sometimes primary is described as master and secondary is described as slave but these meanings are the same To send mail you need to perform mail sending settings of the camera page 85 The NTP server released on the Internet may become invalid without notifying users Retry updating firmware by following steps of Updating the Firmware on page 112 Consult with your de...

Page 138: ...ppens try to lower the sound sensitivity from the Admin Menu For details see Sound Sensitivity on General Settings page 93 Pre post recording files of the Alarm are not sent to the FTP server Pre ecording data is the data before alarm has generated Therefore its data sending order is not necessarily in order Pre recording images will be sent after all the post recording images are sent Please wait...

Page 139: ...e Image sensor Effective Picture Element Focal length Angle of view Maximum relative aperture Shutter speed Minimum illumination Pan Tilt Pan tilt presets Alarm terminal Image size Image compression method Quality settings Maximum frame rate Audio 1 Privacy mask feature Motion alarm feature Normal recording feature External storage media Video output Mail notification feature ND switching mechanis...

Page 140: ...140 Viewing Listening and Operation Introduction Set up Recording Others Appearance Diagram IK WB01A ...

Page 141: ...141 Viewing Listening and Operation Introduction Set up Recording Others Appearance Diagram IK WB11A ...

Page 142: ...TOSHIBA AMERICA INFORMATION SYSTEMS INC Imaging System Division 9740 Irvine Boulevard Irvine California 92618 1697 PhoneNumber 800 288 1354 V2 0 ...

Reviews: