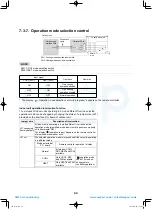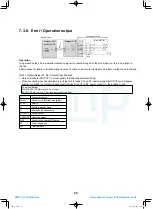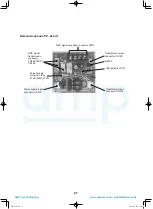
71
2
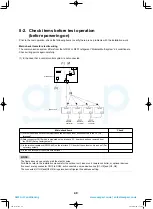
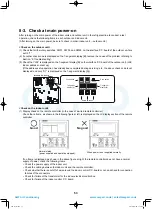
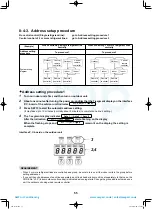
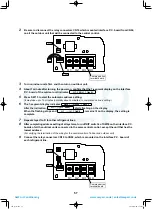
Be sure to disconnect the relay connectors CN10 which mounted interface P.C. board from CN02,
on all the outdoor unit that will be connected to the central control.
3
Turn on indoor units first, and then turn on outdoor unit.
4
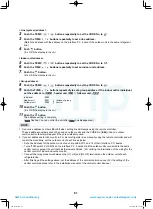
About 1 minute after turning the power on, confirm that the 7-segment display on the interface
.
s
e
t
a
c
i
d
n
i
t
i
n
u
r
o
o
d
t
u
o
e
h
t
f
o
d
r
a
o
b
.
C
.
P
5
Press SW 15 to start the automatic address setting.
(It may take up to 10 minutes (normally about 5 minutes) to complete one line’s setting.)
6
.
s
e
t
a
c
i
d
n
i
y
a
l
p
s
i
d
t
n
e
m
g
e
s
-
7
e
h
T
.
y
a
l
p
s
i
d
e
h
t
n
o
g
n
i
h
s
a
l
f
s
t
r
a
t
s
,
n
o
i
t
a
c
i
d
n
i
e
h
t
r
e
t
f
A
t
il
s
n
i
a
m
e
r
,
d
n
a
s
p
o
t
s
g
n
i
h
s
a
l
f
e
h
t
n
e
h
W
on the display, the setting is
complete.
7
Repeat steps
4
to
6
for other refrigerant lines.
8
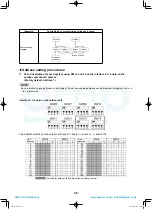
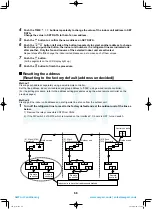
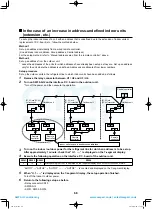
After completing address setting of all systems, turn off DIP switch 2 of SW30 on the interface P.C.
boards of all the outdoor units connected to the same central control, except the unit that has the
lowest address.
(For unifying the termination of the wiring for the central control of indoor and outdoor unit)
9
Connect the relay connectors CN10 to CN02, which is mounted on the interface P.C. board of
each refrigerant line.
U. 1. L08 (U. 1. flash)
Auto 1 Auto 2 Auto 3
U. 1. - - - (U. 1. flash)
U. 1. - - - (U. 1. light)
U1
U2 U3 U4
CN02
CN10
Communication
terminal board
CN02
CN10
U1
U2 U3 U4
Communication
terminal board
57
A10-1510.indb 57
A10-1510.indb 57
2016/04/08 17:20:54
2016/04/08 17:20:54
AMP Air Conditioning
www.ampair.co.uk | sales@ampair.co.uk


