180
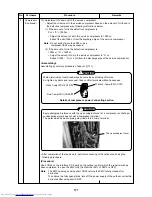
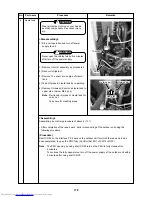
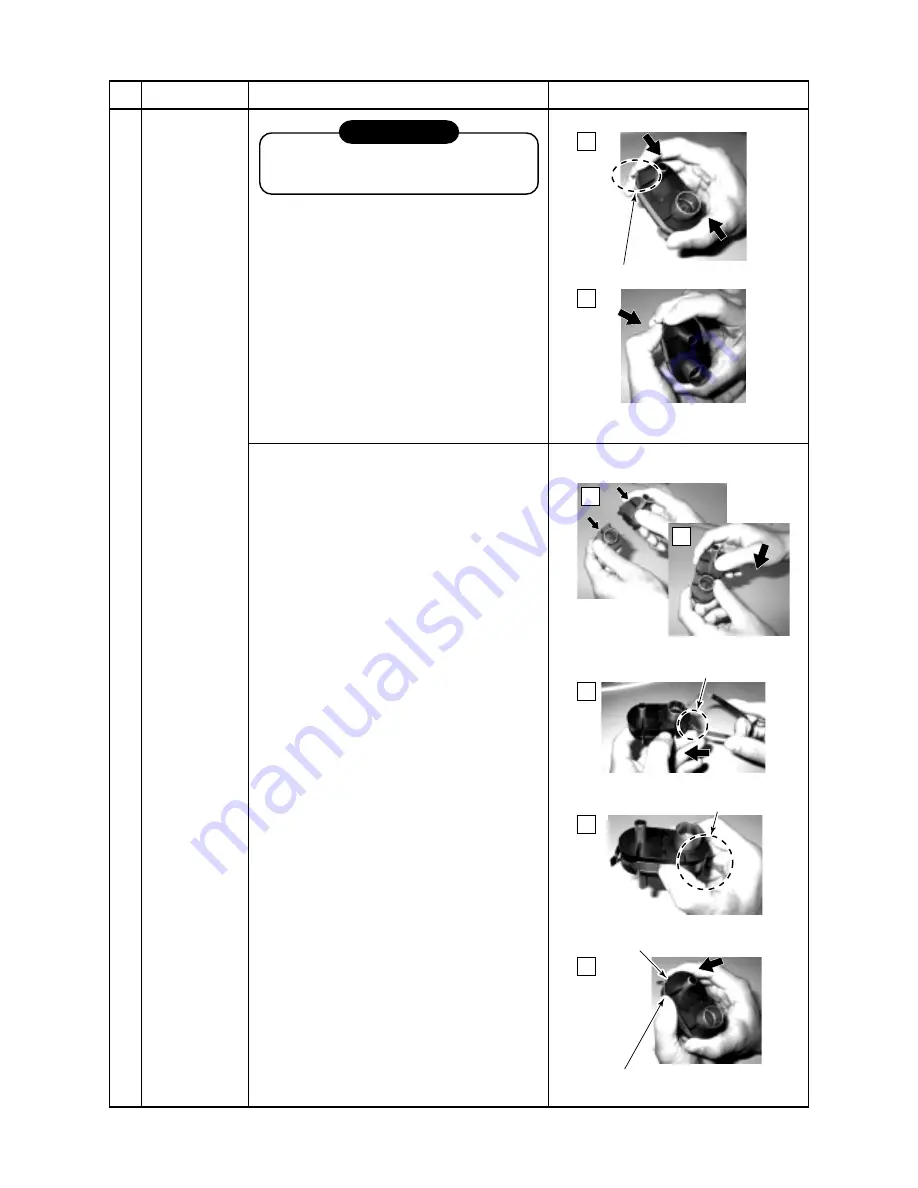
Push the tab side up against the rubber.
Compress the rubber to release the cup.
Push in the band towards the arrow mark.
Align the direction of the slits
and then attach to each pipe.
Matching the tabs, slide them.
Align the tabs to the slit side of the rubber.
Push the band against the
rubber to eliminate any gaps.
Slide the square hole side
towards the arrow mark.
Slide it.
1)
1)
1)
2)
3)
4)
1)
No.
8
Part name
Attachment/
detachment of
pipe fixing
rubber
Procedure
REQUIREMENT
Wear protective clothing on your hands as
other components may cause injury etc.
<Disassembling>
1) Squeeze the band either side of the clip to
release.
2) Pushing in the tab side of SUS band the tab
comes off from square hole.
Remarks
<Assembly>
1) Individually fit each rubber bracket to the
relevant pipe.
2) For assembly align the tab side of the SUS
band to the slit side of the rubber bracket.
3) Attach the rubber band so that there is no
gap between the SUS band and the fixing
rubber bracket. Pay special attention no to
create a gap at the hair pin of the rubber
band.
4) Squeeze the rubber bracket and band so
that the hook part of the band clips into the
square hole.


