– 97 –
FILE NO. SVM-
16042
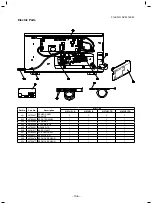
PMV connector
Lead clamp
PMV lead
Binding band
PMV
Lead clamp
Fixing plate
Screws
Partition plate
Screws
Partition plate
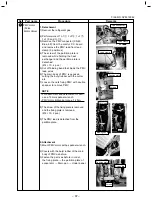
1. Detachment
1) Recover the refrigerant gas.
2) Perform work of 1 of
1
, 1 of
2
, 1 of
7
,
1 of
8
and 1 of
9
.
3) Remove the PMV connector (CN82,
Blue, 6P) from the control P.C. board
and remove the PMV lead from lead
clamp (5 positions)
4) The screw of the partition plate is
removed while holding the heat
exchanger and the partition plate is
detached.
(Ø4 × 10, 4 pcs.)
5) Cut off binding band that binds the PMV
lead wires.
6) The main body of PMV is exposed
cutting the butyl rubber with the cutter
etc.
7) Loosen the nuts fixing PMV with double
spanner to remove PMV.
2. Attachment
1) Mount PMV motor with a spanner wrench.
2) Covers with the butyl rubber of the main
body of PMV as before.
3) Fasten the parts as before in order,
WKHIL[LQJSODWHĺWKHSDUWLWLRQSODWHRI
HYDSRUDWRUĺ'UDLQSDQĺ8QGHUSDQHO
8) The screw of the fixing plate is removed
and the fixing plate is removed.
(Ø4 × 10, 2 pcs.)
9) The PMV lead is detached from the
partition plate.
PMV motor
(Pulse
Motor Valve)
NOTE
)RUDWWDFKPHQWDQGGHWDFKPHQWRI309
use a 19 mm spanner wrench.
309PRWRUWLJKWHQLQJWRUTXH1P
No. Part name
Procedure
Remarks
10


