– 19 –
SMMS Slim Duct Type
Installation Manual
SMMS Slim Duct Type
Installation Manual
Wireless remote controller
1
Remove a small screw which fixes the nameplate of the receiver unit.
Remove the nameplate of the sensor section by inserting a flat-blade screwdriver into the notch at the bottom
of the plate, and set the Dip switch to [TEST RUN ON].
2
Execute a test operation with
ON/OFF button on the wireless remote controller.
•
,
, and
LED flash during test operation.
• Under status of [TEST RUN ON], the temperature adjustment from the wireless remote controller is invalid.
Do not use this method in the operation other than test operation because the equipment is damaged.
3
Use either Cool or Heat operation mode for a test operation.
* The outdoor unit does not operate approx. 3 minutes after power-ON and operation stop.
4
After the test operation finished, stop the air conditioner from the wireless remote controller, and
return Dip switch of the receiver section as before.
(A 60-minutes timer clearing function is attached to the receiver section in order to prevent a continuous test
operation.)
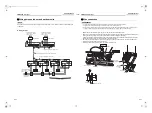
Small
screw
Nameplate
Notch
M4 × 25 screw
(2 pieces)
Spacer
Receiver unit
11
Maintenance
<Daily maintenance>
▼
Cleaning of air filter
If
is displayed on the remote controller, maintain the air filter.
1
Push the
button to stop the operation, then turn off the circuit breaker.
2
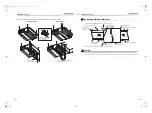
Take out the air filter.
Push the tabs (Forward direction as shown in the figure) of the fir filter, and then pull out it to take out the air
filter.
3
Cleaning with water or vacuum cleaner
• If dirt is heavy, clean the air filter by tepid water with neutral detergent or water.
• After cleaning with water, dry the air filter sufficiently in a shade place.
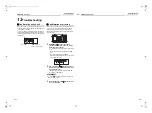
6
1,5
Air filter
Main unit
Push
Remove the filter from the
main unit while pushing
down on the tabs.
37-EN
38-EN
+00EH99879301_01EN.book Page 19 Tuesday, March 15, 2011 8:42 PM

