– 9 –
SMMS Concealed Duct High Static Pressure Type
Installation Manual
SMMS Concealed Duct High Static Pressure Type
Installation Manual
6
Drain Piping
CAUTION
Following the Installation Manual, perform the drain piping work so that water is properly drained. Apply a heat
insulation so as not to cause a dew condensation.
Inappropriate piping work may result in water leakage in the room and wet furniture.
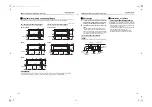
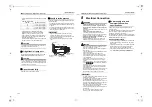
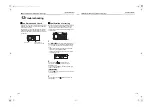
• The draining method is a natural draining. Therefore, slope the piping outside of the unit downward (at 1/50 to 1/100), and
do not put an angle halfway. If doing so, an abnormal sound may be caused.
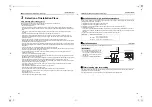
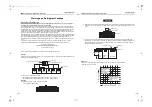
• To prevent overflow of drain pipe, set a drain trap on its way as shown in the right figure.
[The drain trap is required for preventing aspiration of smell through the drain pipe, and also for preventing hardness of
draining because the differential pressure between the drain pan and atmosphere becomes large when the external static
pressure is high (especially, at suction side).]
• Dust inside of the drain pipe is easy to be heaped at the drain trap. Be sure to set a plug so that the drain trap can be cleaned.
• Maximum horizontal drain pipe length should be less than 20 m or shorter.
If the pipe is long, set the support brackets with 1.5 to 2 m interval to prevent waving.
• Mount the collective drain pipe as shown in the right figure.
• Do not mount an air purge pipe.
Otherwise drain water spouts out resulted in water leak.
• Do not apply strength to the connecting part with the drain pipe.
• Do heat insulating securely to the indoor drain pipe.
• Do heat insulating to the connecting part with the indoor unit.
Incomplete heat insulating may cause dewing.
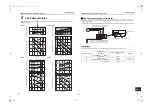
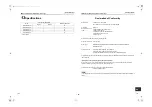
Pipe material, size and insulator
The following materials for piping work and insulating process are procured locally.
Connecting drain pipe
Insert the drain hose into the connector until the hose can go no farther.
REQUIREMENT
• Connect the hard vinyl chloride pipes certainly so that water does not leak by using adhesive agent for vinyl chloride.
• It takes some time to dry and indurate the adhesive agent. (Refer to the manual of adhesive agent.) Do not apply any
extra force on the connecting section until the adhesive agent dried.
Pipe material
Hard vinyl chloride pipe VP25 (Nominal outer diameter Ø32 mm)
Insulator
Foamed polyethylene foam, thickness: 10 mm or more
Service panel
Plug (Port for check
and cleaning)
50 mm or
mor
e
Service panel
Drain pipe
Collective
drain pipe
Plug (Port for check
and cleaning)
100 mm
or
mo
re
Drain up
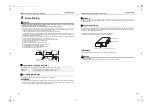
When not securing down slope on the drain pipe, use a drain up kit sold separately. Also refer to the Drain up kit
installation manual.
Check the draining
In the test run, check that water drain is properly performed and water does not leak from the connecting part of
the pipes. When doing this, also check that no abnormal sounds are heard from the drain pump motor. Check
draining also when installed in heating period.
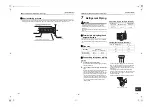
Check the water drainage is surely performed at the trial operation.
Check also no water leakage is found at the pipe connecting part.
REQUIREMENT
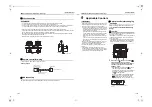
Enter water gradually using a kettle or a hose from drain pan of the discharge port.
CAUTION
Pour water slowly.
If it is poured urgently, water is spread inside of the indoor unit resulted in a trouble.
Discharge port
Drain pipe connecting port
Water entering
Service panel
17-EN
18-EN
+00EH99879501_01EN.book Page 9 Monday, March 14, 2011 10:06 PM

