Installation Manual
29-EN
– 29 –
29-EN
SMMS High-Wall Type
Installation Manual
Adjustment of air direction
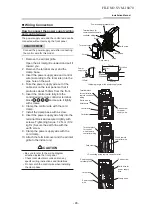
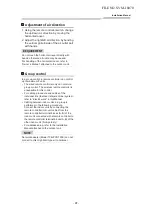
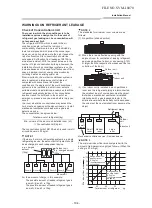
1. Using the remote controller switch, change
the up/down air direction by moving the
horizontal louver.
2. Adjust the right/left air direction by bending
the vertical grille inside of the air outlet port
with hands.
REQUIREMENT
Do not touch the horizontal louver directly with
hands; otherwise a trouble may be caused.
For handling of the horizontal louver, refer to
“Owner’s Manual” attached to the outdoor unit.
Group control
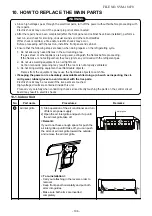
In a group control, a remote controller can control
up to maximum 8 units.
• The wired remote controller only can control a
group control. The wireless remote controller is
unavailable for this control.
• For cabling procedure and cables of the
individual line (Identical refrigerant line) system,
refer to “Electric work” in this Manual.
• Cabling between indoor units in a group is
performed in the following procedure.
Connect the indoor units by connecting the
remote controller inter-unit cables from the
remote controller terminal blocks (A, B) of the
indoor unit connected with a remote controller to
the remote controller terminal blocks (A, B) of the
other indoor unit. (Non-polarity)
• For address setup, refer to the Installation
Manual attached to the outdoor unit.
NOTE
Net work adapter (Model TCB-PCNT20E) can not
connect to this High Wall type air conditioner.
1111058602_EN.indd 29
11/24/16 11:41 AM
TR
EN
SMMS High-Wall Type
Installation Manual
TR
EN
12
TEST RUN
A wired remote controller is necessary for this function. This function cannot be operate with a wireless
remote controller.
Before test run
• Before turning on the power supply, carry out the
following procedure.
1) Using 500V-megger, check that resistance of
1M
:
or more exists between the terminal
block of the power supply and the earth
(grounding).
If resistance of less than 1M
:
is detected, do
not run the unit.
2) Check the valve of the outdoor unit being
opened fully.
• To protect the compressor at activation time,
leave power-ON for 12 hours or more be for
operating.
WARNING
• Never press the electromagnetic contactor to
forcibly perform a test run. (This is very
dangerous because the protective device does
not work.)
• Before starting a test run, be sure to set
addresses following the installation manual
supplied with the outdoor unit.
How to execute a test run
Using the wired remote controller, operate the unit
as usual.
For the procedure of the operation, refer to the
attached Owner’s Manual.
A forced test run can be executed in the following
procedure even if the operation stops by thermo.-
OFF.
In order to prevent a serial operation, the forced test
run is released after 60 minutes have passed and
returns to the usual operation.
CAUTION
• Do not use the forced test run for cases other
than the test run because it applies an
excessive load to the devices.
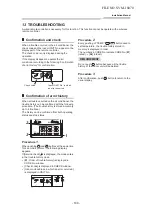
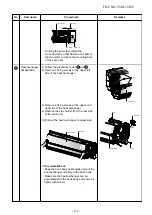
In case of wired remote controller
Procedure
1
Keep
button pushed for 4 seconds or more.
[TEST] is displayed on the display part and the
selection of mode in the test mode is permitted.
Procedure
2
Push
button.
Procedure
3
Using
button, select the operation mode,
[COOL] or [HEAT].
• Do not run the air conditioner in a mode other
than [COOL] or [HEAT].
• The temperature controlling function does not
work during test run.
• The detection of error is performed as usual.
Procedure
4
After the test run, push
button to stop a
test run.
(Display part is same as procedure 1.)
Procedure
5
Push
check button to cancel (release from) the
test run mode.
([TEST] disappears on the display and the status
returns to a normal.)
2, 4
3
1,5
1111058602_EN.indd 30
11/24/16 11:41 AM
FILE NO. SVM-18070
- 98 -

