GR
NL
PT
ES
IT
DE
FR
RU
SI
SK
LV
CS
TR
EN
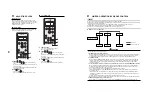
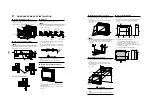
Refrigerant piping
1. Use copper pipe with 0.8 mm or more thickness.
2. Flare nut and fl are works are also different from those
of the conventional refrigerant.
Take out the fl are nut attached to the main unit of the
air conditioner, and use it.
Permissible piping length and
height difference
They vary according to the outdoor unit.
For details, refer to the Installation Manual attached
to the outdoor unit.
Flaring
• Cut the pipe with a pipe cutter.
Remove burrs completely.
Remaining burrs may cause gas leakage.
• Insert a fl are nut into the pipe, and fl are the pipe.
As the fl aring sizes of R410A differ from those of
refrigerant R22, the fl are tools newly manufactured for
R410A are recommended.
However,
the
conventional tools can
be used by adjusting
projection margin of the
copper pipe.
Pipe size
(dia
: mm)
REQUIREMENT
When the refrigerant pipe is long, provide support
brackets at intervals of 2.5 to 3 m to clamp the refrigerant
pipe. Otherwise, abnormal sound may be generated.
CAUTION
IMPORTANT 4 POINTS FOR PIPING WORK
1. Remove dust and moisture from the inside of
the connecting pipes.
2. Tight connection (between pipes and unit)
3. Evacuate the air in the connecting pipes using
VACUUM
PUMP.
4. Check the gas leakage. (Connected points).
MML-
AP007 to
AP012 type
AP015 to
AP018 type
Gas side
9.5
12.7
Liquid side
6.4
6.4
Outer dia. of
copper pipe
R410A tool used
Conventional
tool used
R410A
R410A
6.4 , 9.5
0 to 0.5
1.0 to 1.5
12.7
Outer dia. of copper pipe
R410A
6.4
9.1
9.5
13.2
12.7
16.6
W
Projection margin in fl aring: B (Unit: mm)
Rigid (Clutch type)
W
Flaring dia. meter size: A (Unit: mm)
+0
-0.4
A
* In case of fl aring for R410A with the
conventional fl are tool, pull it out
approx. 0.5 mm more than that for R22
to adjust to the specifi ed fl are size.
The copper pipe gauge is useful for
adjusting projection margin size.
7
7
REFRIGERANT PIPING
REFRIGERANT
PIPING
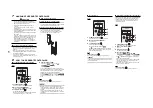
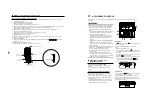
Tightening connection
CAUTION
• Do not apply excessive torque. Otherwise, the
nut may crack depending on the conditions.
Outer dia. of copper pipe
Tightening torque
6.4 mm (dia.)
14 to 18 (1.4 to 1.8 kgf·m)
9.5 mm (dia.)
33 to 42 (3.3 to 4.2 kgf·m)
12.7 mm (dia.)
50 to 62 (5.0 to 6.2 kgf·m)
W
Tightening torque of fl are pipe connections
Pressure of R410A is higher than that of R22.
(Approx. 1.6 times) Therefore, using a torque wrench,
tighten the fl are pipe connecting sections which connect
the indoor and outdoor units of the specifi ed tightening
torque.
Incorrect connections may cause not only a gas leak, but
also a trouble of the refrigeration cycle.
Align the centres of the
connecting pipes and tighten
the fl are nut as far as possible
with your fi ngers. Then tighten
the nut with a spanner and
torque wrench as shown in the
fi gure.
Work using double spanner
(Unit: N·m)
25
25
REQUIREMENT
Tightening with an excessive torque may crack the nut
depending on installation conditions.
Tighten the nut within the specifi ed tightening torque.
Piping with outdoor unit
• Shape of valve differs according to the outdoor unit.
For details of installation, refer to the Installation
Manual of the outdoor unit.
REQUIREMENT
Use a leak detector manufactured exclusively HFC
refrigerant (R410A, R134a, etc.).
Open fully valves of the outdoor
unit
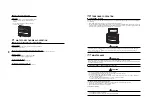
Heat insulation
Heat insulation for the pipes should be done separately
for the liquid side and gas side. Because both of the
liquid and gas side pipes become a low temperature
during cooling operation, suffi cient heat insulation should
be done to prevent condensation.
• Heat insulator with a heat resistance of 120°C or more
must be used for the gas side pipe.
• The pipe connection section of the indoor unit must
be heat insulated securely and compactly with the
attached heat insulator.
Airtight test/Air purge, etc.
For airtight test, air purge, addition of refrigerant,
and gas leak check, follow the Installation Manual
attached to the outdoor unit.
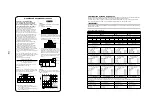
WARNING
1. Using the specifi ed wires, ensure to connect the
wires, and fi x wires securely so that the external
tension to the wires do not affect the connecting
part of the terminals.
Incomplete connection or fi xation may cause a fi re,
etc.
2. Be sure to connect earth wire. (grounding work)
Incomplete grounding cause an electric shock.
Do not connect ground wires to gas pipes, water
pipes, lightning rods or ground wires for telephone
wires.
3. Appliance shall be installed in accordance with
national wiring regulations.
Capacity shortage of power circuit or incomplete
installation may cause an electric shock or a fi re.
CAUTION
• If incorrect/incomplete wiring is carried out, it will
cause an electrical fi re or smoke.
• Be sure to install an earth leakage breaker that is not
tripped by shock waves.
If an earth leakage breaker is not installed, an
electric shock may be caused.
• Be sure to use the cord clamps attached to the
product.
• Do not damage or scratch the conductive core and
inner insulator of power and interconnecting wires
when peeling them.
• Use the power cord and Inter-connecting wire of
specifi ed thickness, type, and protective devices
required.
• Never connect 220–240V power to the terminal
blocks (
,
,
,
, etc.) for control wiring.
(Otherwise, the system will fail.)
8
8
ELECTRIC WORK
ELECTRIC
WORK
REQUIREMENT
• For power supply wiring, strictly conform to the
Local Regulation in each country.
• For wiring of power supply of the outdoor units,
follow the Installation Manual of each outdoor unit.
• Perform the electric wiring so that it does not come to
contact with the high-temperature part of the pipe.
The coating may melt resulting in an accident.
• After connecting wires to the terminal blocks, provide
a trap and fi x wires with the cord clamp.
• Run the refrigerant piping line and control wiring line
in the same line.
• Do not turn on the power of the indoor unit until
vacuuming of the refrigerant pipes completes.
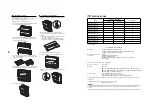
Indoor unit
Wrap the pipe with the attached
heat insulator without any gap
between the indoor unit.
Heat insulator (attached)
Banding band (attached)
Banding band (attached)
Fix with vinyl tape
Heat insulator of the local side pipe
102


