background image

Please read carefully through these instructions that contain important information which complies with the
“Machinery” Directive (Directive 2006/42/EC), and ensure that you understand them.

Definition of Qualified Installer or Qualified Service Person

The air conditioner must be installed, maintained, repaired and removed by a qualified installer or qualified
service person. When any of these jobs is to be done, ask a qualified installer or qualified service person to do
them.
A qualified installer or qualified service person is an agent who has the qualifications and knowledge
described in the table below.

• The qualified service person is a person who installs, repairs, maintains, relocates and removes

the air conditioners made by Toshiba Carrier Corporation. He or she has been trained to install,
repair, maintain, relocate and remove the air conditioners made by Toshiba Carrier Corporation
or, alternatively, he or she has been instructed in such operations by an individual or individuals
who have been trained and is thus thoroughly acquainted with the knowledge related to these
operations.

• The qualified service person who is allowed to do the electrical work involved in installation,

repair, relocation and removal has the qualifications pertaining to this electrical work as
stipulated by the local laws and regulations, and he or she is a person who has been trained in
matters relating to electrical work on the air conditioners made by Toshiba Carrier Corporation
or, alternatively, he or she has been instructed in such matters by an individual or individuals
who have been trained and is thus thoroughly acquainted with the knowledge related to this
work.

• The qualified service person who is allowed to do the refrigerant handling and piping work

involved in installation, repair, relocation and removal has the qualifications pertaining to this
refrigerant handling and piping work as stipulated by the local laws and regulations, and he or
she is a person who has been trained in matters relating to refrigerant handling and piping work
on the air conditioners made by Toshiba Carrier Corporation or, alternatively, he or she has
been instructed in such matters by an individual or individuals who have been trained and is
thus thoroughly acquainted with the knowledge related to this work.

• The qualified service person who is allowed to work at heights has been trained in matters

relating to working at heights with the air conditioners made by Toshiba Carrier Corporation or,
alternatively, he or she has been instructed in such matters by an individual or individuals who
have been trained and is thus thoroughly acquainted with the knowledge related to this work.

• The qualified installer is a person who installs, maintains, relocates and removes the air

conditioners made by Toshiba Carrier Corporation. He or she has been trained to install,
maintain, relocate and remove the air conditioners made by Toshiba Carrier Corporation or,
alternatively, he or she has been instructed in such operations by an individual or individuals
who have been trained and is thus thoroughly acquainted with the knowledge related to these
operations.

• The qualified installer who is allowed to do the electrical work involved in installation, relocation

and removal has the qualifications pertaining to this electrical work as stipulated by the local
laws and regulations, and he or she is a person who has been trained in matters relating to
electrical work on the air conditioners made by Toshiba Carrier Corporation or, alternatively, he
or she has been instructed in such matters by an individual or individuals who have been
trained and is thus thoroughly acquainted with the knowledge related to this work.

• The qualified installer who is allowed to do the refrigerant handling and piping work involved in

installation, relocation and removal has the qualifications pertaining to this refrigerant handling
and piping work as stipulated by the local laws and regulations, and he or she is a person who
has been trained in matters relating to refrigerant handling and piping work on the air
conditioners made by Toshiba Carrier Corporation or, alternatively, he or she has been
instructed in such matters by an individual or individuals who have been trained and is thus
thoroughly acquainted with the knowledge related to this work.

• The qualified installer who is allowed to work at heights has been trained in matters relating to

working at heights with the air conditioners made by Toshiba Carrier Corporation or,
alternatively, he or she has been instructed in such matters by an individual or individuals who
have been trained and is thus thoroughly acquainted with the knowledge related to this work.

Qualified installer
(*1)

Qualified service
person (*1)

Agent

Qualifications and knowledge which the agent must have


- 3 -

Summary of Contents for MMU-AP0071YHPUL

Page 1: ...AIR CONDITIONER MULTI TYPE SERVICE MANUAL Indoor unit 1 way cassette type MMU AP0071YHPUL MMU AP0091YHPUL MMU AP0121YHPUL Revised on November 2021 FILE NO SVM 21073 2 ...

Page 2: ...ircuit Board 7 3 Test run of indoor unit 7 4 Method to set indoor unit function DN code 8 TROUBLESHOOTING 8 1 Overview 8 2 Troubleshooting method 8 3 Troubleshooting based on information displayed on remote controller 8 4 Check Codes Displayed on Remote Controller and SMMS series Outdoor Unit 7 Segment Display on I F Board and Locations to Be Checked 8 5 Diagnostic Procedure for Each Check Code In...

Page 3: ... qualified service person who is allowed to work at heights has been trained in matters relating to working at heights with the air conditioners made by Toshiba Carrier Corporation or alternatively he or she has been instructed in such matters by an individual or individuals who have been trained and is thus thoroughly acquainted with the knowledge related to this work The qualified installer is a...

Page 4: ...ecuted Indicates possibilities assumed that a danger causing a death or serious injury of the repair engineers the third parties and the users due to troubles of the product after work when an incorrect work has been executed Indicates contents assumed that an injury or property damage may be caused on the repair engineers the third parties and the users due to troubles of the product after work w...

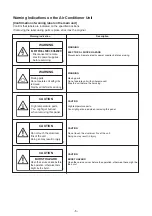
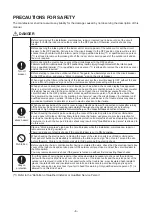
Page 5: ...ature parts You might get burned when removing this panel CAUTION Do not touch the aluminium fins of the unit Doing so may result in injury CAUTION BURST HAZARD Open the service valves before the operation otherwise there might be the burst WARNING ELECTRICAL SHOCK HAZARD Disconnect all remote electric power supplies before servicing WARNING Moving parts Do not operate unit with grille removed Sto...

Page 6: ... noticed that some kind of trouble such as when a check code display has appeared there is a smell of burning abnormal sounds are heard the air conditioner fails to cool or heat or water is leaking has occurred in the air conditioner do not touch the air conditioner yourself but set the circuit breaker to the OFF position and contact a qualified service person Take steps to ensure that the power w...

Page 7: ...dertake work When working at heights use a ladder which complies with the ISO 14122 standard and follow the procedure in the ladder s instructions Also wear a helmet for use in industry as protective gear to undertake the work Before working at heights put a sign in place so that no one will approach the work location before proceeding with the work Parts and other objects may fall from above poss...

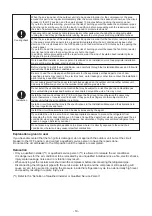
Page 8: ... of the service port is changed from one of the former R22 Do not use any refrigerant different from the one specified for complement or replacement Otherwise abnormally high pressure may be generated in the refrigeration cycle which may result in a failure or explosion of the product or an injury to your body For an air conditioner which uses R410A never use other refrigerant than R410A For an ai...

Page 9: ...h a way that it is not slack For the installation moving reinstallation work follow to the Installation Manual If an incorrect installation is done a trouble of the refrigerating cycle water leak electric shock or fire is caused Check after repair Once the repair work has been completed check for refrigerant leaks and check the insulation resistance and water drainage Then perform a trial run to c...

Page 10: ...another outdoor unit Capacity overflow may occur on the terminal block and may result in fire Do not install the air conditioner in a location that may be subject to a risk of expire to a combustible gas If a combustible gas leaks and becomes concentrated around the unit a fire may occur Install the indoor unit at least 8 2 4 2 5 m above the floor level since otherwise the users may injure themsel...

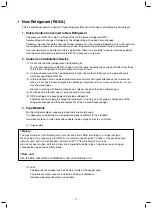
Page 11: ...ot mix in because pipes are affected by impurities such as water oxide scales oil etc Use the clean pipes Be sure to brazing with flowing nitrogen gas Never use gas other than nitrogen gas 4 For the earth protection use a vacuum pump for air purge 5 R410A refrigerant is azeotropic mixture type refrigerant Therefore use liquid type to charge the refrigerant If using gas for charging composition of ...

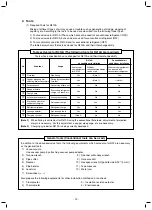
Page 12: ...meter 3 Insulation resistance tester 4 Electroscope Note 1 When flaring is carried out for R410A using the conventional flare tools adjustment of projection margin is necessary For this adjustment a copper pipe gauge etc are necessary Note 2 Charging cylinder for R410A is being currently developed General tools Conventional tools can be used In addition to the above exclusive tools the following e...

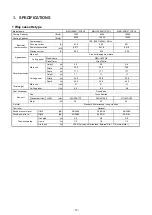
Page 13: ...dB Sound power level H M L dB Gas side in Liquid in Drain port in VP25 Polyvinyl chloride tube External Dia 1 1 4 Internal Dia 1 1 4 1 4 1 4 Connecting pipe 3 8 3 8 3 8 53 49 40 54 50 41 55 51 41 38 34 25 39 35 26 40 36 26 30 30 30 Fan unit 294 229 170 306 241 182 317 247 182 Outer diamension 6 6 6 6 6 6 Total weight 31 31 31 44 0 44 0 44 0 Ceiling panel 1 1 1 1 1 1 Main unit 20 8 20 8 20 8 17 7 1...

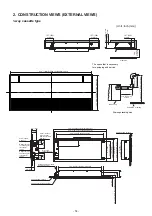
Page 14: ... dimension 42 5 1080 Hanging bolt pitch Electrical control box Indoor Outdoor inter unit wire Remote controller wire port 4 1 105 4 3 110 7 9 200 5 8 147 4 0 102 3 5 90 Refrigerant pipe connecting port Gas Ø3 8 9 52 Power supply wire port Refrigerant pipe connecting port Liquid Ø1 4 6 35 Drain pipe connecting port 15 1 384 Hanging bolt pitch 19 7 500 Ceiling opening dimension 20 9 530 Panel extern...

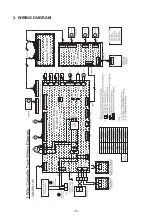
Page 15: ...3 WIRING DIAGRAM 15 ...

Page 16: ...h Drain pump motor MMU AP007 AP009 AP012 ICF 340 30 6A 24BYJ48 ST PAM B25YGTF 1 Lead wire length 8 6 218 mm Vinyl tube Ø0 16 4 mm size lead wire length 39 4 1000 mm Vinyl tube Brown Ø0 24 6 mm size lead wire length 39 4 1000 mm Vinyl tube Black Ø0 24 6 mm size lead wire length 39 4 1000 mm Vinyl tube Red FS 1A 31 3 PMD 08D12TF 2 16 ...

Page 17: ...cooling operation 2 Controls subcool in heating operation 3 Recovers refrigerant oil in cooling operation 4 Recovers refrigerant oil in heating operation Temp Sensor Connector CN104 2P Yellow 1 Detects indoor suction temperature Functional outline TC1 Connector CN100 3P Brown 1 Controls PMV superheat in cooling operation TC2 TCJ Connector CN101 2P Black 1 Controls PMV subcool in heating operation ...

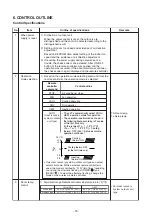
Page 18: ...EAT AUTO Heat recovery system outdoor unit type Control outline Air conditioner stops Fan operation Cooling operation Dry operation Heating operation Only Heat recovery system outdoor unit type can select automatic mode While a wireless remote controller is used the mode is notified by Pi Pi two times receiving sound and the alternate flashing of TIMER and READY To clear the alternate flashing cha...

Page 19: ...F heating operation Thermostat OFF exchanges to cooling operation Description in the parentheses shows an example of cooling ON OFF When 2 7 F 1 5 C lowers against Tsc 10 minutes and after thermostat OFF cooling operation Thermostat OFF exchanges to heating operation 2 For the automatic capacity control after judgment of cooling heating see Item 4 3 For temperature compensation of room temp contro...

Page 20: ...oundary the fan speed does not change Value in the parentheses indicates one when sensor of the remote controller works Value without parentheses indicates one when sensor of the indoor unit sensor works If the fan speed has been changed once it is not changed for 1 minute However when the fan speed changed the fan speed changes When heating operation has started select an upward slope for the fan...

Page 21: ...on value When the power supply is turned on the forced thermostat becomes OFF if the temperature is less than this indicated temperature 1 In heating operation the higher temperature of TC2 sensor and TCJ sensor is compared with temperature of TC1 sensor and then the lower temperature is used to set the upper limit of the fan tap When B zone has continued for 6 minutes the operation shifts to C zo...

Page 22: ...e drain pump 2 During operation of the drain pump if the float switch operates the drain pump continuously operates and a check code is issued 3 During stop status of the drain pump if the float switch operates the thermostat is forcedly off and this control operates the drain pump After continuous operation of the float switch for approx 5 minutes this control stops the operation and a check code...

Page 23: ...y for wireless type remote controller HEAT READY display Operation possible Operation impossible Selection of central control mode 18 Operation from central controller Individual Central 1 Central 2 Central 3 Central 4 Operation on remote controller ON OFF Operation Timer Temp Fan speed Air direction setting selection setting setting setting setting Display of filter sign Not provided to the wirel...

Page 24: ...roup operation the louver positions can be set up collectively or individually 3 When the unit stopped or the warning was output the louver is automatically set to full closed position 4 When PRE HEAT Heating ready is displayed Heating operation started or defrost operation is performed heating thermostat is off or self cleaning is performed the louver is automatically set to horizontal discharge ...

Page 25: ...tup Illustration on the remote controller screen 20 DC motor 1 When the fan starts positioning is performed for the starter and the rotor Vibrate slightly 2 DC motor operates according to the command from the indoor controller Note If the fan rotates by entry of outside air etc while the air conditioner stopped the indoor unit may operate as the fan motor stops Note If the fan lock was detected th...

Page 26: ...r Indoor fan motor CPU DC5V DC5V 1 CN2 CN1 Wired remote controller Up to 2 units Schedule timer Function setup LCD driver CPU Power circuit EEPROM TA sensor TC1 sensor TC2 sensor TCJ sensor HA Application control kit Occupancy sensor Outdoor unit Fan motor control circuit Start Alarm BUS communication circuit Power circuit Power circuit Remote controller communication circuit Remote controller com...

Page 27: ...larm BUS communication circuit MCU EEPROM TA sensor TC1 sensor TC2 sensor TCJ sensor HA Application control kit Occupancy sensor Driver Remote controller communication circuit Remote controller communication circuit DC 280V Indoor unit 1 Header Indoor fan motor Power supply 208 230 1 60 Power supply Power supply Indoor Outdoor communication Outdoor unit 2 3 Follower Follower L L PMV Louver motor D...

Page 28: ...ule timer LCD driver Power circuit EEPROM TA sensor TC1 sensor TC2 sensor TCJ sensor HA Wireless Occupancy sensor Application control kit Outdoor unit Fan motor control circuit Start Alarm BUS communication circuit Power circuit Power circuit Remote controller communication circuit Remote controller communication circuit Display LCD Display LCD Display LED EEPROM Secondary battery Key switch Key s...

Page 29: ...d TC1 sensor CN100 Brown TCJ sensor CN102 Red TC2 sensor CN101 Black Drain pump CN504 White TA sensor CN104 Yellow Not use CN20 Blue Function switching J01 Function switching J08 Application control kit CN521 Red Remote controller communication LED D504 Green Indoor Outdoor central control communication LED D503 Yellow PMV output CN82 Blue HA T10 CN61 Yellow Wireless remote control CN214 White DC ...

Page 30: ...indoor operation Performs operation of indoor fan H Louver horizontal and Drain pump ON without communication with outdoor and remote controller CN72 White DISP Exhibition mode DISP mode input 0V Communication is available by indoor unit and remote controller only When the power is turned on Shortening time of timer Always CN309 Yellow Output power supply for option AC230V AC230V This can be used ...

Page 31: ...tton Change the mode from COOL to HEAT using MODE button Do not use MODE button for other mode except COOL HEAT modes The temperature cannot be adjusted during test run The trouble detection is performed as usual After test run push ON OFF button to stop the operation Display on the display part is same to that in Procedure 1 Push TEST button to clear the TEST mode TEST display in the display part...

Page 32: ... 5 Setting louver position Field setting menu 1 2 Return Set 1 Test mode 2 Register service info 3 Alarm history 4 Monitor function 5 Setting louver position Field setting menu 1 2 Return Set Return Test mode start No Yes Test mode 3 Push the button to select 1 Test mode on the Field setting menu screen then push the Set Set F2 F2 button Pushing the Yes F1 F1 button sets the test mode and the scre...

Page 33: ...e Cool or Heat mode Temperature setting cannot be adjusted during the test mode Check codes are displayed as usual 5 When the test mode is finished push the button to select 1 Test mode on the Field setting menu screen then push the Set Set F2 F2 button The screen 3 appears Pushing the Yes Yes F1 F1 button stops the test mode screen and continues the normal operation NOTE The test mode stops after...

Page 34: ...tons After confirming a signal receiving sound beep immediately set the temperature to 84 F 29 C with the temp setup buttons Cooling test run Heating test run After confirming a signal receiving sound beep immediately set the temperature to 62 F 17 C with the temp setup buttons After confirming a signal receiving sound beep immediately set the temperature to 86 F 30 C with the temp setup buttons 4...

Page 35: ...tion to short circuit of CHK pin CN71 on the indoor P C board the minimum opening degree 30 pls can be set to the indoor PMV only When open DISP pin the maximum opening degree 1500 pls can be obtained again For the detailed positions of CHK pin CN71 on indoor P C board and DISP pin CN72 on indoor P C board refer to the indoor P C board How to clear Open CHK pin While the system is operating it sto...

Page 36: ... the indoor unit Nos under group control is displayed in turn Then the fan and louver of the selected indoor unit move 3 Use the TEMP button to select the CODE No DN code of the desired function 4 Use the button to select the desired SET DATA associated with the selected function 5 Push the button The display changes from flashing to steady To change the selected indoor unit go back to step 2 To c...

Page 37: ...2 2 3 1 3 3 Set Unit DN setting Code DN Data 1 1 0001 0000 Return Fix 5 Push the Set Set F2 F2 button The setting display for the selected unit is displayed The fan and louver of the indoor unit operate 6 Push the to set DN code to 0001 then write down the setting data to be displayed Filter sign lighting time 7 Repeat the operation of 1 to 6 then write down the setting data like Table 1 Setting d...

Page 38: ... TU2C LINK 00Un Unfixed When using U series remote controller 0099 Unfixed Other than U series remote controller Indoor unit address 0001 No 1 unit to 0064 No 64 unit TCC LINK 00Un 0099 Unfixed 1 0001 No 1 unit to 0128 No 128 unit TU2C LINK 00Un Unfixed When using U series remote controller 0099 Unfixed Other than U series remote controller Group address 0000 Individual 0001 Header unit of group 0...

Page 39: ...upancy sensor 0000 None b5 provided 0002 Wireless remote controller provided Occupancy sensor Enable Invalid Absence time judgment time 0000 Invalid 0001 30min 0002 Enable b6 0002 60min 0004 120min 60 min 0005 150min b7 Occupancy sensor operation at absent time 0000 Stand by 0001 operation stop 0000 Stand by CF 4 way cassette type model name 0000 Standard Model 0001 larger case model Depending on ...

Page 40: ...03 Type Model 1 way cassette MMU AP YHPUL Value 0000 0001 1 way cassette type Capacity Invalid 0071 type 0000 is default value stored in EEPROM mounted on service P C board 5d External static pressure High ceiling adjustment 0003 0091 type 0005 0121 type 40 ...

Page 41: ...e for more than 4 seconds LCD starts flashing Outdoor unit Remote controller Indoor unit 1 Refrigerant line 1 Refrigerant line 2 Indoor unit 2 Indoor unit 3 Outdoor unit Indoor unit 1 Indoor unit 2 1 Line system address 1 1 2 2 1 Indoor unit address 2 3 1 2 1 Header unit Group address 2 Follower unit 2 Follower unit 2 Follower unit 2 Follower unit Code No SET DATA 1 3 6 9 11 2 5 8 4 7 10 SET TIME ...

Page 42: ...rns on 11 Push the button The address setting is complete SETTING flashes You can control the unit after SETTING has disappeared In case of group control RBC AMS5 E UL 1 Push the MENU button to display the menu screen MENU 2 Push and hold the button and the button at the same time to display the Field setting menu Push and hold the buttons for more than 4 seconds When the group control is used the...

Page 43: ...nit of each refrigerate line After finishing all the settings above set the address of the central control devices For the setting of the central control address refer to the installation manuals of the central control devices 4 Push the MENU button to set the other Code DN and Data After Continue is Yes Yes F1 F1 button displayed on the screen push the Indoor address F1 F1 button then set 0013 wi...

Page 44: ...are running 1 Push the ON OFF button if the units stop 2 Push the UNIT LOUVER button left side of the button A unit numbers 1 1 1 1 1 1 1 1 1 1 is indicated on the LCD it will disappear after a few seconds The indicated number shows the system address and indoor unit address of the unit When 2 or more indoor units are connected to the remote controller group controlled units a number of other conn...

Page 45: ...ars on UNIT No on the LCD display The fans and louvers of all the indoor units in the group are activated 2 Push the UNIT LOUVER button left side of the button Each time you push the button the indoor unit numbers are indicated one after another The first indicated unit number is the address of the header unit Only the fan and louvers of the indicated indoor unit are activated 1 2 3 Stop 1 SET TIM...

Page 46: ...ted unit changes as follows each time the button is pushed 1 1 1 2 3 3 5 Push the Set Set F2 F2 button The setting display for the selected unit appears When the group control is used the fan and louver of the selected indoor unit operate 6 Push the MENU button to set the other Code DN and Data After Continue is displayed on the screen push the No No F2 F2 button to finish the setting operation Se...

Page 47: ...an outdoor unit 2 Push the UNIT LOUVER button left side of the button and SWING FIX buttons repeatedly to select a system address 3 Push the button to confirm the system address selection The address of an indoor unit connected to the selected refrigerant line is indicated on the LCD display and its fan and louvers are activated 4 Push the UNIT LOUVER button left side of the button Each time you p...

Page 48: ... UNIT No is that of the head unit 2 Push the UNIT LOUVER button left side of the button repeatedly to select an indoor unit number to change if 2 or more units are controlled in a group The fan and louvers of the selected indoor unit are activated The fan of the selected indoor unit is turned on 3 Push the TEMP buttons repeatedly to select13 13 13 13 13 for CODE No 4 Push the TIME buttons repeated...

Page 49: ...p control is used the fan and louver of the selected indoor unit operate F1 F1 button then set 0003 with the Move the cursor to select Code DN with the button Move the cursor to select Data with the F2 F2 button then set Data with the 4 Push the button The setup data is shown in the table below Table 1 MENU button to set the other Code DN and Data After Continue is No displayed on the screen push ...

Page 50: ... to the selected refrigerant line is indicated on the LCD display and the fan and louvers of the unit are activated At first the current indoor unit address is displayed in SET DATA No system address is indicated 4 Push the TIME buttons repeatedly to change the value of the indoor unit address in SET DATA Change the value in SET DATA to that of a new address 5 Push the button to confirm the new ad...

Page 51: ...n A of the following figure counts down as follows at 5 second intervals 0005 0005 0005 0005 0005 o o o o o 0004 0004 0004 0004 0004 o o o o o 0003 0003 0003 0003 0003 o o o o o 0002 0002 0002 0002 0002 o o o o o 0001 0001 0001 0001 0001 o o o o o 0000 0000 0000 0000 0000 The check code is cleared when 0000 0000 0000 0000 0000 appears However the display counts down from 0005 0005 0005 0005 0005 a...

Page 52: ...it 1 Push and hold the and for 4 seconds or longer to enter the service monitoring mode The service monitor lights up The CODE No 00 00 00 00 00 appears at first 2 Push the TEMP button to change to CODE No of the item to monitor Refer to the next page for CODE No 3 Push the left part of the UNIT LOUVER button left side of the button to change to the item to monitor Monitor the sensor temperature o...

Page 53: ...or unit refrigerant leak detection sensor output Outdoor unit data Code Data name 60 Outdoor unit heat exchanger coil temperature TE 61 Outside air temperature TO 62 Compressor discharge temperature TD 63 Compressor suction temperature TS 65 Heatsink temperature THS 6A Operating current x1 10 6D Outdoor heat exchange coil temperature TL F1 Compressor cumulative operating hours x100 h Procedure 1 P...

Page 54: ...ote control Indoor suction air temperature TA Indoor coil temperature TCJ Indoor coil temperature TC2 Indoor coil temperature TC1 Indoor discharge air temperature TF 1 Indoor PMV opening Filter sign time 1 1 1 1 1 1 1 1 10 1 C C F F F F F pls h 0027 27 C 0150 1500 pls 2500 2500h F9 Suction temperature of air to air heat exchanger TSA 1 1 F 0080 80 F FA 0A 0B 0C 0D Outside air temperature TOA 1 No ...

Page 55: ...e l b i s s o P r o i v a h e B O N 1 A compressor would not start The air conditioner is being controlled by the 3 minute protective function It is in standby status though the room temperature has reached the setup temperature It is being operated in timer mode or fan mode It is being in initial communication 2 An indoor fan would not start The air conditioner is being controlled by the cool air...

Page 56: ...s been open short circuit F03 ALT Indoor heat exchanger temperature sensor TC1 check code Heat exchanger temperature sensor TC1 has been open short circuit F10 ALT Ambient temperature Ambient temperature sensor TA has been open short circuit sensor TA check code F11 ALT Discharge temperature sensor TF check code Discharge temperature sensor TF has been open short circuit F29 SIM Indoor EEPROM is a...

Page 57: ...rpose device control interface Device connected to general purpose device control interface is trouble P30 L20 L20 is displayed Communication Link Duplication addresses of indoor units in central control device With the combination of air conditioning system the indoor unit may detect the check code of L20 Operation Timer Ready Check code detected by central control device Note The same trouble e ...

Page 58: ... of outdoor unit from which signal is not received normally E26 Signal lack of outdoor unit Follower outdoor unit initially communicating normally fails to do so reduction in number of follower outdoor units connected Outdoor follower unit trouble E28 E28 O Detected outdoor unit No utdoor header unit detects trouble relating to follower outdoor unit detail displayed on follower outdoor unit E31 E3...

Page 59: ...D2 wiring trouble Wiring installation trouble or detachment of outdoor discharge temperature sensor TD2 has been detected H16 01 TK1 oil circuit trouble 02 TK2 oil circuit trouble H16 Oil level detection circuit trouble No temperature change is detected by temperature sensor for oil level detection TK1 TK2 despite compressor having been started L04 L04 SIM SIM SIM L05 L06 Duplicated outdoor refrig...

Page 60: ...due to detection of overflow detected by indoor unit P13 P13 ALT Outdoor liquid backflow detection trouble State of refrigerant cycle circuit indicates liquid backflow operation P15 P15 ALT 01 TS condition Indoor unit overflow Gas leak detection 02 TD condition Outdoor suction temperature sensor TS1 detects sustained and repeated high temperatures that exceed standard value P17 Outdoor discharge T...

Page 61: ...is detected while inverter compressor is turned off P04 01 Compressor 1 02 Compressor 2 ALT Activation of high pressure SW High pressure SW is activated P04 P22 ALT P22 Compressor breakdown Outdoor fan P C board trouble 1 Fan P C board 1 2 Fan P C board 2 Outdoor fan P C board detects trouble P26 1 Compressor 1 2 Compressor 2 Activation of IPM compressor short circuit protection Short circuit prot...

Page 62: ...tory access procedure is described below up to four check codes stored in memory Check code history can be accessed regardless of whether the air conditioner is in operation or shut down Procedure To be performed when system at rest 1 Invoke the SERVICE CHECK mode by pressing the buttons simultaneously and holding for at least 4 seconds The letters SERVICE CHECK light up and the check code 01 is d...

Page 63: ... screen appears Push the Contact Contact F1 F1 button to display the contact number for service Push the Information Information F2 F2 button to display the model name and serial number of the unit Confirming an alarm history Ten check codes in the past troubled unit and date when trouble occurred are displayed on Alarm history screen Field setting menu 1 2 1 Push the button to select 3 Alarm hist...

Page 64: ...verflow trouble P12 Indoor DC fan trouble P13 Outdoor liquid backflow detection trouble P03 Outdoor discharge TD1 temperature trouble P04 Activation of outdoor high pressure SW P05 Open phase power failure Inverter DC voltage Vdc trouble MG CTT trouble P07 Outdoor heat sink overheating trouble Poor cooling of electrical component IGBT of outdoor unit P15 Gas leak detection insufficient refrigerant...

Page 65: ...el H08 Trouble in temperature sensor for oil level detection circuit TK1 TK2 TK3 TK4 or TK5 H15 Wiring installation trouble or detachment of outdoor discharge temperature sensor TD2 H16 Oil level detection circuit trouble Trouble in outdoor unit TK1 TK2 TK3 TK4 or TK5 circuit H25 Wiring installation trouble or detachment of outdoor discharge temperature sensor TD3 L03 Duplicated indoor group heade...

Page 66: ...ation Timer Synchronized blinking Ready Alternate blinking Operation Timer Ready Light block Check code Cause of trouble Communication trouble between indoor unit s and FS unit s FS unit s system trouble Operation Timer Blinking Ready Synchronized blinking Operation Timer Ready Duplicated FS units E17 L12 FS unit s setting trouble L24 J03 FS unit overflow trouble J10 FS unit temperature sensor TCS...

Page 67: ...ss or network adaptor E03 Check order in which power was turned on for indoor and outdoor units Check indoor address setting Check indoor outdoor tie cable Check outdoor terminator resistor setting SW100 Bit 2 Indoor unit Indoor outdoor communication circuit trouble detected at indoor end Stop of corresponding unit Indoor unit is not receiving signal from outdoor unit E04 Check power supply to ind...

Page 68: ...s Check for any change made to remote controller connection group individual since indoor address setting Indoor unit I F Duplicated indoor address Duplicated indoor address All stop More than one indoor unit are assigned same address E08 E08 Check remote controller settings Check remote controller P C boards Remote controller Duplicated master remote controller Stop of corresponding unit In two r...

Page 69: ...its in one line There is no outdoor header unit in one line E19 E19 Disconnect inter line tie cable in accordance with automatic address setting method explained in Address setting section I F 01 Connection of outdoor unit from other line 02 Connection of indoor unit from other line Connection to other line found during automatic address setting All stop Equipment from other line is found to have ...

Page 70: ...ation trouble between MCU and Sub MCU All stop Communication between MCU and Sub MCU stopped 80 Check connection of TCJ sensor connector and wiring Check resistance characteristics of TCJ sensor Check for failure in indoor P C board Indoor TCJ sensor trouble Indoor unit Stop of corresponding unit Sensor resistance is infinity or zero open short circuit F01 Check connection of TC2 sensor connector ...

Page 71: ...lace Compressor P C board TH sensor trouble Compressor P C board 1 Compressor 1 side 2 Compressor 2 side All stop Sensor resistance is infinity or zero open short circuit F13 F13 Check connection of TO sensor connector Check resistance characteristics of TO sensor Check for failure in outdoor P C board I F TO sensor trouble I F All stop Sensor resistance is infinity or zero open short circuit F08 ...

Page 72: ...ssor 2 side All stop Inverter current detection circuit detects overcurrent and shuts system down H01 H01 Check current detection circuit wiring Check failure in outdoor P C board Compressor Current detection circuit trouble Compressor P C board 1 Compressor 1 side 2 Compressor 2 side All stop Current flow of at least specified magnitude is detected despite inverter compressor having been shut tur...

Page 73: ...tdoor P C board I F TD2 sensor miswiring incomplete insertion I F All stop Discharge temperature of TD2 does not increase despite compressor 2 being in operation H15 H15 Check connection of TK2 sensor connector Check resistance characteristics of TK2 sensor Check for failure in outdoor P C board I F All stop Sensor resistance is infinity or zero open short circuit Main remote controller Outdoor 7 ...

Page 74: ...ed on indoor unit other than priority indoor unit I F No of priority indoor units All stop More than one indoor units have been set up as priority indoor unit L06 L06 Check indoor addresses Connection of group control cable to standalone indoor unit Indoor unit Stop of corresponding unit There is at least one standalone indoor unit to which group control cable is connected L07 Check indoor address...

Page 75: ...oor fan motor trouble Indoor unit Stop of corresponding unit P01 Check outdoor service valves gas side liquid side to confirm full opening Check outdoor PMVs PMV1 2 3 4 for clogging Check resistance characteristics of TD1 sensor Check for insufficiency in refrigerant quantity Check for failure in 4 way valve Check for leakage of SV4 circuit Check SV4 circuit wiring or installation trouble in SV41 ...

Page 76: ... TH Check shortage of refrigerant Check outdoor service valves Check connection of TL2 sensor Check resistance characteristics of TL2 sensor Check resistance characteristics of TO sensor Check malfunctions of Pd and Ps sensors Check outdoor I F P C board malfunction Check PMV2 and PMV3 Heat sink overheating trouble Heat sink dew condensation trouble 01 Compressor 1 heat sink trouble 02 Compressor ...

Page 77: ...ng Check resistance characteristics of TD1 and TD2 sensors Check indoor filter for clogging Check piping for clogging Check SV4 circuit for leakage or coil installation trouble Gas leak detection TD condition I F 02 TD condition All stop Protective shutdown due to sustained discharge temperature TD1 or TD2 at or above 108 C for at least 10 minutes is repeated four times or more Check float switch ...

Page 78: ...peration Pd sensor detects pressure equal to or greater than 3 85 MPa During heating operation Pd sensor detects pressure equal to or greater than 3 6 MPa P20 P20 Main remote controller Outdoor 7 segment display Check code Sub code Check outdoor service valves gas side liquid side to confirm full opening Check outdoor PMVs PMV1 2 3 4 for clogging Check resistance characteristics of TD2 sensor Chec...

Page 79: ...nector connection Check for compressor layer short circuit Check for failure in compressor P C board Compressor position detection circuit trouble Compressor P C board 1 Compressor 1 side 2 Compressor 2 side All stop Position detection is not going on normally P29 P29 Check indoor P C board Other indoor trouble group follower unit trouble Indoor unit Stop of corresponding unit There is trouble in ...

Page 80: ... P C boards of devices at other end of central control communication line Central control device reception trouble Central control device Continued operation Central control device is unable to receive signal C06 Check trouble input Batch alarm for general purpose device control interface General purpose device I F Continued operation Trouble signal is input to control interface for general purpos...

Page 81: ...f the power supply 2 Remove compressor leads from the compressor P C board Be sure to remove all the leads 3 With each compressor check the phase to phase winding resistances and winding to outdoor cabinet resistance using a multimeter Earth trouble o It is normal if the winding to outdoor cabinet resistance is 10M or more Inter winding short circuit o It is normal if the phase to phase resistance...

Page 82: ...ain Replace indoor P C board Replace remote controller Change one to header other to follower Remote controller address connector Check code Check code name Cause Check code Check code name Cause The check code is not indicated on the central control device or the 7 segment indication on the outdoor unit Yes No E02 E03 Signal transmission trouble on the remote controller Communication trouble betw...

Page 83: ...e etc Turn on power again in order of indoor unit outdoor unit Correct inter unit wire Check connection of inter unit wire between indoor and outdoor is correct and then connect communication line connector on indoor P C board CN40 to CN44 EMG Correct the terminator resistor setup Set up address again Replace the fuse Check noise etc and eliminate it if any Replace indoor P C board Yes Yes No No Y...

Page 84: ...se Communication trouble between Application control kit and Indoor unit 1 Application control kit trouble 2 Indoor P C board trouble Is the connection for the UART communication connector indoor P C board CN521 red Application control kit CN1 red normal YES NO Is connector lead wire for the UART communication cut Does Red LED LD1 on the Application control kit light up Red LED LD1 on the Applicat...

Page 85: ... Replace indoor interface P C board Yes No Yes No F01 Yes No Yes No F02 Check code Check code name Cause Check code Check code name Cause Indoor TCJ sensor trouble TCJ sensor Open Short circuit Indoor TC2 sensor trouble TC2 sensor Open Short circuit Is TCJ sensor connector CN102 Red on indoor P C board normally connected Are characteristics of TCJ sensor resistance value normal Is TC2 sensor conne...

Page 86: ... Power ON Repetition Approx 3 minutes Approx 1 minute Indoor other trouble Indoor P C board trouble This trouble is detected during operation of air conditioner of IC10 non volatile memory EEPROM on indoor unit P C board Replace service P C board If EEPROM was not inserted when power was turned on or it is absolutely impossible to read write EEPROM data the automatic address mode is repeated SET D...

Page 87: ...n a group during group control L08 Yes No Check code Cause Indoor unit address is unset Check code name Indoor group address unset Are powers of all the indoor units turned on Turn on the power of indoor units Turn on the power of outdoor unit again Re execute address setup Refer to Address setup Clear addresses Refer to Address clear Note This code is displayed when the power is turned on at the ...

Page 88: ...ltage of 1 3 pin of CN504 on indoor P C board P10 Sub code Overflowing indoor unit s address Cause Check code Is float SW connector Indoor control P C board CN34 connected normally Does float SW operate Is wiring normal Does drain pump operate Is there a trap in the drainage route Is power supply to drain pump normal Correct connector connection Check and correct wiring Check indoor P C board Fail...

Page 89: ... P C board MCC 1643 Replace the indoor P C board MCC 1643 Check the indoor P C board MCC 1643 If failure Replace Disconnect the connector CN210 to the indoor P C board Is the connector CN210 of indoor unit P C board connected correctly Does the fan turn smoothly when turned by hand Is each resistance value on the motor side of the fan motor connector CN210 of the indoor P C board correct Is F01 of...

Page 90: ...0 C 149 F 65 C 158 F 70 C 167 F 75 C 176 F 80 C 185 F 85 C 194 F 90 C 203 F 95 C 212 F 100 C Indoor TC1 sensor 50 100 150 200 5 10 15 20 0 0 Resistance kΩ 50 F 10 C or below Resistance kΩ 50 F 10 C or below Resistance kΩ 115 2 84 2 62 3 46 6 35 2 26 9 20 7 16 1 12 6 10 0 8 0 6 4 5 2 4 2 3 5 2 8 2 4 2 0 1 6 1 4 1 2 Temperature F C Temperature F C 4 F 20 C 5 F 15 C 14 F 10 C 23 F 5 C 32 F 0 C 41 F 5...

Page 91: ...lean the indoor outdoor units regularly will cause shortage of capacity freezing water leakage or trouble on the compressor Check list Part name Object Contents of check Contents of maintenance Indoor Outdoor Heat exchanger Blocking with dust damage check Clean it when blocking is found Fan motor Audibility for sound When abnormal sound is heard Filter Visual check for dirt and breakage Clean with...

Page 92: ...follower unit settings and perform the cooling cycle confirmation through the trial operation Replacement procedures CASE 1 Before replacement the indoor unit can be turned on and the setting data can be read out by wired remote control operation EEPROM data read out 1 Ø Replacement of P C board for Indoor unit servicing and power on 2 Ø Writing the read out EEPROM data 3 Ø Power reset for all ind...

Page 93: ...g time At this time be sure to write down the setting data displayed 2 Change the CODE No DN by pushing buttons for the temperature setting Similarly be sure to write down the setting data displayed 3 Repeat the step 2 2 to set the other settings in the same way and write down the setting data as shown in the table 1 example The CODE No DN are ranged from 01 to FE The CODE No DN may skip CODE No r...

Page 94: ... indoor units cannot be turned on individually Case 1 a Remove temporarily the group wire connected to the terminal blocks A and B of the indoor unit b After connecting the remote controller wire only to the removed terminal block turn on power of the indoor units and proceed to 3 When the above methods cannot be used follow to the two cases below C In case that power of the indoor units cannot be...

Page 95: ...eck the setting data displayed at this time with the setting data put down in 1 1 If the setting data is different modify the setting data by pushing buttons for the timer setting to the data put down in 1 The operation completes if the setting data is displayed 2 If the data is the same proceed to next step Step 7 Change the CODE No DN by pushing buttons for the temperature setting As described a...

Page 96: ...ot fixed 77 Dual set point 0000 Unavailable b3 Soft cooling 0001 Available Fd Priority operation mode FS unit 0000 Heating FE FS unit address 0099 Unfixed b5 Occupancy sensor Provided None 0000 None b7 Occupancy sensor Operation at absent time 0000 Stand by 31 Ventilation fan standalone 0000 Not available 32 Sensor SW Selection of static pressure 0000 Indoor unit sensor 60 Timer setting wired remo...

Page 97: ...3 2 Attachment 1 Attach the electric parts cover by slide 2 Tighten the fixing screw for fix electric parts cover 3 Attach the terminal cover and tighten the fixing screws of the terminal cover 1 Stop operation of the air conditioner and then turn off switch of the breaker Loosen the screw on hook lock grille both side Slide the hook lock grille on grille air inlet in the direction of arrow 1 Fig ...

Page 98: ... Red CN504 Drain pump 2P White CN100 TC1 sensor 3P Brown CN101 TC2 sensor 2P Black CN102 TCJ sensor 2P Red CN210 Fan motor 7P White CN82 PMV 6P Blue Adjust corner cap 4 1 Detachment 1 Pull the edge of the adjust corner cap in the direction of arrow adjust corner cap will be release from ceiling panel Fig 4 2 Attachment 1 Hook the strap of the adjust corner cap securely to the pin 2 Insert the two ...

Page 99: ...outlet side Loosen the panel fixing screw then slide the panel fixing bracket to the open side Panel fixing screw Fig 9 Panel fixing bracket Fig 10 Detach the ceiling panel hole from the panel fixing screw CAUTION Air leakage Air leakage from bottom of the ceiling Contamination Dew drop water leakage If a gap between ceiling panel and bottom of the ceiling still remains after the screws are tighte...

Page 100: ...4 White 2P connected to the control 3 4 5 P C board and then remove the lead wire from the clamp Remove the band hose from the drain hose in the direction of arrow Fig 14 Remove the drain hose from drain pump in the direction of arrow Fig 15 Loosen the fixing screw Ø5 32 4mm x 0 4 10mm 3 pcs and then remove the drain pump from the pump fixture Fig 16 2 Attachment 1 Tighten the fixing screw to the ...

Page 101: ...heck the claw holes in the PMV coil are securely placed into four clows on the PMV body Chcek position of the lock part on the binding band and the lead wire 2 Connect the PMV coil connector CN82 Blue 6P to the control P C board and then fix it as before with the clamp Fig 18 Fig 19 Attach the PMV coil to the PMV body so that the PMV coil protrusion part points to the PMV body inlet Fit the claw h...

Page 102: ... 2 Attachment 1 Check the type name of the fan motor 2 Keep connector position and arrange the fan motor wire following Fig 25 Fig 21 Heat exchanger Fixing screw For ICF 340 30 6A Cover motor Fig 22 Hexagonal wrench Fig 23 Fig 24 Fixing screw 3 Install the fan motor and the cross flow fan into the original position and then tighten the fixing screw to the fan motor band 4 Keep distance between mai...

Page 103: ...nd item 1 of 4 Remove the heat exchanger sensor CN100 TC1 sensor Brown 3P CN101 TC2 sensor Black 2P and CN102 TCJ sensor Red 2P connected to the control P C board and then remove the lead wire from the clamp 5 Loosen the earth screw and then remove the earth lead wire from the heat exchanger 6 Loosen the fixing screw Ø5 32 4mm x 0 4 10mm 4 pcs and then remove the heat exchanger Fig 29 2 Attachment...

Page 104: ...11 EXPLODED VIEWS AND PARTS LIST Indoor Unit 1 way cassette type 104 ...

Page 105: ...515 COIL PMV 1 1 1 210 43T19321 FIX P SENSOR 1 1 1 211 43T19333 HOLDER SENSOR 2 2 2 212 43T49389 PIPE COVER ASSY 1 1 1 213 43T77303 PUMP ASSY 1 1 1 214 43T51316 FLOAT SWITCH ASSY 1 1 1 215 43T07325 PUMP FIXTURE 1 1 1 216 43T72365 DRAIN PAN ASSY 1 1 1 217 43T79322 DRAIN CAP 1 1 1 218 43T07326 SCREW PLATE 1 1 1 219 43T83307 BAND HOSE 1 1 1 220 43T97315 SCREW FIX PANEL 4 4 4 221 43T70326 HOSE DRAIN 1...

Page 106: ...04 43T50389 TA SENSOR 1 1 1 405 43T50477 TC SENSOR TC1 1 1 1 406 43T50387 TC SENSOR TC2 1 1 1 407 43T50386 TCJ SENSOR RED 1 1 1 408 43T50351 HOLDER TA 1 1 1 409 43T6W911 PC BOARD ASSY WP 502 1 1 1 410 43T6W912 PC BOARD ASSY WP 503 1 1 1 411 43T50408 DUST SENSOR 1 1 1 412 43459017 ASM PCB OP 1 1 1 Location No Part No Description Model name MMU AP 106 ...

Page 107: ...4 43T09593 GRILLE ASSY 1 305 43T19381 GRILLE HOOK RIGHT 1 306 43T19382 GRILLE HOOK LEFT 1 307 43T80364 AIR FILTER 2 308 43T07327 PANEL FIXED PLATE 4 309 43T07328 LOUVER MOTOR COVER 2 310 43T21478 MOTOR STEPPING 2 311 43T60550 LEAD MOTOR 1 312 43T97331 SCREW FIX PANEL 2 Location No Part No Description RBC UY32P UL 107 ...

Page 108: ...144 9 MOO 5 BANGKADI INDUSTRIAL PARK TIVANON ROAD TAMBOL BANGKADI AMPHUR MUANG PATHUMTHANI 12000 THAILAND ...

Reviews: