259
<Installing compressor>
• Install a compressor by following the dismantling procedure in reverse.
• The dismantling process may have loosened compressor leads and faston connectors. Prior to installation,
therefore, tighten them a little with a pair of pliers, and verify that they are tight after reconnection.
Notes:
• Although a compressor is provided with only two hexagonal bolts, it is standard.
• The tightening torque of the hexagonal bolts, used to mount the compressor, is 200kg/cm.
• If oil has been drawn from the accumulator, repair the cut pipe through pinching and brazing.
<Vacuum-pumping>
(Single outdoor unit system)
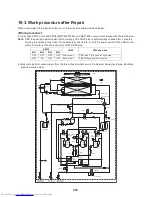
• Before performing vacuum-pumping, fully open PMV1, 2 and 4. If they are closed, the heat exchangers of the
outdoor unit cannot be vacuum-pumped.
• Connect a vacuum pump consecutively to the check joints placed in the liquid and discharge pipes and on the
high-pressure side of the suction pipe, and turn it on.
• Operate the vacuum drying until the vacuum gauge indicates 1 mmHg.
<Method to fully open PMV manually>
(1) Turn on the power switch of the outdoor unit.
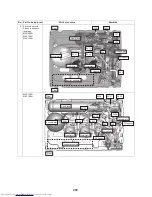
(2) With the Bits 1 and 2 of SW12 set to off, short-circuit the pins of CN30.
(3) Disconnect the connectors of PMV1 and 2 from the I/F P.C. board.
(4) With the Bits 1 and 2 of SW12 set to off and on, respectively, short-circuit the pins of CN30.
(5) Disconnect the connector of PMV4 from the I/F P.C. board
(6) Turn off the power switch of the outdoor unit.
Note:
Steps (4) and (5) are not required for MMY-MAP0804
#
, 1004
#
and 1204
#
.
<Refrigerant charging>
• Inject the same amount of refrigerant as the recovered residual refrigerant via the charging port of the liquid-side
service valve.


