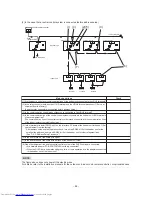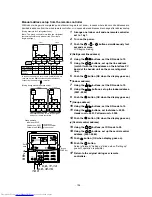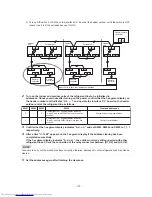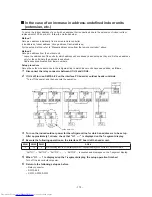
Manual address setup from the remote controller
With indoor wiring work completed and outdoor wiring work not done—in cases where indoor unit addresses are
decided in advance from the wired remote controller, or in cases where addresses are change after address setup.
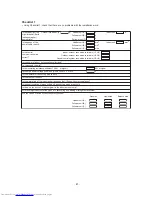
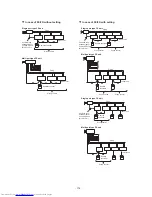
Group address
Individual: 0000
Header unit: 0001
Follower unit: 0002
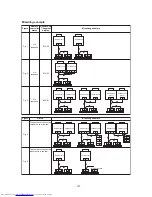
(Wiring example for 2 refrigerant lines)
Line 1
Line 2
Line 1
Line 2
Outdoor
Indoor 1 Indoor 2
Indoor 1
(Remote controller group control)
Indoor 2 Indoor 3
Indoor 1 Indoor 2
Indoor 1 Indoor 2 Indoor 3
Line address
Indoor address
1
1
1
Header
1
2
2
Follower Follower
Follower Follower
1
3
2
2
1
2
2
2
2
Outdoor
Outdoor
Outdoor
(Wiring during manual address setup)
Remote
controller
Remote
controller
Remote
controller
Remote
controller
Remote
controller
Remote
controller
Group
address
In the above example, where remote controllers are not
yet wired, set the address manually after individually
connecting the wired remote controller.
After address setup, return to the original
wiring over remote controllers.
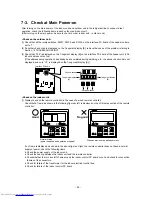
In cases of
remote controller
group control
SET
TIME
TIMER SET
TEST
FILTER
RESET
TEMP.
CL
FAN
SAVE
SWING/FIX
VENT
MODE
ON / OFF
UNIT LOUVER
DN code
(CODE No.)
Set
data
5, 8, 11, 14
6, 9, 12, 15
16
4
7
10
13
3
1
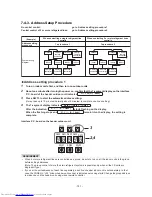
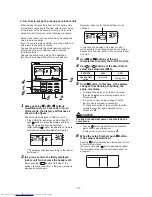
Arrange one indoor unit and one remote controller
set to 1 by 1.
2
Turn on the power.
3
Push the
+
+
buttons simultaneously for 4
seconds or more.
LCD begins blinking.
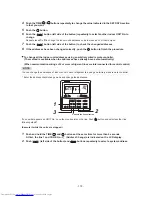
(Refrigerant line address)
4
Using the
buttons, set the DN code to 12.
5
Using the
buttons, set up the line address
(match it with the line address on the interface PC
board of the header unit on the same refrigerant
line).
6
Push the
button (OK when the display goes on).
(Indoor address)
7
Using the
buttons, set the DN code to 13.
8
Using the
buttons, set up the indoor address.
(0001~00
64
)
9
Push the
button (OK when the display goes on).
(Group address)
10
Using the
buttons, set the DN code to 14.
11
Using the
buttons, set Individual = 0000,
Header unit = 0001, Follower unit = 0002.
12
Push the
button (OK when the display goes on).
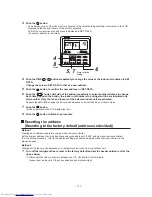
(Central control address)
13
Using the
buttons, set DN code to 03.
14
Using the
buttons, set up the central control
address. (0001~0064)
15
Push
button. (OK when display goes on).
16
Push the
button.
Setup is finished (“Setting up” blinks; when “Setting up”
goes off, operation is possible).
17
Return to the original wiring over remote
controllers.
−
10
6
−
(Note: The group control of more than two refrigerant
systems is possible only when all the FS units are
single port type.)
Summary of Contents for MMY-MAP0806FT7(J)P
Page 32: ... 31 1 2 Single port FS Unit RBM Y1123FE FE2 RBM Y1803FE FE2 ...
Page 33: ... 32 RBM Y2803FE FE2 ...
Page 302: ...MMY MAP0806FT8 J P E MAP1006FT8 J P E MMY MAP0806FT8 J P TR MAP1006FT8 J P TR 301 ...
Page 307: ... 306 MMY MAP1206FT8 J P E MAP1406FT8 J P E MMY MAP1206FT8 J P TR MAP1406FT8 J P TR ...


