background image


ProtoNode Quick Install Guide – 66939-000 


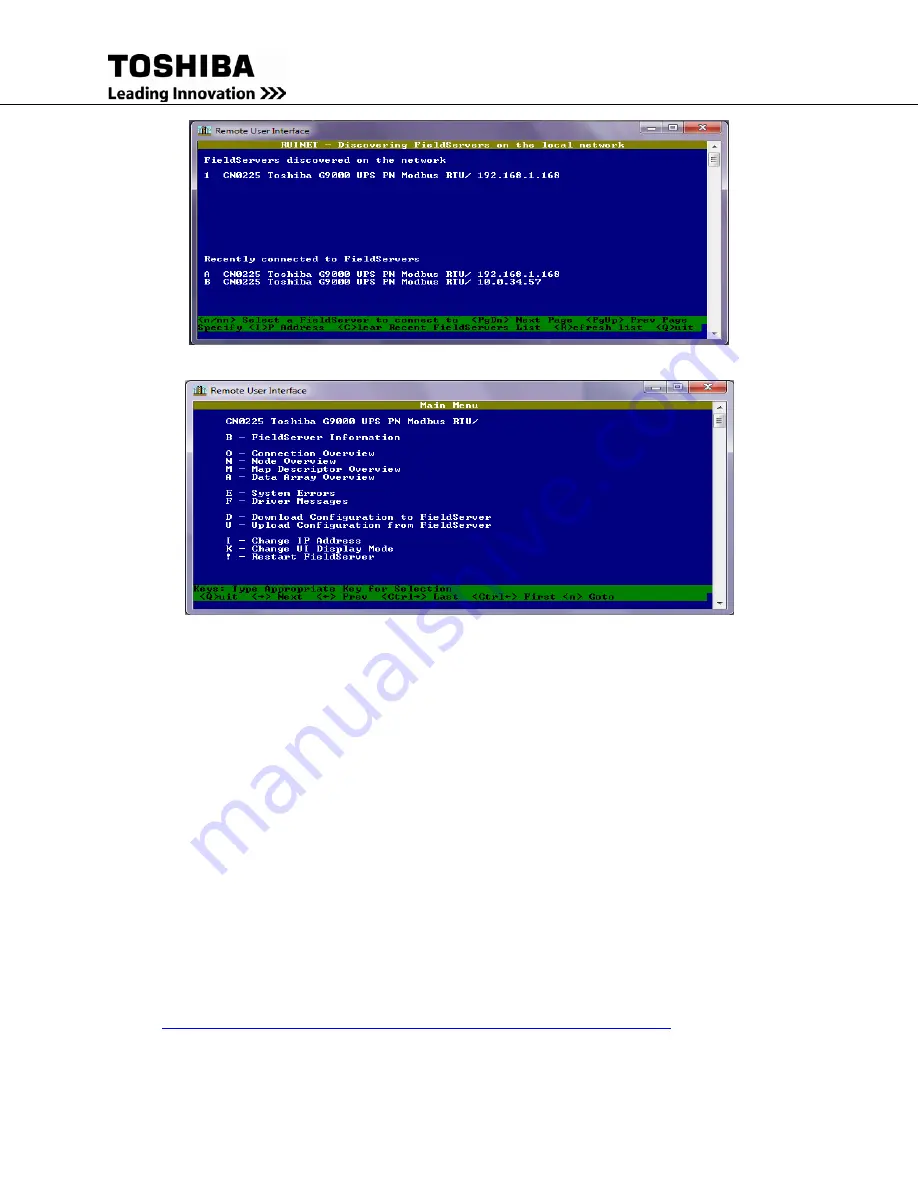
Figure 3 


Figure 4 

Step 5: Changing the IP Settings 


Should it be necessary to change the IP settings of the ProtoNode to match your current network 

configuration, open RUI application and go to the main menu and follow these steps: 

1.


Type “I”, “Change IP Address”, in the main menu to change the IP address. 

2.


Type “1”, and then type the IP address desired for the ProtoNode and hit the <enter> key 

when finished. 

3.


Type “2”, and then type the Netmask and hit the <enter> key when finished. 

4.


Type “3”, and then type the Gateway address and hit the <enter> key when finished.  

5.


When done entering the information required hit the <esc> key and then type “!” in order 

for the changes to take effect.    


 Step 6: Uploading New Firmware 


By default, the ProtoNode is setup to work with ModBus, Metasys and SNMP communication 

protocols. If BACnet protocol is desired go to the following link 

http://www.toshiba.com/ind/product_display.jsp?id1=14&id2=30&id3=581

  (always check this 

link for new firmware releases) and download the correct firmware (See Table 1). Please see the 

following steps to upload new firmware. 

Summary of Contents for ProtoNode

Page 1: ...que serial number and MAC address located on the underside of the unit These numbers should be recorded as they may be required for technical support Serial Number _________________________________________________ MAC Address __________________________________________________ 1 A DB 9 cable should be connected between the Serial 1 port on the ProtoNode and the serial port of the Toshiba UPS RS 232...

Page 2: ...install NOTE These instructions assume a Windows Operating System Step 3 Identification of the ProtoNode on the Network 1 Check that the IP netmask of the PC matches the ProtoNode The default IP address of the ProtoNode is 192 168 1 168 and the default subnet mask is 255 255 255 0 see Section 10 2 in Reference manual to change the IP settings 2 Select Start Programs FieldServer Utilities Ping Util...

Page 3: ... Ethernet adapter installed in the PC s Device Manager List and that it is configured to run the TCP IP protocol If using Windows XP ensure that the firewall is disabled If still having problems see Reference Manual Troubleshooting Tips Step 4 Connection to the ProtoNode Using RUI Remote User Interface 1 Open the Remote User Interface application by clicking Start Programs FieldServer Utilities Re...

Page 4: ...nd then type the Netmask and hit the enter key when finished 4 Type 3 and then type the Gateway address and hit the enter key when finished 5 When done entering the information required hit the esc key and then type in order for the changes to take effect Step 6 Uploading New Firmware By default the ProtoNode is setup to work with ModBus Metasys and SNMP communication protocols If BACnet protocol ...

Page 5: ...nload configuration to FieldServer menu See Figure 4 3 Type f for firmware and the program will automatically fetch the firmware from the Configuration File Folder See Figure 5 4 Type y for yes to precede the installation of the new firmware 5 Wait until the download completes Note resetting or turning off while the ProtoNode is installing the firmware can corrupt the ProtoNode 6 Once download is ...

Page 6: ...nloaded to the ProtoNode type o for other files then type r to specify the remote filename needed on the ProtoNode 5 When satisfied that the correct file names are specified type d to send the file to the ProtoNode The utility will display progress until it is complete 6 Note Wait until the utility indicates that the download is complete before resetting the ProtoNode or you could corrupt the Prot...

Page 7: ...Install Guide 66939 000 7 INDUSTRIAL DIVISION 13131 West Little York Rd Houston TX 77041 Tel 713 466 0277 Fax 713 466 8773 US 877 867 8773 Canada 800 872 2192 Mexico 01 800 527 1204 www toshiba com ind Printed in U S A ...

Page 8: ...ProtoNode Quick Install Guide 66939 000 8 ...

Reviews: