4.3 ODD Bay Module
4 Replacement Procedures
Disassembling the ODD Drive
NOTE: Do not disassemble the ODD drive when it is working normally. Disassemble
or replace the ODD drive only if it fails.
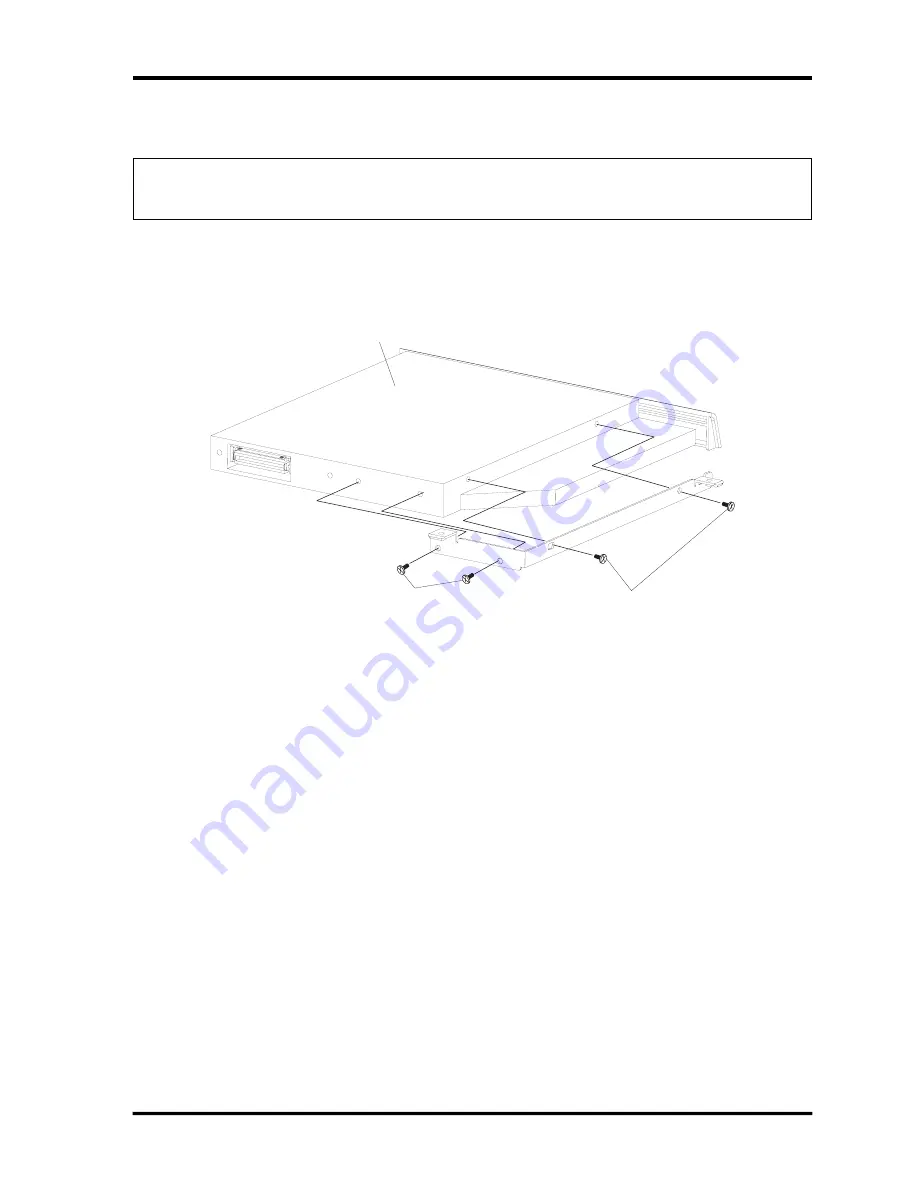
Disassemble the ODD drive according to the following procedures and Figure 4-10, 4-11.
1.
Remove four
M2x3 black flat head screws.
2.
Remove
the
bracket.
M2x3 flat head screw
M2x3 flat head screw
ODD bay module
Figure 4-10 Removing the bracket from the ODD drive
3. Release the following 4 latches on the ODD bezel
4. Remove the ODD bezel.
Qosmio F40/F45 Maintenance Manual
4-25
Summary of Contents for Qosmio F40
Page 6: ...Chapter 1 Hardware Overview ...
Page 7: ...1 Hardware Overview 1 1 Features Qosmio F40 F45 Maintenance Manual 2 ...
Page 29: ...1 Hardware Overview 1 5 HD DVD ROM Qosmio F40 F45 Maintenance Manual 24 ...
Page 35: ...2 Troubleshooting 2 概要 Chapter 2 Troubleshooting 2 i Qosmio F40 F45 Maintenance Manual ...
Page 64: ...Chapter 3 Diagnostic Programs ...
Page 67: ......
Page 119: ...3 Diagnostic Programs 3 10 Peripheral 52 QosmioF40 F45 dynabook Qosmio F40 Maintenance Manual ...
Page 131: ...Chapter 4 Replacement Procedures 4 1 ...
Page 132: ...4 Replacement Procedures 4 ii Qosmio F40 F45 Maintenance Manual ...
Page 215: ...6000 1 次 Appendices ...


