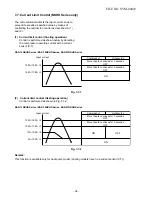
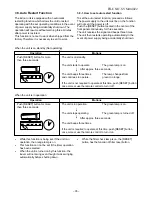
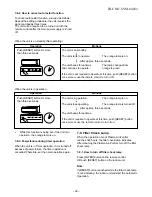
background image

 22 

FILE NO. SVM-04022

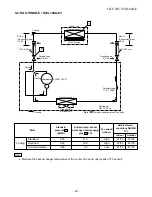
5-5. RAS-10NKD-E / RAS-10UA-E3

Indoor unit

Cross flow fan

Cooling

Cooling

Compressor

Heat exchanger

Propeller fan

Outdoor unit

PH102T1-4CH

Cooling

Mark (        ) means check points of Gas Leak.

O.D.:9.52 mm

O.D.:6.35 mm

Cooling

Packed valve

(

9.52)

Packed valve

(

6.35)

0.39 m
(Connecting pipe)

9.52

0.49 m
(Connecting pipe)

6.35

T1

P

Refrigerant
R22 : 0.65 kg.

Heat exchanger

Capillary tube

1.5 x 1000

l

Ambient temp.

conditions DB/WB

(°C)

Indoor

Outdoor

Standard

0.53

11.0

High

27/19

35/24

Cooling

Overload

0.62

16.0

High

32/23

43/26

Low temperature

0.48

5.0

Low

21/15

21/15

Standard

pressure  P

(MPaG)

Surface temp. of heat

exchanger interchanging

pipe  T1 (°C)

Fan speed

(indoor)

50Hz

Note

•  

Measure the heat exchanger temperature at the center of U-bend. (By means of TC sensor)

Summary of Contents for RAS-07NKD-E

Page 1: ...1 SERVICE MANUAL AIR CONDITIONER SPLIT WALL TYPE RAS 13NKHD E RAS 13UAH E3 RAS 10NKHD E RAS 10UAH E3 RAS 07NKHD E RAS 07UAH E3 RAS 13NKD E RAS 13UA E3 RAS 10NKD E RAS 10UA E3 RAS 07NKD E RAS 07UA E3 Revised on March 2005 ...

Page 2: ... 13NKD E RAS 10NKD E RAS 07NKD E 4 6 Outdoor Unit RAS 13UA E3 5 REFRIGERATION CYCLE DIAGRAM 5 1 RAS 13NKHD E RAS 13UAH E3 5 2 RAS 10NKHD E RAS 10UAH E3 5 3 RAS 07NKHD E RAS 07UAH E3 5 4 RAS 13NKD E RAS 13UA E3 5 5 RAS 10NKD E RAS 10UA E3 6 CONTROL BLOCK DIA GRAM 7 OPERATION DESCRIPTION 7 1 Outline of Air Conditioner Control 7 2 Description of Operation Circuit 7 3 Hi POWER Mode 7 4 High Temperatur...

Page 3: ...0 PART REPLACEMENT 10 1 Indoor Unit 10 2 Outdoor Unit 11 EXPLODED VIEWS AND PARTS LIST 11 1 Indoor Unit E Parts Assy 11 2 Indoor Unit 11 3 Outdoor Unit RAS 13UAH E3 11 4 Outdoor Unit RAS 10UAH E3 11 5 Outdoor Unit RAS 07UAH E3 11 6 Outdoor Unit RAS 13UA E3 11 7 Outdoor Unit RAS 10UA E3 8 INSTALLATION PROCEDURE 8 1 Safety Cautions 8 2 Installation Diagram of Indoor and Outdoor Units 8 3 Installatio...

Page 4: ...35 Interconnection Connection type Flare connection pipe Maximum length 1 One way Maximum height difference INDOOR UNIT RAS 13NKHD E RAS 13NKD E Height mm 275 Dimensions Width mm 790 Depth mm 218 Net weight kg 10 Evaporator type Finned tube Indoor fan type Cross flow fan High fan m3 h 630 650 630 Air volume Medium fan m3 h 520 550 520 Low fan m3 h 430 490 430 Fan motor output W 20 Air filter Honey...

Page 5: ... size mm 6 35 Interconnection Connection type Flare connection pipe Maximum length m 10 1 One way Maximum height difference INDOOR UNIT RAS 10NKHD E RAS 10NKD E Height mm 275 Dimensions Width mm 790 Depth mm 218 Net weight kg 10 Evaporator type Finned tube Indoor fan type Cross flow fan High fan m3 h 570 610 610 Air volume Medium fan m3 h 460 520 460 Low fan m3 h 340 400 340 Fan motor output W 20 ...

Page 6: ...erconnection Connection type Flare connection pipe Maximum length m 10 1 One way Maximum height m 5 difference INDOOR UNIT RAS 07NKHD E RAS 07NKD E Height mm 275 Dimensions Width mm 790 Depth mm 218 Net weight kg 10 Evaporator type Finned tube Indoor fan type Cross flow fan High fan m3 h 570 610 570 Air volume Medium fan m3 h 460 490 460 Low fan m3 h 340 400 340 Fan motor output W 20 Air filter Ho...

Page 7: ...the following temperature conditions Note 2 No need to charge extra refrigerant 1 Temperature Condition JIS B8615 1 Cooling Heating Indoor unit inlet air temperature DB 27 C 20 C WB 19 C 15 C Outdoor unit inlet air temperature DB 35 C 7 C WB 24 C 6 C ...

Page 8: ...ceiling 170 or more 65 or more Minimum distance to ceiling Hanger Hanger Hanger For stud bolt 8 10 For stud bolt 6 Installation plate outline Center line Wireless remote control Hanger Hanger Drain hose 0 54 m Connecting pipe 0 43 m Flare 6 35 For 13 series Flare 12 70 For 07 10 series Flare 9 52 Connecting pipe 0 33 m Knock out system Front panel Air inlet Air Filter Air outlet Back body Heat exc...

Page 9: ... 6 Hole 2 11 x 14 Hole For 8 10 anchor bolt 436 4 x 11 Long holes For 8 10 anchor bolt 11 x 14 Hole 6 Hole 36 52 310 330 R15 270 600 90 780 62 COVER PV Electrical part cover Liquid side Flare 6 35 Gas side Flare 9 52 10 Series Gas side Flare 12 7 13 Series Service port 600 or more 13 Series A 600 mm 400 mm B 100 mm 45 mm 10 Series B or more A or more 100 or more 325 600 Air inlet Air outlet Instal...

Page 10: ...15 R 5 5 273 5 265 6 Hole B Detail Drawing Front Leg 50 36 R 15 660 265 273 5 6 Hole 11x14 Hole A B Z View 97 25Drain outlet 2 11x14 hole for 8 10 anchor bolt Fan guard 530 Liquid side Flare 6 35 Gas side Flare 9 62 Service port 126 48 325 100 or more 100 or more 600 or more 600 or more Installation dimension 600 Air inlet Air outlet 4x 11x14 Long holes for 8 10 anchor bolt ...

Page 11: ...7 8 9 10 3 4 5 6 1 2 11 7 8 9 10 3 4 5 6 1 2 11 7 8 9 10 3 4 5 6 1 2 11 ORN 1 1 2 2 2 2 1 1 4 4 3 3 1 2 1 2 3 4 3 4 1 2 1 2 3 4 3 4 5 6 5 6 High voltage Power supply Ion Electrode Air purifier Electrode BRW BLU CN34 CN33 RED BRW BRW BRW RED BRW BRW BLK BLK BRW DC12V 3 3 5 5 1 1 3 3 1 1 2 2 3 3 4 4 1 1 2 2 5 5 6 6 P01 P02 BLK RED SINGLE PHASE 220 240V 50Hz BRW BLU GRN YEL Power Cord THERMO SENSOR T...

Page 12: ...0 3 4 5 6 1 2 11 7 8 9 10 3 4 5 6 1 2 11 ORN 1 1 2 2 2 2 1 1 4 4 3 3 1 2 1 2 3 4 3 4 1 2 1 2 3 4 3 4 5 6 5 6 High voltage Power supply Ion Electrode Air purifier Electrode BRW BLU CN34 CN33 RED BRW BRW BRW RED BRW BRW BLK BLK BRW DC12V 3 3 5 5 1 1 3 3 1 1 2 2 3 3 4 4 1 1 2 2 5 5 6 6 P01 P02 BLK RED SINGLE PHASE 220 240V 50Hz BRW BLU GRN YEL Power Cord THERMO SENSOR TA CN03 HEAT EXCHANGER SENSOR TC...

Page 13: ...1 2 11 7 8 9 10 3 4 5 6 1 2 11 7 8 9 10 3 4 5 6 1 2 11 7 8 9 10 3 4 5 6 1 2 11 1 1 2 2 2 2 1 1 4 4 3 3 1 2 1 2 3 4 3 4 1 2 1 2 3 4 3 4 5 6 5 6 High voltage Power supply Ion Electrode Air purifier Electrode BRW BLU CN34 CN33 RED BRW BRW BRW RED BRW BRW BLK BLK BRW DC12V 3 3 5 5 1 1 3 3 1 1 2 2 3 3 4 4 1 1 2 2 5 5 6 6 BLK RED SINGLE PHASE 220 240V 50Hz BRW BLU GRN YEL Power Cord THERMO SENSOR TA CN0...

Page 14: ...otor 1 1 2 2 7 8 9 10 3 4 5 6 1 2 11 7 8 9 10 3 4 5 6 1 2 11 7 8 9 10 3 4 5 6 1 2 11 7 8 9 10 3 4 5 6 1 2 11 1 1 2 2 2 2 1 1 4 4 3 3 1 2 1 2 3 4 3 4 1 2 1 2 3 4 3 4 5 6 5 6 High voltage Power supply Ion Electrode Air purifier Electrode BRW BLU CN34 CN33 RED BRW BRW BRW RED BRW BRW BLK BLK BRW DC12V 3 3 5 5 1 1 3 3 1 1 2 2 3 3 4 4 1 1 2 2 5 5 6 6 BLK RED SINGLE PHASE 220 240V 50Hz BRW BLU GRN YEL P...

Page 15: ...Z 12VDC 12 Relay Comp RY01 DI1U Rating 25A AC250 V 12VDC Louver motor Relay Fan RY03 Relay Solenoide RY04 13 14 G5N 1A G5N 1A Rating 3A AC250V 12VDC Rating 3A AC250V 12VDC 4 2 Outdoor Unit RAS 13UAH E3 No Parts name Type Specifications Output Rated 1100 W 2 poles 1 phase 220 240 V 50Hz 1 Compressor PH170T2 4L2 Winding resistance C R C S at 20 C 2 22 3 04 Output Rated 42 W 6 poles 1 phase 220 240 V...

Page 16: ... JMRA99269 9200 U T 6 8A 90 C OPEN 135 5 C CLOSE 69 11 C No Parts name Type Specifications Output Rated 560W 2poles 1 phase 220 240V 50Hz 1 Compressor PH80T1 4C Winding resistance Ω C R C S at 20 C 4 80 8 37 Output Rated 20W 6poles 1 phase 220 240V 50Hz 2 Fan motor for outdoor HF 240 20B or SKF 240 20B Winding resistance Ω Red Black White Black at 20 C 387 3 or 235 2 466 2 or 260 1 3 Running capac...

Page 17: ...1 5μF 4 Running capacitor DS371356CPNB AC 370 V 35 F for compressor μ FILE NO SVM 04022 16 No Parts name Type Specifications 1 Fan motor for indoor SKF 220 20 4A 1 AC Motor with 150 C thermo fuse 2 Thermo sensor TA sensor 10kΩ at 25 C 3 Switching transformer SWT 77 4 Microcontroller unit IC30 TMP87CM40AN 5 Heat exchanger sensor 10kΩ at 25 C TC sensor 6 Line filter L01 LC SS11V 06270 27mH 600mA 7 B...

Page 18: ...apacitor DS371256CPNB AC 370 V 25 F for compressor μ μ SKF 240 20B 387 3 or 235 2 466 2 or 260 1 No Parts name Type Specifications Output Rated 560W 2poles 1 phase 220 240V 50Hz 1 Compressor PH80T1 4C Winding resistance Ω C R C S at 20 C 4 80 8 37 Output Rated 20W 6poles 1 phase 220 240V 50Hz 2 Fan motor for outdoor Winding resistance Ωı Red Black White Black at 20 C 3 Running capacitor DS451155CB...

Page 19: ... m Connecting pipe T1 P Refrigerant R22 1 00 kg 12 7 6 35 Ambient temp conditions DB WB C Indoor Outdoor Standard 1 84 46 0 High 20 15 7 6 Heating Overload 1 2 00 2 42 52 0 59 0 Low 27 24 18 Low temperature 1 50 38 0 High 20 Standard 0 49 10 0 High 27 19 35 24 Cooling Overload 0 60 15 0 High 32 23 43 26 Low temperature 0 45 2 0 Low 21 15 21 15 Standard pressure P MPaG Surface temp of heat exchange...

Page 20: ...00l Accumulator Heat exchanger Ambient temp conditions DB WB C Indoor Outdoor Standard 1 65 40 0 High 20 15 7 6 Heating Overload 1 2 00 2 40 52 0 59 0 Low 27 24 18 Low temperature 1 40 35 0 High 20 Standard 0 48 12 0 High 27 19 35 24 Cooling Overload 0 58 15 0 High 32 23 43 26 Low temperature 0 45 5 0 Low 21 15 21 15 Standar d pressure P MPaG Surface temp of heat exchanger inter changing pipe T1 C...

Page 21: ...6 35 T1 P Refrigerant R 22 0 62 kg Accumulator Heat exchanger Capillary tube 1 0x800S 2 pcs Standard 1 35 35 0 High 20 7 6 Heating Overload 1 85 49 0 Low 27 24 18 Low temperature 1 10 30 0 High 20 10 10 Standard 0 58 12 0 High 27 19 35 24 Cooling Overload 0 67 16 0 High 32 23 43 26 Low temperature 0 50 2 0 Low 21 15 21 15 Note Measure the heat exchanger temperature at the center of U bend By means...

Page 22: ...ture 0 45 2 0 Low 21 15 21 15 Standard pressure P MPaG Surface temp of heat exchanger interchanging pipe T1 C Fan speed indoor 50Hz Heat exchanger Indoor unit Cross flow fan Cooling Cooling Compressor Heat exchanger Propeller fan Outdoor unit Capillary tube 1 7 x 1000l PH225X2C 4FT Cooling Mark means check points of Gas Leak O D 12 7 mm O D 6 35 mm Cooling Packed valve 12 7 Packed valve 6 35 0 39 ...

Page 23: ...Connecting pipe 9 52 0 49 m Connecting pipe 6 35 T1 P Refrigerant R22 0 65 kg Heat exchanger Capillary tube 1 5 x 1000l Ambient temp conditions DB WB C Indoor Outdoor Standard 0 53 11 0 High 27 19 35 24 Cooling Overload 0 62 16 0 High 32 23 43 26 Low temperature 0 48 5 0 Low 21 15 21 15 Standard pressure P MPaG Surface temp of heat exchanger interchanging pipe T1 C Fan speed indoor 50Hz Note Measu...

Page 24: ...d indoor Ambient temp conditions DB WB C Indoor Outdoor Standard pressure P MPaG Surface temp of heat exchanger interchanging pipe T1 C Indoor unit Cross flow fan Cooling Cooling Compressor Heat exchanger Propeller fan Outdoor unit PH80T1 4C Cooling Mark means check points of Gas Leak O D 9 52mm O D 6 35mm Cooling Packed valve 9 52 Packed valve 6 35 0 39m Connecting pipe 9 52 0 49m Connecting pipe...

Page 25: ...Y03 Relay RY04 220 240 V 50 60Hz Compressor 4 Way Valve Outdoor Fan Motor ıLouver Control ı3 minutes Delay at Restart for Compressor ıProcessing Temperature Processing ıMotor Revolution Control ıTimer Initiallizing Circuit Clock Frequency Oscillator Circuit Thermo Sensor Infrared Rays Signal Reciver REMOTE CONTROL Air purifier Unit Micro Switch Remote Control ON TIMER Setting OFF TIMER Setting Lou...

Page 26: ... Display Timer Display Filter Sign Display Hi Power Sign Display PAP Sign Display Indoor Fan Motor Air purifier Unit Micro Switch Louver Motor Louver ON OFF Signal Compressor ON OFF Signal Power Supply Circuit Noise Filter Relay Driver Louver Driver Relay RY01 220 240 V 50 60Hz Compressor Outdoor Fan Motor Initiallizing Circuit Clock Frequency Oscillator Circuit Louver Control 3 minutes Delay at R...

Page 27: ...tes all components based on the commands transmitted from the remote control and the feedback data of the sensor is as follow The temperature measurement at the air inlet of the indoor heat exchanger by the indoor temperature sensor ı The temperature measurement at the indoor heat exchanger by the indoor heat exchanger temperature sensor Plasma Air Purifier operation control Indoor fan motor opera...

Page 28: ...air flow NOTE 1 The values marked with 1 are calculated and controlled by the difference in motor speed between M and L Fig 7 2 1 Setting of air flow FAN AUTO 2 The Hi POWER operation cannot be set 7 2 2 Cooling operation MODE button on the remote control is set to the cooling operation 1 The compressor outdoor fan and operation display on the remote control are controlled as shown in Fig 7 2 2 Fi...

Page 29: ...trol are controlled as shown in Fig 7 2 4 Fig 7 2 4 2 The microcontroller turns the compressor on and off at the regular intervals 4 to 6 minutes While the compressor is turning off the indoor fan motor operates in the SUPER LOW position The pattern of operation depending on the relation between room temperature and preset temperatures is shown in Fig 7 2 5 Fig 7 2 5 3 FAN button on the remote con...

Page 30: ...t is pushed the preset temperature is fixed at 24 C and the indoor unit is controlled as shown in Fig 7 2 9 From 12 to 25 minutes passed after starting the unit and room temperature is between preset temperature and 3 C lower than preset temperature 25 minutes or more passed after starting the unit Room temperature Preset temperature 3 5 C A 4 A 8 A 4 A 8 42 41 34 33 29 28 21 20 2 6 5 Manual One o...

Page 31: ...no 7 reset by RESET button on the indoor unit and Air Purifier will operate again after 1 hour Case no 7 reset by FILTER button on the remote control and Air Purifier will operate again after 1 hour Case no 7 can not reset by turning unit OFF and ON Case 1 2 3 4 1 4 2 4 3 5 6 7 8 9 Short timer is the function of the remote control that activates the setting for the sudden operation This function c...

Page 32: ...Purifier is activated individually and the fan speed is set to LOW LOW MED MED or HIGH the speed revolution of the indoor fan will be constant In fact Plasma Air Purifier works continuously Moreover when the Plasma Air Purifier is activated individually and the fan speed is set to AUTO the speed revolution of the indoor fan and the operation of Plasma Air Purifier is shown as the fig 7 2 10 Fig 7 ...

Page 33: ... 13NKHD Series RAS 13NKD Series Fig 7 5 1 RAS 10NKHD Series RAS 07NKHD Series RAS 10NKD Series RAS 07NKD Series Fig 7 5 2 7 C 5 Compressor Heat exchanger temperature Outdoor fan ON Less than 5 C continues for 5 minutes OFF 60 C 53 52 Compressor Outdoor fan OFF OFF ON ON OFF ON Heat exchanger temp 6 C 2 Compressor Outdoor fan ON Less than 2 C continues for 5 minutes OFF Heat exchanger temperature ı...

Page 34: ...tal of 90 minutes Fig 7 6 1 Indoor fan speed M 7 6 2 Defrost operation time control In case of B 1 The heating operation is performed for at least 40 minutes 2 The maximum defrost operating time is 6 minutes The defrost operating time for the 4th cycle is 10 minutes When the outdoor temperature is very low however the defrost operating time is 10 minutes Fig 7 6 2 minutes 40 Heating Heating Heatin...

Page 35: ... RAS 07NKHD Series Fig 7 7 1 2 Current limit control Heating operation Control is performed as shown in Fig 7 7 2 RAS 13NKHD Series RAS 10NKHD Series RAS 07NKHD Series Fig 7 7 2 Remark This function is available only for heat pump model Cooling models have no a current sensor C T Input current 13 5A 19 2A I4 12 5A 17 8A I3 10A 15 6A I2 9A 15 0A I1 Compressor Outdoor fan More than I4 continues for ...

Page 36: ...Motions Push RESET button for more The unit is in operation The green lamp is on than three seconds The unit stops operating The green lamp is turned off After approx three seconds The unit beeps three times If the unit is required to operate at this time push RESET button once more or use the remote control to turn it on While this function is being set if the unit is in operation the orange lamp...

Page 37: ... lamp 7 9 1 How to turn off filter check lamp Press FILTER button on the remote control OR push RESET button on the indoor unit Note If RESET button is pushed while the filter check lamp is not indicating the indoor unit will start the Automatic Operation Operation Motions Push RESET button for more The unit is on standby than three seconds The unit starts to operate The orange lamp is on After ap...

Page 38: ...y will show in orange color When AUTO RESET is ON or green color When AUTO RESTART is OFF Hold down the RESET button for more than 20 seconds The air conditioner will stop suddenly when the RESET is pressed but keep holding it continue Then will beep 3 times is the first 3 seconds but it is not related to Self Cleaning function After holding about 20 seconds the air conditioner will beep 5 times a...

Page 39: ...place which cannot bear the weight of the unit Personal injury and property damage can result if the unit falls Before doing the electrical work attach an approved plug to the power supply cord Also make sure the equipment is properly earthed Appliance shall be installed in accordance with national wiring regulations If you detect any damage do not install the unit Contact your TOSHIBA dealer imme...

Page 40: ...ER Please make absolutely sure that the installation of this appliance is reported to the local power supplier before installation If you experience any problems or if the installation is not accepted by the supplier the service agency will take adequate countermeasures ...

Page 41: ...k heat resisting polyethylene foam Saddle Do not allow the drain hose to get slack Make sure to run the drain hose sloped downward Cut the piping hole sloped slightly Before installing the wireless remote control With the remote control cover open load the batteries supplied correctly observing their polarity Shield pipe Air filter Hook Hook Attach to the front panel 65 mm or more 170 mm or more 1...

Page 42: ... wind Use 8 mm or 10 mm anchor bolts and nuts Air inlet Air outlet Drain outlet 600 mm 90 mm 125 mm 115 mm 32 5 mm 73 mm 102 mm 310 mm 7 mm 3 0 Q ty One each 1 One each Parts name Refrigerant piping Liquid side 6 35 mm Gas side 9 52 mm 07 10 series Gas side 12 70 mm 13 series Pipe insulating material polyethylene foam 6 mm thick Putty PVC tapes RAS 07 Series Air inlet Drain outlet Air outlet 500 m...

Page 43: ... name Q ty Battery x 2 Zeolite plus filter x 1 Part No 3 4 Part No 5 6 Others Name Owner s manual Installation manual This model is not equipped with an extension drain hose Option For the extension drain hose use an optionally available RB 821SW or commercially available one Part name Q ty Mounting screw 4 x 25 s x 6 Plasma air purifier x 1 ...

Page 44: ...rest TV set or stereo equipment This is necessary to prevent image disturbances or noise interference The location of the remote control should be determined as shown below Fig 8 4 1 5 m 5 m 45 45 75 7 m 7 m Top view Indoor unit Axial distance Reception range Reception range Remote control Indoor unit Remote control Side view 8 4 2 Cutting a hole and mounting installation plate Cutting a hole When...

Page 45: ...clip anchors for appropriate mounting screws 5 NOTE Secure four corners and lower parts of the installation plate with 4 to 6 mounting screws to install it Installation plate Keep horizontal direction 8 4 3 Electrical work 1 The supply voltage must be the same as the rated voltage of the air conditioner 2 Prepare the power source for exclusive use with the air conditioner CAUTION This appliance ca...

Page 46: ...elow 1 Open the air inlet grille upward 2 Remove the four screws securing the front panel 3 Slightly open the lower part of the front panel then pull the upper part of the front panel toward you to remove it from the rear plate 4 After removing the front panel remove the power cord connect cover and the cord camp 5 Connect and secure the power supply cord and secure the cord camp and the power con...

Page 47: ... on the indoor unit CAUTION Be sure to refer to the wiring system diagram labeled inside the front panel Check local electrical cords and also any specific wiring instructions or limitations 1 2 3 4 1 2 3 4 Stripping length of the connecting cable Earth line Connecting cable Terminal cover Screw Cord clamp Terminal block about 15 cm Screw Screw Earth line Connecting cable 80 mm 10 mm 10 mm 10 mm 7...

Page 48: ...eat insulator Fig 8 4 14 How to fix the drains cap 1 Insert hexagonal wrench 4 mm in a center head Fig 8 4 15 2 Firmly insert drains cap Fig 8 4 16 CAUTION Firmly insert the drain hose and drain cap otherwise water may leak In case of right or left piping After scribing slits of the front panel with a knife or a making off pin cut them with a pair of nippers or an equivalent tool Fig 8 4 17 In cas...

Page 49: ...t off the insulating tape wound on the connecting pipe to avoid double taping at the joint moreover seal the joint with the vinyl tape etc Since dewing results in a machine trouble make sure to insulate both the connecting pipes Use polyethylene foam as insulating material When bending a pipe carefully do it not to crush it Installation plate Auxiliary pipes Indoor unit Connecting cable 8 4 6 Indo...

Page 50: ...your neighbors A place which is not exposed to a strong wind A place free of a leakage of combustible gases A place which does not block a passage When the outdoor unit is to be installed in an elevated position be sure to secure its feet An allowable length of the connecting pipe is up to 10 m 07 10 series or 15 m 13 series An allowable height level is up to 5 m 07 10 series or 6 m 13 series A pl...

Page 51: ...ter dia Tightening torque of copper pipe 6 35 16 to 18 1 6 to 1 8 kgf m 9 52 30 to 42 3 0 to 4 2 kgf m 12 70 50 to 62 5 0 to 6 2 kgf m 8 5 2 Refrigerant piping connection 1 Cut the pipe with a pipe cutter Fig 8 5 2 2 Insert a flare nut into the pipe and flare the pipe Projection margin in flaring A Unit mm Fig 8 5 3 Tightening connection Align the centers of the connecting pipes and tighten the fl...

Page 52: ...hen the pump stops 1 Connect the charge hose from the manifold valve to the service port of the gas side packed valve 2 Connect the charge hose to the port of the vacuum pump 3 Open fully the low pressure side handle of the gauge manifold valve 4 Operate the vacuum pump to start evacuating Perform evacuating for about 15 minutes if the piping length is 20 meters 15 minutes for 20 meters assuming a...

Page 53: ...e type H07 RN F or 245 IEC66 2 0 mm2 or more 8 6 How to Set Remote Control Selector Switch When two indoor units ae installed in seperated rooms there is no need to change the selector switch Remote control selector switch When two indoor units are installed in the same room or the adjacent two rooms they may be controlled simultaneously with a single remote control To prevent this set either unit...

Page 54: ...t follow the steps described in the section Auto Restart Function of the Owner s Manual Valve stem cap connection Service cap connection Valve cover 2 Set the remote control selector switch with the remote control B is indicated on the liquid crystal display when setting remote control selector switch to B A is not indicated on the display even if the selector switch is set to A 1 Load the remote ...

Page 55: ... not turned off even though the room temperature is in the range that the compressor is turned off 4 The compressor is not turned on and off even though the thermo control is operated in the Dry operation 5 The compressor is not turned on even though the room temperature is in the range that the compressor is turned on 6 The operation mode changes in the Automatic operation 7 The Fan only operatio...

Page 56: ...lamp is blinking 5Hz E OPERATION lamp is blinking 5Hz F OPERATION and TIMER lamps are blinking 5Hz G OPERATION TIMER and PAP lamps are blinking Table 9 3 2 Diagnosis by detective operation The remote control does not work The outdoor fan does not rotate Turn off the power supply once then turn it on Try to operate the remote control The compressor operates The compressor does not operate The remot...

Page 57: ... no fault with a code the indoor unit will beep once Pi and the display of the remote control will change as follows Check the unit with all 52 check codes 00 to 33 as shown in Table 9 4 1 Press ON 8 or OFF 9 button to change the check code backwards If there is a fault the indoor unit will beep for 10 seconds Pi Pi Pi Note the check code on the display of the remote control 2 digits alphanumeric ...

Page 58: ...r 2 If it is OK check P C board 1 Check heat thermal fuse is blow or not Terminal block part 2 If the thermal fuse is not blow check indoor fan motor Refer to trouble shooting flow charts Replace P C board 1 Check connective cable correct if wiring is wrong 2 Check thermal fuse and Terminal blocks 3 If it is OK check P C board 1 If overload relay and thermostat for compressor are OK check refriger...

Page 59: ...ontrol flash normally and transmit certainly Remote control is defective No problem Replace the remote control Does the fuse F01 blow Parts R21 R22 SG01 C01 C02 DB01 C03 IC01 T01 are defective Does the thermal fuse blow Under PF Terminal Does the CN13 connector the wrong connecting Is the indication voltage DC12 V or 5 V of main P C board correct P C board is defective Check Resistance of Pin 1 an...

Page 60: ... the AC power supply Does the OPERATION lamp blink Is it wired as shown in Figure below Return the wiring of the power relay is returned to the normal procedure To the paragraph of No Power turns on NO NO YES YES 59 RAS 13NKHD E 2 1 Blue Brown Power Cord RY01 PC Board CN31 Black White Indoor terminal block 3 4 ...

Page 61: ...RAS 10NKHD E Bind Band Double winding 2 1 Blue Brown Power Cord RY01 PC Board CN31 Black White Indoor terminal block RAS 07NKD E RAS 10NKD E RAS 13NKD E Blue Brown RY01 PC Board CN31 Black White Power Cord 8 2 block 3 1 Indoor terminal ...

Page 62: ...hing the button of the remote control Is cable connection between indoor and outdoor units correct NO NO NO NO Replace the P C board Correct cabling between indoor and outdoor units Check items as following procedure in 9 5 4 9 5 5 Relays RY01 or IC31 or IC30 is failure Is AC 220 V supplied between terminal block 1 2 YES YES YES YES See Power cannot be turned on See Power cannot be turned on ...

Page 63: ...ormal Does the compressor start Compressor starts but it stops after a while Re wire or replace the defective cords Compressor is defective Capacitor is defective NO NO NO NO NO YES YES YES YES Is the overload relay normal Overload relay is defective NO YES YES YES Is the gas quantity normal Check the pressure NO See Power cannot be turned on Compressor is defective Gas shortage Gas leakage Compre...

Page 64: ...ive Cables between indoor and outdoor units are defective Correct cabling between indoor and outdoor units Are all the cords for outdoor fan motor normal NO YES YES Correct the wire or replace the defective cords Is the capacitor for Fan motor normal NO YES Capacitor for outdoor fan motor is defective Is the outdoor fan motor winding normal Check the winding resistance NO YES Outdoor fan motor is ...

Page 65: ... not be turned on Is the voltage across the indoor terminal 2 3 220 240V Relays RY04 or IC31 or IC30 is failure Replace the P C board Is cable connection between indoor and outdoor units correct Correct cabling between indoor and outdoor units Is the voltage across the outdoor terminal 2 3 220 240V Cables between indoor and outddor units are defective Is the wiring of solenoid coil for 4 way valve...

Page 66: ...ng cable and power cord Change the setting of cooling to high fan Does the cross flow fan rotate normally Repair the bearing of the fan Thermal fuse operated due to prevent temperature rising cause of incompleted connecting Shut off the power supply Turn on the power supply Does the fan speed become higher Operation stops Motor control circuit failure IC30 IC03 T01 or 12V power circuit failure D38...

Page 67: ...he receptor of the air conditioner Is there any thyristor fluorescent light near by Is operation possible when the transmitter is moved nearer to the infrared signal receiver of the air conditioner There is no beep from the indoor unit The OPERATION lamp of the air conditioner main unit does not light Is operation possible when setting the RESET button of the air conditioner main unit to TEST RUN ...

Page 68: ... on the P C board hold the Whole housing Do not pull at the lead wire 2 Inspection procedures 1 When a P C board is judged to be defective check for disconnection burning or discolora tion of the copper foil pattern or this P C board 2 The P C board consists of the following 2 parts a Main P C board part Power relay indoor fan motor drive circuit and control circuit C P U and peripheral circuits b...

Page 69: ... Voltage of relay coil DC 12 V Between pin 10 of IC31 and GND Between pin 11 of IC31 and GND 1 All indicators light for 3 sec 2 Indicators do not indicate normally after approximate 3 sec 1 Compressor does not operate 2 OPERATION lamp blinks 1 Compressor does not operate 2 OPERATION lamp blinks 1 Motor does not rotate The key operation is accepted 2 The Motor rotates but it vibrates too much Shut ...

Page 70: ...ure 0 C 10 C 20 C 25 C 30 C Resistance value 33 8 20 35 12 59 10 00 7 99 kΩ 9 6 3 How to set cancel self cleaning function The self cleaning function is set from a factory To cancel this function should keep press the RESET switch on Indoor unit for 20 seconds till can hear the long combination sound and repeat the same procedure when need to set PAP AUTO PRESET MODE CLOCK CHECK FILTER RESET HiPOW...

Page 71: ...te control is in status which is shortened by time on the reactivation preventive timer and all display lamps go on for approx 3 seconds when a signal is received If time on the reactivation preventive timer is not shortened the high voltage is not applied to electrode of the air purifier for approx 1 hour While the air purifier operates check that the fan speed AUTO is not displayed Because the p...

Page 72: ...rring to the right figure check the high voltage output of the air ionizer In this time peel the thermal insulator and attach it to the original position after check operation NOTE Use an exclusive high voltage tester otherwise the tester may be broken Does the plasma lamp go off within 2 seconds after it was ON and does the filter lamp Orange go on Does the indoor fan rotate Micro switch is stuck...

Page 73: ...a air purifier 5 Remove the 4 screws fixing the front panel before open the horizontal louver and then remove the front panel from back body by pulling it toward you How to mount the front panel Reverse step to remove the front panel Push the front panel back in and make sure all hooks are locked 10 PART REPLACEMENT 10 1 Indoor Unit No Part name Procedures Remarks 4 4 Screws 1 Front panel 2 2 Air ...

Page 74: ... To put back the electrical part box lock it to the upper hook of the back body 2 Tighten the screw on the electrical part box 3 Connect the 3 connectors and arrange the wiring same as original condition and then tighten the screw from the LED unit to the back body 4 Attach the TC sensor to the holder 5 Tighten the screw for the ground connection 6 Tighten the screw on the electrical part cover 1 ...

Page 75: ... and the fan motor Notice To assemble cross flow fan and fan motor to the unit please turn the fan motor unit the center of its terminal meets the lowest point of band motor R point A Fix the cross flow fan with the set screw at the position where the gap between the back body and the right surface of the cross flow fan is 6 0 5 mm 1 Remove the front panel electrical part heat exchanger and the cr...

Page 76: ...rews 4 x 22L and disconnect the connecting cable 4 Remove the upper cabinet 4 Screws 4 x 10L Pulling out upword 5 Remove the front cabinet 3 Screws 4 x 10L Pull the front right portion toward you and remove it pulling out upward 10 2 Outdoor Unit 1 Common procedure No Part name Procedures Remarks Cord clamp 3 Screws 4 x 10L 2 Screws 4 x 22L Electric parts cover Packed valve cover Upper cabinet Fro...

Page 77: ...orm the common procedure 1 2 Remove the fixing screw 1 Screw 4 x 10L 3 Disconnect the lead wires 2 Capacitor for compressor 3 Capacitor for fan motor No Part name Procedures Remarks Capacitor for compressor Screws 4 x 10L Capacitor band Capacitor for fan motor Screws 4 x 10L Screws 4 x 10L Capacitor for compressor Capacitor band Capacitor for fan motor Screws 4 x 10L RAS 10UA 13UA RAS 07UA ...

Page 78: ...C Board ASSY WRS LED MCC 861 406 43T69364 Fuse Temperature 73 C 407 43T60355 POWER CORD Location Part Description No No 410 43T62003 Cord Clamp 411 43T69408 P C Board RAS 07NKD E 411 43T69409 P C Board RAS 10NKD E 411 43T69410 P C Board RAS 13NKD E 411 43T69412 P C Board RAS 10NKHD E 412 43T51305 MICRO SWITCH 401 43T60001 Terminal Block 2P 411 43T69411 P C Board RAS 07NKHD E 411 43T69413 P C Board...

Page 79: ... 231 43T82301 Plate Installation Location Part Description No No 201 43T00404 Front Panel Assy 202 43T09336 Inlet Grille Assy 203 43T03314 Back Body Assy 204 43T80309 Air Filter R 205 43T80310 Air Filter L 206 43T09328 Horizontal Louver 207 43T70002 Drain Hose 208 43T79301 Cap Drain 209 43T21321 Motor Stepping 210 43T44343 Refrigeration Cycle Assy For 07 Series 210 43T44345 Refrigeration Cycle Ass...

Page 80: ...a 12 43T46019 Valve packed 12 7 Dia 13 43T47331 Bonnet 6 35 Dia 14 43T47333 Bonnet 12 7 Dia Location Part Description No No 15 43T03303 Fixing plate valve 16 43T47011 1 5ID 17 43T41764 18 Compressor PH170T2 4L2 19 43T47324 Bolt compressor M6 20 43T49008 Cushion rubber 21 43T52310 Packed valve cover assembly 22 43T55304 Capacitor Plastic film 35μF 370V 23 43T55314 Capacitor Plastic film 1 5μF 450V ...

Page 81: ...6311 Valve packed 6 35 Dia 12 43T00347 Valve packed 9 52 Dia 13 43T47331 Bonnet 6 35 Dia 14 43T47332 Bonnet 12 7 Dia Location Part Description No No 15 43T03303 Fixing plate valve 16 43T47011 1 5ID 17 43T41400 18 Compressor PH120T1 4C 19 43T47325 Bolt compressor M6 20 43T49001 Cushion rubber 21 43T52310 Packed valve cover assembly 22 43T55305 Capacitor Plastic film 25μF 370V 23 43T55314 Capacitor ...

Page 82: ... 52 DIA 09 43T47332 Bonnet 9 52 DIA 10 43T46311 Valve Packed 6 35 DIA 11 43T47331 Bonnet 6 35 DIA Location Part Description No No 13 43T47001 Nut Flange 14 43T19312 Handle 15 43T49001 Cushion Rubber 16 43T63001 Holder Ol Relay 19 43T62305 Packed Valve Cover 20 43T00394 Upper Cabinet Coating Assembly 21 43T63301 Fixing Plate Valve 22 43T42314 Base Coating Assembly 23 43T55305 Capacitor Plastic Film...

Page 83: ...43T41351 Nut flange 10 43T46311 Condenser assembly 11 43T46019 Valve packed 6 35 Dia 12 43T47331 Valve packed 12 7 Dia Location Part Description No No 13 43T47333 Bonnet 12 7 Dia 14 43T63303 Finxing plate valve 15 43T47014 Capillary tube 1 7 Dia 16 43T41348 Compressor PH225X2C 4FT 17 43T47324 Bolt compressor M6 18 43T49008 Cushion rubber 19 43T52310 Packed valve cover assembly 20 43T00396 Upper ca...

Page 84: ...6311 Condenser assembly 11 43T00347 Valve packed 6 35 Dia 12 43T47331 Valve packed 9 52 Dia Location Part Description No No 13 43T47332 Bonnet 9 52 Dia 14 43T63303 Finxing plate valve 15 43T47011 Capillary tube 1 5 Dia 16 43T41339 Compressor PH102T1 4CH 17 43T47325 Bolt compressor M6 18 43T49001 Cushion rubber 19 43T52310 Packed valve cover assembly 20 43T00395 Upper cabinet assembly 21 43T55305 M...

Page 85: ...ube 1 2 DIA 08 43T00347 Valve Packed 9 52 DIA 09 43T47332 Bonnet 9 52 DIA 10 43T46311 Valve Packed 6 35 DIA 11 43T47331 Bonnet 6 35 DIA Location Part Description No No 13 43T47001 Nut Flange 14 43T19312 Handle 15 43T49001 Cushion Rubber 18 43T41304 Compressor PH80T1 4C 19 43T62305 Packed Valve Cover 20 43T00394 Upper Cabinet Coating Assembly 21 43T63301 Fixing Plate Valve 22 43T42313 Base Coating ...

Page 86: ...FILE NO SVM 04021 73 TOSHIBA CARRIER THAILAND CO LTD 144 9 MOO 5 BANGKADI INDUSTRIAL PARK TIVANON ROAD TAMBOL BANGKADI AMPHUR MUANG PATHUMTHANI 12000 THAILAND ...

Reviews: