– 36 –
CAUTION
• Exposure of unit to water or other moisture before installation will result in an electrical short.
Do not store in a wet basement or expose to rain or water.
• After unpacking the unit, examine it carefully for possible damage.
• Do not install in a place that can increase the vibration of the unit. Do not install in a place that can
amplify the noise level of the unit or where noise and discharged air might disturb user’s neighbors.
• To avoid personal injury, be careful when handling parts with sharp edges.
• Please read the installation manual carefully before installing the unit. It contains further important
instructions for proper installation.
For general public use
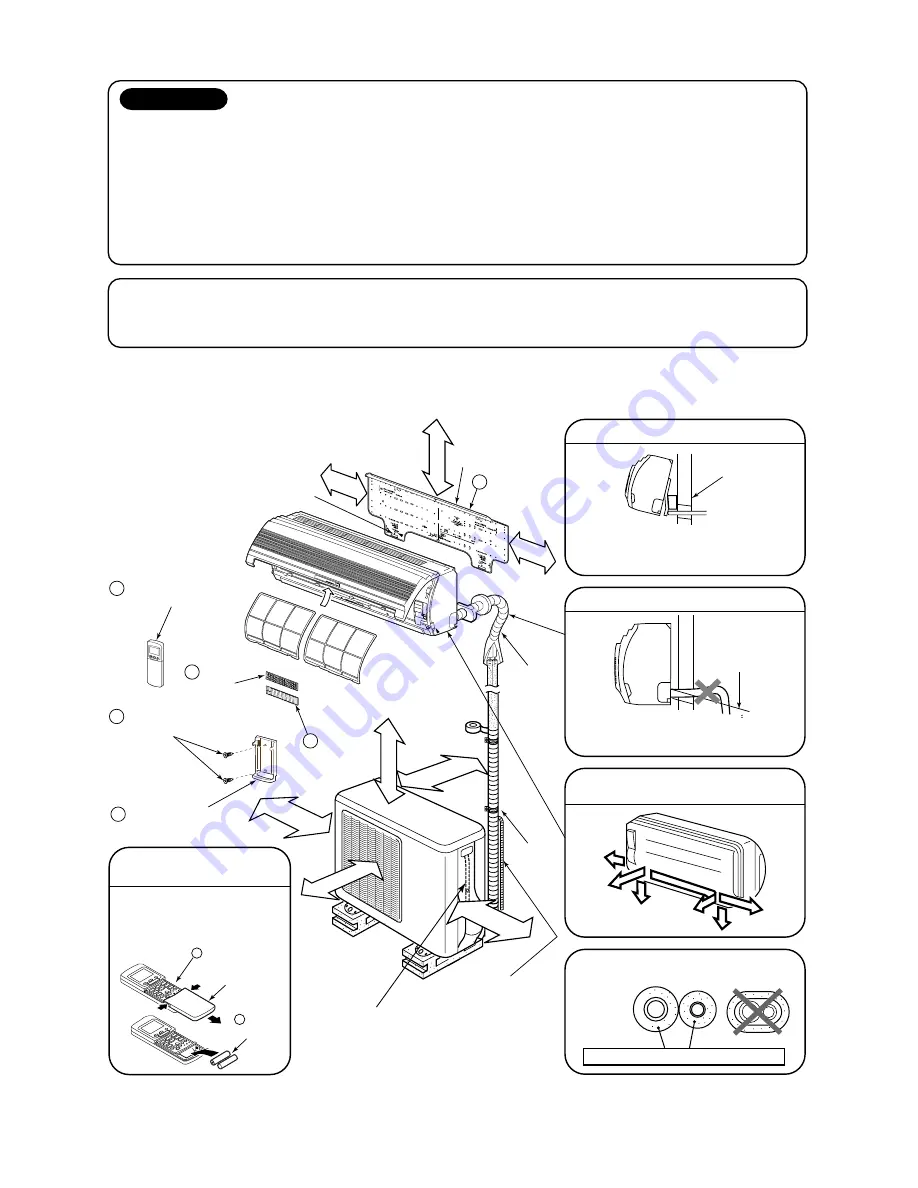
9-1-1. Installation Diagram of Indoor and Outdoor Units
Power supply cord of parts of appliance for outdoor use shall be more
than polychloroprene sheathed flexible cord (design H07 RN-F), or
cord designation 245 IEC 66. (1.5mm² or more)
Fig. 9-1-1
Air filter
(Attach to the front panel)
Shield
pipe
2 Wireless
remote controller
3
Batteries
Cover
Before installing the
wireless remote controller
• With the remote controller
cover open, load the batteries
supplied correctly, observing
their polarity.
1 Installation
plate
6 Purifying
filter
6 mm thick heat resistin gpolyethylene foam
Bottom right
Bottom left
Right
Rear left
Rear right
Left
Cut the piping hole
sloped slightly
Wall
For the rear left and left piping
Do not allow the drain hose to get slack.
Make sure to run the drain hose sloped
downward.
The auxiliary piping can be connected
the left, rear left, rear, right or bottom.
Insulation of refrigerant pipes insulates
the pipes separately, not together.
Insert the cushion between the indoor
unit and wall, and lift indoor unit for
better operation.
4 Remote controller
holder
2 Wireless
remote controller
Hook
Hook
Extension drain hose
(Option : RB-821SW)
Vinyl tape Apply
after carrying out
a drainage.
As shown in the figure,
hang power cord and
connecting cable downward,
and take out it along piping
connection port.
200mm or more
600mm or more
50mm or more
from w
all
100mm or
more from w
all
250mm or
more from w
all
170mm
or more
65mm or more
170mm
or more
Saddle
5 Zeolite
filter
8 Flat head
wood screw
Summary of Contents for RAS-13UAV-E
Page 1: ... ILE NO A02 001 SPLIT TYPE RAS 13UKV E RAS 13UAV E PRINTED IN JAPAN Mar 2002 ToMo ...
Page 73: ... 73 MCC 813 ...
Page 78: ......


