High Wall, Heat Pump Type
Service Manual
100
Toshiba
11-3.Outdoor Unit
11-3-1. Common Procedure
REQUIREMENT
Wear gloves for this job.
Otherwise, you may injure your hands on the parts, etc.
Detachment
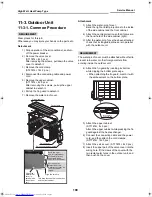
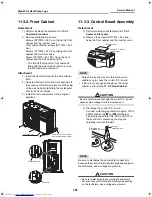
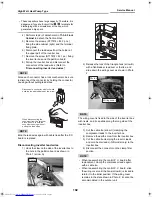
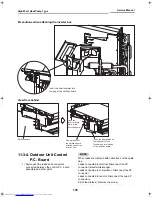
1) Stop operation of the air conditioner, and turn
off the power breaker.
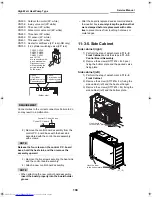
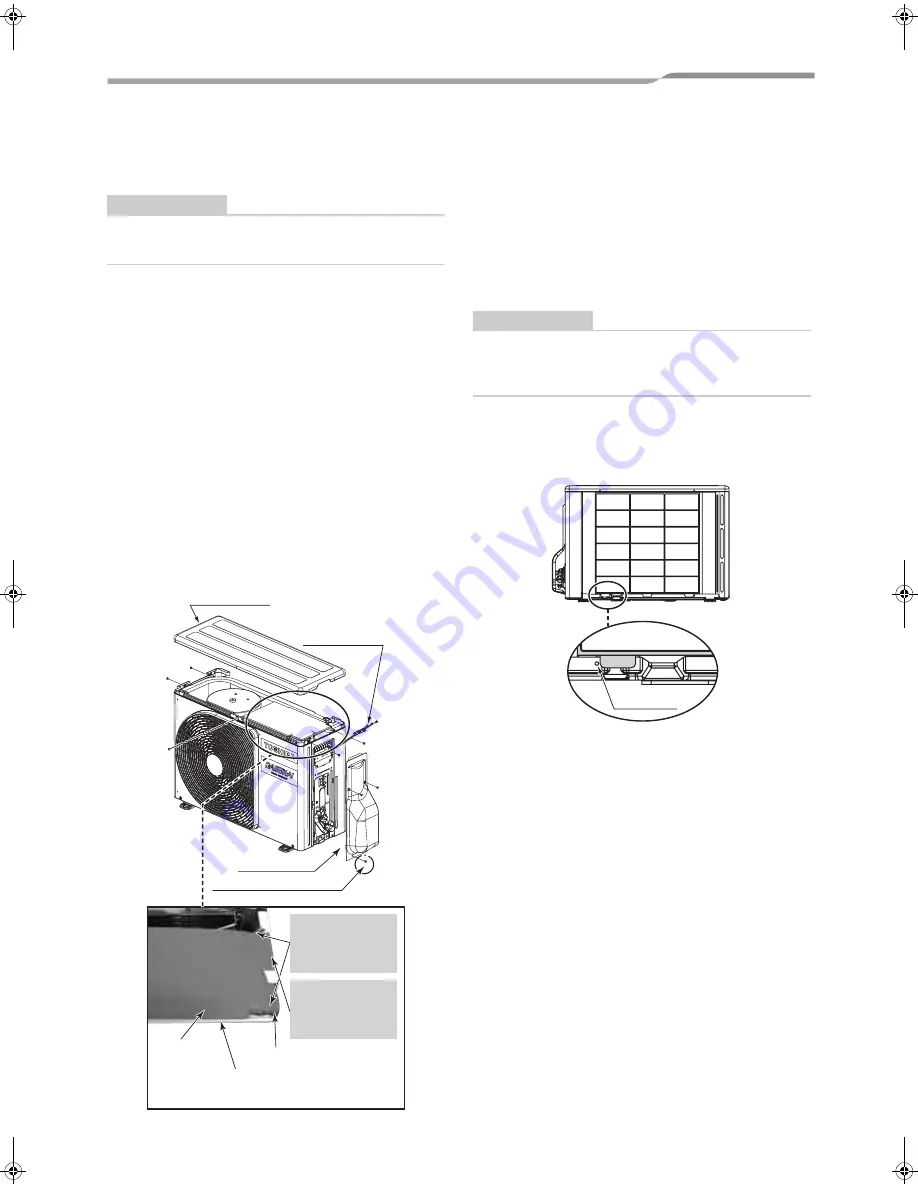
2) Remove the valve cover.
(ST1TØ4 × 8L 3 pcs.)
After removing the screws, pull down the valve
cover to detach it.
3) Remove the cord clamp.
(ST2TØ4 × 14L 3 pcs.)
4) Disconnect the connecting cable and power
cord.
5) Remove the upper cabinet.
(ST1TØ4 × 8L 5 pcs.)
After removing the screws, pull up the upper
cabinet to detach it.
6) Pull up the fin guard to detach it.
7) Remove the water-proof cover.
Attachment
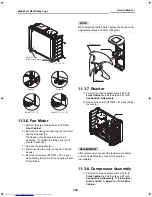
1) Attach the water-proof cover.
Bend the right and left projections to the inside
of the side cabinet and the front cabinet.
2) Attach the centre projection so that it comes on
the hand-held of the side cabinet (right).
3) After the water-proof cover has been attached,
check that its longitudinal lines are in parallel
with the outdoor unit.
REQUIREMENT
The water-proof cover must be attached without fail to
prevent rain water or other foreign matters from
entering inside the outdoor unit.
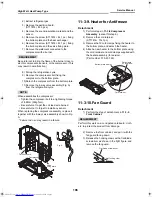
4) Attach the fin guard by inserting its bottom
while nipping the bottom plate edge.
• When attaching the fin guard, match it with
the embossment on the bottom plate.
5) Attach the upper cabinet.
(ST1TØ4 × 8L 5 pcs.)
Attach the upper cabinet while pressing the fin
guard against the heat exchanger.
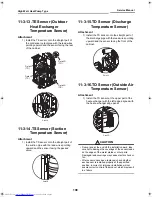
6) Connect the connecting cable and the power
cord, and then attach the cord clamps.
(ST1TØ4 × 14L 3 pcs.)
7) Attach the valve cover. (ST1TØ4 × 8L 3 pcs.)
8) Insert the upper part of the valve cover into the
wiring hole, fit the claws of the cover with the
two rectangular holes in the outdoor unit, and
then push up the cover.
Upper cabinet
Valve cover
*Valve cover bottom screw
Bend the right
and left projections
of the water-proof
cover and insert
them into the cabinet.
Put the center
projection of the
water-proof cover on
the side cabinet
(right).
Align the corners.
This area touches the inverter box
and the front cabinet.
Attach the
water-proof
cover in
parallel with
the outdoor
unit.
Cord clamp
Bottom plate
embossment
+00A08-010_01EN_SVM_HighWallHeatPump.book Page 100 Wednesday, March 4, 2009 11:22 AM

