High Wall, Heat Pump Type
Service Manual
107
Toshiba
Attachment
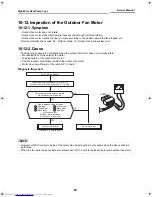
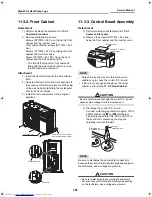
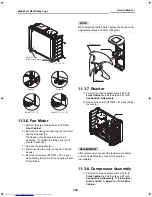
1) Insert the claws of the fan guard into the holes
in the front cabinet. Press the hooking claws (9
locations) by hand to fix them.
REQUIREMENT
The entire attaching work has been completed. Check
that all the hooking claws are fixed at their original
positions.
11-3-11.Pulse Motor Valve Coil
<C12A>
Detachment
1) Perform the step of detachment in
11-3-2.
Front Cabinet
and all the steps in
11-3-3.
Control Board Assembly
and
11-3-5.Side
Cabinet
.
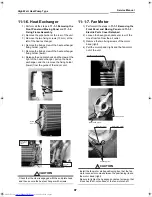
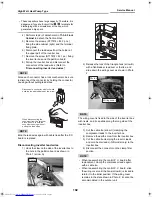
2) Turn the coil clockwise (or counter clockwise)
90 degrees, and remove the coil from the pulse
motor valve body.
Attachment
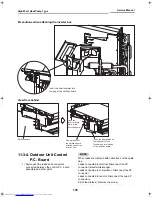
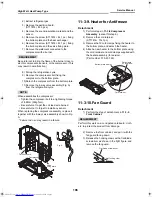
1) Match the coil lead wire lead-out portion with
the coin insertion position of the pulse motor
valve body, and attach the valve coil.
2) Turn the coil 90 degrees and fix it while
matching the projection at the bottom of the coil
with the positioning hole in the pulse motor
valve body.
11-3-12.4-way Valve Coil
Attachment
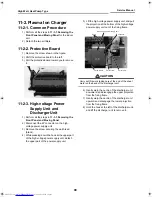
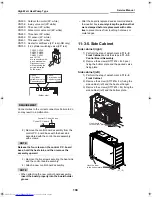
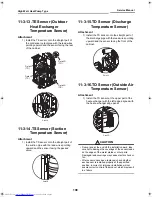
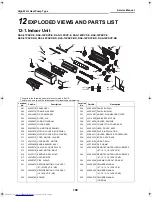
1) When connecting wires to the 4-way valve
coils, be careful of lead colours for correct
connection.
Lead wire
lead-out portion
Notch
Coil insertion position
Coil fixing position
Positioning hole
Turn 90°
Cooling/heating switching 4-way valve coil
(housing color: white)
Connect the red lead to terminal No.1
Connect the yellow lead to terminal No.2
Cylinder switching 4-way valve coil
(housing color: red)
Connect the red lead to terminal No.1
Connect the yellow lead to terminal No.2
+00A08-010_01EN_SVM_HighWallHeatPump.book Page 107 Wednesday, March 4, 2009 11:22 AM

