FILE NO. SVM-05015
– 73 –
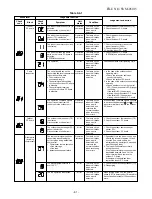
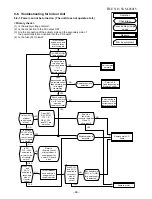
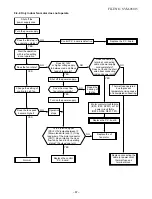
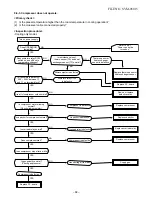
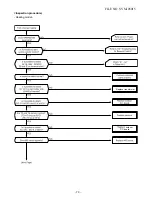
Table 9-8-1 Inspection procedure
No.
Procedure
Check points
Causes
1
Turn off the power supply and
remove the P.C. board assembly
from electric parts base. Remove the
connecting cables from the terminal
block.
2
Remove the connector of the motor
and turn on the power supply. If
OPERATION lamp blinks (once per
second), it is not neccessary to
check steps (1 to 3) in the right next
column.
3 Press [ ] button once to
start the unit. (Do not set the mode
to Fan Only or On-Timer operation.)
4
Shorten the line of the restart delay
timer and start unit.
5 Press [ ] button once to
start the unit.
• Shorten the time of the restart
delay timer.
• Set the operation mode to COOL.
• Set the fan speed level to AUTO.
• Set the preset temperature much
lower than the room temperature.
(The unit (compressor) operates
continuously in the above
condition.)
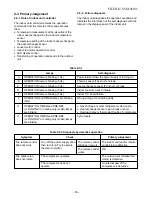
9-8. Troubleshooting for P.C. Board
9-8-1. How to check indoor P.C. board
<Cautions for handling P.C. board>
(1) When removing the front panel and the P.C. board,
be sure to turn off the power supply.
(2) When removing the P.C. board, hold the edge of
the P.C. board and do not apply force to the parts.
(3) When connecting or disconnecting the connectors
on the P.C. board, hold the housing. Do not pull at
lead wires.
<Inspection procedure>
(1) If the P.C. board is detective, check for
disconnection, burn or discoloration of the copper
foil pattern of the P.C. board.
(2) The P.C. board consists of the following 2 parts:
a. Main P.C. board parts:
Power relay, indoor fan motor drive circuit and
control circuit, C.P.U. and peripheral circuits, buzzer
drive circuit and buzzer.
b. Infrared rays parts:
Infrared rays receiving circuit
Check the defects of the P.C. board with Table 9-8-1.
Check whenther or not the fuse (F01)
is blown.
Check power supply voltage;
1. Between TP3 and TP4 of CN30
and CN31 (220 – 240V AC)
2. B and – of C02
(DC310 – 340V)
3. Between 12V and GND
4. Between 5V and GND
Check power supply voltage;
<Heating and cooling model>
1. Between CN31 and CN23
(AC70 – 100V)
<Cooling only model>
1. Between collector of Q33 and
GND (for relay coil (DC12V))
2. Between 2 and 3 of terminal block
for connecting cable
Check whether or not all lamps
(OPERATION, TIMER,
PRE.-DEF. (or FAN ONLY), ECO and
AUTO) are indicated for 3 seconds
1. Check whether or not the
compressor operates.
2. Check whether or not the
OPERATION lamp blinks.
Impluse voltage was applied or the
indoor fan motor short-circuited.
1. The terminal block or the cross-
over cable is connected wrongly.
2. The capacitor (C01 and C15), line
filter (L01), resistor (R01), or the
diode (DB01) is defective.
3. Q301, F02 and T01 are defective.
4. Q301, F03, IC07 and T01 are
defective.
<Heating and cooling model.>
IC05 and IC06 are defective.
<Cooling only model>
1. The wire of the relay coil (RY04)
comes down or the relay drive
(Q33) is defective.
2. CN27 or RY04 is connected
wrongly.
The lamps are defective or the
housing assembly (CN13) is
defective.
1. The temperature of the indoor
heat exchanger is extremely low.
2. The connection of the heat
exchanger sensor is loose.
(The connector is disconnected.)
(CN01)
3. The heat exchanger sensor and
the P.C. board are defective.
(Refer to Table 9-8-2.)
4. The main P.C. board is defective.

