13
Toshiba 1115551210 (EN)
• Do not use any pipe with a wall thickness less than these thicknesses due
to insuffi cient pressure capacity.
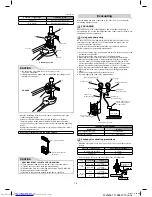
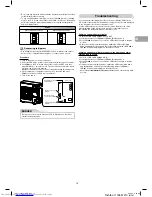
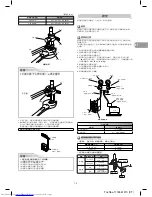
• To use an existing Ø19.1 mm pipe, set bit 3 of SW802 (switch for existing
pipe) on the P.C. board of the outdoor unit to ON. In this case, the heating
performance may be reduced depending on the outside air temperature
and room temperature.
SW802
When shipped from factory
When using existing pipe
12
3
4
ON
12
3
4
ON
Recovering refrigerant
• Use refrigerant recovery switch SW801 on the P.C. board of the outdoor
unit to recover refrigerant when the indoor or outdoor unit is moved.
Procedure
1. Turn on the power of the air conditioner.
2. Select the FAN mode for indoor unit operation with the remote controller.
3. Set SW804 on the P.C. board of the outdoor unit to all OFF, and then
press SW801 for 1 second or more. The air conditioner enters the forced
cooling mode for up to 10 minutes.
Operate or handle the valve to recover refrigerant during this time period.
4. Upon completion of refrigerant recovery, close the valve and press
SW801 for at least 1 second to stop operation.
5. Turn off the power.
DANGER
Be careful of electric shock because the P.C. board has an electrical
current running through it.
Refrigerant recovery
switch SW801
Optional connector
CN610
Special operation
select switch SW804
Existing pipe switch
SW802
P.C. board
Troubleshooting
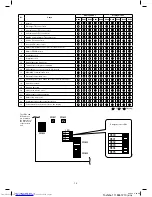
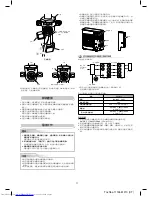
You can perform fault diagnosis of the outdoor unit with the LEDs on the
P.C. board of the outdoor unit in addition to using the check codes displayed
on the wired remote controller of the indoor unit.
Use the LEDs and check codes for various checks. Details of the check
codes displayed on the wired remote controller of the indoor unit are
described in the Installation Manual of the indoor unit.
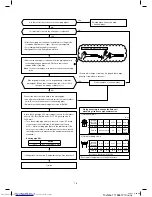
Verifying current abnormal status
1. Check that DIP switch SW803 is set to OFF.
2. Jot down the states of LED800 to LED804. (Display mode 1)
3. Press SW800 for at least 1 second. The LED status changes to display
mode 2.
4. Check the code whose display mode 1 equals the LED states jotted
down and display mode 2 equals the current fl ashing status of LED800 to
LED804 from the following table to identify the cause.
Verifying an abnormal state in the past although the abnormal
state no longer occurs
1. Set bit 1 of DIP switch SW803 to ON.
2. Jot down the states of LED800 to LED804. (Display mode 1)
3. Press SW800 for at least 1 second. The LED status changes to display
mode 2.
4. Find an error whose display mode 1 equals the LED states jotted down
and display mode 2 equals the current fl ashing states of LED800 to
LED804 from the following table to identify the error.
• An outside
air temperature (TO) sensor error
can be checked only while
it occurs.
TSB 1115551210_EN.indb 13
TSB 1115551210_EN.indb 13
6/18/14 9:03 AM
6/18/14 9:03 AM

